
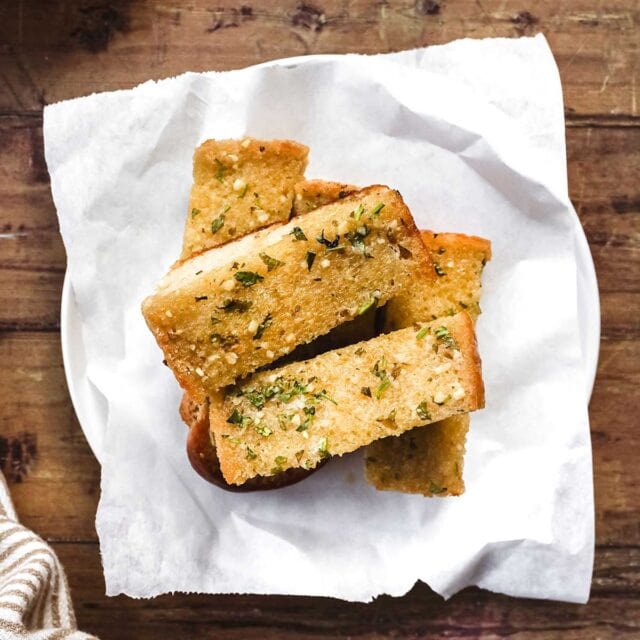
Easy Semi-Homemade Garlic Bread with Sliced Bread turns a regular bread loaf into the best ever buttery, garlicky bread in just 20 minutes!
Delicious Garlic Bread is as easy spreading garlic butter over a loaf of bread halves or pre-cut bread slices and popping them in the oven. In no time you have the perfect Side Dish for all your favorite Pasta Dishes!

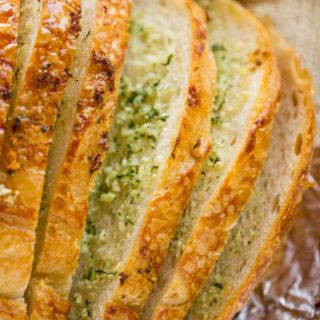
While crispy garlic bread loaves are delicious, slicing the crusty bread tends to make a giant crumbly mess. Besides, one bakery bread loaf doesn’t feed more than 5 or 6 people, and that’s with everyone possessing super human willpower! This is where making Garlic Bread with Sliced Bread comes in handy. You get all the garlicky buttery goodness without having to bust out the broom, you can feed a large crowd, and it’s still ready for the oven in minutes.
Garlic Bread with Sliced Bread is a pretty straightforward recipe, perfect when you need a last minute bread side dish. It’s a budget-friendly garlic bread recipe using any kind of sliced bread, some softened butter, a few cloves of garlic, and a handful of parsley. You spread the butter mixture on the slices, then wrap the buttered garlic bread in foil and bake. In less than 20 minutes you’ll have hot, delicious garlic bread that is perfectly buttered and ready to eat with all your favorite soups and pasta dishes.
This Sliced Garlic Bread Loaf is sure to be a hit at any party! Even kids will be going back for seconds and thirds of this buttery garlic bread so make an extra loaf or two if you don’t want to run out! Luckily this recipe is just about the easiest ever to double up. Speaking of kids, you could have them help you butter the slices. It won’t matter if they miss a patch or two because the way the loaf bakes, you’ll still get perfectly buttered bread.
This semi-homemade Garlic Bread recipe is a game changer for pasta nights, parties, and potlucks. It goes amazing with all your favorite recipes like Spaghetti with Meatballs, Broccoli Casserole or a big bowl of Tomato Soup. It even stays warm on your table if you leave the foil mostly around it and wrap a kitchen towel around it to keep heat in. Talk about the perfect bread side dish!

How to Make Garlic Bread with Sliced Bread
- Prep: Preheat your oven and spread out a piece (or two large pieces) of aluminum foil big enough to wrap the whole loaf.
- Butter: Combine the softened butter, garlic, parsley and salt in a small bowl. Spread the butter mixture evenly on the bread slices.
- Wrap: Stack the slices together standing up, so they form a loaf again. Wrap the loaf of bread completely in the foil, making sure the sides are covered too.
- Bake: Place the wrapped loaf in the center of the oven. Bake for 15-18 minutes. Open the foil, leaving sides to hold the loaf together. Bake for another 5 minutes to make it crispy on top.
Delicious Saucy Pasta Recipes
FAQs for Garlic Bread with Sliced Bread
Absolutely! You can use a whole bread loaf for this recipe. Simply slice it into individual servings, spread the garlic butter between the slices, and follow the same baking instructions.
While you can use almost any bread for garlic bread, denser breads like French bread, Italian bread, or baguettes are typically the best choices. They have a sturdy structure that can hold up to the butter and garlic, absorbing the flavors well without becoming soggy. Their crusty exteriors also provide a satisfying crunch once baked.
Garlic bread, as it is commonly known today with butter and garlic, is more accurately an Italian-American dish. Traditional Italian “Bruschetta” does involve rubbing a cut clove of garlic on toasted bread and drizzling it with olive oil, but the rich, buttery garlic bread that’s a popular side dish in many countries is a product of Italian immigrants adapting to American ingredients and tastes.

Create a free account to Save Recipes
Key Ingredients
- Garlic: The star ingredient here is undoubtedly garlic. Opt for fresh garlic for the best flavor but in a pinch you can use garlic powder. Just don’t use garlic salt because it doesn’t have a strong enough flavor and it will make your bread really salty even if you omit the other added salt.
- Bread: It wouldn’t be Garlic Bread with Sliced Bread without a loaf of pre-sliced bread. Not only does it save you cutting time later, it’s less messy and tastes just as yummy! Shepherd’s bread or French bread is ideal because they are denser and won’t get soggy. Plus they still have a slightly crunchy crust!
- Butter: The key is to use softened butter instead of melted butter. This allows you to easily mix in the garlic and parsley and spread it on the bread. Softened butter will melt as the loaf bakes for buttery bread that isn’t greasy.
- Seasonings: You don’t need a lot of seasoning, just some parsley for a subtle peppery freshness and a little salt to bring everything together.

Can Garlic Bread be made ahead of time?
Yes, you can prepare the garlic butter spread and slather it on the bread slices ahead of time. Combine them into a loaf, wrap in foil and refrigerate until ready to bake. You can keep it chilled for a day or two. When you are ready to serve it, bring it to room temperature first or add a couple minutes to the baking time.
Variations
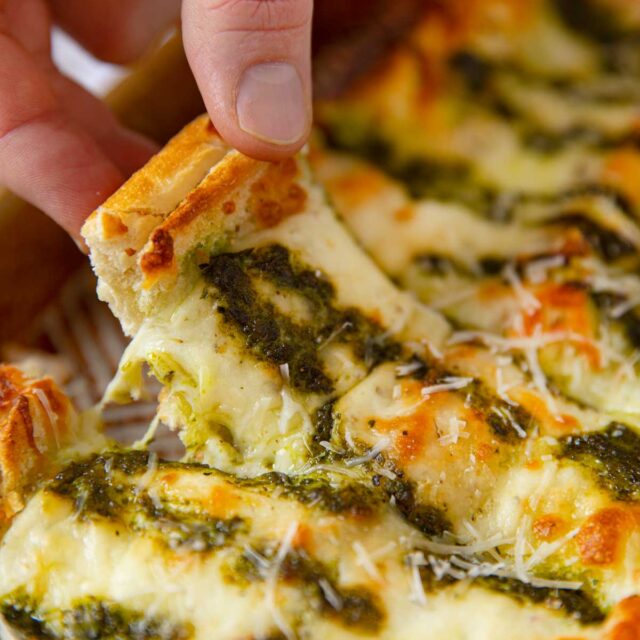
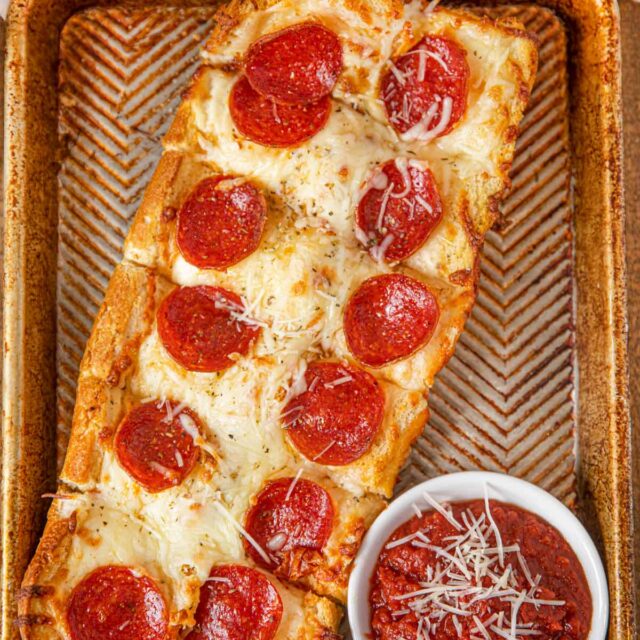
- Cheesy Garlic Bread: After the initial baking, sprinkle your favorite cheese, like mozzarella cheese, cheddar cheese, or Parmesan cheese, over the slices and bake uncovered until the cheese is beautifully melted and bubbly.
- Spices: You can mix in some dried spices to the garlic butter mixture or sprinkle them on top before wrapping the loaf in the foil. Try savory spices like chili powder, paprika, cumin, black pepper, or even cayenne pepper for a little kick.
- Herbs: Replace or complement the parsley with other herbs like basil, rosemary, or thyme. You can use fresh herbs or try a dried Italian herb blend. For a garlic ranch bread, add a couple tablespoons of Dry Ranch Dressing Mix and some extra fresh dill.
- Olive Oil: For those who want a lighter or Mediterranean-inspired version, substituting half the butter with extra virgin olive oil is a great option. The olive oil adds a fruity, slightly peppery flavor and makes the bread taste similar to Italian bruschetta.

Air Fryer Sliced Garlic Bread
- Preheat your air fryer to 350 degrees.
- Mix the softened butter, minced garlic, minced parsley, and kosher salt together in a bowl.
- Spread the garlic butter mixture evenly onto each slice of bread.
- Arrange the slices in a single layer in the air fryer basket. Depending on the size of your air fryer, you may need to do this in batches.
- Air fry the bread slices for about 4-5 minutes, or until they reach your desired level of crispiness.
- Remove the bread from the air fryer and serve warm. Enjoy!
Grilled Garlic Bread Slices
- Preheat your grill to medium heat.
- In a bowl, mix the softened butter, garlic, parsley, and salt.
- Spread the garlic butter mixture evenly onto each slice of bread.
- Place the slices back into a loaf on a large piece of aluminum foil. Fold the foil around the bread to create a packet.
- Place the foil packet on the grill and close the lid. Grill for about 10-15 minutes, checking occasionally.
- Carefully open the foil packet (watch out for hot steam), and continue to grill for another 2-3 minutes or until the bread is toasted to your preference.
- Remove the garlic bread from the grill, let it cool for a moment, and serve warm.
More Easy Semi-Homemade Bread Recipes

How to Store
- Store: Wrap any leftover garlic bread in foil and store in the refrigerator for up to 3 days. You can also keep it at room temperature in an airtight container for a day or two.
- Reheat: To reheat, bake in a pan covered with foil in a preheated oven at 350 degrees until warm. The foil keeps the bread from burning while it heats up.
- Freeze: If you want to freeze leftovers, it’s best to do so before baking. Wrap individual slices in wax paper or plastic wrap and place in a freezer-safe bag, and freeze for up to 2 months. Bake from frozen, adding a few more minutes to the cooking time.
Ingredients
- 1 loaf shepherd's bread or French bread , sliced
- 12 tablespoons butter , room temperature
- 6 cloves garlic , minced
- 1/4 cup parsley , minced
- 1/4 teaspoon Kosher salt
Instructions
- Preheat the oven to 400 degrees.
- Mix the butter, garlic, parsley and kosher salt and spread the butter compound onto the slices of bread.
- Wrap the bread loaf in foil until fully covered. (Use two large sheets in a + shape and wrap up the sides until covered)
- Bake for 15-18 minutes, then open the foil packet and bake an additional 5 minutes.
Nutrition
Want to save this recipe? Create a free account to easily save your favorite recipes


This is a great recipe and I make it often for company. Do you think it could be baked at 350 degrees instead of 400?
I haven’t tested the recipe at 400 degrees. Try it, watch carefully and let us know how it turns out!
I’ve been making garlic bread this way since I was a little girl. My mom didn’t know how to make any other kind. I introduced my husband and step-kids to it and they can’t get enough. They are the pickiest eaters, but constantly ask for more of this. They even asked if I’d teach their mom and grandma how to make it. ?
So glad it’s such a favorite!
Can I freeze the remainder?
Yes 🙂
Sabrina
Thank you for the recipe and brilliant idea.
I am cooking for a wedding -150 people.
Do you think I could make this the day before- keeping the integrity of the bread?
Thank you
Yes but I would use a bit of extra of everything to really soak into the bread. Have fun!
Did you make this for the wedding? If so, please share how it went. How many loaves did you use? I am cooking for a dinner of about 150 and would love your feedback!
Say, do u butter both sides of bread?
It’s up to you. I like to spread it all over to really get the flavor in there.
Ohmygosh I want this for lunch! The perfect garlic bread!
I want a loaf right now!
Looks like it is time to make a loaf of this bread asap!
Such a smart decision, haha!
I would eat the whole loaf of this garlic bread.
It’s very tempting!!
This is ahhh-mazing! Such a perfect way to make garlic bread!
Thank you Sandra!
Pass me a couple of slices, please!!
You got it!
This bread looks so incredible!
This sounds simply amazing! I love homemade bread!
always game for less clean-up! garlic bread is always a favorite (:
I couldn’t agree more!