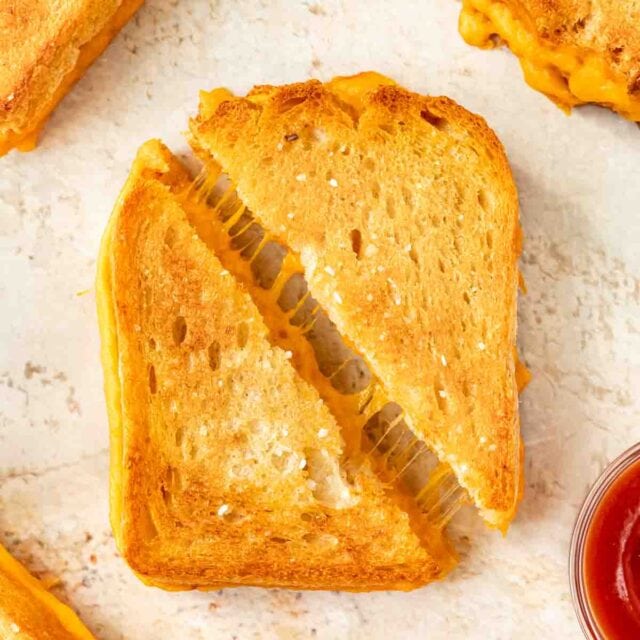
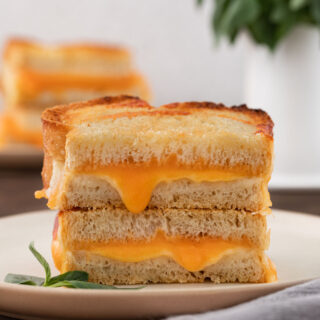
Air Fryer Grilled Cheese Sandwich is an easy way to make your favorite comfort food with a melty cheesy filling and perfectly toasted bread.
Grilled Cheese Sandwiches are a classic kid-friendly, quick and simple recipe. The gooey, cheesy center makes the easy Sandwich peak comfort food. This air fryer version is great when you don’t have time to watch them cook on the stove. Along with my air-fryer hack, try my Sheet Pan Grilled Cheese for another way to get perfectly golden grilled cheese sammies every time.


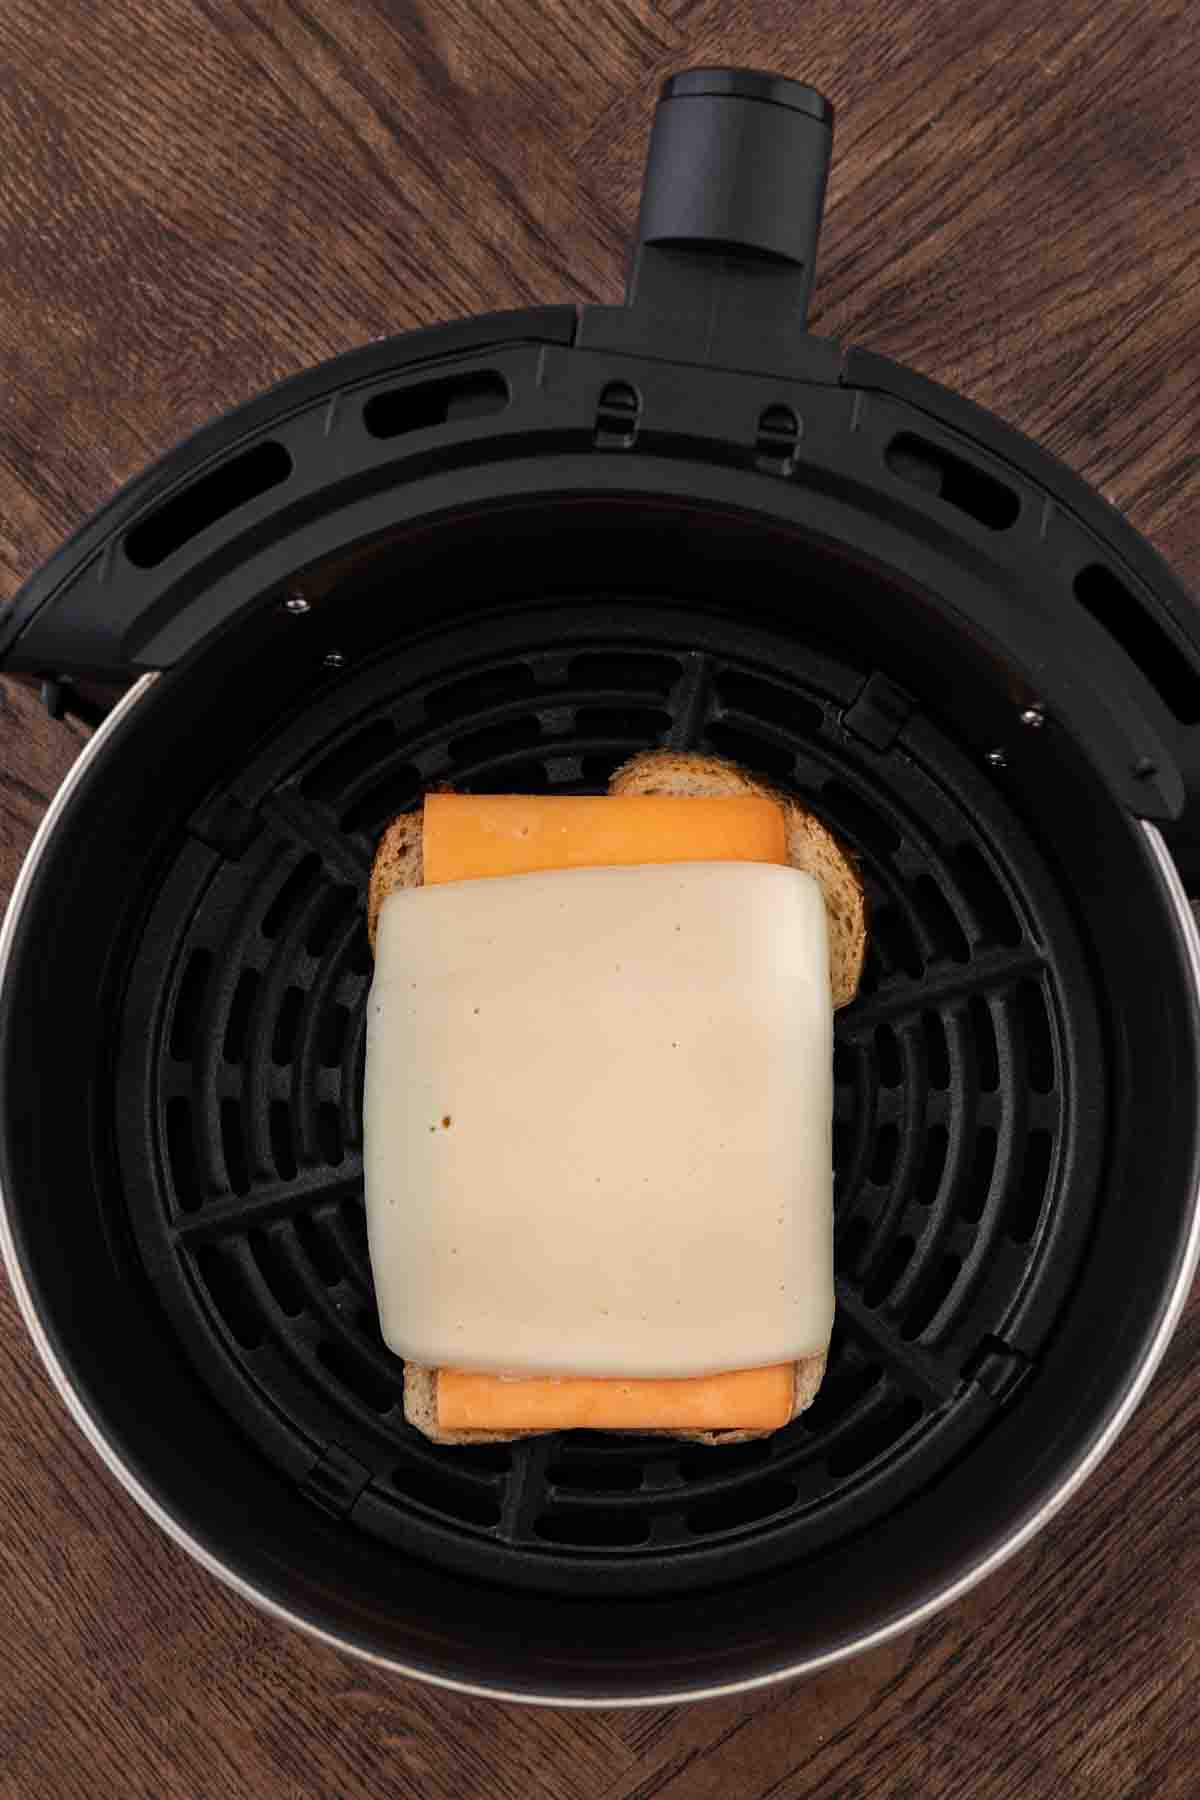
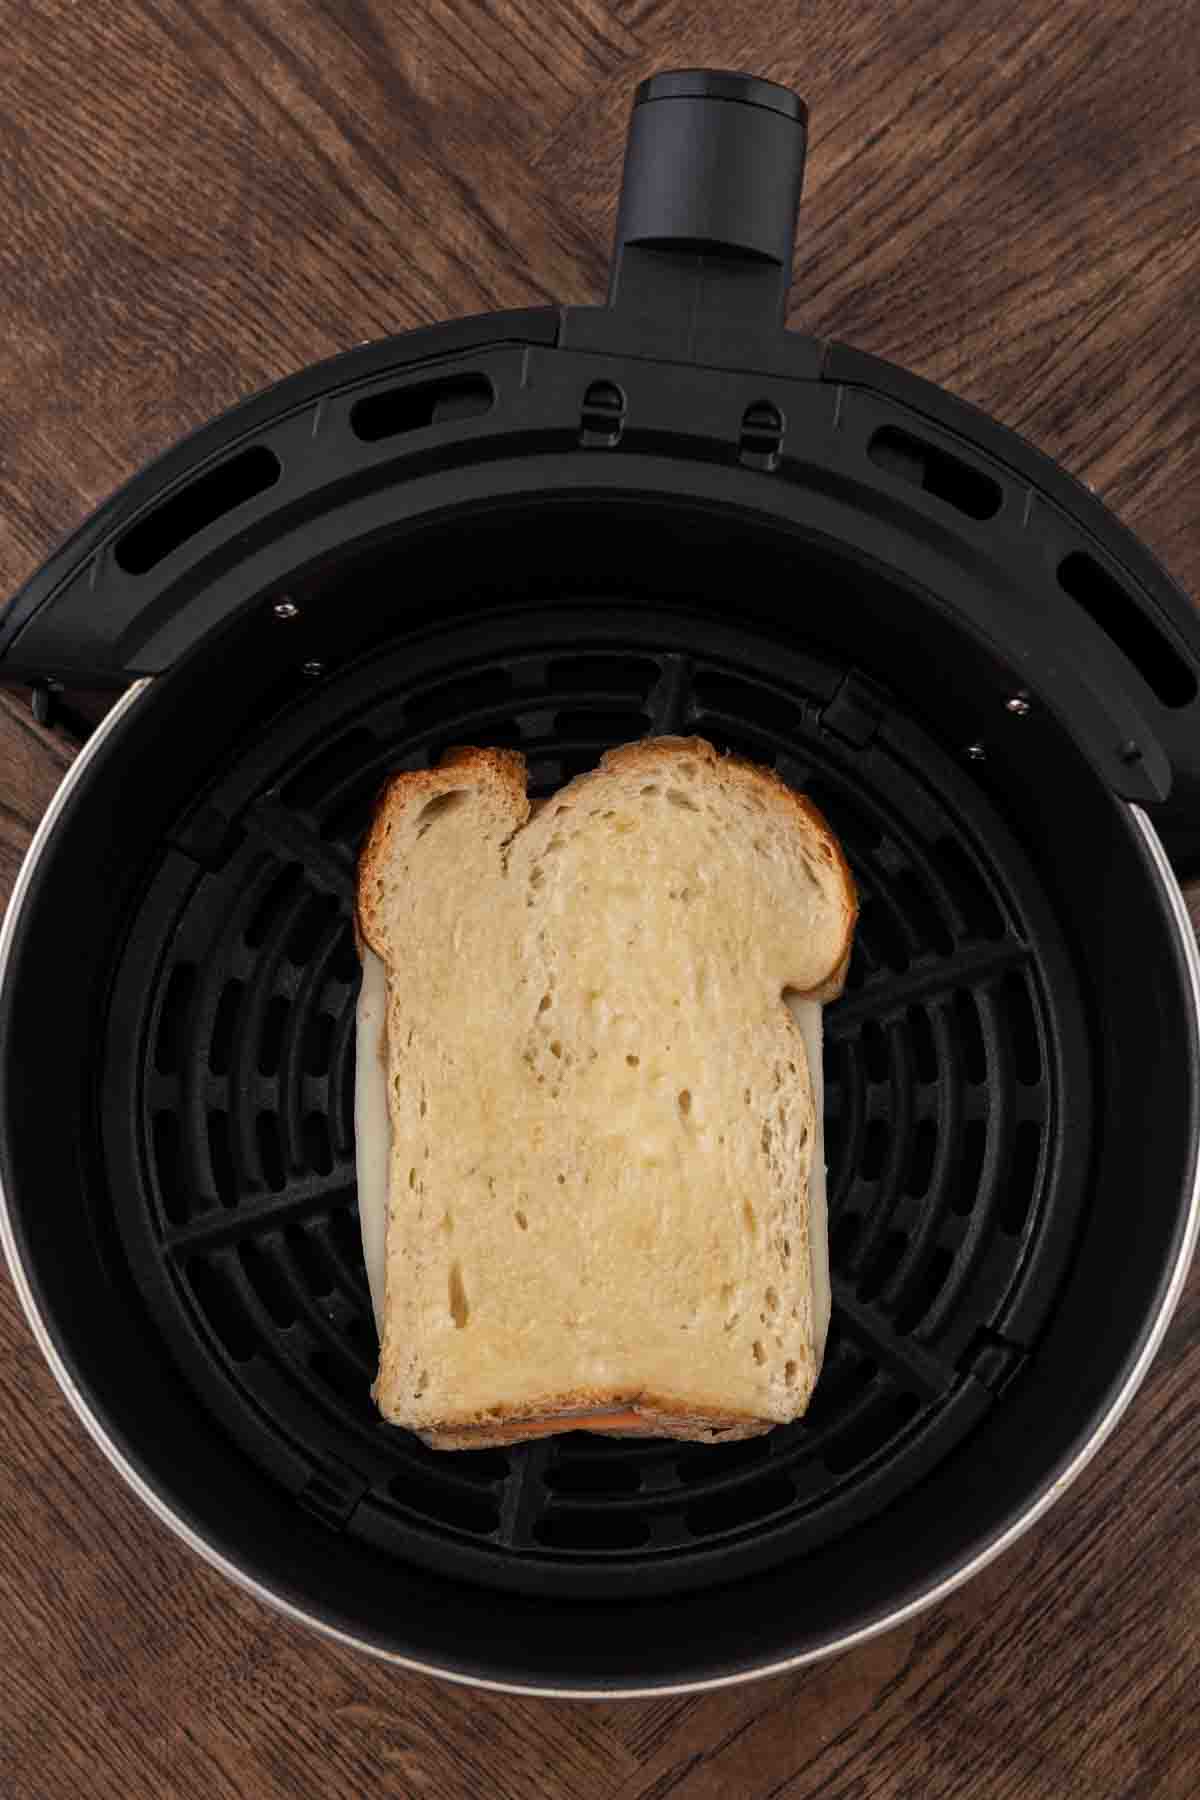
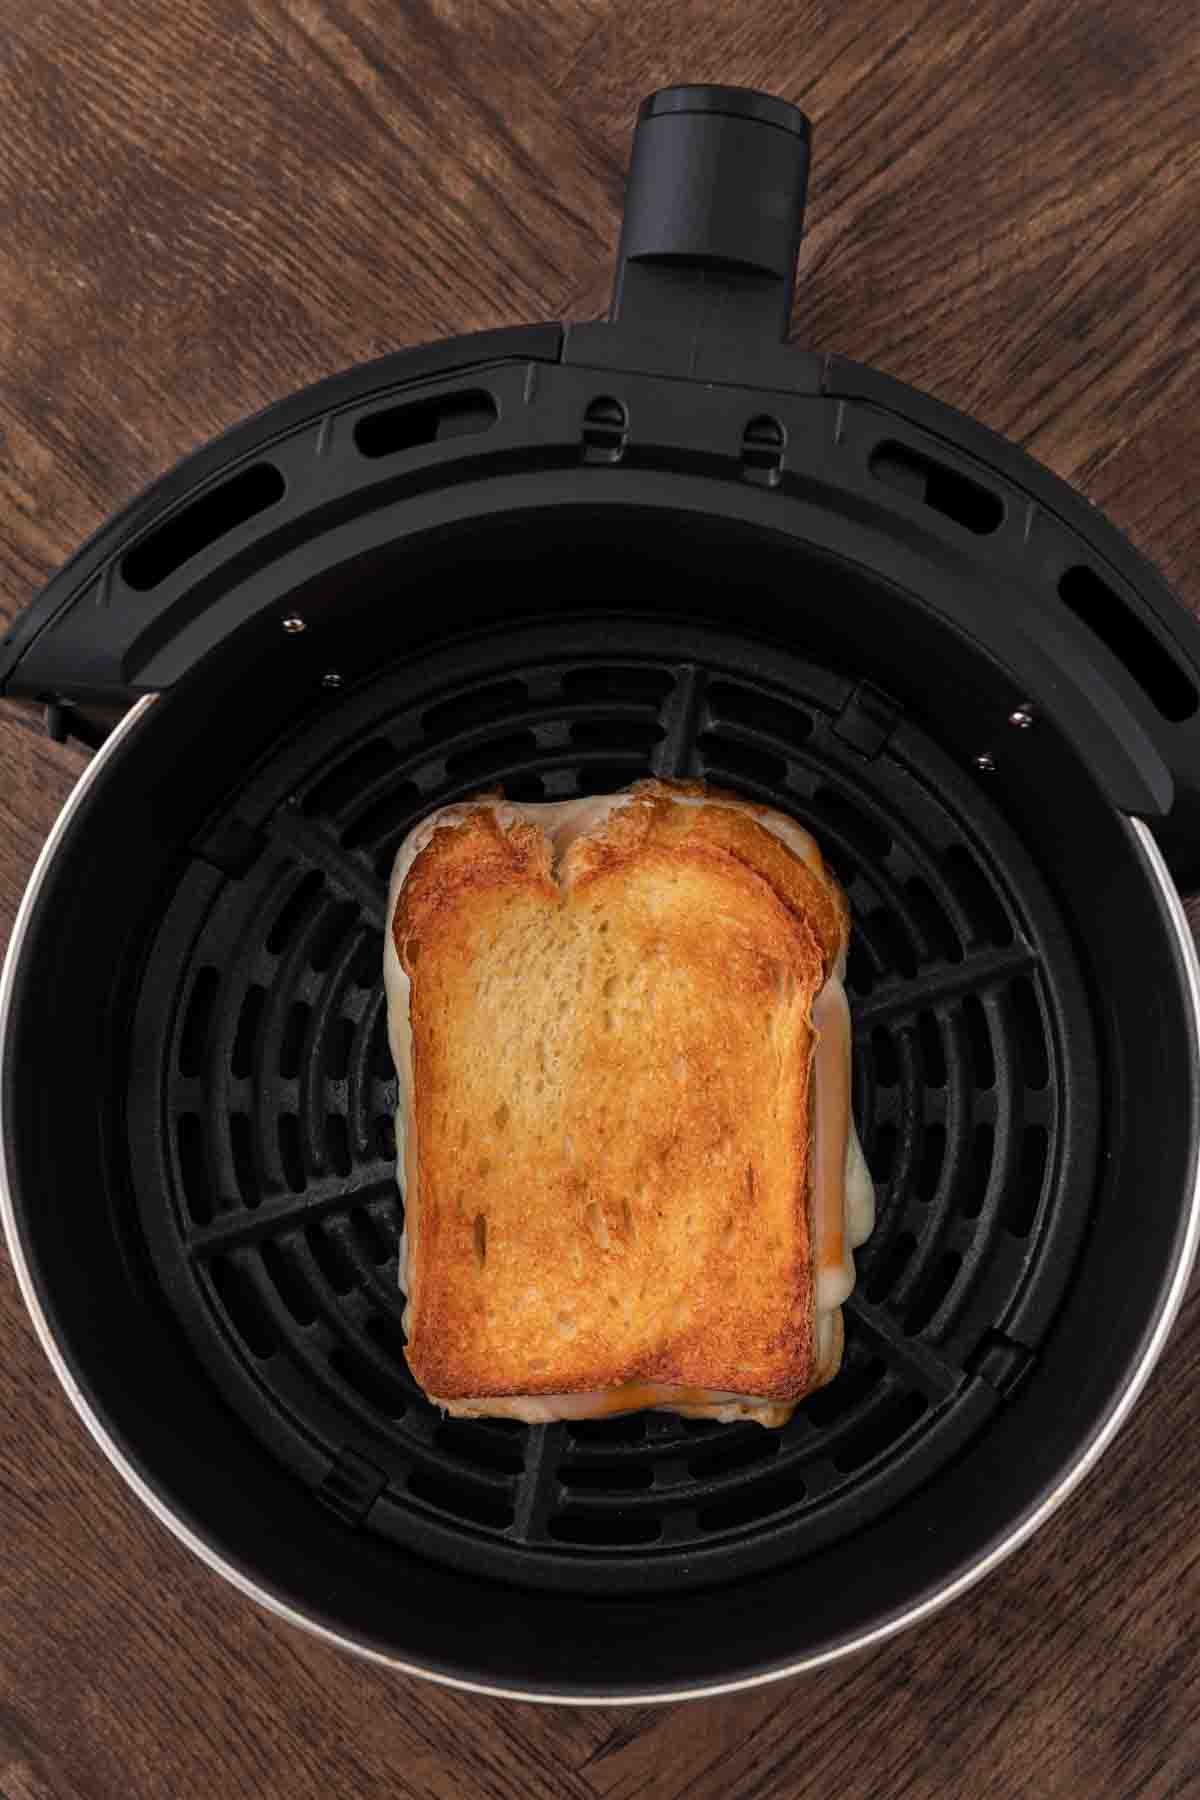


Table of contents
Sabrina’s Air Fryer Grilled Cheese Sandwich Recipe
My Air Fryer Grilled Cheese Sandwich is a delicious, unfussy meal idea. It only takes 6 minutes to cook in the air fryer, and you’ll love the combination of crunchy, buttery toast and flavorful cheese. This air fryer version comes out perfectly golden brown and crisp with the melty filling that everyone loves. It’s a simple recipe that you can’t get enough of.
This recipe is perfect if you just want a cheesy sandwich for yourself or split with another person. However, it’s not ideal if you’re making sandwiches for a bigger group. Because the air fryer basket is relatively small, you can’t cook more than one sandwich at a time. So, you can do a few batches or skip the air fryer and make multiple sandwiches at a time on a griddle or sheet pan.
Table of Contents
Ingredients
- 2 tablespoons Unsalted Butter: Butter helps the bread to crisp up nicely. You can use salted butter if that’s all you have.
- 2 slices Sandwich Bread: When you’re picking your sandwich bread for Air Fryer Grilled Cheese Sandwich, go for nice, thickly cut, fluffy pieces of bread. If the bread is too thin, the grease from the cheese can make it less sturdy.
- 3 slices Cheese: For the melty filling, use 3 pieces of cheese. The 2 slices of cheddar cheese give it a classic grilled cheese taste, while the jack cheese changes things up slightly with a slightly tangy and buttery flavor. They both melt up beautifully to make the rich, gooey filling that everyone loves.
Table of Contents
How to Make Grilled Cheese
Time needed: 11 minutes.
- Preheat
Start by preheating the air fryer to 370 degrees. Then spray the air fryer basket with vegetable oil so that the slices of bread don’t get stuck while it’s cooking.
- Assemble the Sandwich
Brush the slices of bread with butter on one side. Add slices of cheese to one of the pieces of bread on the unbuttered side. Then top it off with the second slice of bread so that the buttered side is facing out.
- Air Fry
Place the cheese sandwich in the air fryer basket. Then cook for 3 minutes. Flip and cook for another 3 minutes until you have melty cheese on the inside and toasty bread on the outside.
Table of Contents
Can This Be Made Ahead?
Yes! Make up to a day in advance and store in the fridge. Reheat when ready. Or you can freeze it for several weeks if need be.
Back toTable of Contents
Nutritional Facts
Table of Contents
What to Serve with Grilled Cheese
Grilled Cheese and Tomato Soup are a classic combo, and it tastes terrific to dip the buttery sandwich in the delicious soup. You can also enjoy it with other kinds of soup like Chicken Noodle or Vegetable Soup. If you don’t want soup, try out easy side dishes. Your Air Fryer Grilled Cheese Sandwich would taste great with fresh salad, Coleslaw, or Garlic French Fries.
Back toTable of Contents
How to Store
- Store: Because of the cheese filling, you shouldn’t leave these sandwiches out for more than 2 hours. Air Fryer Grilled Cheese Sandwiches are definitely best served fresh. However, if you can’t finish your sandwich, you can wrap it in plastic wrap. Then store it in the fridge overnight. Use the air fryer or a skillet to reheat the sandwich. Cook for a couple of minutes on each side until the cheese starts to melt again.
- Freezing: This is best served fresh, but you can easily wrap them in air-tight packaging and store them in the freezer for up to 6 weeks before thawing overnight and reheating in the air fryer.
Table of Contents
Frequent Questions
I personally like my Grilled Cheese Sandwich with cheddar and Jack cheese. However, some people insist that American cheese is the way to go, and you can honestly use whatever your favorite cheese is for this sandwich.
Butter melts easily. Simply add butter to a microwave-safe dish and melt it in the microwave for 7-12 seconds just to soften it. You can also soften it on the stovetop on a low-hot to medium-hot pan. Make sure it’s not too hot or it will cook the butter. You just need it to melt a little.
Table of Contents
Recipe Card
Ingredients
- 2 tablespoons unsalted butter , melted
- 2 slices thick cut sandwich bread
- 2 slices cheddar cheese
- 1 slice jack cheese
Instructions
- Preheat the air fryer. (Optional: Spray the basket with vegetable oil spray.)
- Brush the butter on one side of each piece of bread
- Add cheese slices to one piece of bread on the unbuttered side and top with second slice of bread.
- Buttered side should be facing out of the sandwich.
- Cook for 3 minutes.
- Flip and cook for an additional 3 minutes.
Notes
- Click on the yield amount to slide and change the number of servings and the recipe will automatically update!
- Click on times in the instructions to start a kitchen timer while cooking.
- To convert measurements to grams, click on the Metric option next to Ingredients in the recipe card.
Nutrition
Want to save this recipe? Create a free account to easily save your favorite recipes
Table of Contents
Variations for Grilled Cheese
- Types of Bread: We used classic sandwich bread for this sandwich recipe, but you can go way beyond basic white bread. Grilled cheese usually tastes best with fluffy bread. So, sourdough bread, French bread, or slices of brioche bread would work well. If you’re trying to make a healthier sandwich, you can use wheat bread or make the recipe with gluten-free bread if you have dietary restrictions. Feel free to experiment with any of your favorite bread varieties to see what you like best.
- Types of Cheese: Like with the bread, you can try making this Air Fryer Grilled Cheese Sandwich recipe with different cheese. Try Swiss cheese, provolone, Colby Jack, Pepper Jack, Monterey Jack, or gouda instead of sharp cheddar cheese.
- Bacon: Grilled cheese also tastes great with crispy bacon. You can cook the bacon in the air fryer or on the stovetop ahead of time. Then add cooked bacon to the sandwich filling.
- Onions: To add more depth of flavor, you can top the cheese off with Caramelized Onions before cooking the sandwich.
Table of Contents
Related Recipes
More Grilled Cheese Recipes