
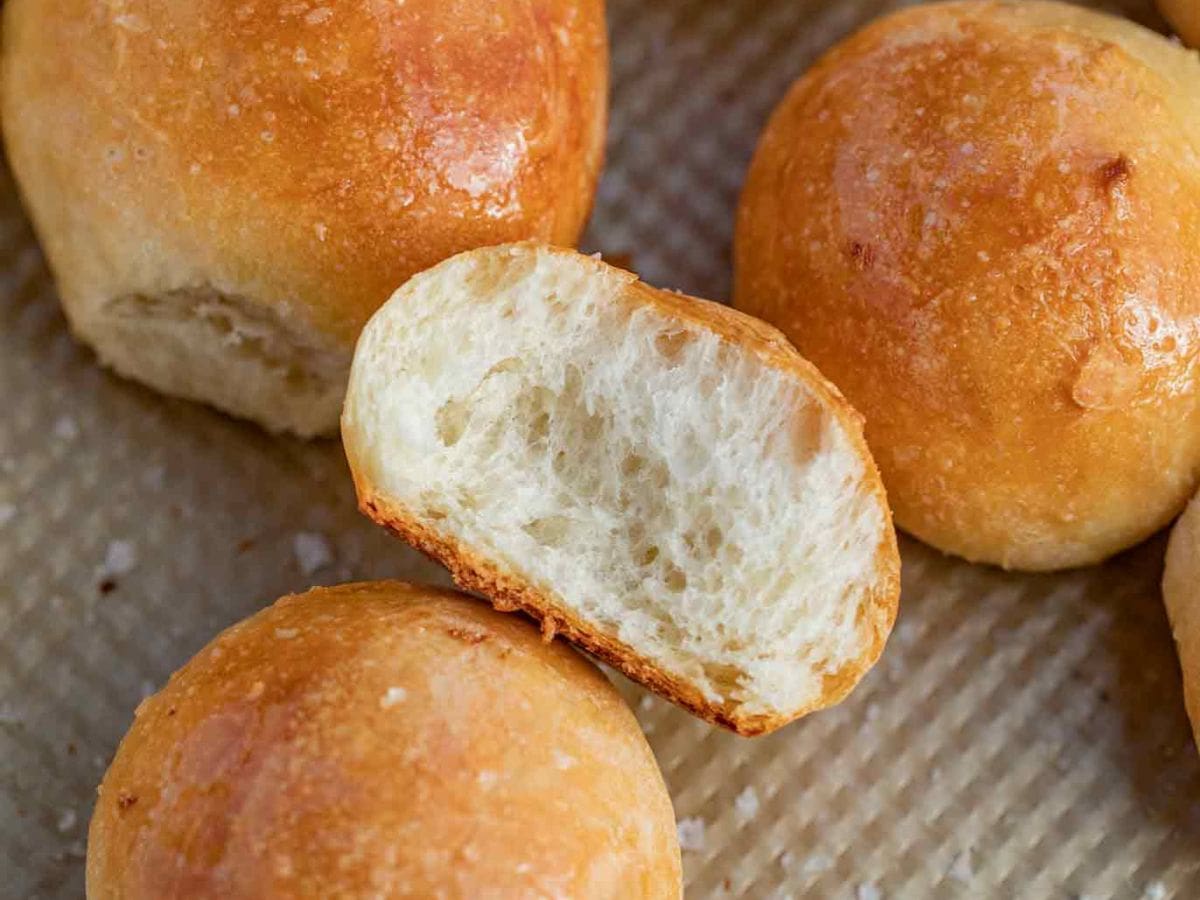
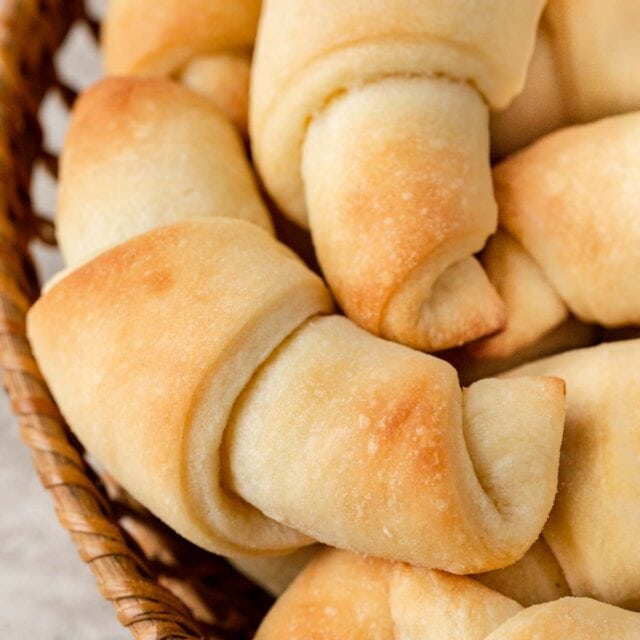
Crusty French Bread Rolls are the perfect bread to serve on weekends and holidays because they’re incredibly easy to make! Try them today!
Homemade Bread doesn’t have to be intimidating! I’ve got a large collection with a variety of yeast bread recipes from these crusty french rolls to Italian Bread to Garlic Herb Dinner Rolls and more!
Sabrina’s Crusty French Bread Rolls
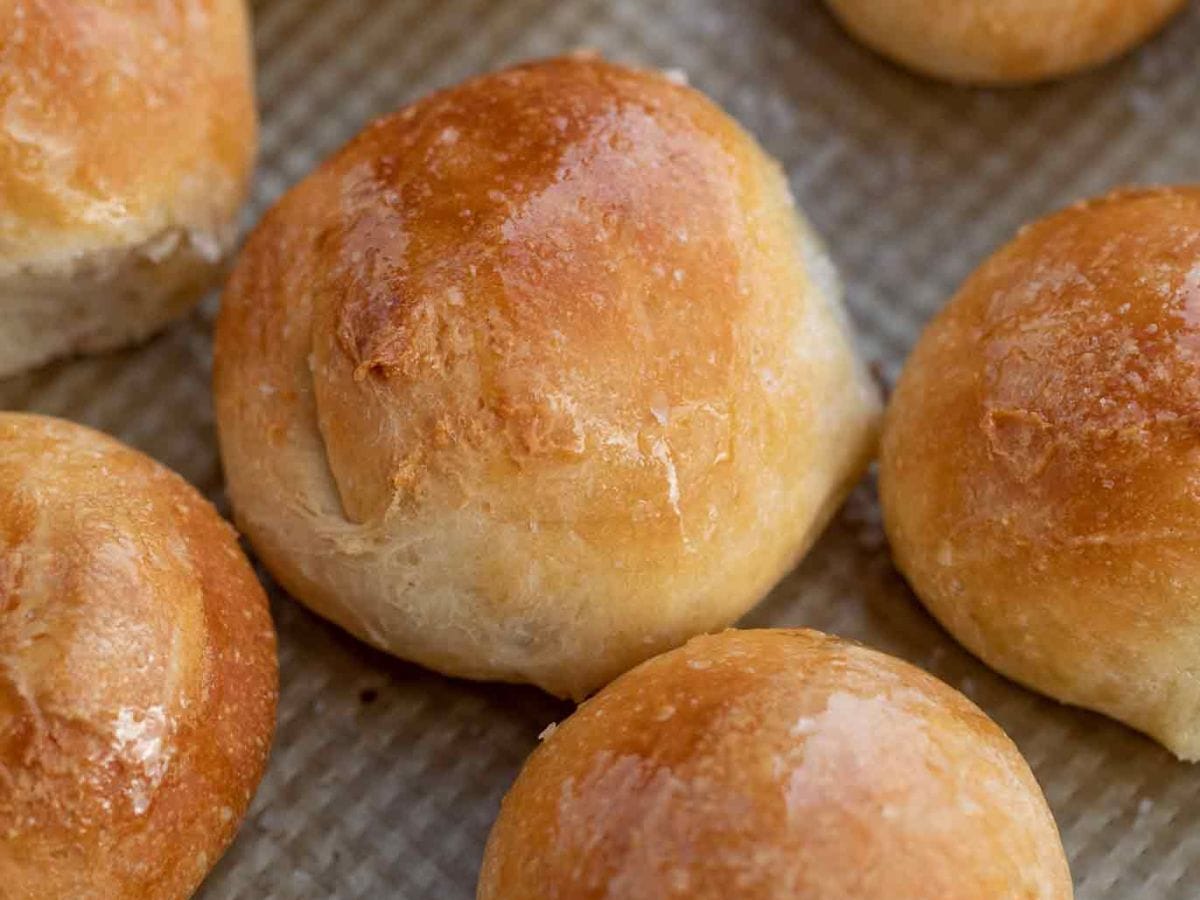
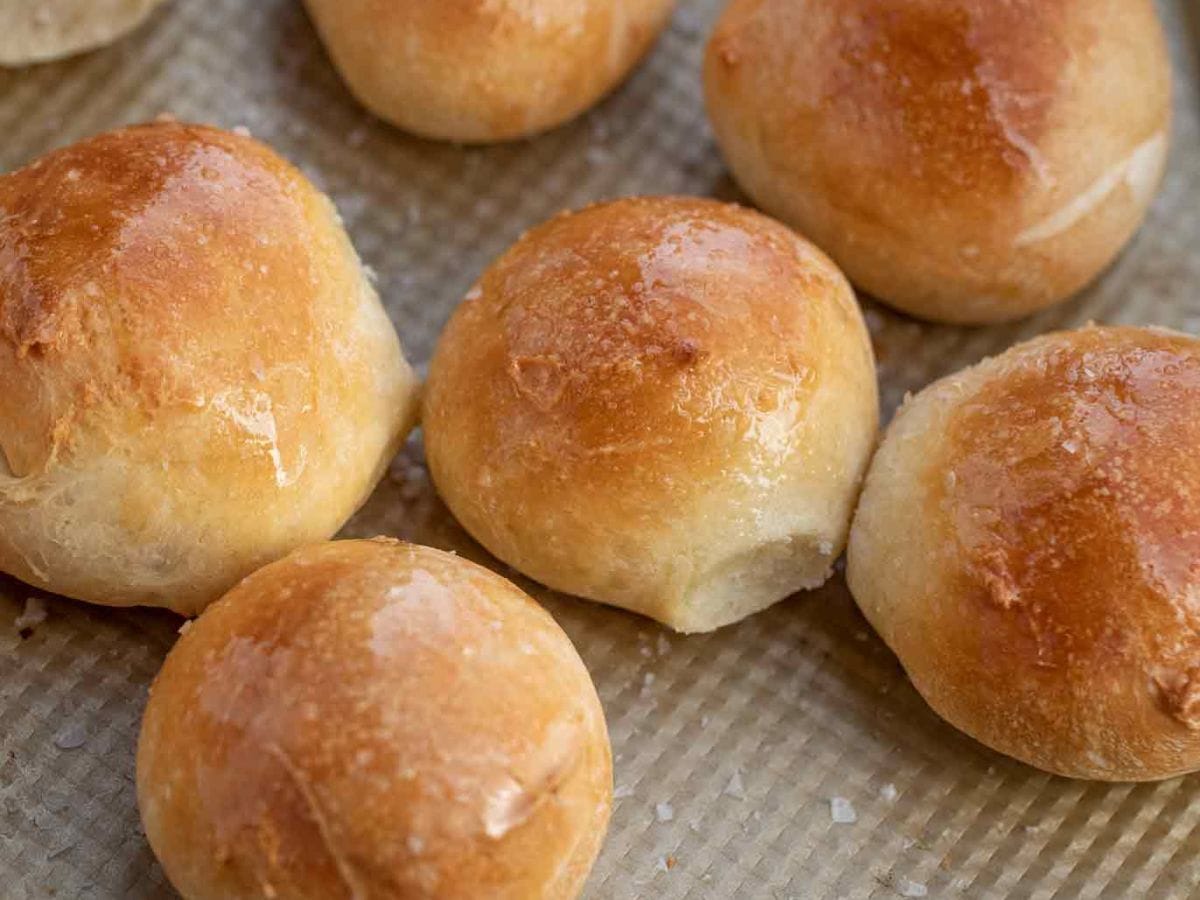
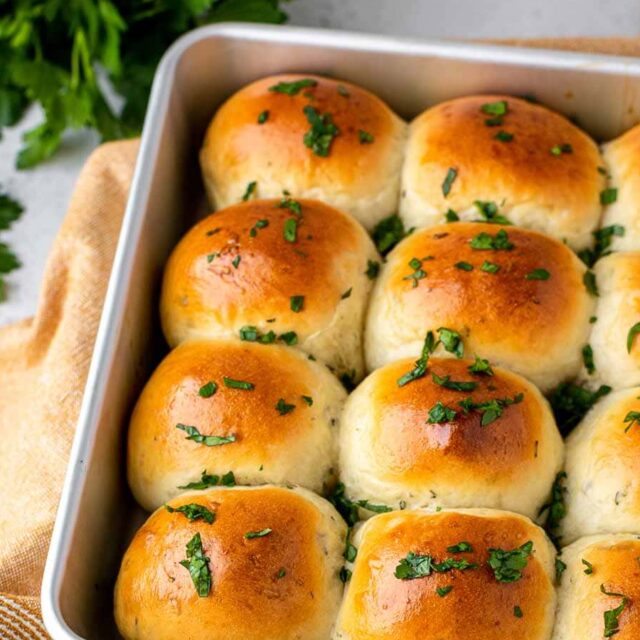
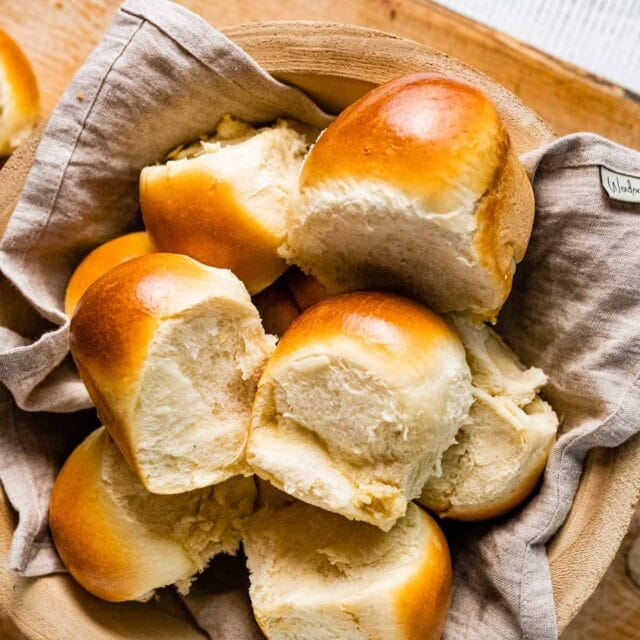
These French Bread Rolls are a favorite side that can go with any dinner. They’re soft and fluffy on the inside and crusty on the outside like a baguette. This is one of my go-to roll recipes because they’re incredibly easy – you don’t even have to knead it by hand if you have a stand mixer! I’ve also included a bread machine variation plus lots of baking tips so any home chef can master these delicious, easy rolls!
Recipe Card
Ingredients
- 1 1/2 cups warm water , (110 degrees)
- 3 teaspoons active dry yeast
- 2 tablespoons sugar
- 2 tablespoons vegetable oil
- 2 teaspoons kosher salt , divided
- 3 1/2 cups flour , up to 4 cups as needed
- 2 tablespoons unsalted butter , melted
- spray bottle with ice water
Instructions
- To a stand mixer add the warm water, yeast and sugar and let sit for 10 minutes until cloudy.
- Add the oil, half the salt and 2 cups of the flour with the dough hook and let it combine on medium speed adding the remaining flour in ¼ cup increments until the dough starts to come together and eventually starts to pull away from the bowl, then turn up the speed and let it knead for 5 minutes.
- Add dough to an oiled bowl and turn in the bowl to coat the dough with oil then cover with a damp towel and let rise in a warm spot until it doubles in size for 60 minutes.
- Divide the dough into 16 balls, place on a greased baking sheet and let rise for an additional 30 minutes.
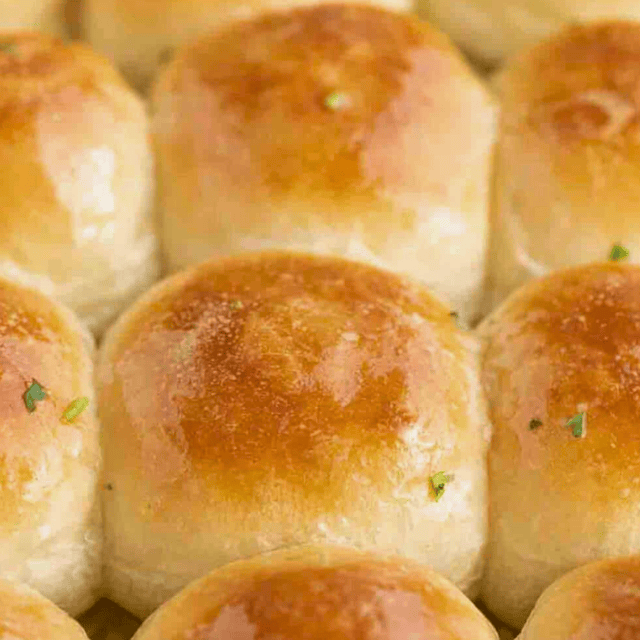
- Brush gently with butter and sprinkle with remaining salt before baking at 400 degrees for 18-20 minutes spraying the dough with ice water twice halfway through the baking process to make the crust chewier.
Notes
- This dough is stickier than most bread dough, however the more you knead it, the more it will come together.
- If it isn’t pulling from the sides or seems too wet, mix in additional flour, 1-2 tablespoons at time, up to ½ cup of flour.
- This recipe was made using the US measuring system and works with the exact US measurements listed. The Metric Conversions on each recipe card are automatically generated and are not chef tested for this recipe.
Nutrition
Want to save this recipe? Create a free account to easily save your favorite recipes
Sabrina’s Note
My easy-to-make rolls are a family favorite and loved by many home chefs who have been following my recipe site for years. My hack is to add an ice water spray halfway through to create steam which results in the crispiest crust. It’s a great side for any dinner during the week and good enough for special events. Hope you enjoy this recipe as much as my readers and I do!
Table of contents
Ingredients
- Warm Water: Activates the yeast to raise the dough. For best results, make sure the water is about 110 degrees, which is on the hotter side but not close to boiling.
- Active Dry Yeast: This is the leavening that makes the bread nice and fluffy. Instant yeast can be used too. You can mix it directly in with the dry ingredients without proofing, but this is not recommended unless using a bread machine.
- Sugar: Feeds the yeast which creates air. Sugar also adds a slight touch of delectable sweetness to the bread.
- Vegetable Oil: This helps the final texture to be soft and delicious. Olive oil can be used if desired.
- Kosher Salt: Salt helps to enhance the flavor.
- Flour: You can use bread flour for a chewier texture, but I’m using regular all-purpose flour for my recipe.
- Unsalted Butter: The melted butter adds the signature golden crust we’re looking for in the recipe.
- Spray Bottle With Ice Water: This is the secret ingredient that creates steam in the oven and gives the rolls that crispy, chewy crust!
Can These Be Made Ahead?
Yes. These are great to make a day in advance, even though fresh-baked bread is always better! But you can freeze the dough ahead of time to make it easier to bake the day of. Divide the uncooked dough into balls, place them on a baking sheet, and freeze. Once they’re frozen, about an hour, you can move them to a plastic bag. When you’re ready to bake, place them back on the baking sheet and bake according to the recipe, spraying with cold water to make them extra crusty (make sure it’s cold; warm water won’t work as well).
Baking Tips
- Make sure to set a timer and let the yeast and sugar sit in the hot water for the full time for the yeast to activate. The water will look cloudy and slightly foamy when it’s ready to use.
- When you’re letting the dough rise, the yeast needs a warm environment to grow. I usually put it near a window, or if your oven is on for another recipe you can keep it on top of the stove.
- Make sure your yeast is as fresh as possible for this bread recipe. If the packet has expired, I recommend not using it, because your dough might not rise correctly.
- Be careful not to knead the dough for longer than the suggested 5 minutes. Kneading the dough for too long can result in dense rolls.
- We’re using the stand mixer for this bread recipe, but you can knead it by hand if you want to.
- You can use this same recipe to make an actual loaf or baguette, either freeform or in a special pan. Or roll them very thin and make breadsticks!
- Wrap these dinner rolls in tinfoil after they’re done baking, to keep them warm until you’re ready to serve.
- Line your baking sheet with parchment paper to help keep the French bread from sticking.
- If the dough is sticking to your hands while you’re trying to work with it, dust your hands with flour lightly.
- Brush the baguette dough with egg wash, or with butter to make the outside golden brown. You can also use a sharp knife to slice down the middle top of the roll for presentation.
How to Store
- Store: These bread rolls will last at room temperature for 4-5 days, wrapped tightly. You can also store them in an airtight container to keep them soft.
- Reheating Tips: Heat leftover rolls in the oven wrapped in tinfoil at 200 degrees to make them seem fresh-baked again before serving.
- Freezing: French bread rolls can be frozen either before or after they’ve been cooked. For cooked bread, freeze the rolls in a sealable plastic bag wrapped in tinfoil. Defrost at room temperature for a few hours before serving, or reheat in the oven to make them soft and crusty again.
Bread Machine Method
- Add Ingredients: Place warm water, yeast, sugar, oil, salt, and flour into the bread machine pan in the order recommended by the bread machine manufacturer.
- Select Settings: Choose the dough cycle and start the machine. The machine will mix, knead, and allow the dough to rise.
- Shape and Bake: Once the dough cycle is complete, remove the dough and follow the recipe here. You’ll divide it into 16 balls, place them on a greased baking sheet, let them rise again for 30 minutes, and then bake in a preheated oven at 400 degrees for 18-20 minutes, spraying with ice water twice halfway through baking.
Frequent Questions
If your roll recipe turns out too hard, it’s possible that you’re overcooking the rolls. Set a timer, and use an oven thermometer to make sure the oven is cooking at the right temperature.
Some French bread recipes call for bread flour because bread flour contains more protein. But I find that all-purpose flour works fine instead of bread flour for this French bread recipe. You can also use whole wheat or other wheat flour for a healthier version.
Variations
- Herb-Infused Rolls: Add 1 tablespoon of dried herbs (like rosemary, thyme, or oregano, or an Italian mix) to the flour at the second step. You’ll get a mouthwatering flavor to add to the aroma of fresh bread! You could also serve the rolls with Garlic Herb Butter.
- Cheese Rolls: Add 1 cup of shredded cheese (your choice between cheddar, parmesan, or asiago) into the dough during the mixing stage.
More Homemade Bread Roll Recipes

Photos used in previous versions of this post.


This is an excellent recipe. The rolls are beautifully fluffy inside and lovely and crisp on the outside. A real winner.
my grandson is dairy free, canyour french bread do without the two
tablespoons of butter?
You’ll want to brush on some oil or shortening in place of the butter before baking or the rolls would not be as crispy, but the butter can definitely be substituted for!
This is my new bun recipe! I cut it into 6ths and used them as pulled pork buns. They were just right for pulled pork but probably too big for hamburgers so maybe try in 8ths for burgers. This was my first time making bread in the stand mixer and I am sold. The dough was so lovely when it finished kneading, not sticky at all but alive! I always make no knead recipes because I hate kneading and I hate making a mess of my counter top (I know, I’m not a Real Baker). Im going to try this dough in a bread pan today. Thank you so much for this fantastic recipe! PS I didn’t do the butter and salt at the end because I was in a rush. They were still excellent so I think I’ll continue to skip that step.
Made these for my family and we LOVED them! I loved how easy and not fussy this recipe is. Love using my stand mixer for bread. Confused with freeze ahead option, do you thaw them or cook from frozen? Would like to make for Christmas hopefully someone can answer in time! Cheers:)
Just made these to go with soup for friends that are moving today. I made exactly as written. Super easy and super good. I tossed four ice cubes into the bottom of oven at the 9 minute mark and baked for another 9 minutes.
Started baking bread during the pandemic and now am addicted to home baked breads.
Thanks for sharing.
Reserving comment on taste. Making now but your directions seem incomplete. Did you mean add remaining 1.5 c flour in 1/4 c increments? I added but doesn’t seem to help. And using dough hook? Not doing what I suspect it should. Not making again.
These had great flavor! My only problem with them is that they spread out and didn‘t stay as round as I would have liked. Crispy on the top but soft on the side and bottom. Otherwise they were very tasty and light inside. I think I might try skipping the final rise and just baking after I form the rolls.
The family can’t get enough of these rolls. After freezing the dough do I have to let it rise again or just bake?
Making these now…testing recipe for Thanksgiving. Due to regional humidity I needed to add an extra 1/2 cup AP flour. Baked in 2 lipped baking sheet pans, needed to add extra 10 -15 minutes to baking time. Next time I would use non-lipped baking sheets and I bet the original time would be excellent! Flavor and crust perfect!
Wonderful rolls! And yes chewy! I did not have a sprizer bottle so just threw 3 ice cubes into bottom of oven after 10 minutes. A classic method for rusty rolls. Definitely a keeper.
I was worried because the dough was quite soft. I would make again using the US weights. A lovely soft dough when cooked. We loved them !
Great recipe, will make them again. They weren’t brown like yours but likely a user error.
You ever make bulkie rolls? Similar to Kaiser but slightly more chewy, crusty and not as sweet. I cannot find a decent recipe for them. It’s a New England regional sandwich roll. They are one of my favorites and no longer live in the area.
When do I add the other 1/2 of the salt?
Under instruction see #4:
Divide the dough into 16 balls, place on a greased baking sheet and let rise for an additional 30 minutes then brush gently with butter and sprinkle with remaining salt before baking at 400 degrees for 18-20 minutes spraying the dough with ice water twice halfway through the baking process to make the crust chewier.
@starzkeeper, the recipes says to add the remaining salt to the tops of the rolls before baking
After knead for 5 minutes the dough got like cake batter what happened
Hi Roose . I had the same issue.
I think the two cups go into the yeast water initially mix at medium speed
Then 1/4 cup at a time you add the next 1 and 1/2 cups of flour waiting for it to pull away from the sides.
Lol I had the same sloppy looking stuff.
Mine are rising beautifully right now can’t wait to bake them.
My one recommendation is that the amount of flour needed varies based off of elevation. So you may need more than the recipe calls for.
Yes, I discovered this as well, had to add quite a bit more flour, also the first rise took 40 mins… as I live in the desert.
I’m not sure about the elevation, but I know that the amount of flour depends on how dry it is, which changes from day to day and season to season (also is your kitchen ac’ed or heated.)
These were absolutely amazing! I used a coarse kosher salt which tasted so good and I added Italian spices to the melted butter. The ice water spray is a must. These were so deliciously crunchy!
I made these this morning, but formed into 8 larger rolls. They turned out perfect! They remind my husband of a roll his mother bought at a corner bakery in New York when he was a kid. He told me not to loose this recipe! Thank you!
I’ve made these rolls several times and they’ve turned out great! I used the US measurements with the full 3 1/2 cups of flour and had no issues, so I’m unsure what the other commenters are talking about there. I added some roasted garlic and shredded parmesan this time, so good. This recipe is going to stay in the rotation!
The recipe is really easy to follow and the rolls turned out great. Trust the recipe.
These bread rolls were spectacular! Above my expectations! I was unsure of the dough as it seemed too sticky (I used cups, by spoon and level) and was hoping to find process shots to make sure the consistency was right, but in the end they turned out perfect! Thank you! ?
Your metric conversion for the yeast is off. Active dry yeast is 3.1 gram per teaspoon, so your conversion for 3 tsp would be 9.3 grams, not 3.1.
These turned out so well that my daughter only ever wants to eat this French crusty bread! So delicious!! Tonight we are shaping the dough into baguette shaped loaves so we can make sandwiches with this bread!
I loved this recipe and I’m making it again tonight! Thanks for all the helpful tips!
The timing is wrong. You say it takes one hour to make and yet all together you’ve mentioned about 2 hours something. If you really are a professional and want people to trust you, you’re going to need to change the times.
Time is money. 105 minutes vs. stated 60. Oh no. I usually don’t count the baking time because it can vary. Be that as it may, baking is an art, and art takes time. Relax and enjoy the process. It’s a good recipe and I would not skip the ice water spritzing.
First time I made it last week for my daughter’s birthday and my granddaughter’s boyfriends mum thought they was brought and they was so good
These sound great. Would these make good, crusty hamburger rolls?
I made these a week ago. Everyone raved about them. If you are making rolls you have to make this one.
Delicious roll recipe and very easy with the use of a stand mixer. Followed the directions and did have to add almost a full cup of flour. I weighed out the first 3.5 cups (420 grams), added 2 full cups, then continued adding by 1/4 cups until the dough pulled away from the bowl. I did not have a spray bottle for water so I just used my fingers to flick the water over the rolls. Served with corn chowder and got rave reviews.
I liked this recipe and made it just as it is. the dough was a bit sticky but I followed to a T and in the end, the rolls were just like the ones I have in Europe crunchy on the outside light, and fluffy on the inside. Perfect
These rolls are so good. My family said it’s a keeper. So easy and doesn’t take the whole day to make. Thank you for the recipe ?
I did have to add about 1/4 cup of flour during the mixing as it was a bit wet but otherwise, perfect results and easy to follow! I use this recipe for hamburger buns or some bread for the table. Love them!
The ratio of flour and water is off even for US measuring. The dough was way too sticky and I added more flour. They are rising as we speak. I am am experienced baker and cooking teacher. Something is wrong with this recipe. I’ll second there comments about time. You left out the rising time in the top.
I’m baking them now and while they came together nicely, the prep time, baking time, and cook times listed at the top of the recipe are wildly off (Prep Time 30 minutes Cook Time 30 minutes Total Time 1 hour ) and would really throw someone off if they are trying to time things to finish at the same time. Thankfully I am experienced enough to suspect that things were off and read through first (which I suppose everyone should do regardless).
I made these tonight. I’ve been making yeast bread for years but still feel intimidated by yeast each time. Your recipe is so clear. Thank you. They came out great!
Why does everyone seem to assume stand mixers are standard in every kitchen?
Instructions without, please?
I never use a mixer. I find it rides up while mixing besides kneading by hand works out better and it’s good exercise.
Very good recipe, easy to follow. Thank you so much for sharing this!
Hi Sabrina,
I haven’t made bread since school (a VERY long time ago!) but I decided to make these and they are delicious!!!! I did half topped in egg yolk and half topped in butter and both great. Thanks for this superb recipe, wishing you a good year all the way from London 🙂
Just made these tonight to accompany homemade chicken soup. Absolutely fantastic, I added a dash of garlic and onion powder to the melted butter and holy cannoli, super delicious. Perhaps a sprinkle of fresh parsley?
The metric conversion on here says 354.88g , but when I looked it up it suppose to be 438g…
Used the US measurements and they came out flawless. Did an egg white + water wash on the top before baking and two spritzes of water during cooking. Came out hard on the outside, soft on the inside! These will be a regular in our house for sure!
These buns were perfect!
I made 8 rolls, cooked for 22 mins at 400. Used the US measurements and they were spot on. Brushed with an egg/water glaze and they browned nicely. Thank you for the recipe!
Can I make this recipe into one bread loaf. How long should it stay in the oven
Silvia. Wondering the same thing. If you’ve tried baking in a single loaf, let me know how long you baked it and at what temperature. I’m also curious to how this would come out. Thanks
Hi:
Just went through all the comments but could not find a picture, as requested by many, of what the dough should look like. Is there a picture somewhere?
I also added an extra cup of flour so I could manage this very wet dough. Just waiting on the first rise now. I make sandwich bread every week, by hand, so I’m trying to broaden my bread making knowledge. Hope these turn out as this seems an easy recipe.
Absolutely wonderful. I used bread machine by letting it mix, knead and do first rising. They are perfect!
I agree with some earlier comments on the wet/dry ingredient ratio. It seems if you use US cups, the recipe is fine, but the metric conversion is completely wrong giving a consistency of a thick batter which does not hold its shape. I did persevere and added more flour plus a lots of patience and managed to end up with nice soft crumb rolls, but not crispy. I would try again but with adjusted ingredients.
I don’t have a lot of experience making bread. These sounded very easy. I ended up throwing my dough out as it seemed to wet and sticky. Not due to the recipe but my lack of experience. So wet that it seemed I wouldn’t be able to shape it into balls. I added quite a bit more flour, let it rise for an hour and it just didn’t look right. Guess I was expecting a firmer ball of dough. So my question is, is a wet sticky dough typical and could you provide a video for comparison?
Use bread machine on dough cycle. It is a perfect dough. (I don’t like mixing dough with my hands because I end up using too much flour trying to make it less sticky).
This needs a rewrite, which rack do we bake the rolls on? Had mine on second from bottom (like everything else I bake) and they turned out completely black on the bottom
I’ve made the same bread recipe a week apart and one time it’s fine with stated amount of flour the next week I have to add a lot more flour. You need to add slowly until it is pulling away from the side of bowl and forms a ball on the dough hook. It changes by the temp/humidity in the house, may not be enough of a difference for you to feel but the dough will. Hope you’ll try again nothing better the the smell and taste of home made bread and rolls
These are the absolute best rolls ever!! I make them at least once a week and can’t wait until the next time. Looking forward to serving these during the holidays!!!!
I love these rolls, super easy and really delicious! I do have 1 issue, the rolls don’t get brown. I brushed them with butter, sprayed with ice water…the oven is well calibrated.
Any suggestions?
So for me personally I always just do an egg brush before baking rolls or French bread and it always gives it that crunchy golden top. I had never heard of the cold water spray method until reading this recipe. And butter just adds yummy flavor, but won’t make it get crusty. Hope this helps!:)
I love these rolls, super easy and really delicious! I do have 1 issue, the rolls don’t get brown. I brushed them with butter, sprayed with ice water…the oven is well calibrated.
Any suggestions?
These were very nice rolls. I like that they were crusty on top and tender inside.
I wish they had risen higher, considering they had 3 tsp of yeast. I used instant yeast. The dough was quite wet, & sticky, I added extra flour when I shaped them. They had very nice flavor. I made 8 rolls instead of sixteen for bigger rolls.
Excellent recipe. Easy to follow instructions. This was my first time making a yeast bread and the rolls came out perfect! My dough was a little sticky and I made 8 rolls for sandwiches instead of 16.
Hi all. I made the dough now but was hoping to bake these to have warm at a dinner party later tonight. Any suggestions on how to keep them before baking in let’s say 6 hours from second rising.
The recipe in US customary 3 tsp of yeast but the metric says 3.2gr? Should be 9-10gr’s
Author should correct grams of yeast in recipe
Turned out perfect. I baked for an extra couple minutes to achieve browning in photos. I didn’t use as much salt on the top, as it seemed like a lot, but honestly the little pops of salt were SO GOOD, just do it.
Usually I’d use parchment, but was out. Baked on a tinfoil sheet lined with crisco and they came out beautifully brown and crusty. I formed the dough in my mixer, but as always I prefer to knead by hand to get the perfect moisture balance. Ignore the bad reviews, all bread recipes require a little bakers intuition to balance out the dry/wet.
After their final proofing, they buns on a single sheet looked like they had merged, but it cooked perfectly and they all pulled apart perfectly.
Served them with a french navy bean soup. We’re definitely going to enjoy these through the week!
This needs a rewrite, which rack do we bake the rolls on? Had mine on second from bottom (like everything else I bake) and they turned out completely black on the bottom
This recipe is very easy to make, there is o stress involved, the rolls come out beautifully, they are crusty and tender inside it’s now in my cookbook for kee
Thank you so much, Dolores!