
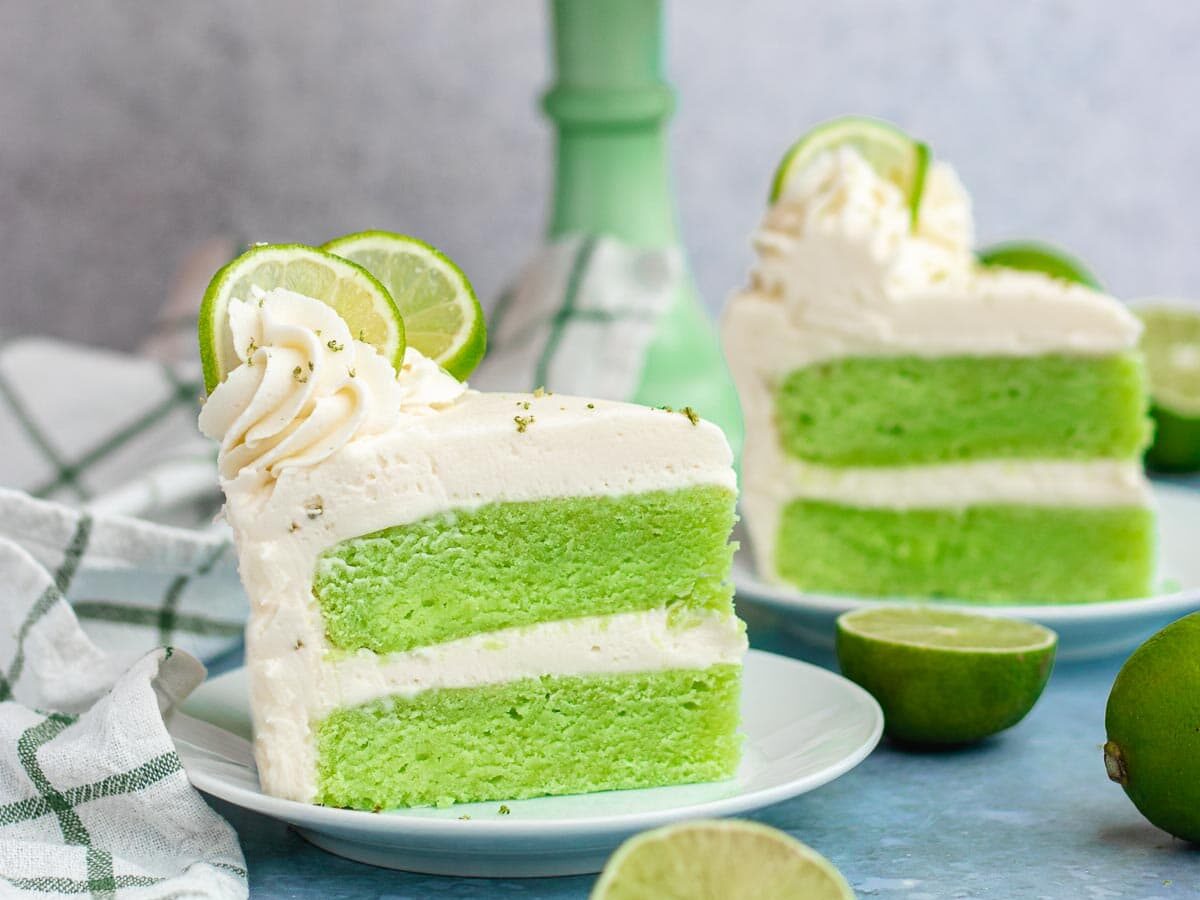
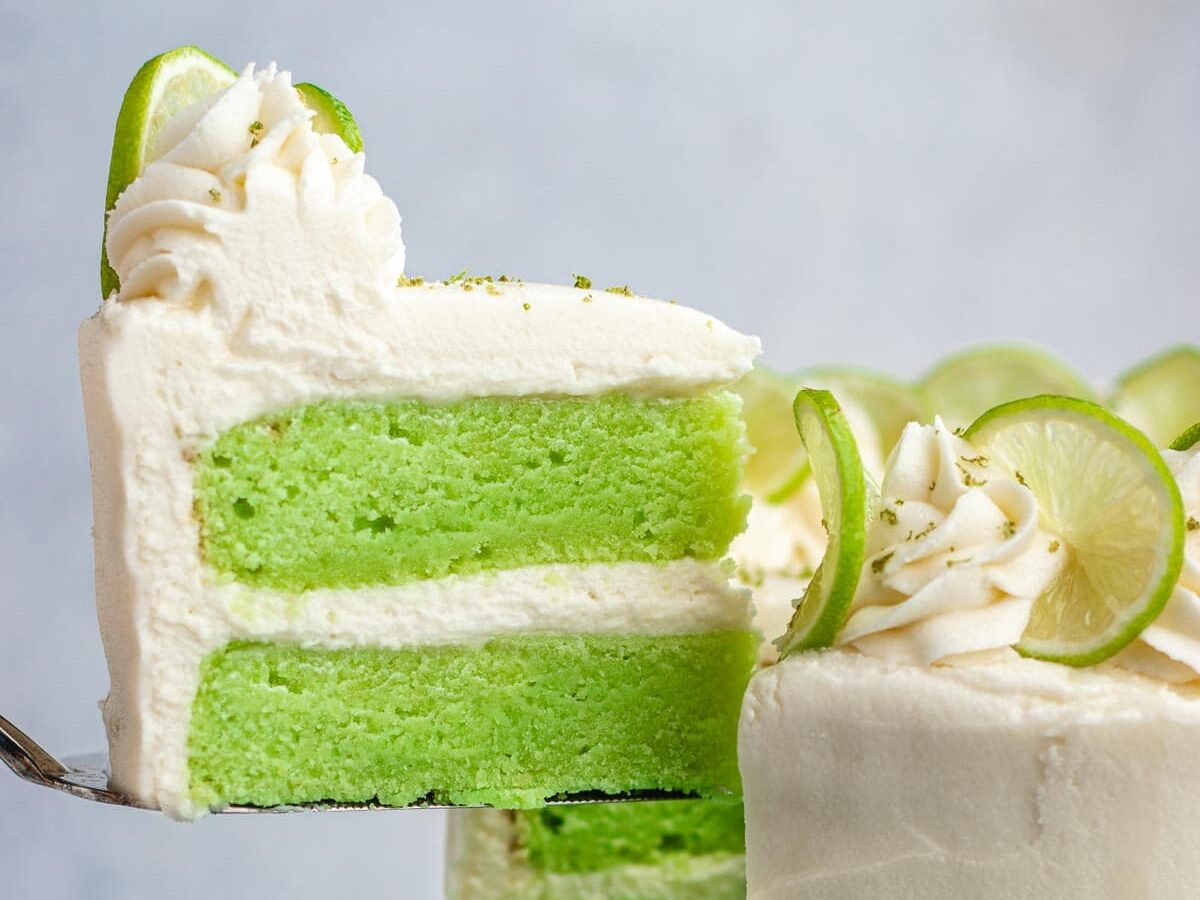
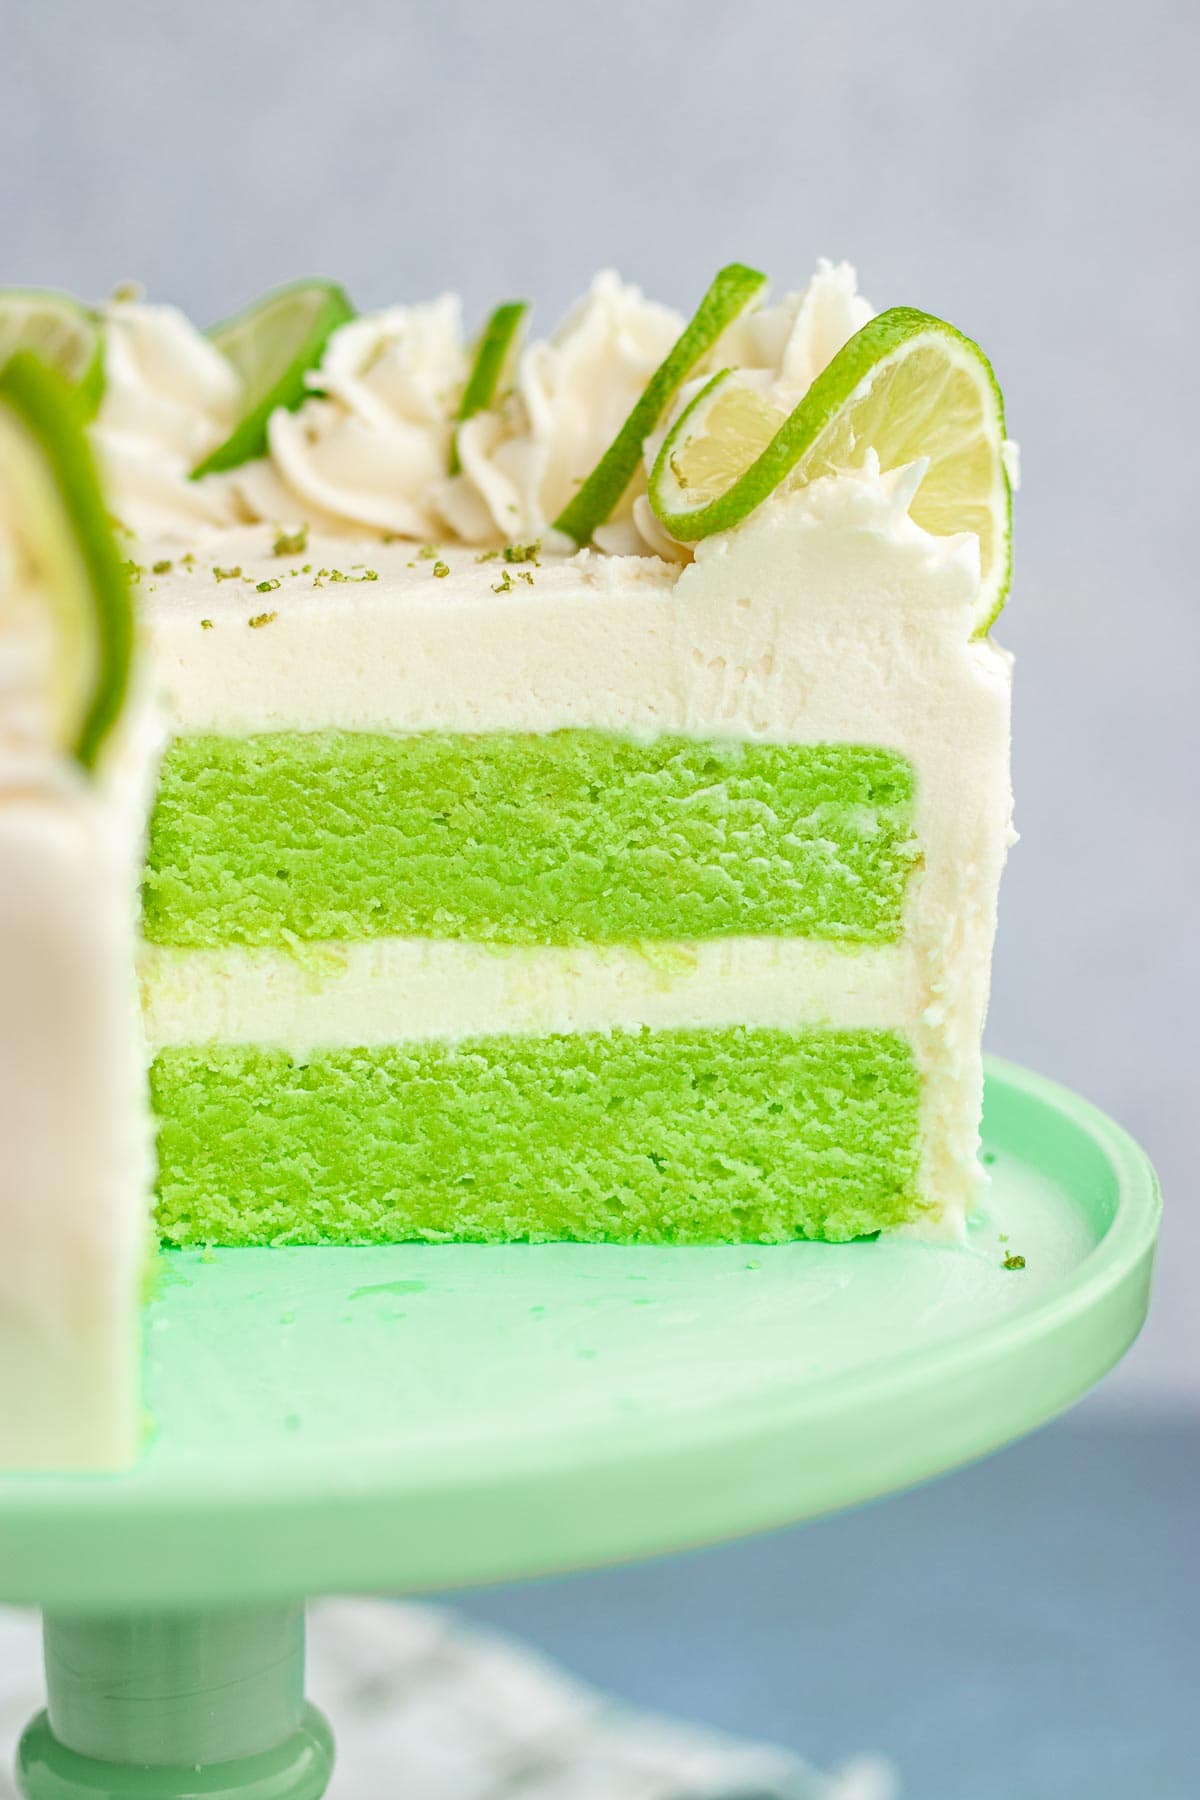
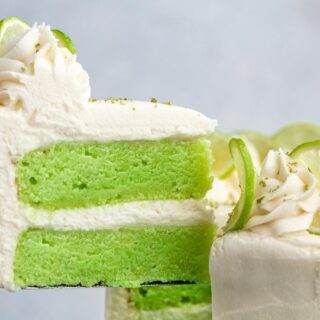
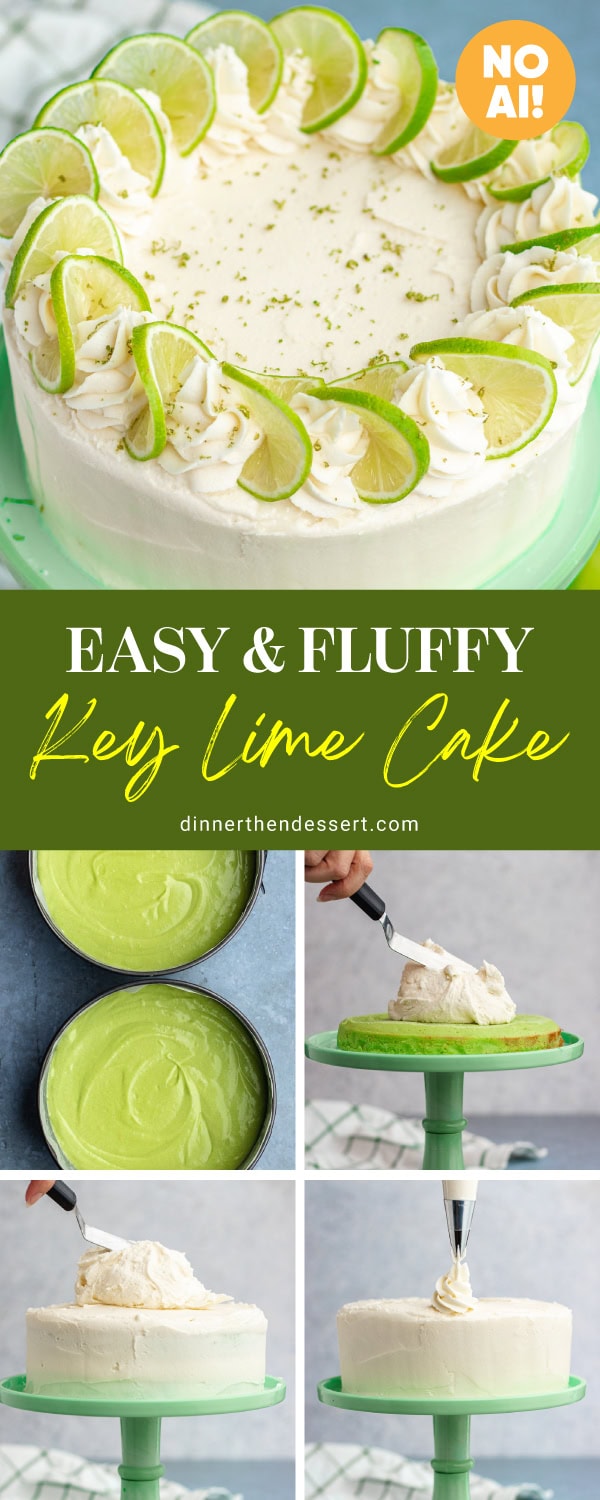
Key Lime Cake is a fluffy, tangy-sweet, layered dessert with a tropical twist. Perfectly balanced with an extra rich cream cheese frosting.
If you’re a fan of Key Lime Pie, then you’re sure to love this delicious Cake Recipe. Like the famous citrus and custard pie, it has the perfect combination of sweet and tangy flavors, but in a delicious showstopping layer cake.
Sabrina’s Key Lime Cake Recipe
This easy recipe uses a classic cake batter with simple pantry ingredients as the base. You’ll add key lime and coconut for a refreshing, summer flavor. It’s the perfect dessert to enjoy with your family or bring to a party as the weather gets warmer. Along with the tasty, tender cake, this cake has a delicious layer of Key Lime Cream Cheese Frosting. The sweet and tangy flavor of thick, cream cheese frosting goes perfectly with the citrus flavor of the lime cake.
Recipe Card
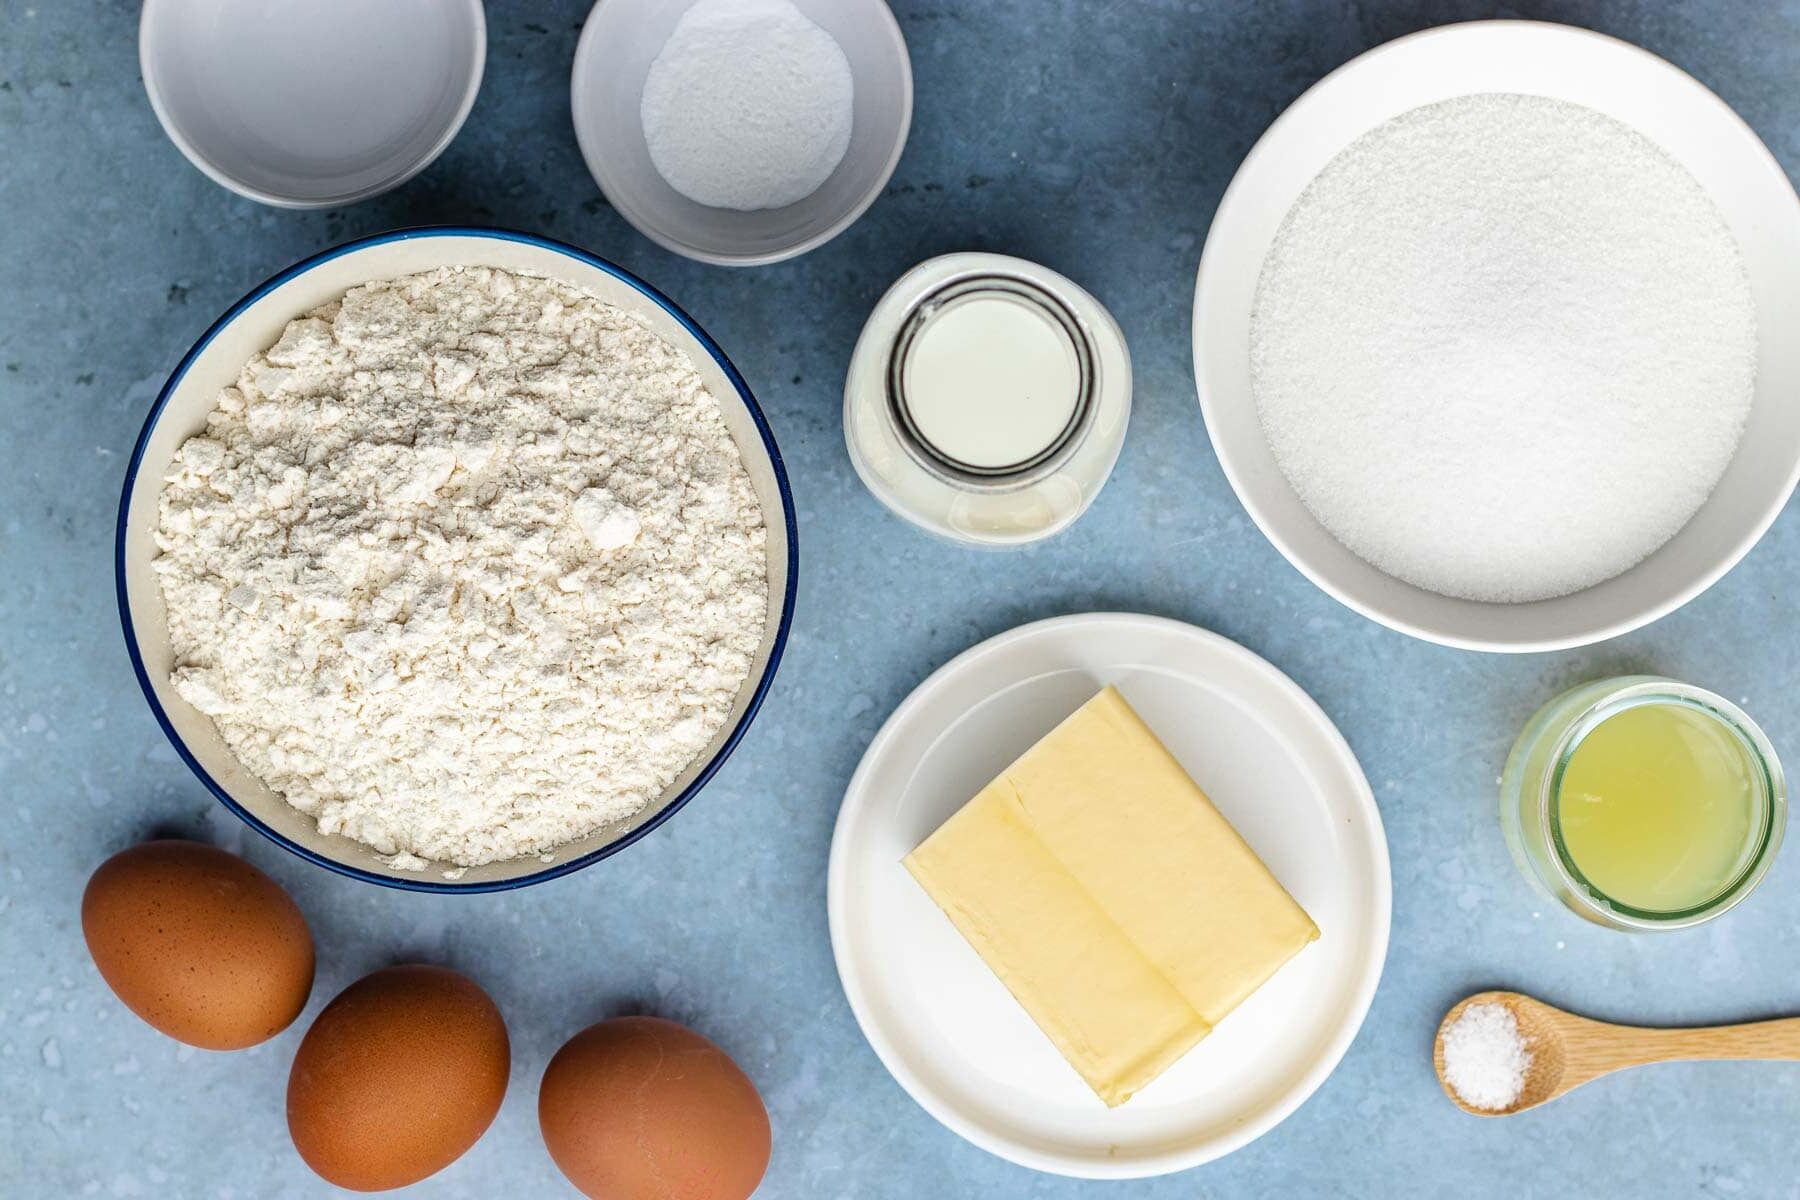
Ingredients
Key Lime Layer Cake:
- 3/4 cup unsalted butter , softened
- 1 1/3 cups sugar
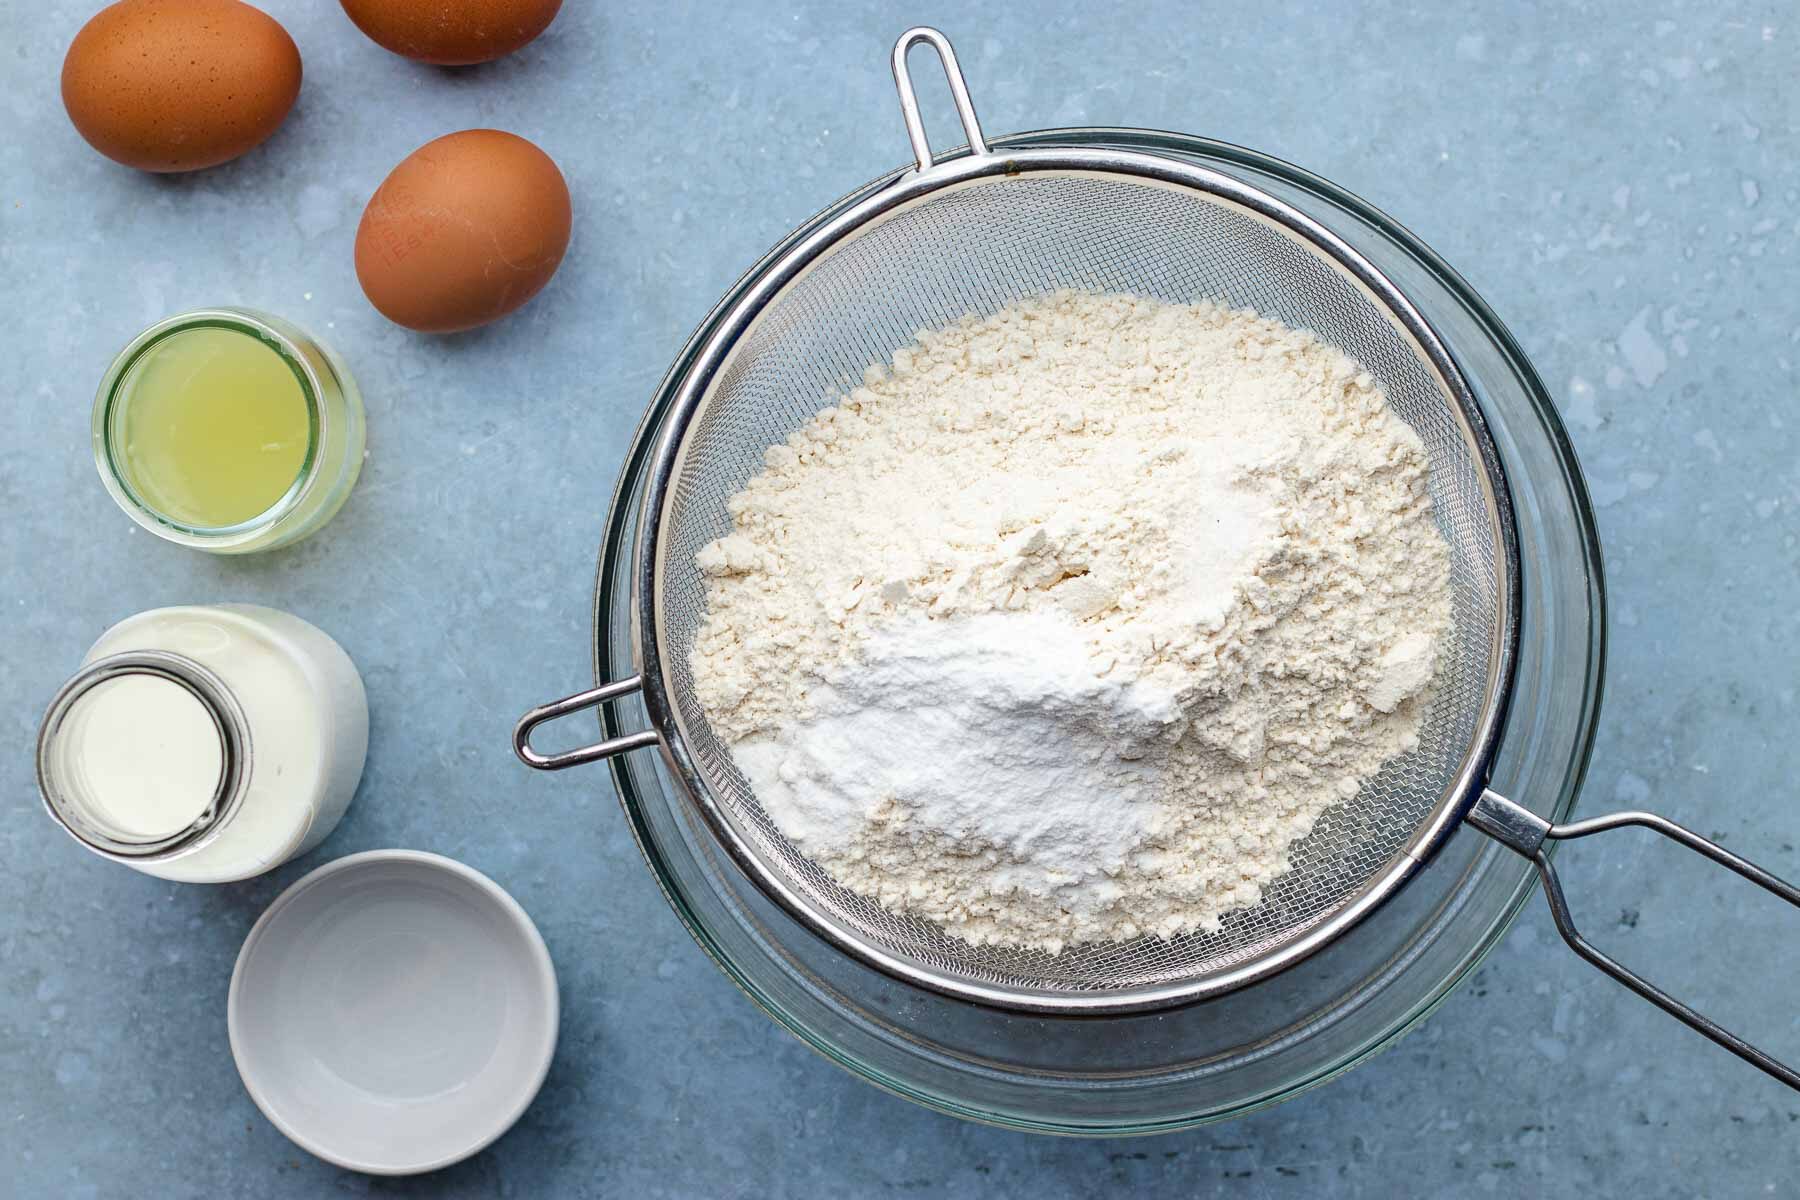
- 3 large eggs
- 1/2 teaspoon coconut extract
- 1 cup whole milk (at room temperature)
- 1/4 cup key lime juice
- 2 1/3 cups flour
- 2 1/4 teaspoons baking powder
- 1/2 teaspoon salt
- 4-6 drops green food coloring , optional
Key Lime Cream Cheese Frosting:
- 24 ounces cream cheese , softened
- 1/2 cup unsalted butter , softened
- 3 tablespoons sour cream
- 3 tablespoons key lime juice
- 1 teaspoon lime zest , (optional), about 2 key limes, or more if desired
- 1 teaspoon vanilla extract
- 6 1/2 cups powdered sugar , about 2 pounds
- 4-6 drops green food coloring , optional
Filling:
- 1/2 cup condensed milk , divided, for brushing
Instructions
Key Lime Layer Cake:
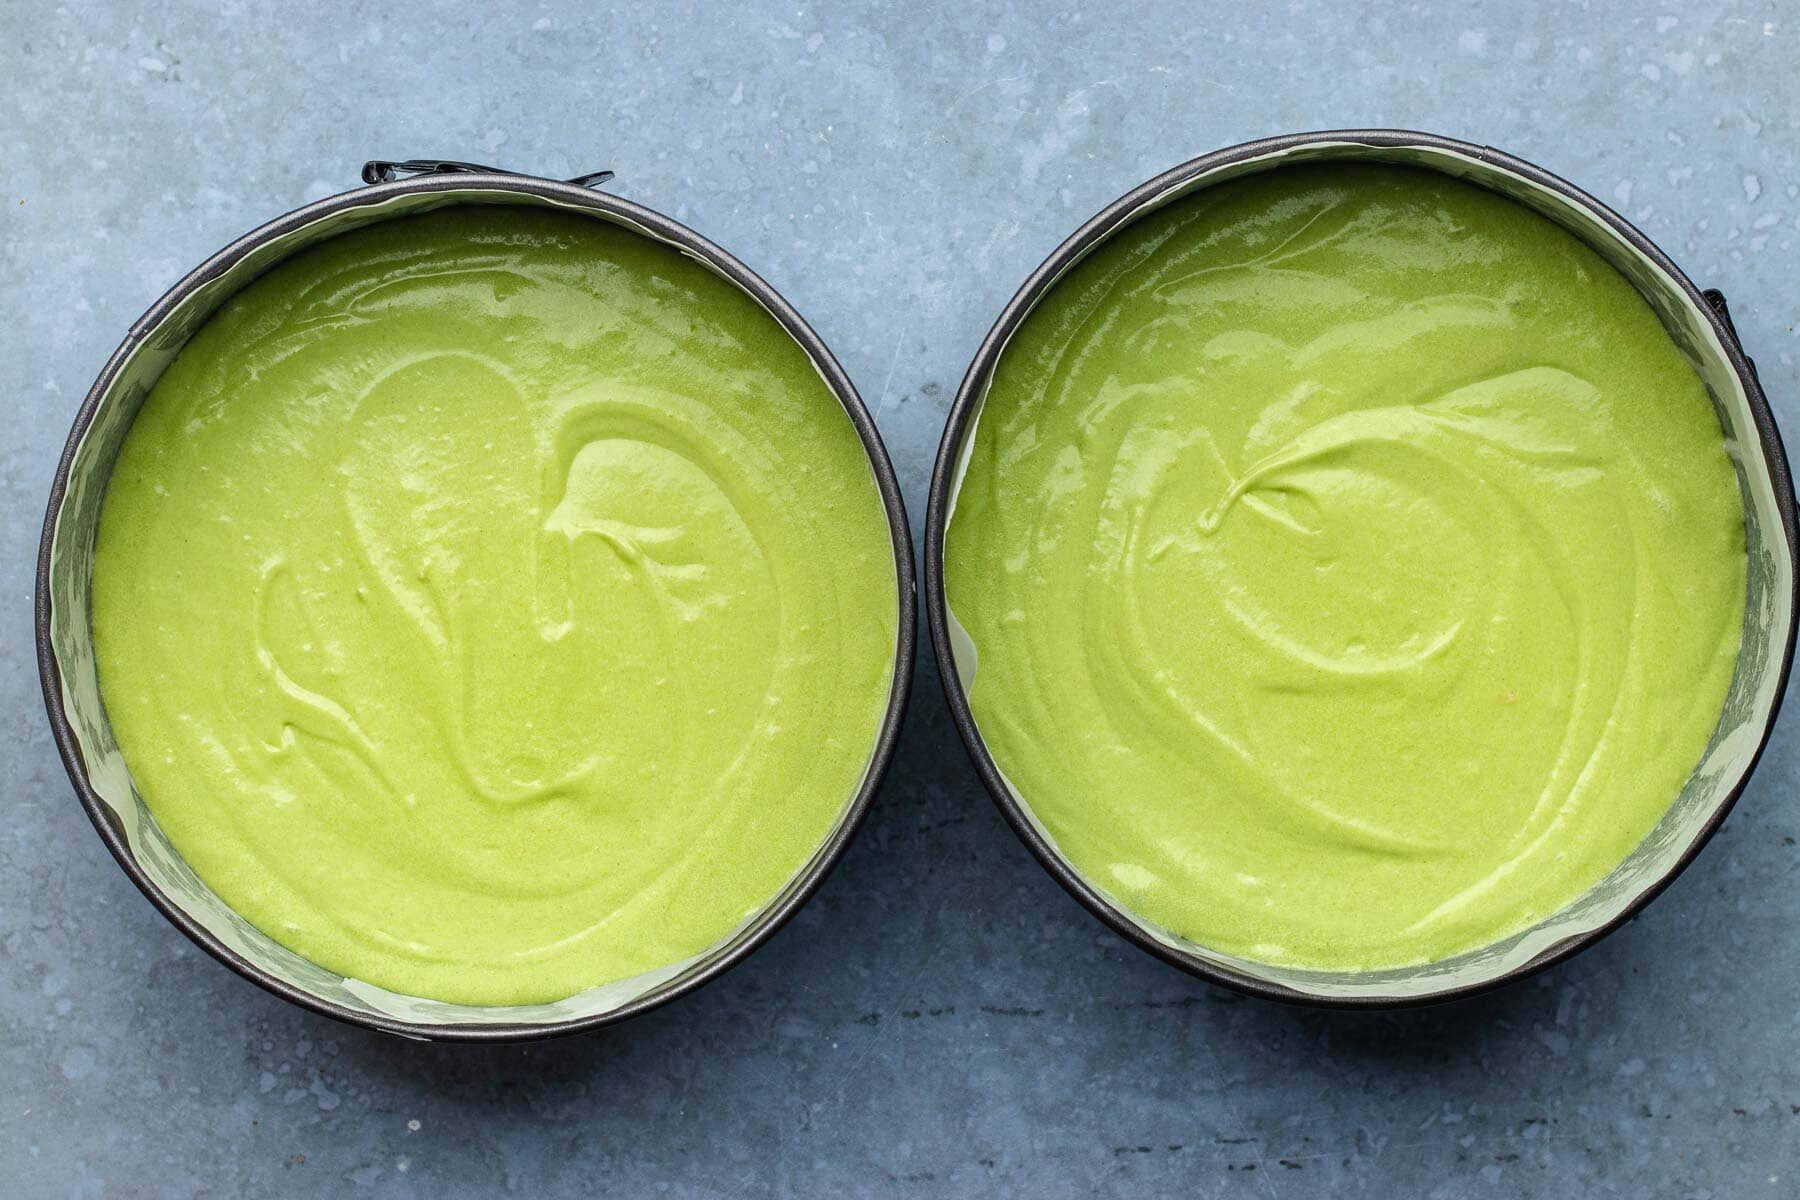
- Preheat the oven to 350 degrees and butter and flour two 8-inch cake pans.
- Sift together the flour, baking powder, and salt then set aside.
- To your stand mixer add the butter and sugar and beat them together until light and fluffy on medium speed, 2-3 minutes, then add in the eggs one at a time, 15 seconds apart. Finally mix in the coconut extract and lime juice, then lower the speed to low.
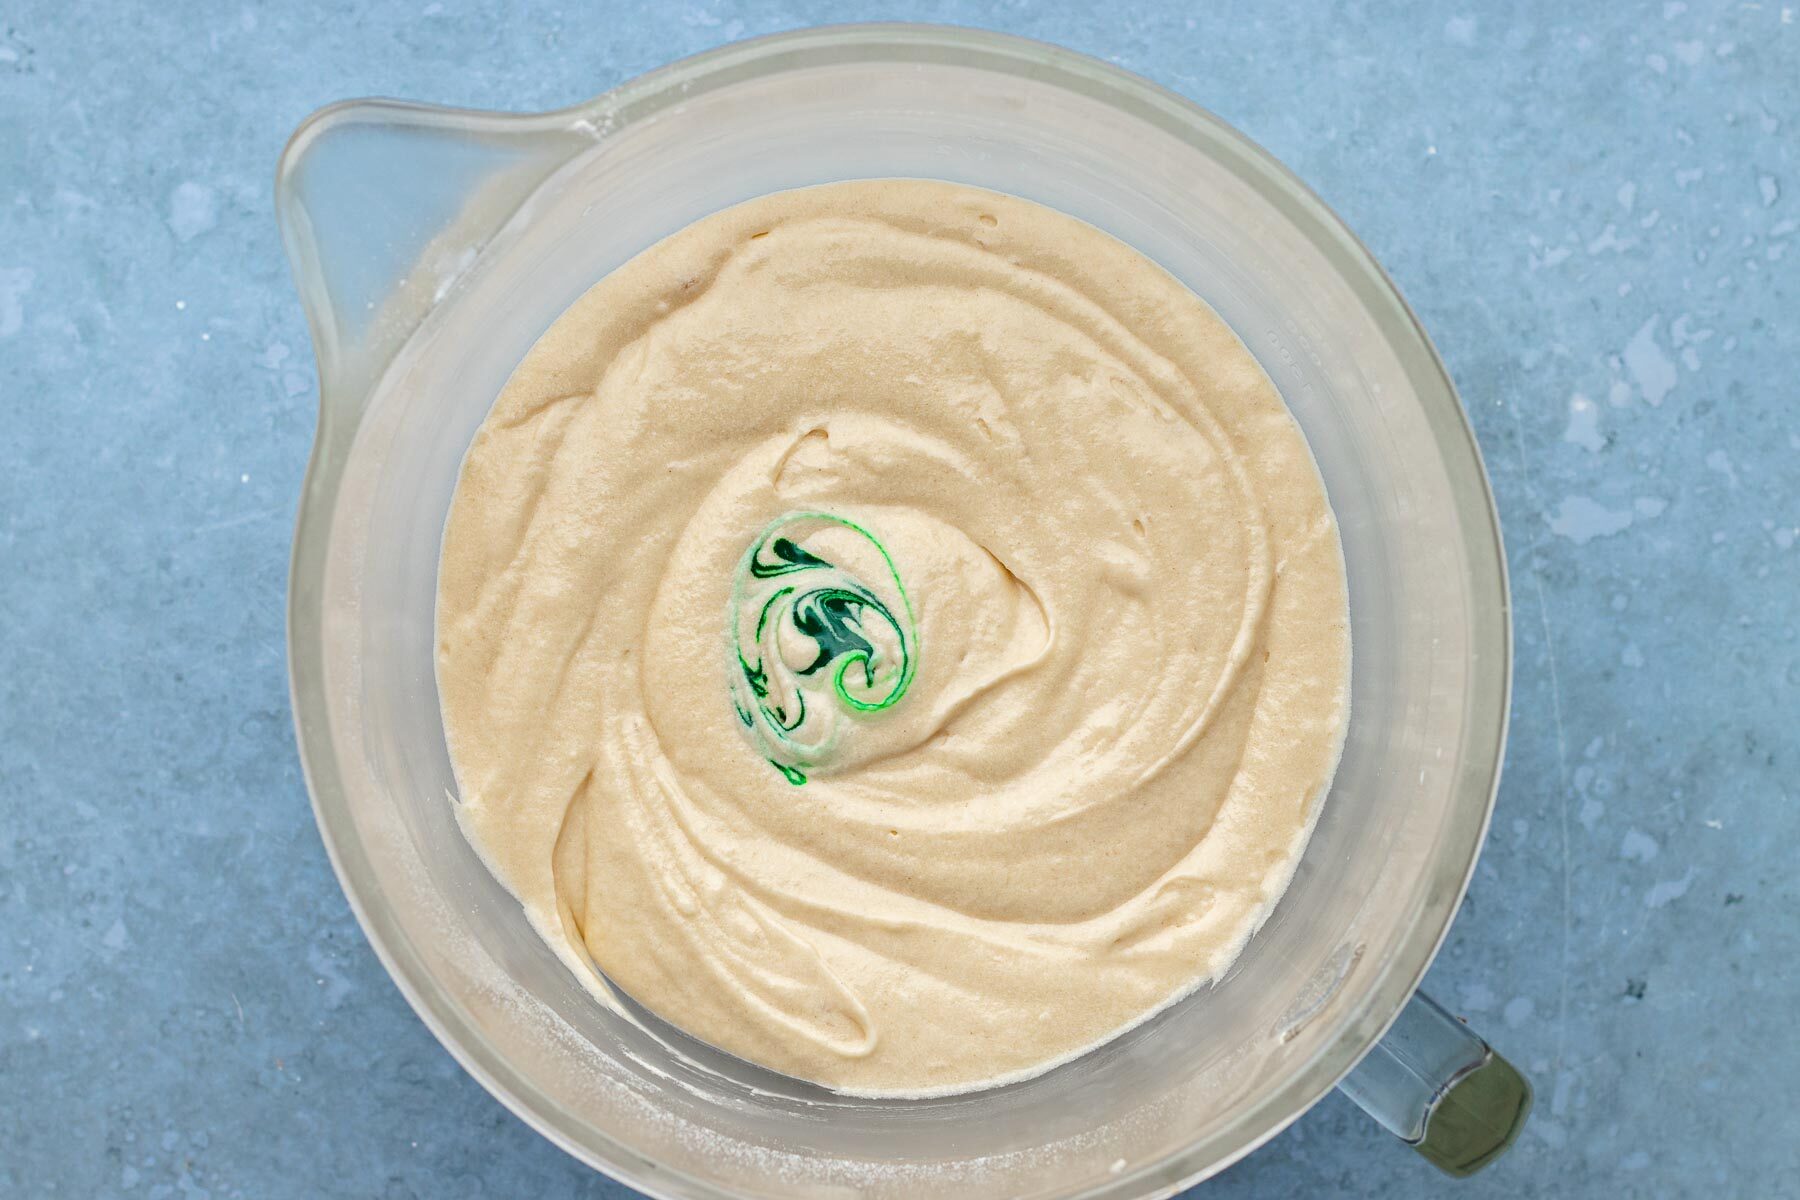
- Add the flour mixture and milk, alternating a little of each at a time.
- If you want a green cake, add in the green food coloring until you get a beautiful lime color, starting with just a drop at a time.
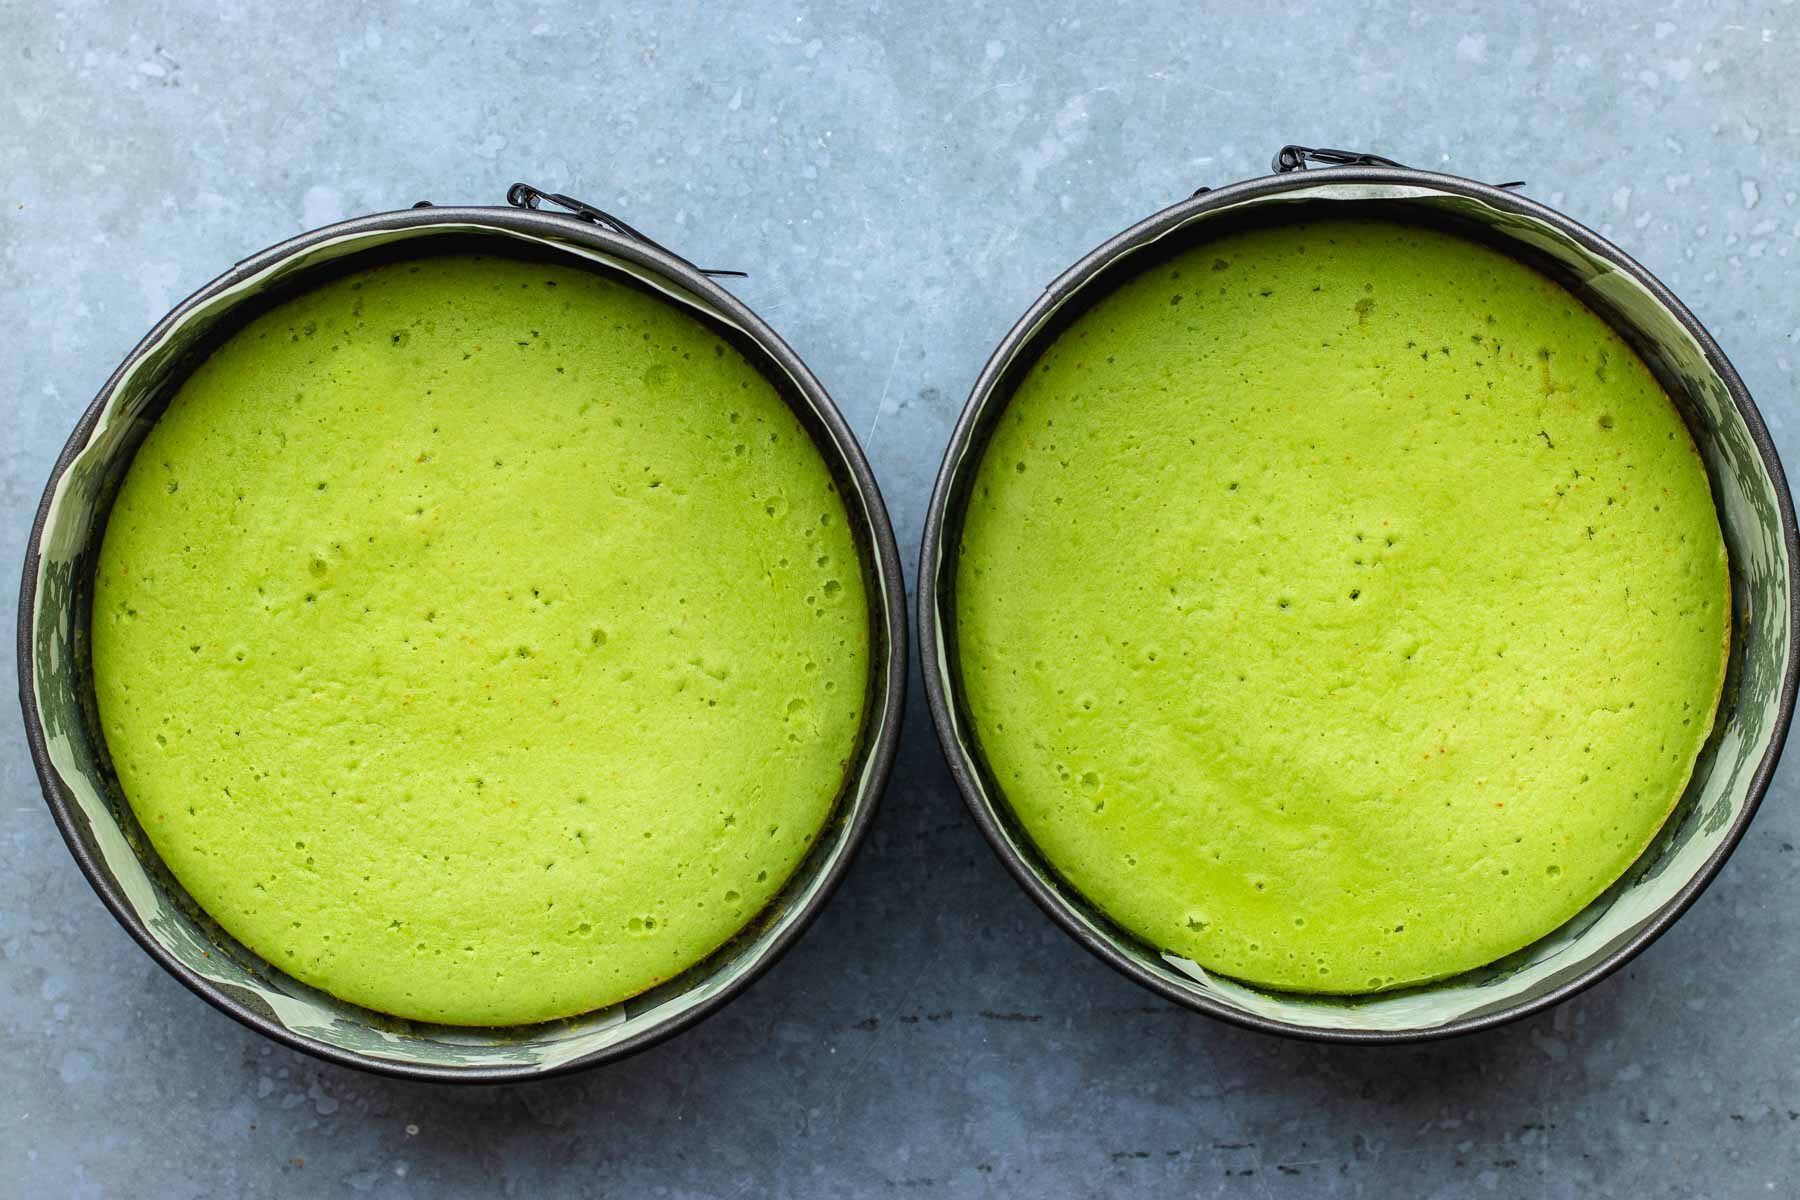
- Pour into the cake pans evenly and baked for 25-30 minutes until a toothpick comes out clean.
- Cool cakes completely before frosting.
Key Lime Cream Cheese Frosting:
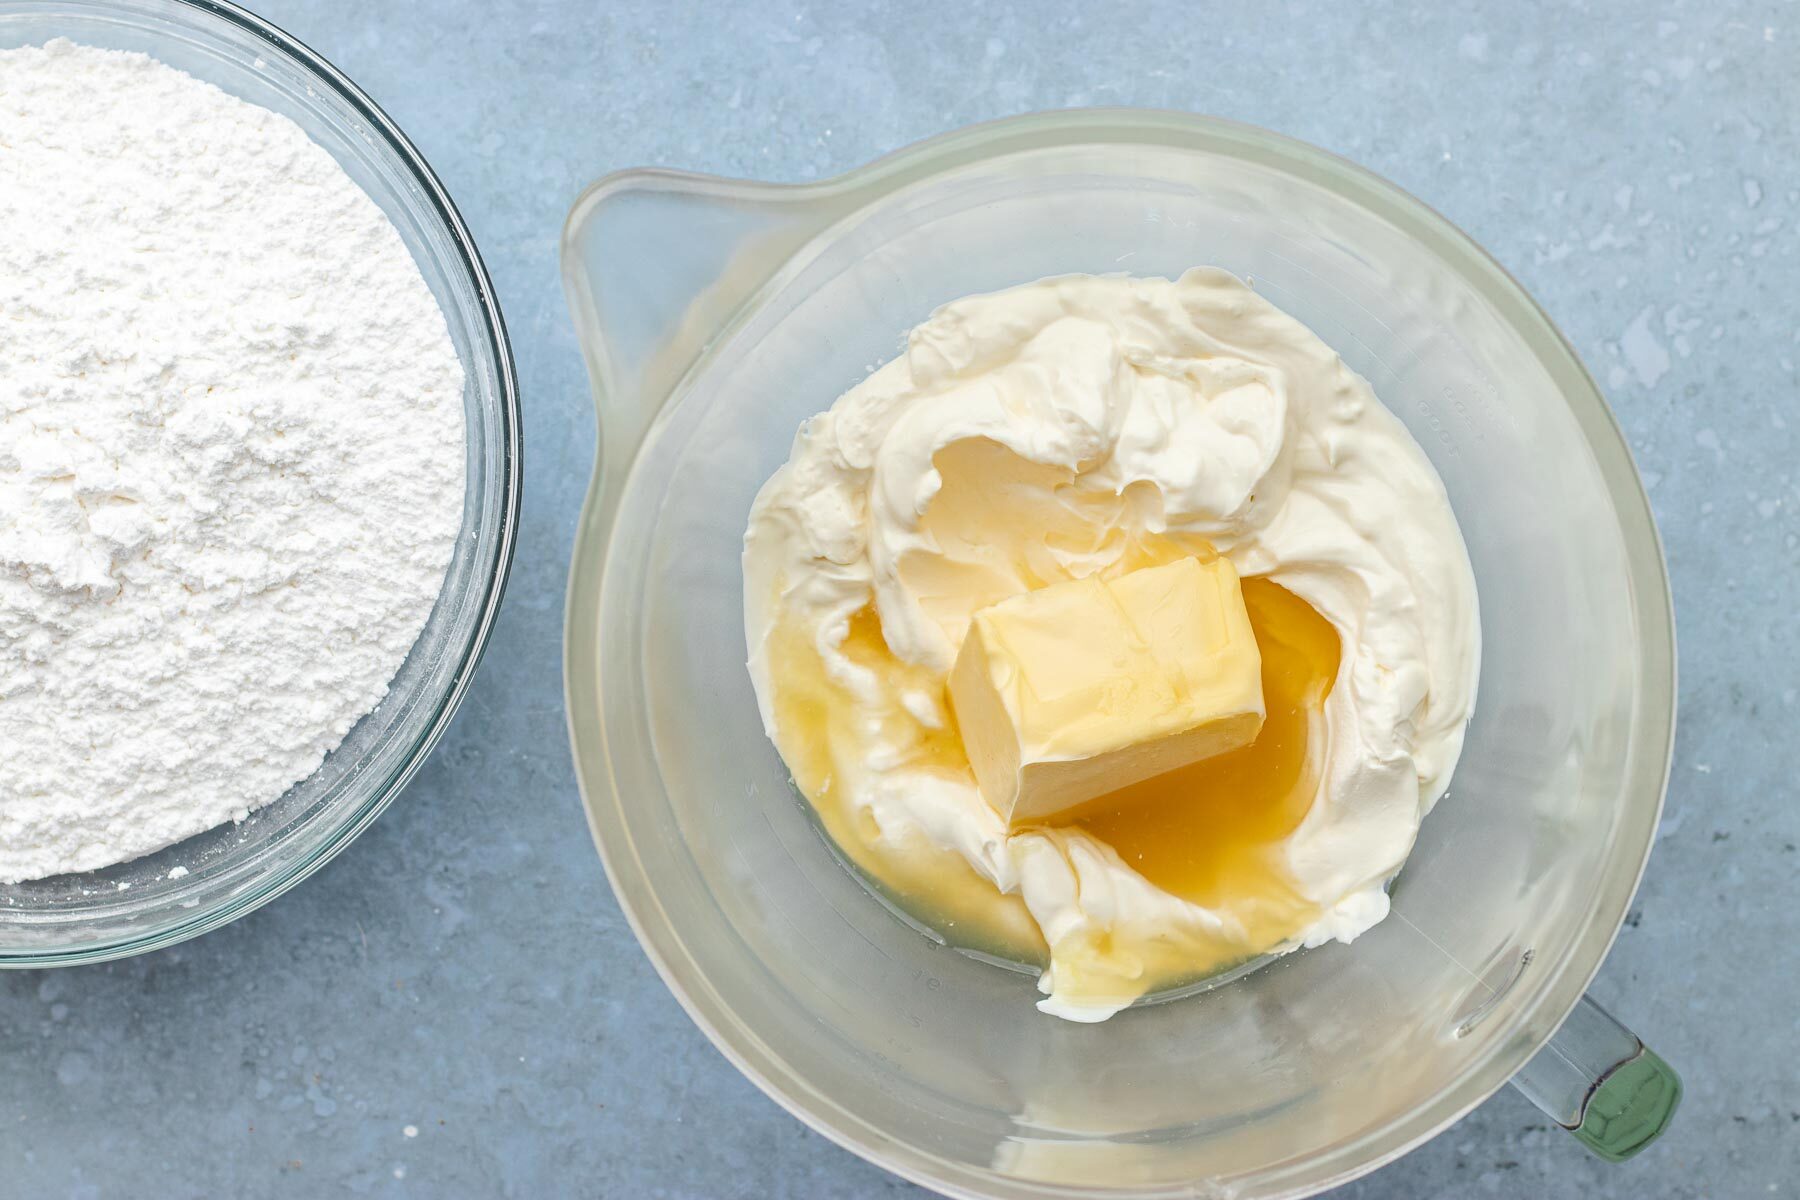
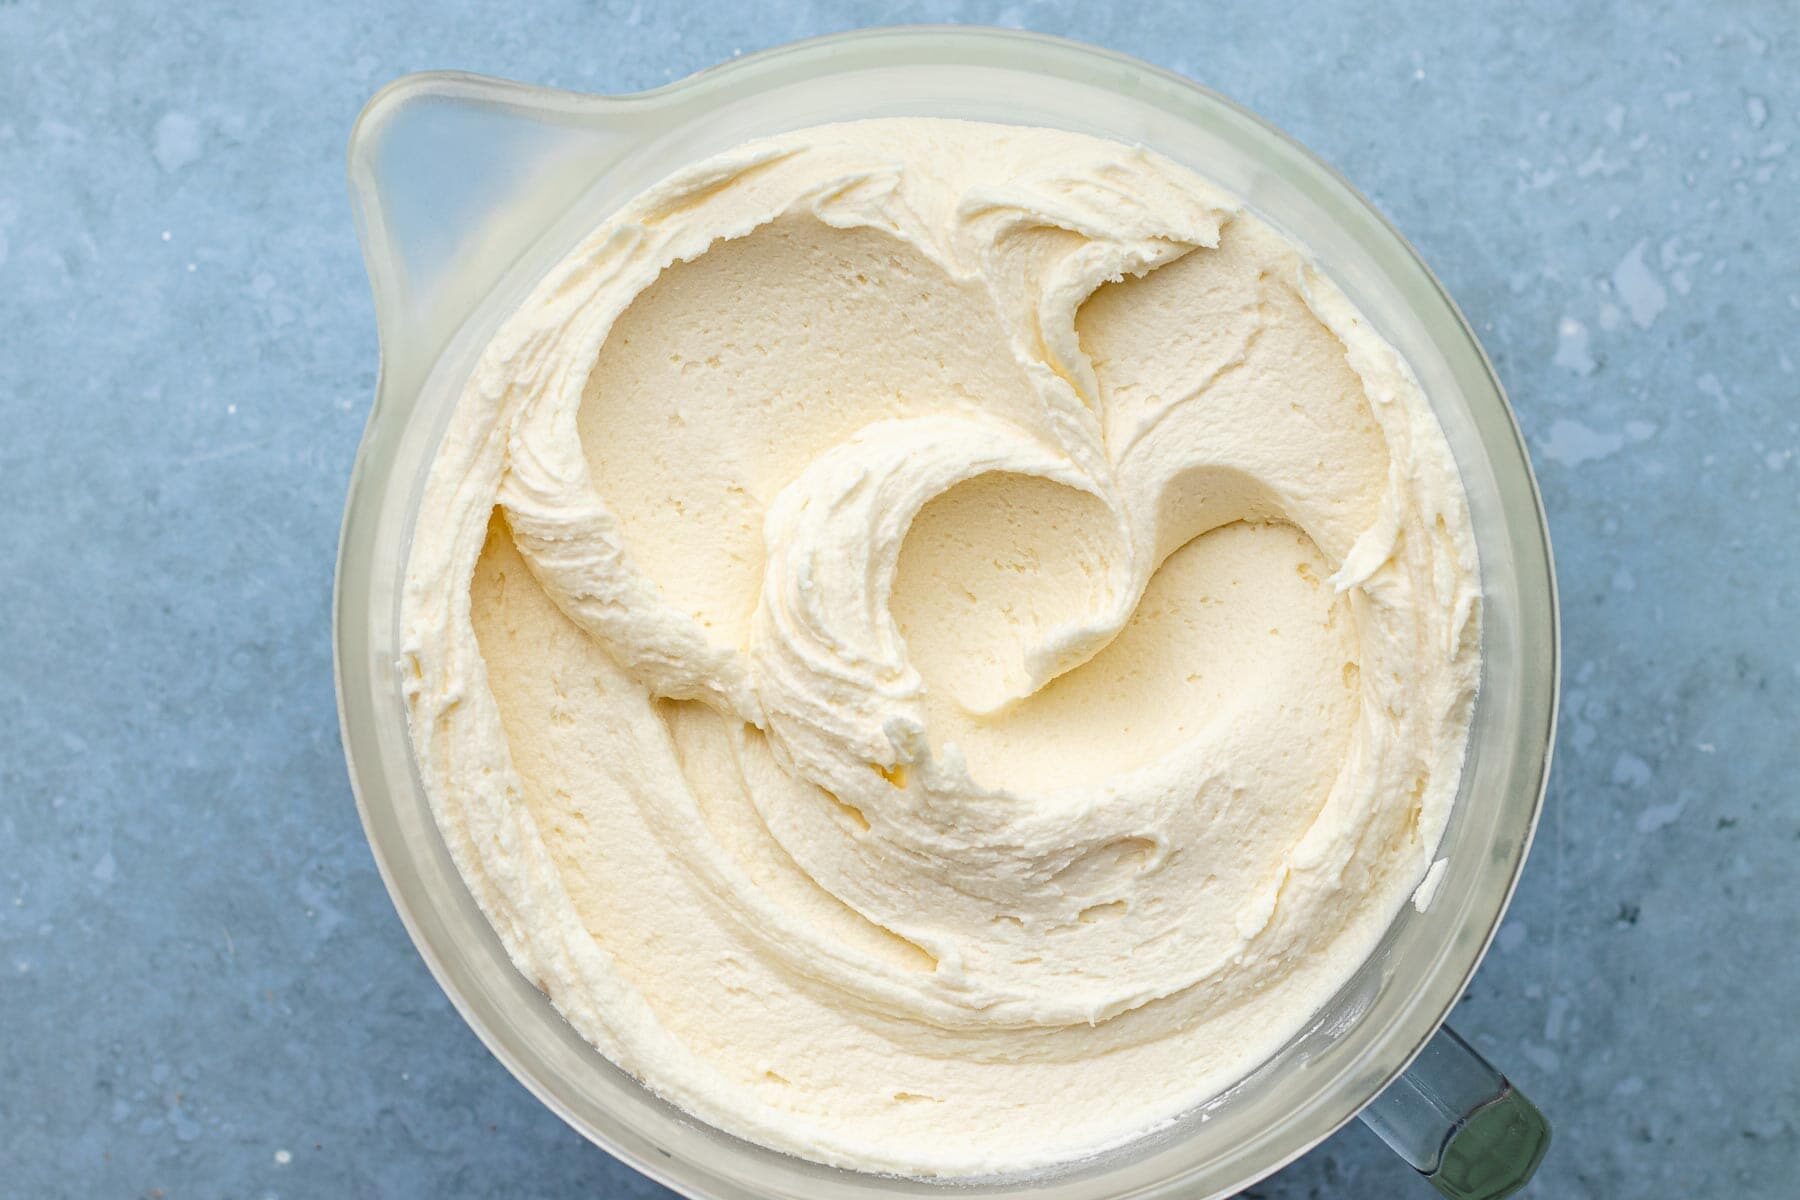
- Add the cream cheese, butter, sour cream, lime juice, and vanilla to a stand mixer and beat until light and fluffy.
- (Note: If you use fresh key limes for juice, you can add the zest from a couple limes to the frosting)
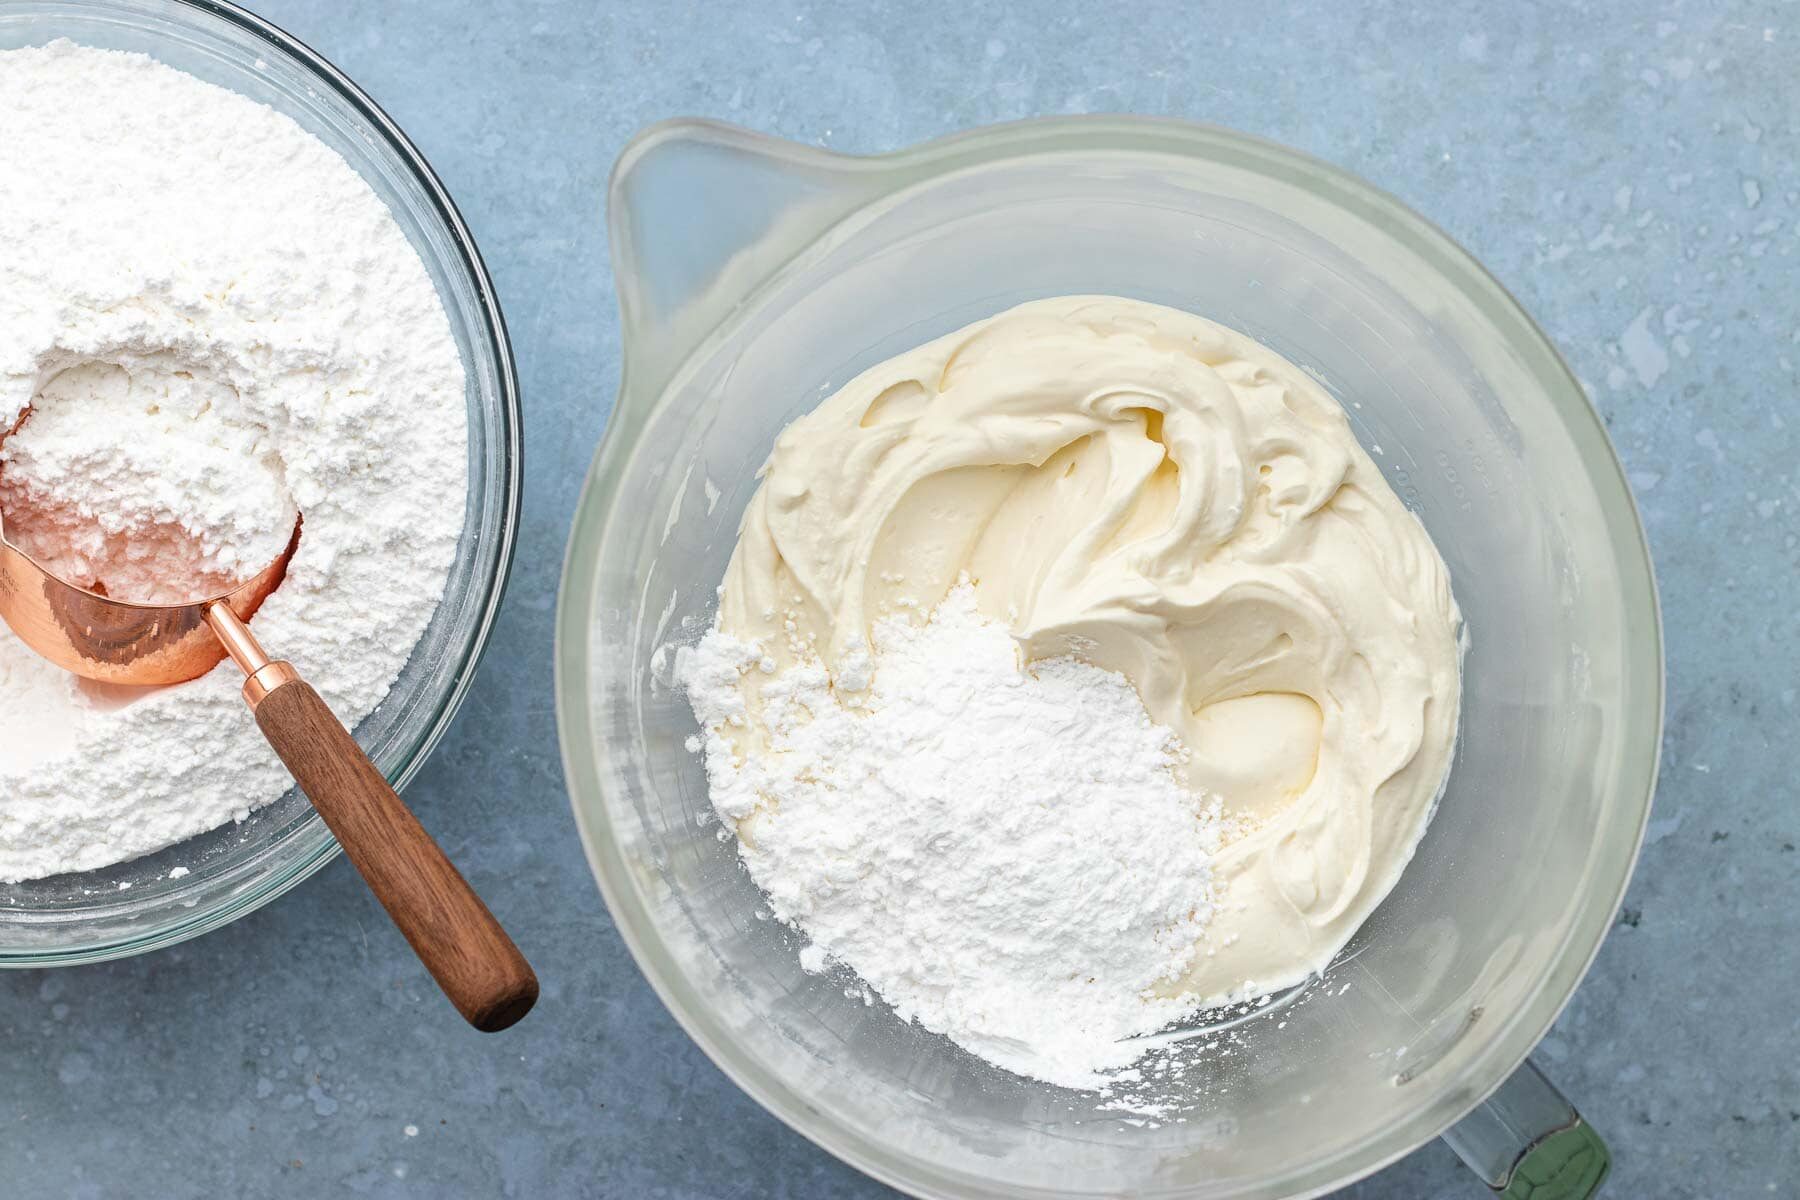
- Add in the powdered sugar one cup at a time until smooth and incorporated, as well as thick. Beat an additional minute until fluffy.
- Optional: Add in green food coloring until you get a beautiful lime color, starting with just a drop at a time and stir.
To Finish:
- To your cake stand add a spoonful of frosting for the first layer to stick to.
- Level the cakes with a large serrated knife and discard the cake pieces.
- Brush off excess crumbs.
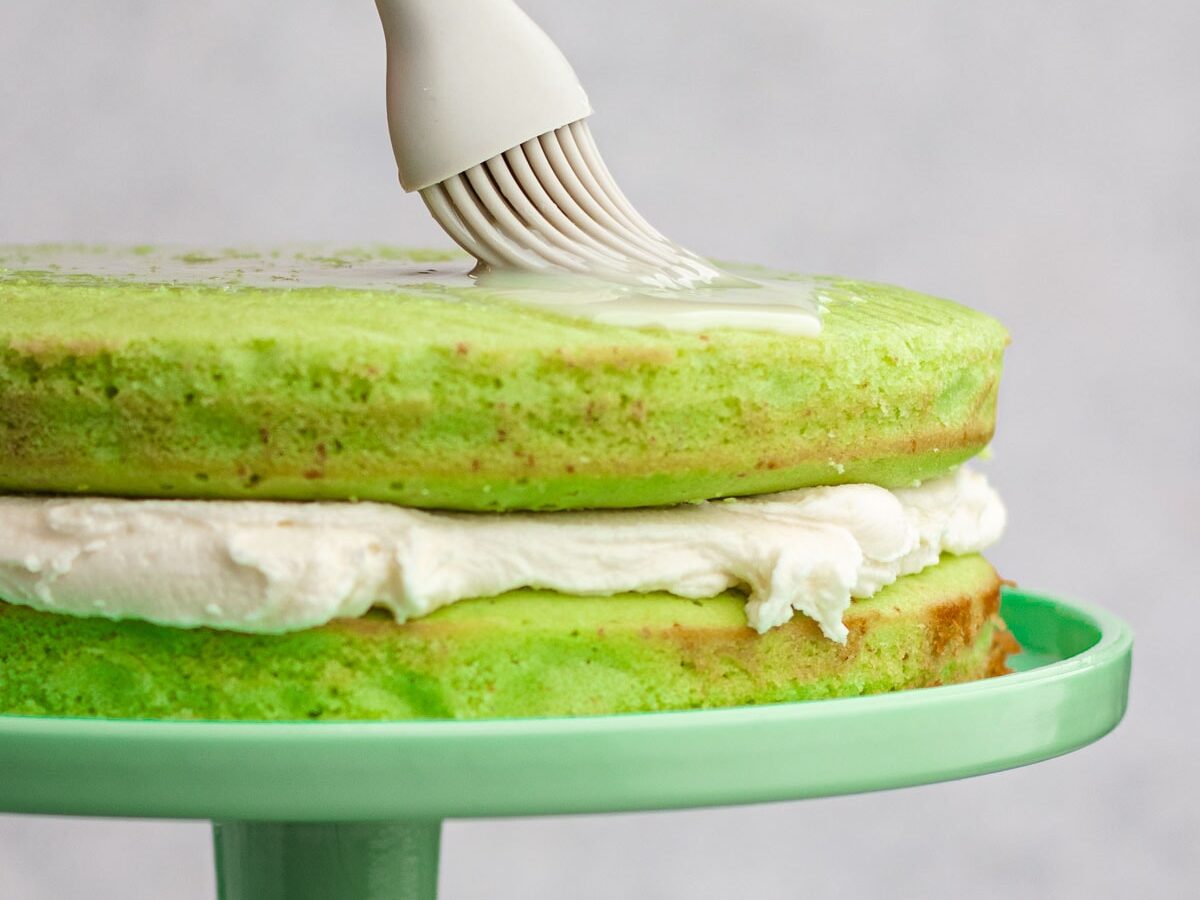
- Add the first layer of the cake to the cake stand.
- Brush with ¼ cup condensed milk.
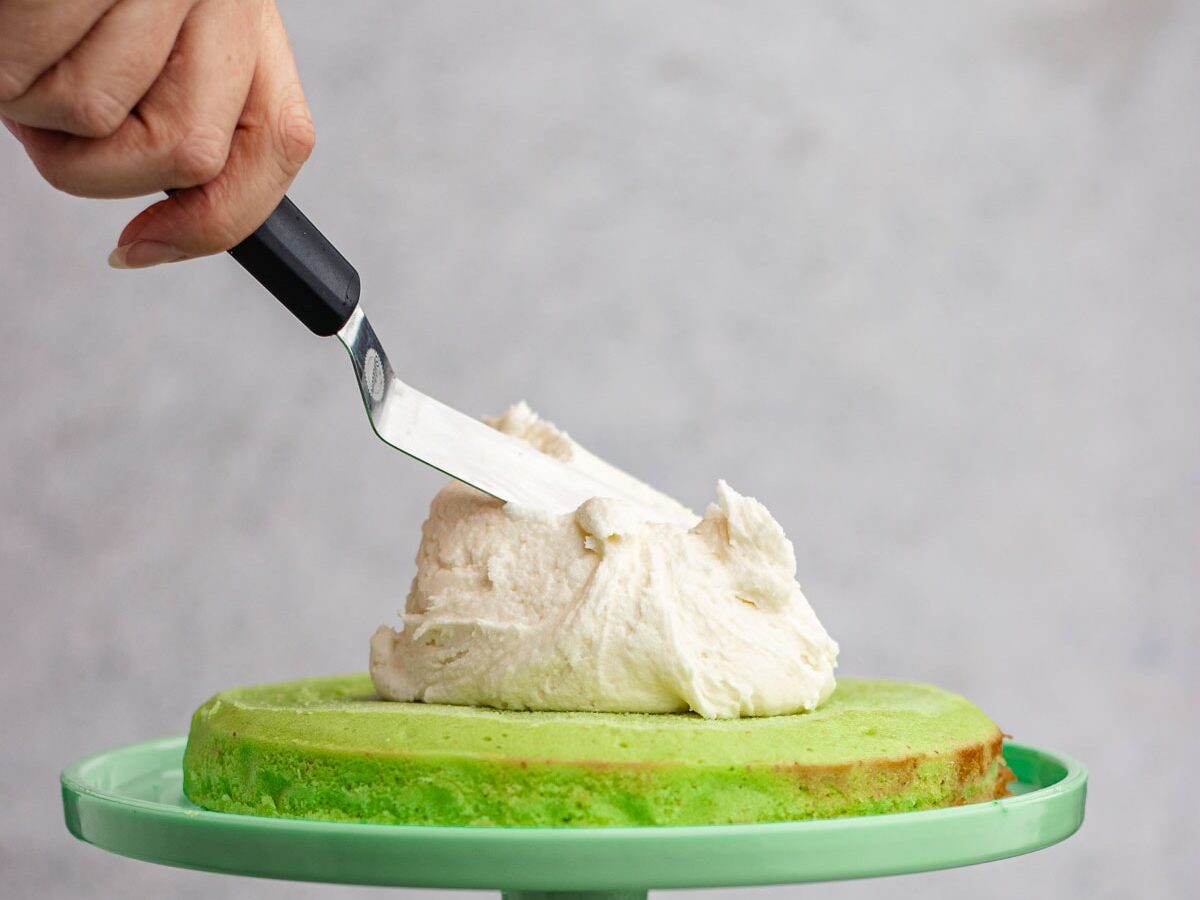
- Top with 1 cup of frosting, spread evenly.
- Top with second layer of cake.
- Brush with remaining ¼ cup condensed milk.
- Top with 1 cup of frosting on top, spreading evenly.
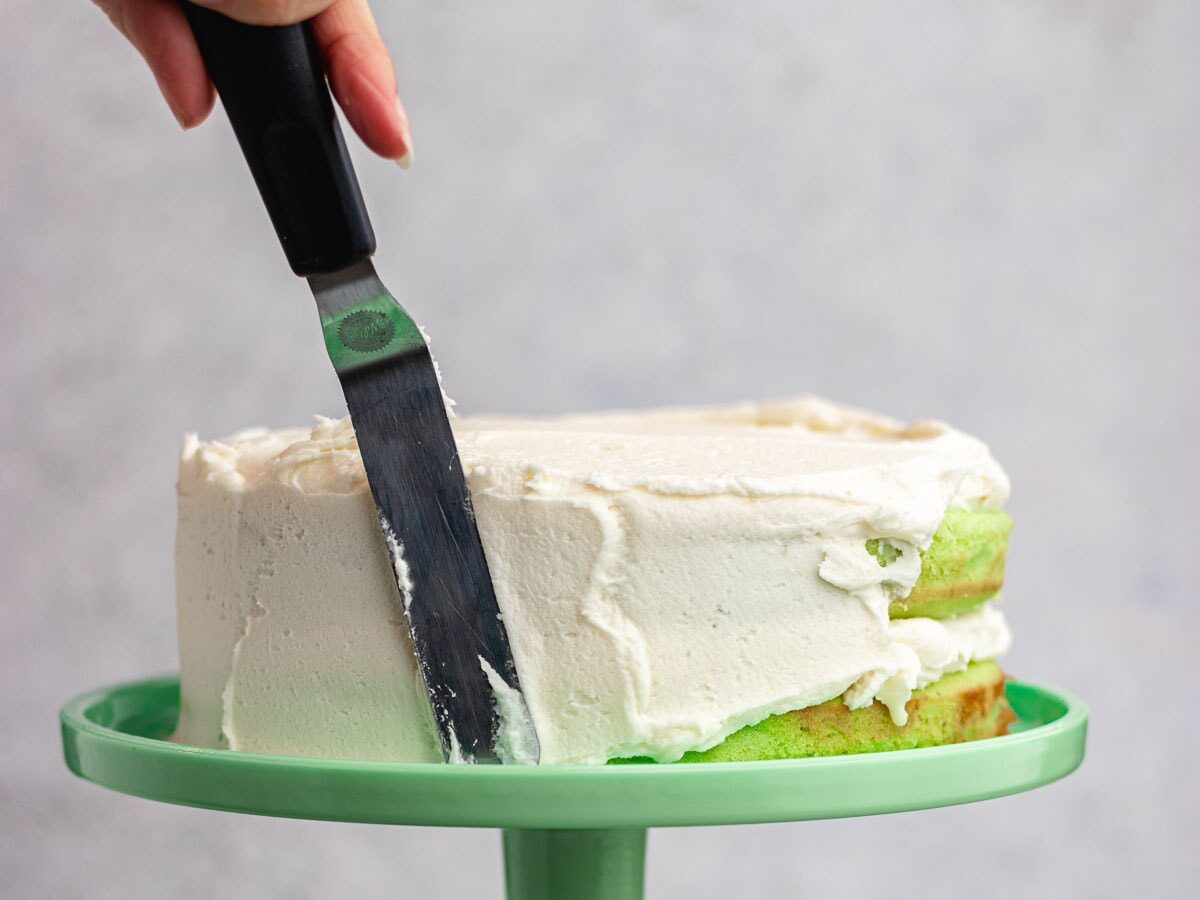
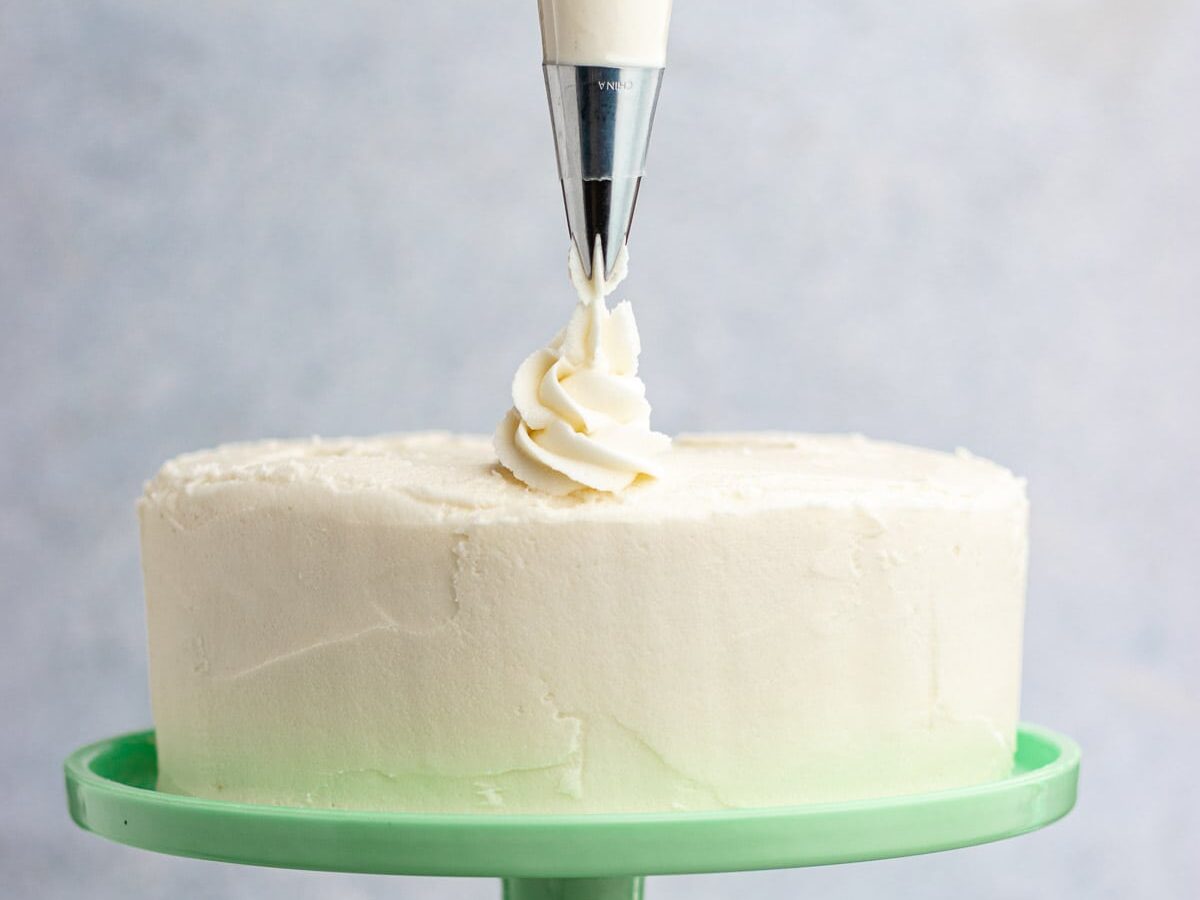
- Add 1 cup of frosting, coating the outside of the cake.
- Refrigerate for 30 minutes to allow to harden.
- Frost the cake with half the remaining frosting.
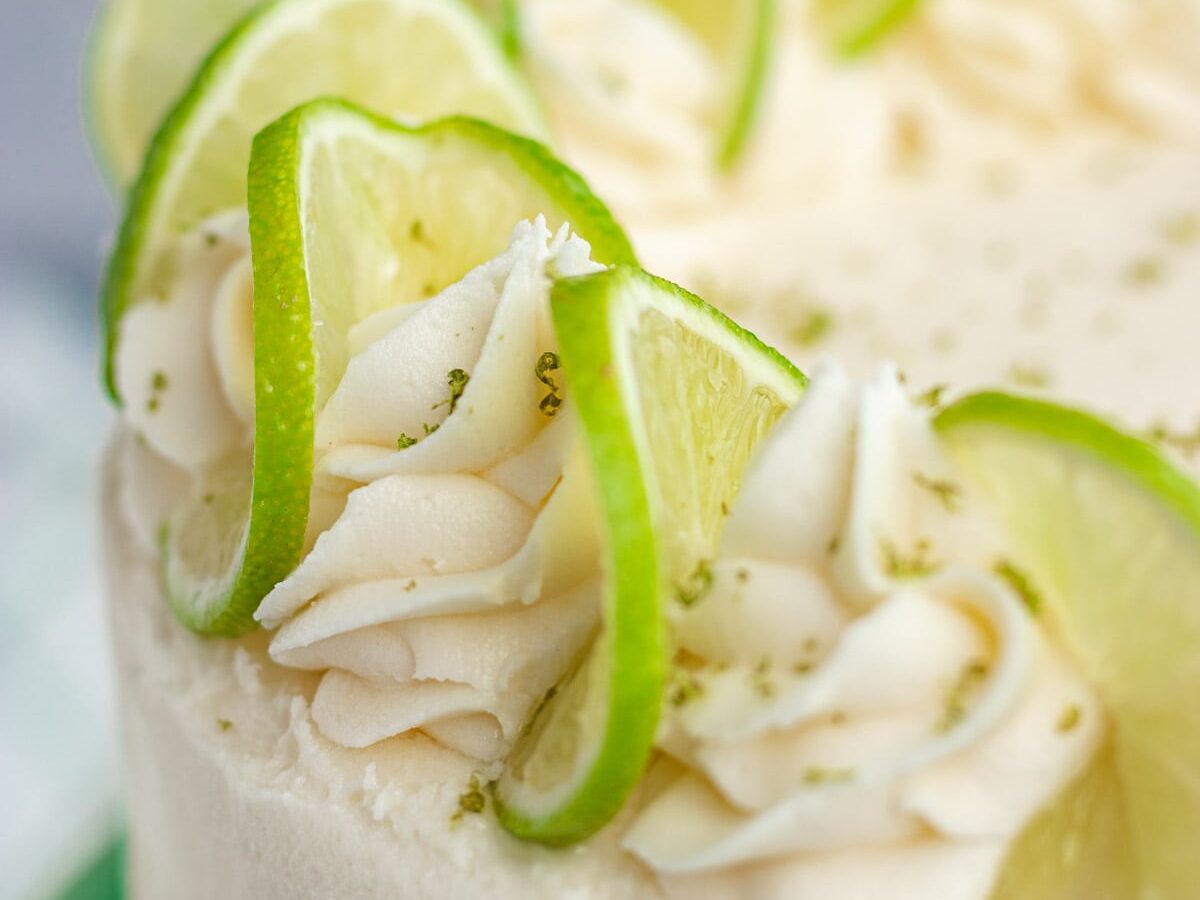
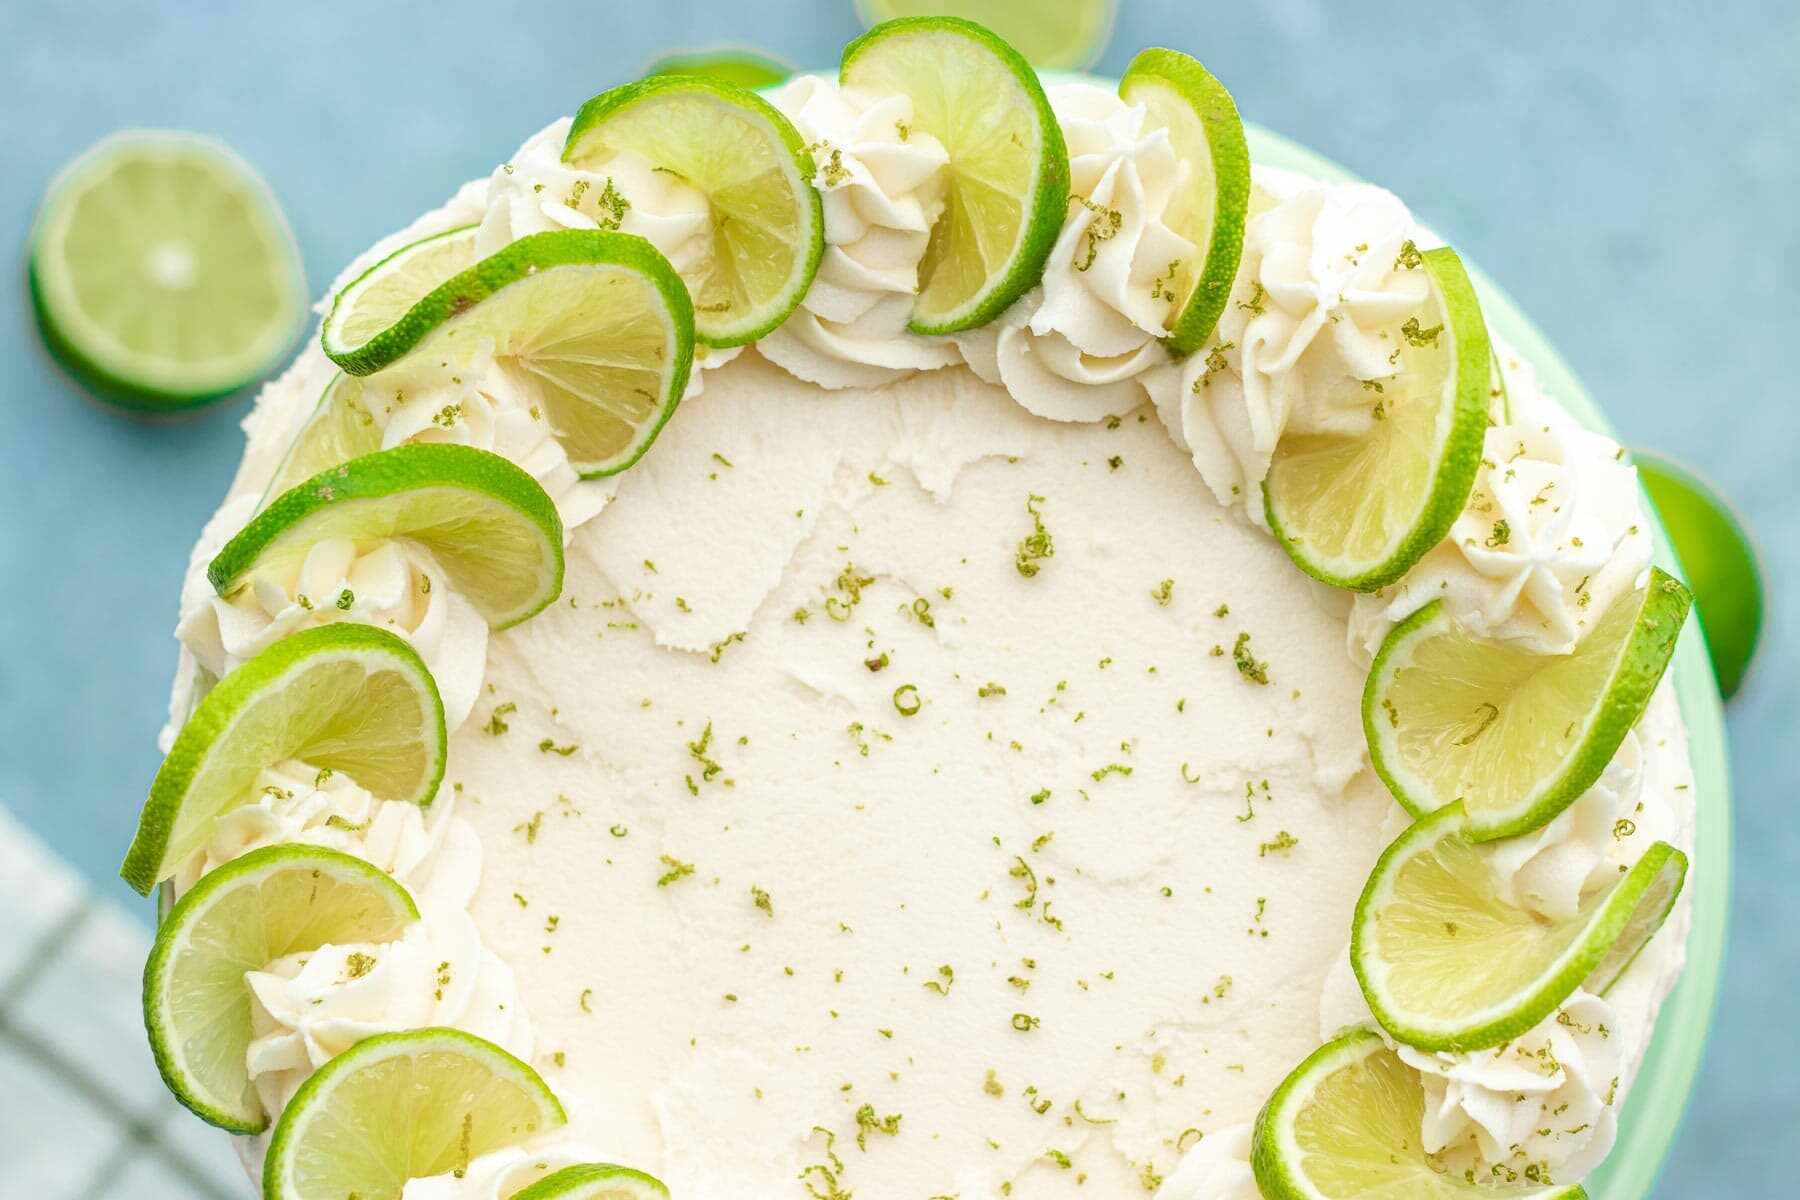
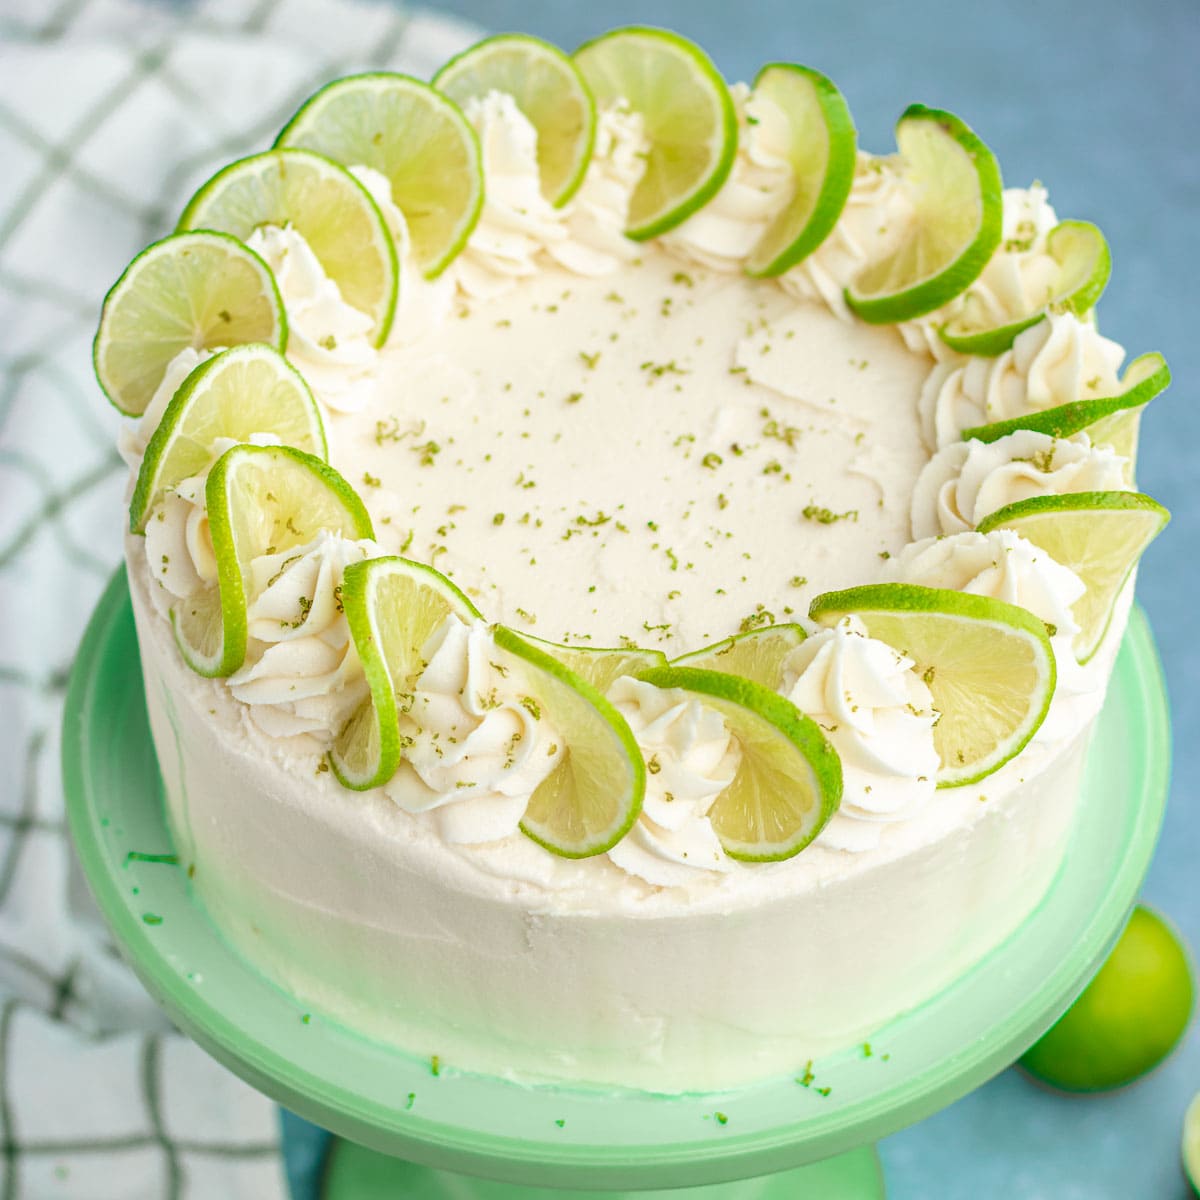
- Pipe swirly mounds onto the top of the cake.
- Add thin slices of limes to the cake, cutting through one segment and twisting to create an "s" shape.
- Optional: Grate fresh lime zest over the cake as a garnish (if you used key lime juice that is bottled, just zest from a normal lime).
Nutrition
Want to save this recipe? Create a free account to easily save your favorite recipes
Chef’s Note
Don’t have key limes? No worries! They’re just smaller and rounder than regular limes, with a sweeter, more aromatic flavor. If you’re out of them, mix half lime juice and half lemon juice for that same tangy-sweet vibe. Your dish will still taste amazing!
Table of Contents
Tools & Equipment
- Cake Pans: You can use different cake pan shapes and sizes. However, if you alter the size too much, you’ll have too much or not enough batter. You can fairly seamlessly switch the recipe into a 9-inch cake pan or swap out a circular cake dish for a square one. Just keep in mind that the layer of batter will be thinner in a 9-inch pan, so the cakes will bake faster.
- Piping Bag: A standard piping bag and a 1-inch tip are all you need to make a gorgeous cake. The key is to not overfill your bag and to take your time when piping. And of course, start with a completely cooled cake so the frosting doesn’t melt.
Baking Tips & Tricks
- Don’t Over-Mix the Batter
- The key to light and fluffy baked goods is not to overmix the batter once you add the flour and other dry ingredients. Mixing the flour too much will make your cake dense because it makes it more glutenous. Just mix until there are no dry streaks.
- Start with Room Temperature Ingredients
- Unless a recipe calls for cold ingredients, it’s a good practice to have all your ingredients to be room temperature. Not only is it easier to mix things like eggs and butter, but it also prevents cold spots in your batter, so it bakes evenly.
How to Store
- Serve: After frosting the cake, let it set for a few minutes before slicing and serving. You don’t want to leave the cake uncovered at room temperature for more than a few hours, or it will start to dry out.
- Store: To keep the leftover cake fresh, put it under a cake cover, cover it in plastic wrap, or store individual pieces in an airtight container. The cake will stay fresh at room temperature for 3-4 days.
- Freeze: To freeze the cake, carefully wrap it in plastic wrap, followed by a layer of aluminum foil. It can stay good frozen for up to 3 months. Then let the cake thaw at room temperature before serving.
Variations
- Citrus Cake: If you prefer, you can swap out the lime flavor in this recipe for other citrus flavors, such as freshly squeezed orange juice or fresh lemon juice.
- Frosting: If you prefer, you can make this recipe with Buttercream Frosting in place of cream cheese frosting. Add lime flavoring to the classic buttercream mixture so that it still has key lime flavor.
Related Recipes
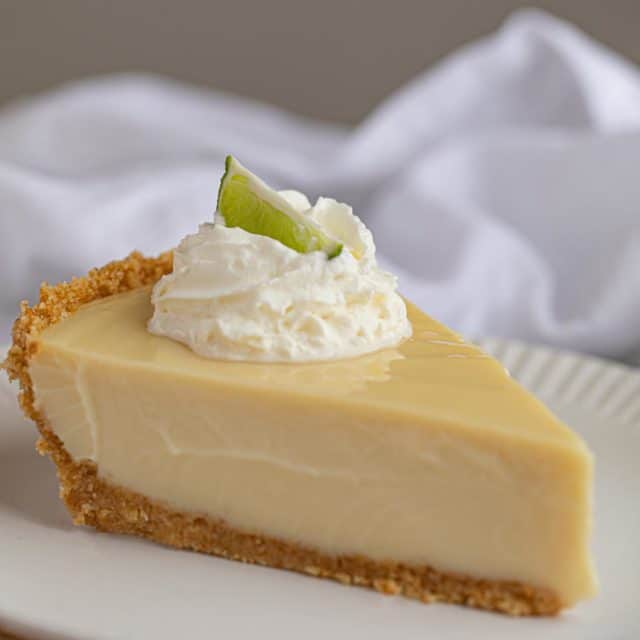
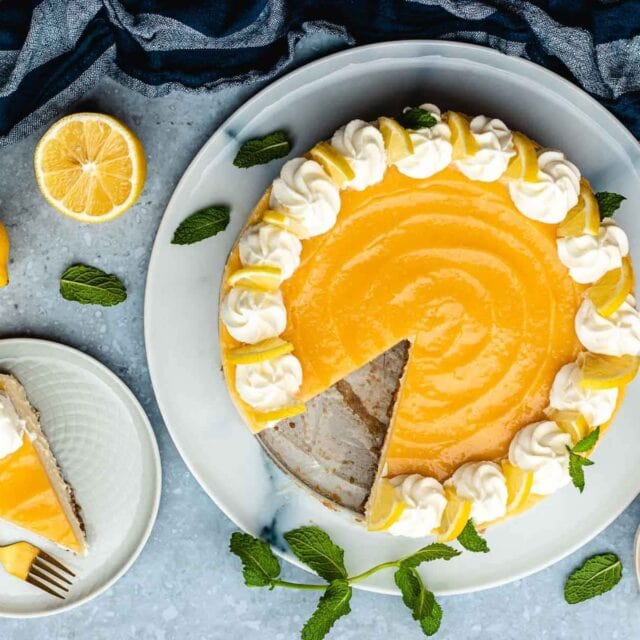
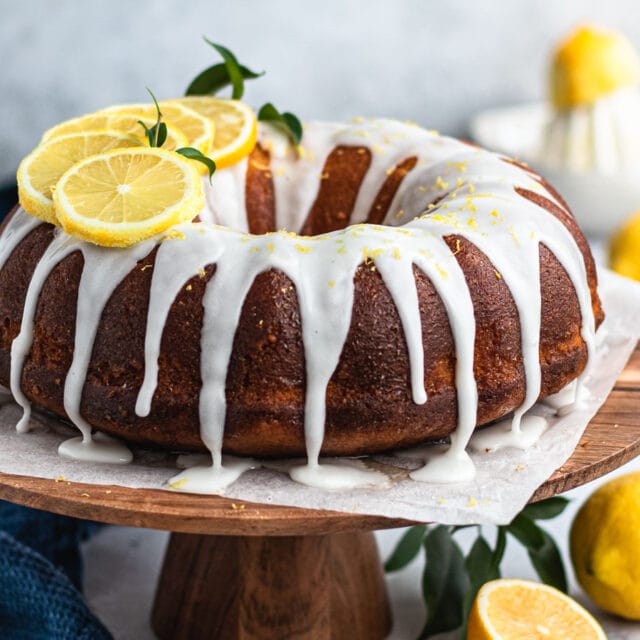
More Sweet Citrusy Desserts
These photos were used in a previous version of this post


There were a few missing ingredients and/or actions in the steps. This was a pretty confusing recipe to follow, though I admit–I’m no pastry chef! The end product tasted pretty good, but the icing was not fluffy and melted on the cooled cake layers. I had to re-refridgerate once iced to keep the frosting from rolling off completely. And yes, the cake had cooled for two hours prior to frosting. All in all, this took me 4 hours and two trips to the store. So, I’m tired and full of sugar from sampling the product all afternoon, but it was a fun project. ???
Our apologies Michelle. This recipe has been reviewed and updated. I hope you’ll try it again some time.