
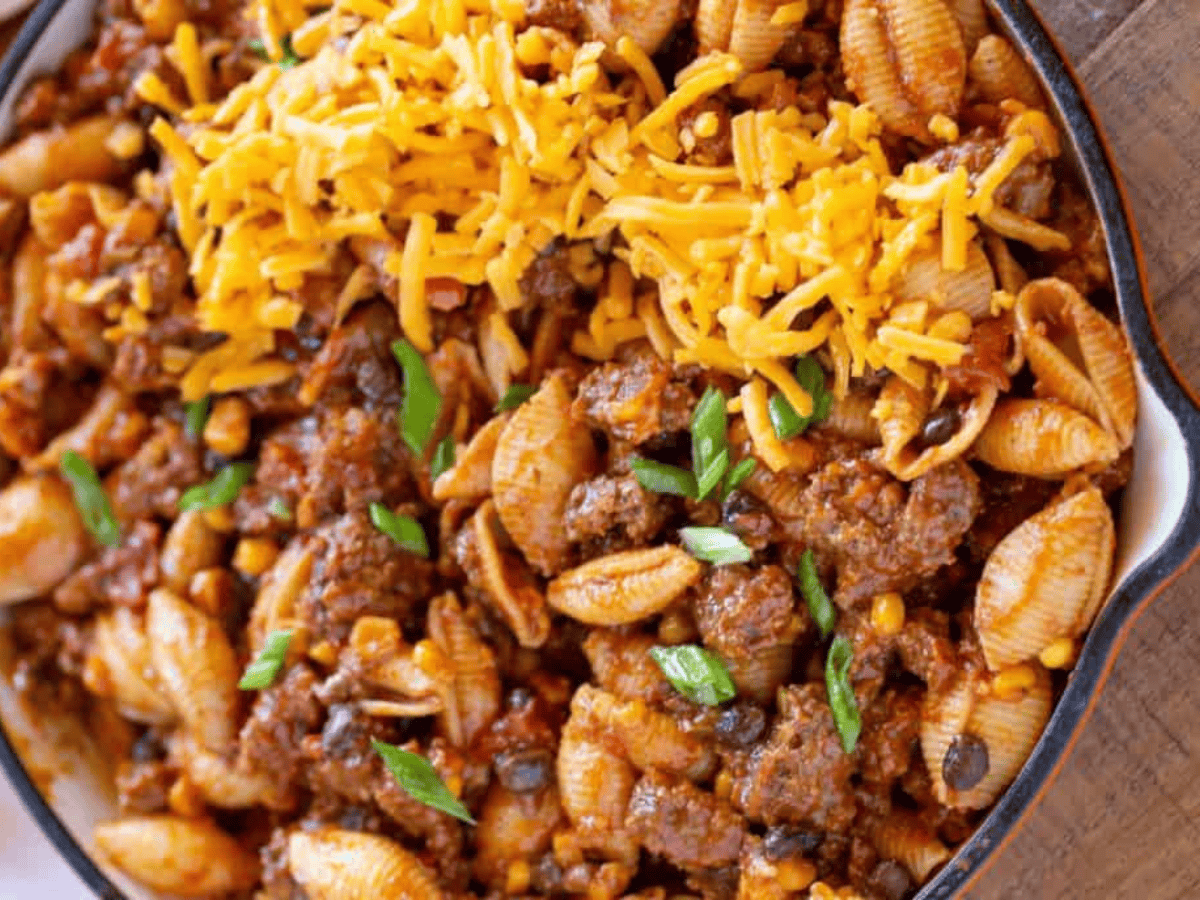
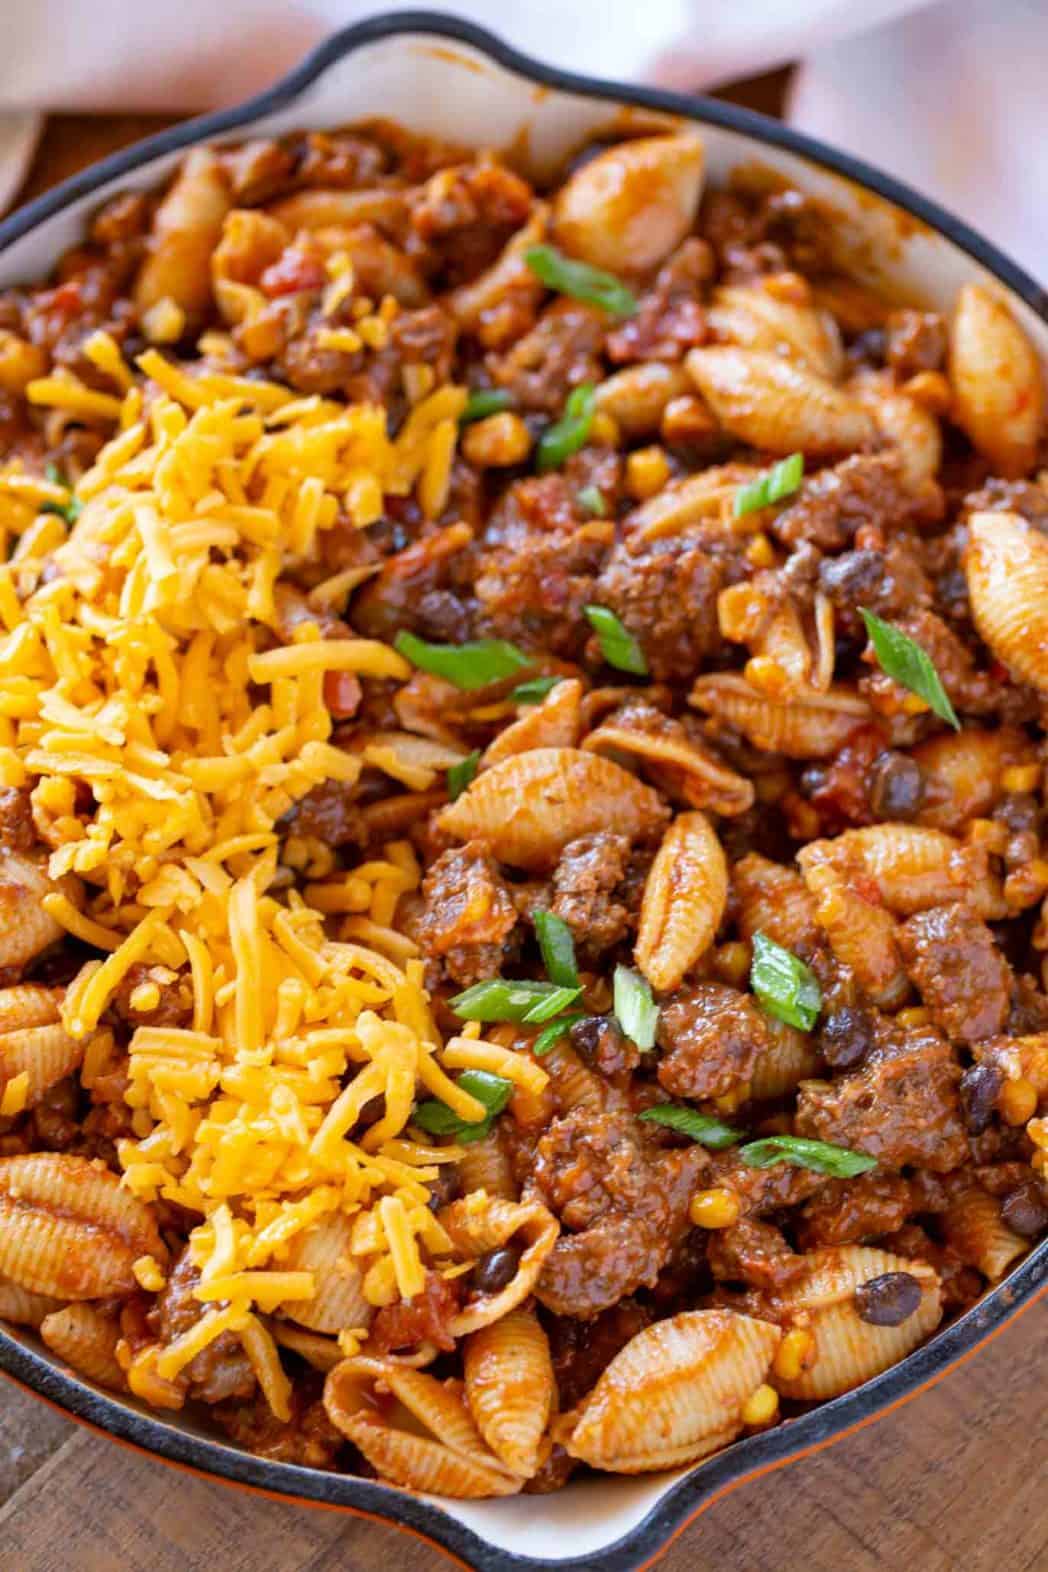
Taco Mac is a cheesy Tex-Mex pasta made in one pot that will be a family favorite that comes together in just 20 minutes! Try it out soon!
Easy Mexican-inspired Pasta Recipes are the perfect go-to on busy weeknights! Try out Cheesy Taco Pasta and Tex-Mex Cheesy Beef Pasta too!
Sabrina’s Easy Taco Mac Recipe
Taco Mac is a delightful fusion of Mexican flavors and Italian pasta all in a one-pot meal and perfect for your next weeknight meal. This dish offers a versatile Tex-Mex twist, perfect for a quick, family-friendly meal, and its blend of ingredients brings a unique, mouthwatering experience to the table.
Recipe Card

Ingredients
- 2 tablespoons vegetable oil
- 1 pound ground beef
- 1 cup onion , diced
- 1/2 red bell pepper , diced
- 2 tablespoons taco seasoning
- 1 cup beef broth
- 1 cup tomato sauce
- 1 cup salsa
- 1 cup corn
- 1 cup black beans
- 1 cup cheddar cheese
- 8 ounces rigatoni pasta , cooked
Instructions
- Add the vegetable oil, beef, onion and bell pepper to a large skillet and cook on medium-high until cooked through, about 5-7 minutes.
- Add in the taco seasoning, beef broth, tomato sauce and salsa and cook until it thickens, 3-4 minutes.
- Add in the corn, black beans, cheese and pasta and stir to combine. Serve hot when ready!
Notes
- Click on the “yield” amount to slide and change the number of servings and the recipe will automatically update!
- Click on times in the instructions to start a kitchen timer while cooking.
- To convert measurements to grams, click on the “Metric” option next to “Ingredients” in the recipe card.
Nutrition
Want to save this recipe? Create a free account to easily save your favorite recipes
Sabrina’s Tips
To achieve a golden-brown, bubbly cheese topping, utilize an oven-safe skillet and broil the dish for about 2-3 minutes. Caution is advised to prevent burning under the high heat of the broiler.
Table of contents
About this Recipe
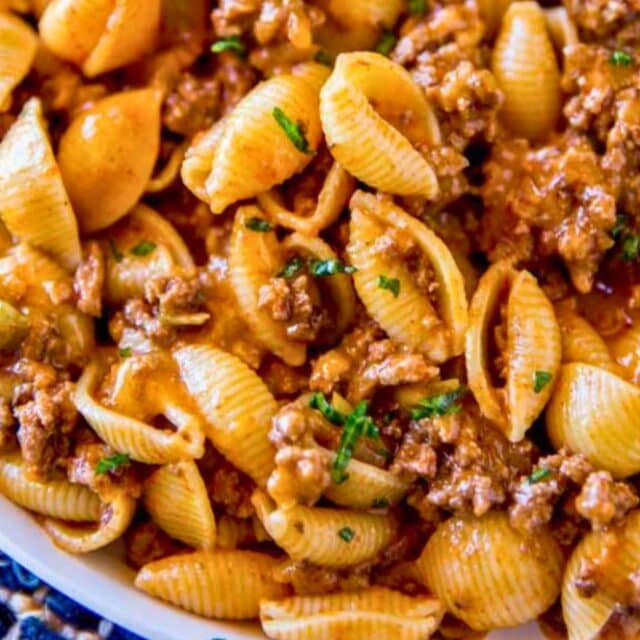
This recipe is savory, cheesy, and incredibly easy to make in one pot in under 20 minutes. It’s perfect for a weeknight dinner, made with ground beef, taco seasoning, cheddar cheese, tomato sauce, and pasta. Plus it’s full of vegetables like bell peppers, black beans, corn, and salsa. You can use store-bought salsa or freshly homemade Pico De Gallo. Flavor it with Homemade Taco Seasoning, and store leftover seasoning in the pantry for a quick meal next time! Optional toppings like extra cheese, cilantro, or crushed tortilla chips add extra flair.
Ingredients
- 2 tablespoons Vegetable Oil: The vegetable oil serves as the cooking medium, allowing the ground beef, onions, and bell peppers to sauté evenly. You can use other cooking oils like canola or olive oil as substitutes.
- 1 pound Ground Beef: Lean ground beef is the primary protein source, adding savory flavor and texture to the dish. Ground chicken, turkey, or plant-based alternatives can be used if desired.
- 1 cup Onion, diced: Diced onions provide a sweet and aromatic base for the dish, enhancing its overall flavor.
- ½ Red Bell Pepper, diced: The red bell pepper adds a vibrant color and a slightly sweet, smoky taste. You can use green, yellow, or orange bell peppers for variety.
- 2 tablespoons Taco Seasoning: Taco seasoning blends spices like chili powder, cumin, and paprika, infusing the dish with classic Mexican flavors. You can make your own blend of Homemade Taco Seasoning or use a store-bought mix.
- 1 cup Beef Broth: Beef broth adds depth and richness to the sauce, intensifying the savory profile. Vegetable or chicken broth can replace beef broth for dietary preferences.
- 1 cup Tomato Sauce: Tomato sauce provides a tangy and slightly sweet tomato base to the dish, balancing the flavors.
- 1 cup Salsa: Salsa contributes a zesty kick and tomato-based moisture, enhancing the overall taste. Choose mild, medium, or hot salsa based on your spice preference.
- 1 cup Corn: Sweet corn kernels offer a delightful burst of sweetness and texture. You can use frozen or canned corn.
- 1 cup Black Beans: Black beans provide a creamy texture and earthy flavor, along with a dose of protein and fiber. Kidney beans or pinto beans can be used as substitutes.
- 1 cup Cheddar Cheese: Shredded cheddar cheese adds richness and a gooey texture, making the dish creamy and indulgent. Monterey Jack, pepper jack, or a Mexican cheese blend are good alternatives.
- 8 ounces Rigatoni Pasta, cooked: Cooked rigatoni pasta is a hearty component, soaking up the flavorful sauce. You can use other pasta shapes like Penne or macaroni for variety.
Can this be made ahead of time?
Yes, you can make this ahead of time and freeze it for a busy night. I recommend only cooking the pasta until it’s al dente, so it can finish cooking the rest of the way when it’s reheated. Also, leave the cheese out if you’re making this to freeze. Defrost in the refrigerator the night before, then reheat in a large skillet, adding some extra broth as needed. Stir in the cheese before serving.
Pairing Suggestions
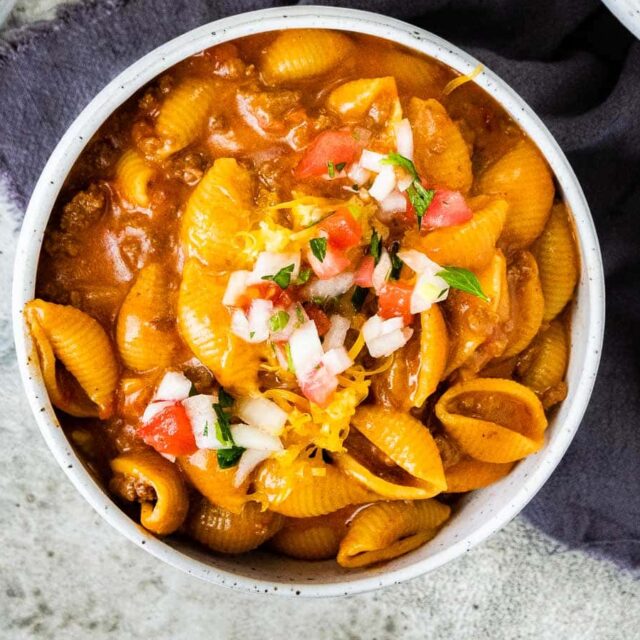
Consider serving the meal with extra cheese and green onion and/or fresh cilantro as colorful toppers. Sour cream is a must too! For added texture, garnish the dish with crushed tortilla chips just before serving. If you are looking for the perfect sides add Spicy Mexican Cornbread and Calabacitas (Mexican Zucchini).
How to Store
- Store: To keep your pasta fresh, transfer any leftovers into airtight containers. Refrigerate them within two hours of cooking. Consume within 3-4 days to maintain optimal flavor and texture.
- Reheating: When reheating, add a splash of water or broth to maintain the sauce’s moisture. Use a microwave or stovetop at medium heat to avoid overcooking and ensure your pasta tastes as delicious as when it was freshly made.
- Freeze: For long-term storage, freeze individual portions in airtight containers or freezer bags. It can be frozen for up to 2-3 months without compromising taste or quality.
Frequent Questions
Absolutely! You can substitute rigatoni with penne, macaroni, or any pasta of your choice without affecting the overall taste.
Ground chicken, turkey, or plant-based alternatives work well as substitutes for ground beef. Adjust the cooking time accordingly.
Yes, for added heat, you can sprinkle in ¼ teaspoon of cayenne pepper or adjust the amount of taco seasoning to suit your spice preference.
Absolutely! You can replace the pasta with rice or serve the seasoned meat and vegetables with warm tortillas for a Tex Mex burrito bowl. Enjoy the versatility of this dish!
Variations
- Pasta Options: In this recipe, rigatoni pasta is recommended, but alternatives like pPenne or other noodles can be used depending on preference and availability. The inclusion of pasta is optional; rice or serving the seasoned meat and vegetables with warm tortillas can provide an alternative Tex Mex burrito bowl experience.
- Protein Choices: Ground beef is typically used, but you have the flexibility to opt for ground chicken, turkey, or sausage. Leftover rotisserie chicken can also be diced and incorporated into the dish.
- Spicy Twist: For those who love heat, add a diced jalapeño or red pepper flakes to the meat mixture. You can also use a spicier salsa or sprinkle extra cayenne pepper. A smoky flavor can be introduced with chipotle seasoning.
- Vegetarian Delight: Skip the meat altogether and double up on beans. Add more veggies like diced zucchini, mushrooms, or spinach for a hearty vegetarian version.
- Cheese Lover’s Dream: Experiment with different cheese blends like pepper jack, Monterey Jack, or a Mexican cheese mix for a cheesier, gooier experience.
- Healthier Option: Opt for ground turkey or chicken, whole-grain pasta, and reduced-fat cheese for a lighter version. Add extra veggies to boost the nutrition.
- Gluten-Free: If you’re gluten-sensitive, substitute gluten-free pasta for the rigatoni and ensure your taco seasoning mix is gluten-free. Check all other ingredients for potential hidden gluten.
- Vegan Twist: Replace ground beef with crumbled tofu or tempeh. Use dairy-free cheese and ensure your taco seasoning is vegan-friendly. Serve with dairy-free sour cream or avocado for creaminess.
- Kid-Friendly: Make it kid-friendly by using mild salsa and reducing the spice level. You can also add diced tomatoes or even a bit of ketchup to sweeten the sauce.
Related Recipes
More Yummy Beef Pasta Recipes


Photos used in previous versions of this post.


This looks very good. Do you typically use canned or frozen corn in this?
I typically use canned but you can use frozen too. I’d recommend rinsing it in a colander and letting it drain before adding it at the end. It will have a bit more bite to it. Enjoy!
This dish is amazing! I cooked it for my wife and children. Let’s just say there was no leftovers. Very, very good!
So happy to hear you all loved it!
YUM! This looks delicious! Perfect weeknight meal for my family!
Hope you enjoy it!
I love how quick & easy this is!! It is full of flavor & ingredients that I like to keep on hand!
Easy peasy!
This is our new family favorite recipe! All the flavors and textures we love.
Thanks for dropping by to let me know! I’m so glad you guys enjoyed it!
Do you think this would be good without the meet? It looks super delish!
I’ve haven’t tested it like that yet but I don’t see why not. If you decide to try, I’d love to know how it turned out. Thanks!
We love how quick and easy this hearty dinner is……so good!
This recipe was DELICIOUS!!! My family loved it! I will defiantly make it again. The next time I prepare this dish, I plan to serve it along side of tortilla chips. Thanks for sharing this recipe.
Sounds like a delicious idea! So glad you enjoyed it!