
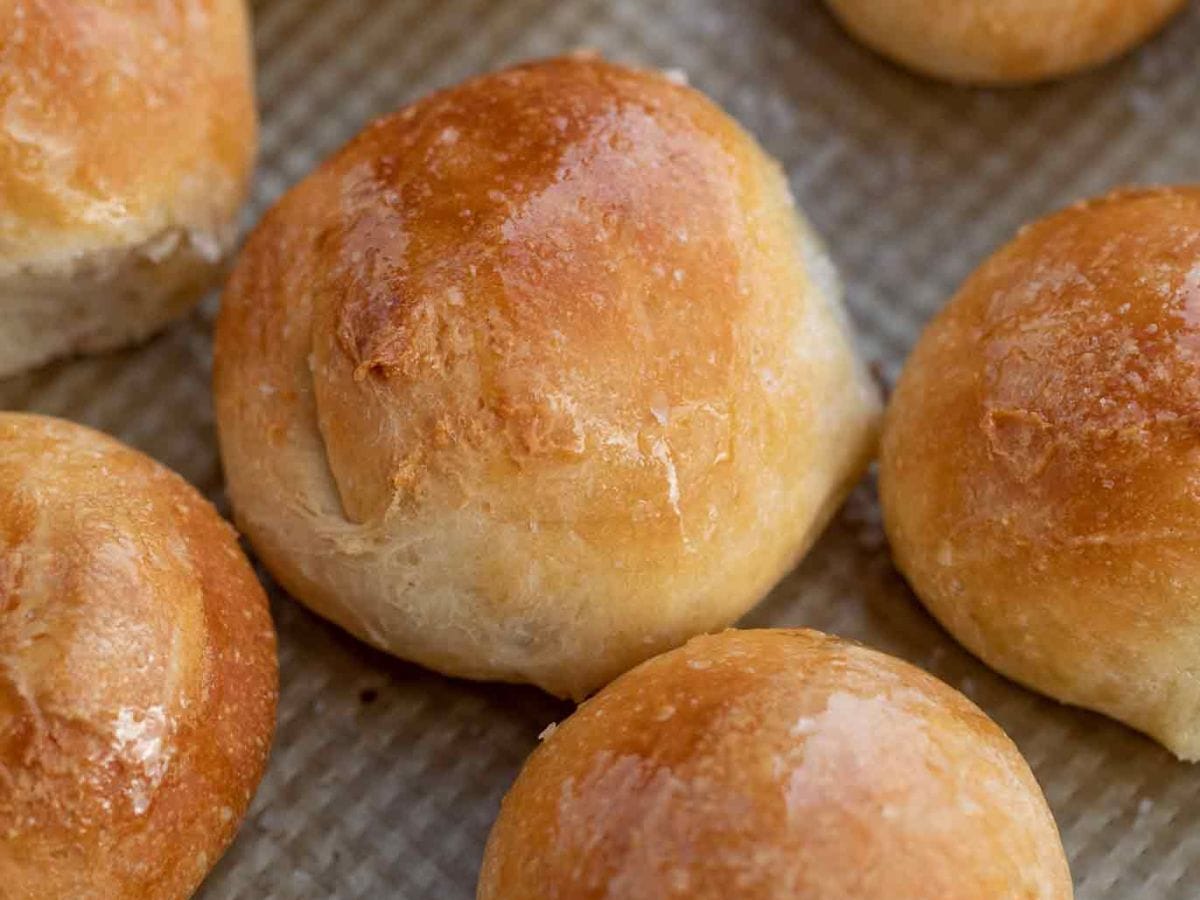
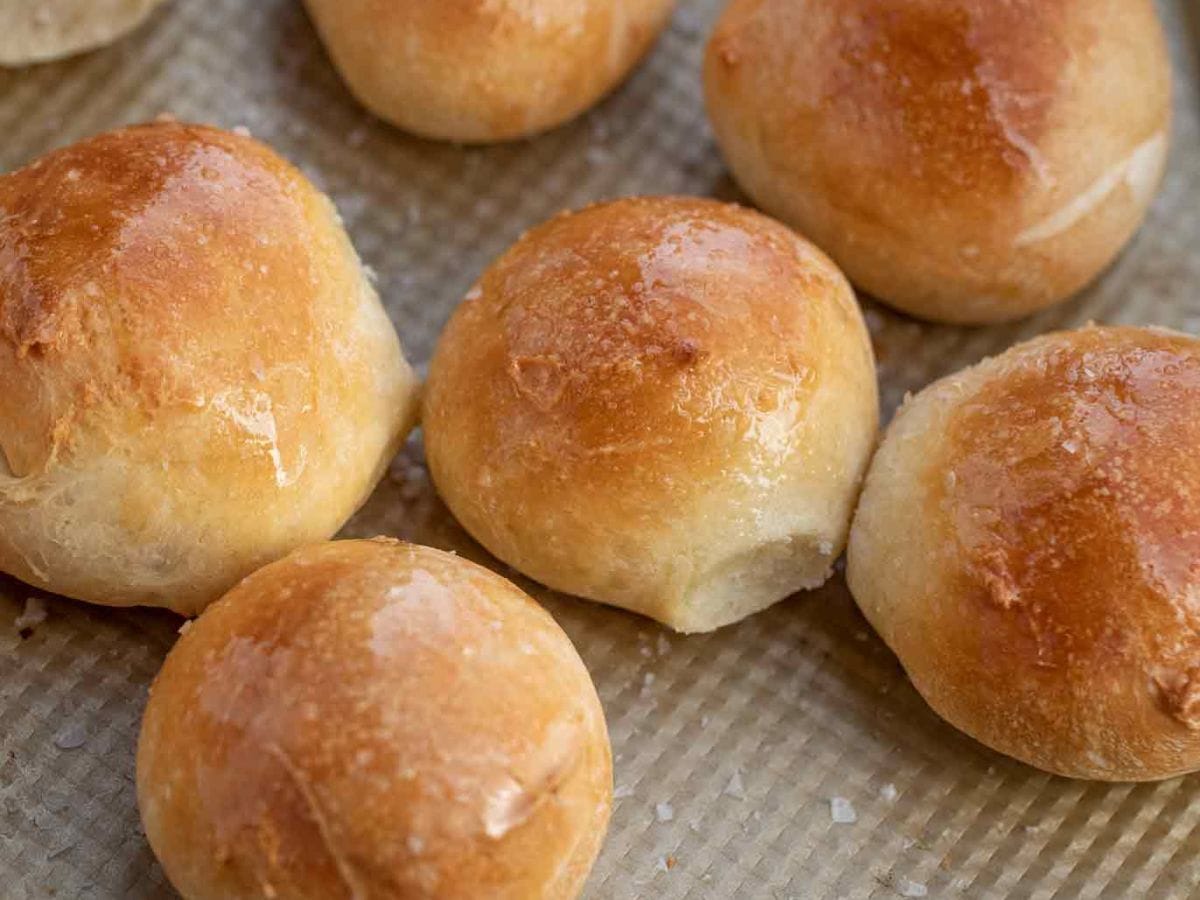
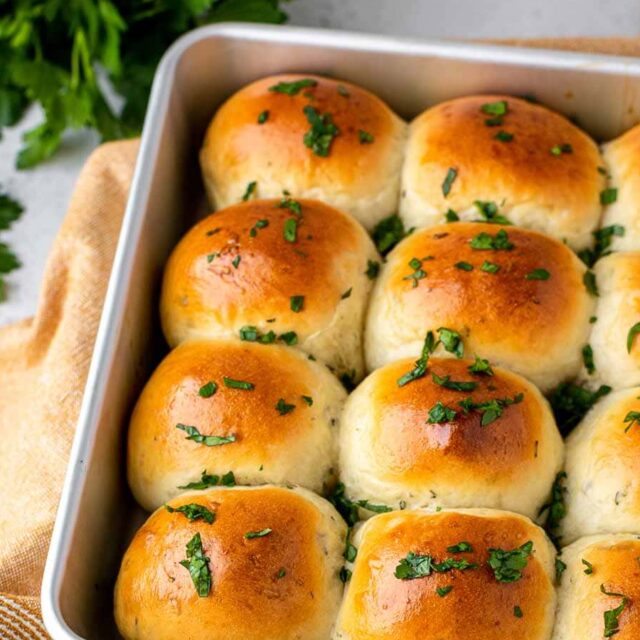
Crusty French Bread Rolls are the perfect bread to serve on weekends and holidays because they’re incredibly easy to make! Try them today!
Homemade Bread doesn’t have to be intimidating! I’ve got a large collection with a variety of yeast bread recipes from these crusty french rolls to Italian Bread to Garlic Herb Dinner Rolls and more!
Sabrina’s Crusty French Bread Rolls
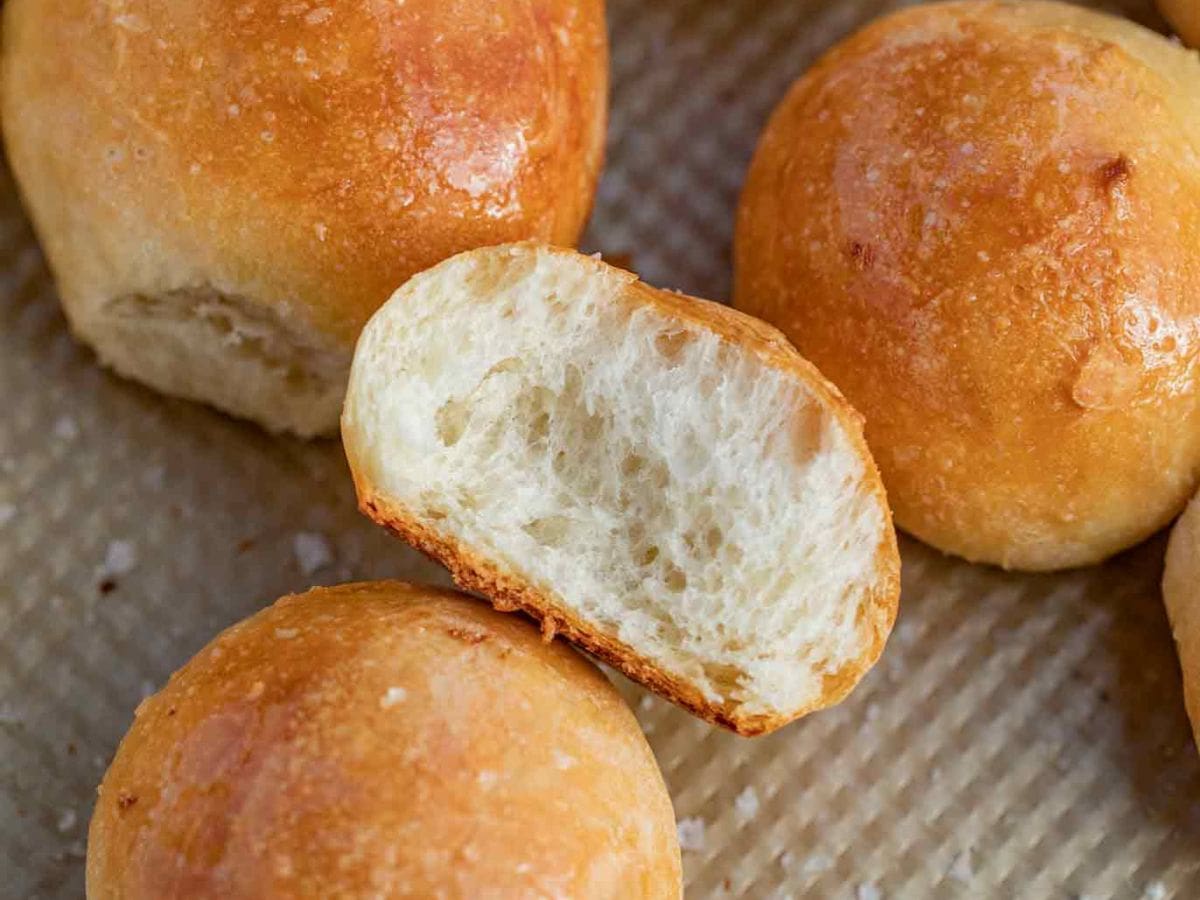
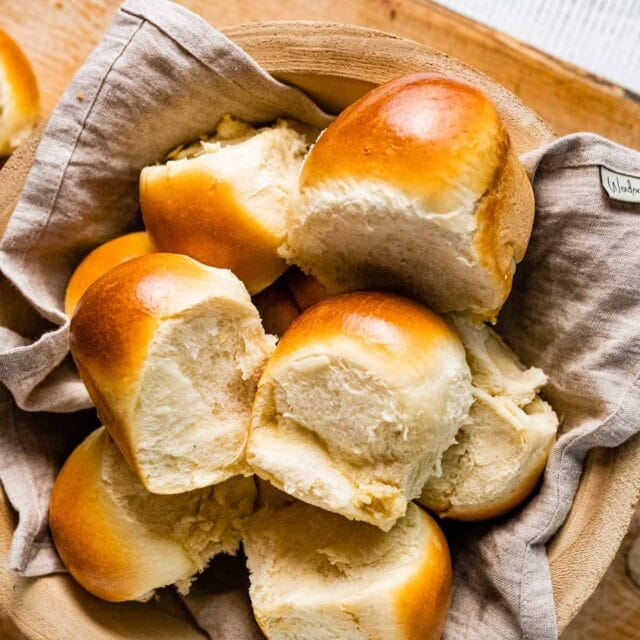
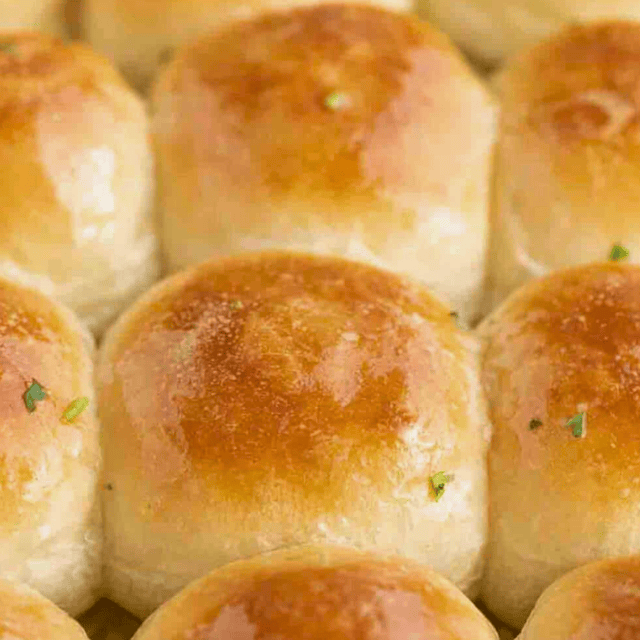
These French Bread Rolls are a favorite side that can go with any dinner. They’re soft and fluffy on the inside and crusty on the outside like a baguette. This is one of my go-to roll recipes because they’re incredibly easy – you don’t even have to knead it by hand if you have a stand mixer! I’ve also included a bread machine variation plus lots of baking tips so any home chef can master these delicious, easy rolls!
Recipe Card
Ingredients
- 1 1/2 cups warm water , (110 degrees)
- 3 teaspoons active dry yeast
- 2 tablespoons sugar
- 2 tablespoons vegetable oil
- 2 teaspoons kosher salt , divided
- 3 1/2 cups flour , up to 4 cups as needed
- 2 tablespoons unsalted butter , melted
- spray bottle with ice water
Instructions
- To a stand mixer add the warm water, yeast and sugar and let sit for 10 minutes until cloudy.
- Add the oil, half the salt and 2 cups of the flour with the dough hook and let it combine on medium speed adding the remaining flour in ¼ cup increments until the dough starts to come together and eventually starts to pull away from the bowl, then turn up the speed and let it knead for 5 minutes.
- Add dough to an oiled bowl and turn in the bowl to coat the dough with oil then cover with a damp towel and let rise in a warm spot until it doubles in size for 60 minutes.
- Divide the dough into 16 balls, place on a greased baking sheet and let rise for an additional 30 minutes.
- Brush gently with butter and sprinkle with remaining salt before baking at 400 degrees for 18-20 minutes spraying the dough with ice water twice halfway through the baking process to make the crust chewier.
Notes
- This dough is stickier than most bread dough, however the more you knead it, the more it will come together.
- If it isn’t pulling from the sides or seems too wet, mix in additional flour, 1-2 tablespoons at time, up to ½ cup of flour.
- This recipe was made using the US measuring system and works with the exact US measurements listed. The Metric Conversions on each recipe card are automatically generated and are not chef tested for this recipe.
Nutrition
Want to save this recipe? Create a free account to easily save your favorite recipes
Sabrina’s Note
My easy-to-make rolls are a family favorite and loved by many home chefs who have been following my recipe site for years. My hack is to add an ice water spray halfway through to create steam which results in the crispiest crust. It’s a great side for any dinner during the week and good enough for special events. Hope you enjoy this recipe as much as my readers and I do!
Table of contents
Ingredients
- Warm Water: Activates the yeast to raise the dough. For best results, make sure the water is about 110 degrees, which is on the hotter side but not close to boiling.
- Active Dry Yeast: This is the leavening that makes the bread nice and fluffy. Instant yeast can be used too. You can mix it directly in with the dry ingredients without proofing, but this is not recommended unless using a bread machine.
- Sugar: Feeds the yeast which creates air. Sugar also adds a slight touch of delectable sweetness to the bread.
- Vegetable Oil: This helps the final texture to be soft and delicious. Olive oil can be used if desired.
- Kosher Salt: Salt helps to enhance the flavor.
- Flour: You can use bread flour for a chewier texture, but I’m using regular all-purpose flour for my recipe.
- Unsalted Butter: The melted butter adds the signature golden crust we’re looking for in the recipe.
- Spray Bottle With Ice Water: This is the secret ingredient that creates steam in the oven and gives the rolls that crispy, chewy crust!
Can These Be Made Ahead?
Yes. These are great to make a day in advance, even though fresh-baked bread is always better! But you can freeze the dough ahead of time to make it easier to bake the day of. Divide the uncooked dough into balls, place them on a baking sheet, and freeze. Once they’re frozen, about an hour, you can move them to a plastic bag. When you’re ready to bake, place them back on the baking sheet and bake according to the recipe, spraying with cold water to make them extra crusty (make sure it’s cold; warm water won’t work as well).
Baking Tips
- Make sure to set a timer and let the yeast and sugar sit in the hot water for the full time for the yeast to activate. The water will look cloudy and slightly foamy when it’s ready to use.
- When you’re letting the dough rise, the yeast needs a warm environment to grow. I usually put it near a window, or if your oven is on for another recipe you can keep it on top of the stove.
- Make sure your yeast is as fresh as possible for this bread recipe. If the packet has expired, I recommend not using it, because your dough might not rise correctly.
- Be careful not to knead the dough for longer than the suggested 5 minutes. Kneading the dough for too long can result in dense rolls.
- We’re using the stand mixer for this bread recipe, but you can knead it by hand if you want to.
- You can use this same recipe to make an actual loaf or baguette, either freeform or in a special pan. Or roll them very thin and make breadsticks!
- Wrap these dinner rolls in tinfoil after they’re done baking, to keep them warm until you’re ready to serve.
- Line your baking sheet with parchment paper to help keep the French bread from sticking.
- If the dough is sticking to your hands while you’re trying to work with it, dust your hands with flour lightly.
- Brush the baguette dough with egg wash, or with butter to make the outside golden brown. You can also use a sharp knife to slice down the middle top of the roll for presentation.
How to Store
- Store: These bread rolls will last at room temperature for 4-5 days, wrapped tightly. You can also store them in an airtight container to keep them soft.
- Reheating Tips: Heat leftover rolls in the oven wrapped in tinfoil at 200 degrees to make them seem fresh-baked again before serving.
- Freezing: French bread rolls can be frozen either before or after they’ve been cooked. For cooked bread, freeze the rolls in a sealable plastic bag wrapped in tinfoil. Defrost at room temperature for a few hours before serving, or reheat in the oven to make them soft and crusty again.
Bread Machine Method
- Add Ingredients: Place warm water, yeast, sugar, oil, salt, and flour into the bread machine pan in the order recommended by the bread machine manufacturer.
- Select Settings: Choose the dough cycle and start the machine. The machine will mix, knead, and allow the dough to rise.
- Shape and Bake: Once the dough cycle is complete, remove the dough and follow the recipe here. You’ll divide it into 16 balls, place them on a greased baking sheet, let them rise again for 30 minutes, and then bake in a preheated oven at 400 degrees for 18-20 minutes, spraying with ice water twice halfway through baking.
Frequent Questions
If your roll recipe turns out too hard, it’s possible that you’re overcooking the rolls. Set a timer, and use an oven thermometer to make sure the oven is cooking at the right temperature.
Some French bread recipes call for bread flour because bread flour contains more protein. But I find that all-purpose flour works fine instead of bread flour for this French bread recipe. You can also use whole wheat or other wheat flour for a healthier version.
Variations
- Herb-Infused Rolls: Add 1 tablespoon of dried herbs (like rosemary, thyme, or oregano, or an Italian mix) to the flour at the second step. You’ll get a mouthwatering flavor to add to the aroma of fresh bread! You could also serve the rolls with Garlic Herb Butter.
- Cheese Rolls: Add 1 cup of shredded cheese (your choice between cheddar, parmesan, or asiago) into the dough during the mixing stage.
More Homemade Bread Roll Recipes


Photos used in previous versions of this post.


Excellent recipe, Sabrina! The dough was flexible and a joy to knead by hand. I baked these just a tad longer than you suggested. (Probably because I opened the oven door to check more often than I should have.) They were delicious slathered with real butter; wish I could post a picture of these attractive rolls!
Thanks for sharing your recipe. – Karl
You’re welcome. You can always post to instagram and tag #dinnerthendessert.
Would you let the rolls rise for the second time in a warm place? I just let them rise on my counter for 30 minutes and baked them and they are flat?
Yes, in a warm draft-free location is best but falling flat could be due to other factors too. Make sure to also knead the dough long enough t =o allow the gluten mesh to develop enough. Lastly, it could be from over-proofing. Before placing them in the oven, give the dough a slight poke. If the indentation slowly comes back, the bread is just right. If it pops right back, it needs longer to sit and if it doesn’t pop back at all, it’s over-proofed. Hope all of these help for next time.
Sorry folks but I read the instructions once and it was quite clear that you start with 2 cups of flour then add the balance, approx 1 1/2 cups , a quarter of a cup at a time to get desired consistency.
I am planning on making these tonight I am at high altitude any suggested changes? They look delicious I hope I don’t screw this up
I am not an expert on adapting to high altitude at all, I’m sorry.
These were awesome, divided the dough into 8 pcs for a larger roll and used them for burgers.
Very delicious!!
So glad you enjoyed them!
I made these today. Actually made 8 rolls and 2 baguettes. This made a wonderful dough. After the first 3 cups of flour I just added and added until it was not sticky. I did this with a mixer and bread hook and even then when I took it out I did knead it on a board with a little flour before going into the oiled bowl. I did not do the ice water while cooking and next time I will. Right now all my spray bottles have water and bleach in them.
The rolls and baguettes taste wonderful and are sturdy enough to hold up in a sandwich or burger. Tomorrow I’ll make more.
Thank you so much for coming back to let me know, Laura.
I used a bread machine to make the dough and they turned out perfect. I didn’t spray the rolls I just threw a bit of water on the bottom of the oven for some steam a couple of times. I got a baker’s dozen of buns perfect for hamburgers and the like. My family loved them.
Thanks for coming back to let me know, Perry.
Yummm, just took the second attempt batch out of the oven and superb! Making a quarantine family lunch of fresh tuna fish, lettuce, tomato sandwiches on our fresh sandwich buns! I put some cornmeal on parchment paper on the pan and made 12 vs. 16 for a little bigger, so I let them rise the second time a few minutes longer and baked for the full 20 minutes, spritzing with water @ 10:00 minutes twice and 15:00 minutes one quick spray. AMAZING!
Since we’re social distancing, planning to make soon. Do you punch down the dough after the first rising and before you divide into 16 balls?
No, I didn’t need to.
If making a French loaf how long would you recommend baking for?
375 degrees for 25-30 minutes. Make sure to cut diagonal slashes about 2 inches apart on the top of the bread. Enjoy!
For the sake of all us novice bread makers, please please update the instructions around adding flour. It is not clear that the 1.5 extra cups is added 1/4 by 1/4.
I just had to rebrand my extra flour in and the dough is feeling pretty tough. Fingers crossed. Thank you ????
Step 2 states to add flour in 1/4 cup increments until the dough starts to come together.
Do you use bread flour or does plain flour work? It’s been hard to come by bread flour these days ?
I used plain flour.
After the first rise, do you punch the dough down? Also, found it very sticky and had to add flour before I could do anything eithe the dough. Thoughts,
If it was still sticky, more flour would needed to be added. I didn’t punch it down either. I let the dough hook do all the work.
My first attempt at making bread was a success! I made this recipe last week. I think I need to work on how to roll them into balls…is their a correct way to roll them? I was trying not to handle them too much so I gave it a really quick roll and set them down but some of my rolls looked funny looking-I wish I could post a picture to show you. They still tasted good. They went really quicky!
I followed the instructions to the letter, and after the first rising all I had was very thick pancake batter. Hard to roll into a ball. Complete failure.
TT
Sounds like you (like many other commenters below) got hung up at the flour measurements part. You were supposed to start with 2c in the bowl and gradually add in the other 1.5c.
Thank you, this is helpful, the recipe was not clear how to go from 2c to 3.5c in the recipe, I was confused too 🙂
Hi
The dough turned out to be very sticky. No bread mixer here just my hands.
I added a dash More flour and still very sticky . Have left it in the warm sun to rise. Will update.
To be fair, the instructions are incredibly unclear about the flour step, especially if the person making these is not an experienced baker. Might want to consider modifying the instructions.
Sorry folks but I read the instructions once and it was quite clear that you start with 2 cups of flour then add the balance, approx 1 1/2 cups , a quarter of a cup at a time to get desired consistency.
So, the way you wrote this would be helpful to someone new at this. But the snark really isn’t.
I have made this bread a couple of times and have also had problems with extremely sticky dough. The second time I added more flour and it worked much better, but I must say either way it makes a very good bread! I do have a question though. When you say 1 tablespoon of yeast do you mean 1 packet? I measured my packet. It was less than 1 tbl so added extra. I got a fantastic rise (maybe too much) but it fell a little when brushing with butter…both times.
I’m so glad you’re enjoying the recipe. I’m glad you measured and added extra, thank you for catching that. You do need 1 tablespoon of yeast. I recommend adding a pan of water to the bottom of the oven to help with them staying crispy.
Just made these and they came out GREAT! I wish they were less dense more fluffy inside… can you recommend I do something different?
So glad you enjoyed them. Next time, try kneading them for a longer time.
A step was left out. The recipe doesn’t say when to add the rest of the 1 1/2 cups of flour. I made the recipe and added the remaining flour after mixing the 2 cups of flour on medium. Still don’t know how it will turn out as it is in the rising process.
You’ll add it in using 1/4 cup increments until the dough starts to come together and pull away from the bowl.
The dough was extremely sticky and stretchy — is it supposed to be like that? If so, it would be helpful to mention that (ideally before instructions to put the dough to rise) and give some tips on how to divide it up. If not, tips on correcting the situation would also be helpful.
Since I discovered this bread recipe, I have made it every Saturday for the past month and now I don’t need to purchase any buns or rolls! Absolutely the best and always turns out perfectly!!!
Fantastic! I’m so glad you love it so much, Sue.
This was my first attempt at baking crusty buns. I followed the recipe exactly as written but instead of spritzing with water during baking, I put a 9×13 baking pan on the bottom rack 1/2 filled with water to keep buns moist. It worked beautifully. Buns were perfection! My family loves it, better than the bakery we usually get our buns from! Thank you so much for posting this recipe! It’s a keeper! 🙂
Yay!! Thanks for the suggestion.
I have no idea what the bread is like due to the instructions having a mystery 1.5 cups go missing in the recipe left up to interpretation
The additional flour will be added in at 1/4 cup increments into the dough.
Just going to make these buns and planning to use quick rise yeast. What do I do different to adjust for this change?
I’ve not tested it with this recipe but quick rise yeast can be added directly into the dry ingredients. No need to mix with water.
My rolls didn’t turn out as brown & crispy as the photo but they taste amazing! We loved them!
If you read her tips, you brush it with egg wash or butter for golden brown look
Very easy and delicious recipe. I’ve made these a couple of times and ,both times I needed about another 1/4 cup of flour. I also add some Italian seasoning to the dough and I a sprinkling of sea salt when they go into the oven. Mine were beautifully brown at 15 minutes. Highly recommended for even beginners. As a reminder, garlic kills yeast. FYI. Mahalo for the recipe.
You’re welcome. So glad you love the recipe.
So glad I found you! :-). Can I refrigerate the dough after the first rise, and bake the next day? Many thanks!
Yes 🙂
The recipe shows 3 1/2 cups of flour under ingredients, but the directions show to add 2 cups of flour in 1/4 cups increments. What happened to the other 1 1/2 cups of flour??? My dough was like liquid and could not be handled!!! This recipe should be re-written correctly! Can you tell what I missed? I ended up adding another almost two cups of flour and I still could not handle it!
Step 2 states that you’ll start with 2 cups of flour when you start to combine the dough and then add the additional flour into the mixture 1/4 cup at a time until it’s all in there and combined. I hope this helps clear things up for next time.
It’s hard to interpret, but you add 2 cups and start mixing and then add 1/4 cup increments until it stiffens up and pulls away from the bowl (add up to an additional 1 1/2 cups if need be) Hope this helps
The part of the recipe where the flour is mentioned is very confusing. It should say adding the additional 1 1/2 cups of flour 1/4 cup at a time. Where it’s written now it seems as if you only add 2 cups of flour adding that in 1/4 cup at a time.
You’ll be adding in the additional flour in at 1/4 cup increments.
Hello Sabrina, new to your site and love your detailed instructions and insight. I want to choose either this french roll or the regular dinner roll on your site for Christmas dinner of roast beef tenderloin. What would you say is the main difference in taste and texture on these two choices and do you have a suggestion as to which of these two (or another of your recipes) would make the better choice. Thank you.
These rolls are crusty and perfect for dipping into sauces to really soak up the flavor. The dinner rolls are a softer, fluffier type of roll. Either would go great with roast beef tenderloin. Enjoy!
If you freeze the raw dough, do you freeze the dough balls before or after the 2nd rise?
You’ll freeze it before the 2nd rise. 🙂
The rolls were delicious and super easy to make. The recipe does need updated, though. It states Prep Time: 30 minutes; Cook Time: 30 minutes; Total Time: 1 hour. That is a lie. 10 to bubble the yeast + 5 to mix the ingredients + 5 to knead + 60 to rise + 5 to roll + 30 to rise + 20 to bake. It is actually over two hours time. I used the 50% quick rise but still couldn’t do it under an hour. I want other to realize that these are not quick rolls, but they are yummy.
If I freeze uncooked dough do I cook them from frozen or bring to room temp and let them rise on first?
I bake them from frozen and just spray them with cold water to make them extra crunchy.
Bring them to room temperature and allow them to rise before baking
I have tried making these twice now and while the dough initially pulls away from the sides, it then gets wet again when I speed up the stand mixer from 2-4 on my Kitchenaid. I’m following the timing and recipe exactly! What am I doing wrong…seems like I need to add more flour, but then it won’t rise!
Hmmm that is really odd. It does sound like you need more flour. If you want to email me at contact @ dinnerthendessert .com, I would love to troubleshoot with you!
It sounds as if you aren’t getting all the four in while mixing- I had to stop several times to make sure the hook was catching the flour and dough at bottom/sides
I’m having the same problem as Rachel with the dough getting all sticky again after I turn it up to knead. I have ended up adding way more flour (total 5c or so!) and they are tasty, but no idea why mine need so much flour. I have tried mixing with the regular paddle and then changing to the dough hook as well as lots of scraping the bowl to make sure all the dough is incorporated.
I was looking for French rolls for sandwiches. I found your blog, and I made your recipe. Absolutely delicious and easy to make. I only made two changes I had French flour and I used that and I made eight rolls instead of 16 I wanted large sandwich type rolls that we can cut in half and oh my gosh this was exactly what I was looking for thank you so much I highly recommend this recipe for anyone to try very simple
What a fantastic idea to make them larger for hoagies! So glad you enjoyed!
Is it bread flour or just regular flour?
All-purpose flour 🙂
I made these buns tonight and they are truly amazingly delicious!!! I will make them again soon for sure!!!!
So glad you liked them!!
I haven’t made bread or rolls in years. This is a very easy recipe with delicious results. I used the old fashioned method of hand kneading for 7 minutes. I might knead a little longer next time.
Regardless my husband and I had eaten half of the rolls within the first two hours out of the oven.
Thanks!
That’s the best time to eat them – right out of the oven 🙂 So glad you enjoyed them!
Perfect easy dinner rolls.
However, having made this recipe several times, I now omit the second addition of salt – we all found them far too salty.
Even without that ‘prior to baking’ added sodium, these are terrific! In fact, have a batch rising as I type.
Thanks!
So glad you are liking them! Thanks for coming back and letting me know 🙂
WOW!!! I am so lucky that my very first attempt at making bread was, by luck of the draw, this very recipe! I am not a good cook at all, but can follow instructions, so as I was house-bound for a few days, I figured I will try to make a loaf or rolls.
These were absolutely fantastic. My family truly believed I bought them at our local bakery. The salt on top was the perfect addition!
I will make these again… very soon… I am certain.
Thank you for such an easy recipe to follow! Can’t believe I did it…
So glad you like them and they came out for you! I do try to make my recipes so everyone can do them!
Hello Sabrina
I’m going to be making the French rolls and I just needed to know for the second rise should it be covered with the towel again?
I’m excited to try these because they look delicious and all the comments (other than the confusion about the flour LOL) it seems to be the best recipe.
Thanks in advance
Yes, you’ll want to cover it for the second rise. I really hope you enjoy them.
DeLiCiOuS.
Hello,
Thanks for the recipe, Is it possible to freeze the rolls? If so, would it be before or after baking?
Thanks!!
You can freeze before or after the cooking. In the post, I go over how to freeze both ways. Hope this helps!
These turned out perfect! I had the last one 3 days later and it was still soft and delicious!
So happy to hear that! I can’t believe they lasted 3 days without being eaten first – that would be a record in our house haha!
When do you you use the remiaing flour after the first 2 cups go in?
You continue to add it at 1/4 c increments until the dough comes together. If you look at step 2, it will give you further instructions.
I also found this confusing. I only added about 2 1/2 cups total since that was when it started separating from the bowl.
I think you need to revise the wording. Is step 2 supposed to say
– Add oil, half salt and 2 cups of total flour
– Add additional 1 1/2 cups slowly (1/4 cup at a time) until…
To me the “until” part is unclear.
Just made these last night, and they were delicious! I don’t like opening my oven during baking; instead of using a water bottle to spray the rolls, I put a 9 x 13“ pan halfway filled with water onto the bottom rack of the oven while it was preheating and left it in there during the baking. The rolls were perfectly crusty and chewy!
Love that idea of the pan to add moisture – what a hack! Thanks for sharing!
Thanks for that, I don’t have a spray bottle to use for this. I was looking to see if spraying water was necessary.
Did you use coarse kosher salt or fine kosher salt? Looking forward to making these.
Generally kosher salt is coarse and that is what I use. Let me know how they turn out for you!
Wish you could see and smell this wonderful bread.!!!
Do not have a mixer with a dough hook. Can these crusty buns be made just by kneaded and if so, how long would you need to knead the dough.
Yes, you can knead these by hand if you don’t have a dough hook. You’ll want to stop kneading it when it starts pulling away from whatever surface you’re kneading it on. Enjoy!
Wish the salt was listed separately instead of divided. Accidentally used it all in my dough. worried it would impair the rise. Still, my dough rose well in a warmed oven . Dough much softer than I expected. Never really pulled from the sides even after adding more flour. Omitted the salt sprinkled on the tops and they weren’t too salty. Crusty and delish. I’m sad I only baked 2 and froze the rest as dough balls.
Oh no! So glad you enjoyed them.
These are the perfect rolls for just about anything. We enjoyed them with a big pot of soup the other night. I can’t wait to make them again.
Fantastic!
I CANNOT wait to try these!! I just love homemade bread and rolls so much. YUM!
Bread is pretty much life!
These are sooo good! I will be making these for Easter brunch!
I’m so glad you enjoyed them, Jennifer!
We made these to go with Chicken & Wild Rice Soup. We’ll definitely be making them again soon!
So perfect with that!! So glad you enjoyed them.
Who knew rolls were so easy to make from scratch! Such a great addition to Sunday dinner.
I know, right?!
Hi Sabrina – My husband made these French dinner rolls today. He is an experienced bread maker and has made many dinner rolls also. These rolls were absolutely delicious! The best we’ve ever eaten. They were also very easy to make! Thanks for another superb recipe ??
Thanks so much, Renee! I appreciate the 5 stars.
I’m no expert, but I think bread flour specifically has more gluten, which makes it stretchier for breads and pastries.