
Fudge Iced Brownies are soft and chewy treats made with simple ingredients. Ready to serve in under an hour! Try them today!
These classic brownies are a tried and true Dessert favorite just like my homemade Chocolate Chip Cookies.
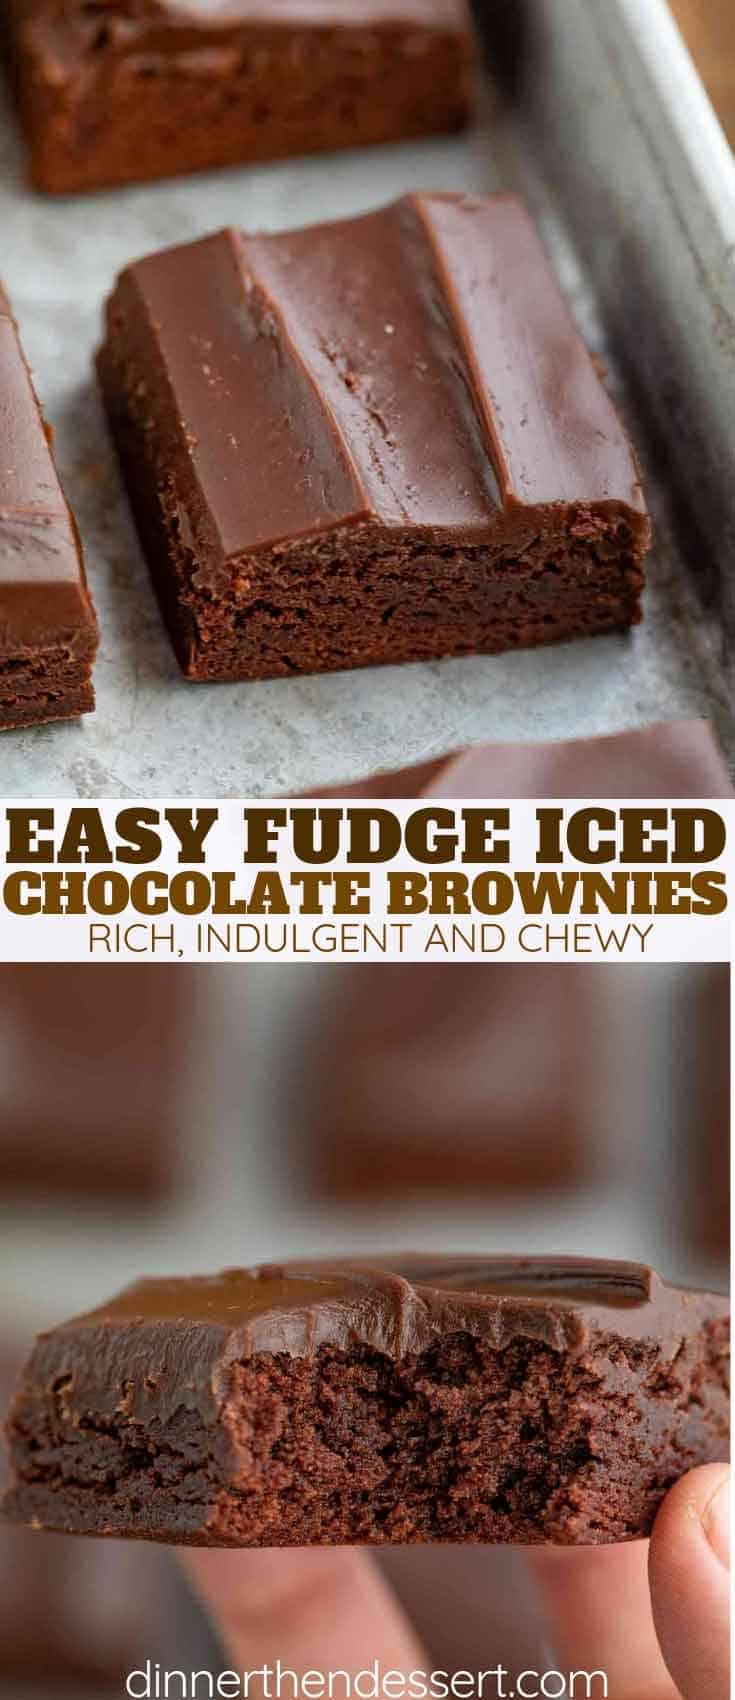
 Sabrina’s Fudge Iced Brownies Recipe
Fudge Iced Brownies are one of my go-to brownie recipes because they’re super fudgy, chocolatey, and incredibly EASY to throw together in less than an hour. These are topped with a creamy, indulgent, fudgy icing that throws these homemade brownies into a totally different league than store-bought brownies. You’ll want to make this a regular weekend tradition! Fudgy brownies use more fat than flour in the recipe. You can make brownies more cake-like by using less butter and adding flour. Or on the other side, you can make cakey brownies more fudgy by adding more butter or oil and less flour. If you want to skip the icing, try my Pecan Brownies to add some nutty crunch to the bite!
How to Store
- Store: Fudge brownies should be stored on the counter (room temperature) in an airtight container. If you cut the brownies into squares, they’ll keep for about 3 days. Wrap each square in plastic wrap to help them stay fresh for even longer. If you haven’t cut them yet, they’ll last 3-4 days before going stale.
- Freeze: These can be frozen pre or post-cutting into squares. Wrap tightly with plastic wrap, then tinfoil to keep any air out. Brownies will keep in the freezer for about 3 months.
Why Are My Fudge Brownies Dry?
If your brownies are turning out dry instead of fudgy, it’s possible that your brownie recipe contains too much all purpose flour or dry ingredients and not enough moisture. If you’re following my brownie recipe which is tried-and-true, then your brownies may be over-baked. Check your oven temperature, and set a kitchen timer to make sure they come out on time.
Create a free account to Save Recipes
When Are They Ready?
The usual clean-toothpick trick doesn’t necessarily apply to brownies that are fudgy. If you insert a toothpick into the middle, I would make sure there is no obvious raw batter, but a few crumbs are ok. Fudgy brownies naturally have more moisture, so they won’t behave exactly like the cakey version.
 Baking Tips and Tricks
- Try serving these brownies while they’re still warm with a scoop of Vanilla Ice Cream on top, and some extra chocolate chips.
- You can use dark chocolate cocoa powder or regular Dutch-process cocoa powder for this brownie recipe, depending on how intense you like your chocolate flavor. If you’re adding cocoa powder to another recipe, keep in mind that cocoa brownies can be on the dry side so you may need to add more fat to the recipe.
- Add 2-3 tablespoons of chocolate chips to the batter for some melted chocolate pockets in your brownies. Try dark, milk, or even white chocolate chips. Also, sprinkle a few chocolate chips on top of the brownies for decoration.
- Make these gluten free by substituting with a gluten free cup-for-cup all purpose flour.
- Make these brownies non-dairy by substituting the butter with applesauce, and using a dairy free cocoa powder, along with a non-dairy icing.
- Decorate your fudgy brownies with a drizzle of melted chocolate, peanut butter, Caramel Sauce, or melted Marshmallows on top. Melt for 30 seconds at a time in a microwave-safe bowl, stirring between, until smooth. Or use a glass bowl on top of a water-filled saucepan to make an easy double-boiler.
- Sub ½ cup of the white sugar for brown sugar for a darker more molasses-like flavor that goes really well with the fudgy chocolate in this brownie recipe.
- If I’m in a really chocolatey mood, I’ll make a double batch of the fudgy icing so each serving is twice as chocolatey!
- If your icing isn’t smooth enough, you can add a few drops of coconut oil to help with its appearance.
Ingredients
Brownies:
- 1/2 cup unsalted butter , melted (one stick)
- 1 cup sugar
- 1 tablespoon vanilla extract
- 2 large eggs
- 3/4 cups flour
- 1/2 teaspoon baking soda
- 2/3 cups unsweetened cocoa powder
- 1 teaspoon salt
Chocolate Icing:
- 1/2 cup whole milk
- 1/2 cup unsalted butter
- 2 1/4 cups sugar
- pinch salt
- 1 1/2 cups semi-sweet chocolate chips
- 2 teaspoons vanilla extract
Instructions
- Preheat the oven to 350 degrees.
- Butter and cocoa powder the bottom and sides of a 8×8 inch baking pan.
- In a large bowl whisk the melted butter and sugar until sugar is dissolved and the butter mixture has cooled (about a minute) then add in the vanilla and eggs.
- Sift together the flour, baking soda, cocoa, and salt and add to the large wet mixture, whisking until just combined.
- Pour into the baking pan and bake for 30-35 minutes.
- While the brownies are baking, add the milk, butter, sugar, and salt to a medium pot on medium heat and bring to a boil for 30 seconds.
- Remove from the heat and whisk in the chocolate until smooth then add in the vanilla whisking again and let it cool for at least 10 minutes before pouring over the brownies and smoothing with a spatula.
- Slice and serve once it cools and firms up a bit.
Notes
Nutrition
Want to save this recipe? Create a free account to easily save your favorite recipes

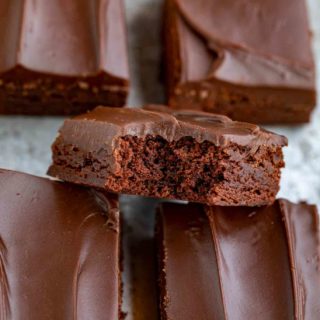
Photos used in previous versions of this post.


These are delicious, the icing is to die for. Ate the whole pan, icing was extremely for the pan size. But it’s my go to icing now.
Love this! So glad you enjoyed the icing and brownies!
These are delicious and very easy to make. The icing was a bit much but what the heck I put it all on pan of brownies. It’s all amazing and I can’t stop eating them. Thank u so much for a great recipe.
LOL. They are pretty addictive. Thanks for your kind words Giovannia.
Your recipe looks good but what does 1stick of butter means can you pls mention it in grams
I think the frosting recipe you have listed is for a 13×9 pan, not an 8×8. I was suspicious and made a half recipe of the frosting and I still have about a half inch thick layer of (delicious, delightful) fudge frosting on my brownies in an 8×8 pan. I found that a 1tsp of salt was a bit much, although I see why it would be important to balance the sweet frosting. Next time I will probably use 1/2 or 3/4 tsp of salt. Otherwise though the brownies are delicious and soft, and go great with the amazing fudge frosting
These are awesome. I already had what I thought was the perfect brownie recipe, but it pales in comparison and I’ll never make it again. The brownies are super fudgy which is what I love. The frosting is so dang good! True, there is plenty of left over frosting – that is never a bad thing in my book. They present so beautifully, too, with the uber smooth finish once the frosting sets up. The batter is thick (thicker than I expected) but I buttered the back of a spoon and smoothed it out. Easy. I baked for 25 minutes and the texture is ideal! I didn’t read the frosting prep directions and added everything to the pot on the stove. Had I followed the directions, I would have been better able to dissolve the sugar. (My frosting has a little graininess – next time I’ll follow the directions, duh). Great job!
Wow, thanks for such a great review! I really appreciate the 5 star rating, DeeBee.
These are the best brownies so good. I didn’t put any frosting on them and they were amazing! This is the best homemade brownie recipe I’m so glad I stumbled soon this.
I’m so glad you enjoyed them, Olivia. Thanks for the 5 star rating.
Do you have a recipe for cake brownies?
Do you mean cake mix brownies?
Terrific texture, loved the frosting as well since it didn’t call for powdered sugar it was especially convenient since I didn’t have any on hand.
Made more than enough for one 8×8 batch though, so I’d cut in half. Or just refrigerate the frosting & make another pan of brownies in a few days, which is what I chose to do. ?
Lovely chocolate craving solution. Very satisfying frosted brownie, even better the next day if you have them around that long.
Is the sugar in the icing supposed to be confectioners sugar? My icing came out really grainy
Oh no! It sounds like you needed the sugar to melt longer while cooking. This recipe doesn’t call for confectioners sugar.
Would it be alright if I substitute confectioners’ sugar?
I wouldn’t suggest it.
Do you let the brownies cool completely before icing?
I was looking for a good brownie recipe and these were just awful. Sorry but I followed this recipe to a T, they’re so incredibly salty and not enjoyable. However, I liked the icing and I will be using that in future.
Hi, the batter is too thick to be poured, so I had to spread it into the pan, and this meant that it kept pulling up the cocoa powder I had dusted the pan with, so I hope there are not streaks of bitter cocoa in the brownies. The batter barely yields enough for the 9 x 13 pan and I noticed your other Classic Brownies recipe calls for an 8 x 8″ pan, using the same amounts of butter, sugar, and eggs, and only slightly less flour and cocoa powder ( 1/2 cup unsalted butter , melted
1 cup sugar
2 large eggs
2 teaspoons vanilla extract
1/3 cup unsweetened cocoa powder
1/2 cup flour
1/4 teaspoon salt
1/4 teaspoon baking powder)
Because it was so difficult to spread the stiff batter in the pan, some parts of the batter in the batter of the pan were thicker than others, and this did not even out during baking, so I have a thin end that appears done and a thick end that needs more baking. I feel as if this batter needed more eggs and more butter to be pourable. Or else use this recipe in a 9 x 9 inch pan.
Done in 20 minutes. Thickness between slightly under and slightly over 1/2 inch.
Also, usually a 9 x 13 pan of brownies serves more than 12 , and certainly the illustrated brownies appear to be small enough to have yielded 24.
Another misleading thing is that many people who posted a 5-star review hadn’t actually made the brownies, they just thought they looked and sounded amazing! This is wrong.
Last, how do you wrap a frosted brownie so that the icing doesn’t stick to the wrapping once it is thawed?
I usually store these in the container with a lid over it so that the frosting doesn’t even touch it.
I had the same problem. The batter was way to dense not pourable. It pulled up the dusted cocoa powder. Also if the frosting would not have been on them they would have been impossible to eat. Tooo much cocoa for the amount of batter.
So sorry your comment was stuck in my spam folder. I’m not sure if you made them before the adjustment I made after retesting.
Made the icing today and it turned out beautifully! But, I have so much of it now! lol! can the icing be frozen to be used for something else? If so, how can I “revive” it from the freezer? Thanks ever so much!
Certainly. Place in an airtight container and when you are ready to use, thaw in the freezer overnight.
I read your reviews and made up my mind that this recipe would be amazing! But yet it didn’t turn out close to what I expected. The brownie resembled week old cake and though I put it in slightly smaller pan and baked TEN minuets less due to the amount of batter, it was NOT at all fudgy. The icing on the other hand is a total delight, in my opinion it saved this dessert, BUT the amount made ended up being just as thick as the brownie once spread out! How did all this happen? I couldn’t possibly come up with an answer.
I’m so sorry it didn’t turn out will for you. It’s hard to troubleshoot from afar, but if you try this again, I would use the same size pan and trust the cook time (unless you need to adjust for altitude).
Mine didn’t come out as expected, either. The brownie batter was too thick to pour, and had to be spread thinly over the 9 x 13″ pan. Finished brownies were maybe 1/2-inch thick. And cooking time was WAY less than recipe.
After further testing, it looks like I may have made a double batch in a 9×13 pan. I’m so sorry. I’ve edited the recipe card to show using an 8×8 pan. That should correct the issue. Thank you for letting me know.
Can I make these sugar free?
I haven’t tested it that way but if you decide to try, I’d love to know how it turns out. Thanks!
Probably THE best iced fudge brownies I’ve ever made. They were a huge hit, and this is definitely my new go-to. Thanks, Sabrina!
You’re welcome, Deb. So glad you enjoyed them so much!
Oh yum. I’m with you- I like my brownies on the fudgie end of the brownie spectrum. These look perfect.
Thanks, Emily!
Whoah, these brownies almost look too good to be homemade! Now I’m craving brownies!! YUM!
wow that icing on the brownies is perfection nothing like a chocolatey treat, I need one now LOL
Hits the spot perfectly!
Wow, these look so fabulous. I would be in trouble alone with a whole batch. That icing is calling my name!
Very tempting to want to eat them all!
These brownies look AMAZING! And great tip that these can last in the freezer for up to 3 months… not that they would ever actually last that long without being eaten 🙂
Haha, it takes great restraint!