
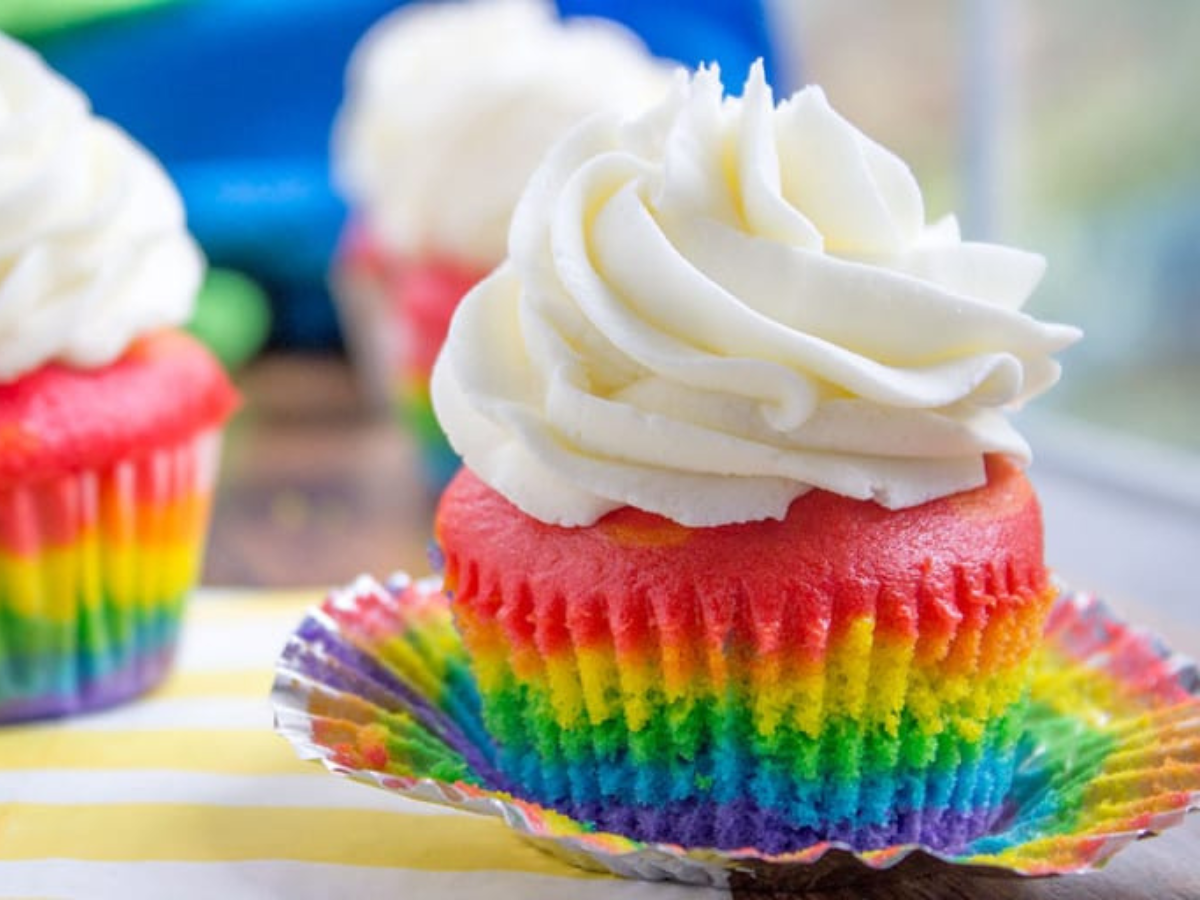
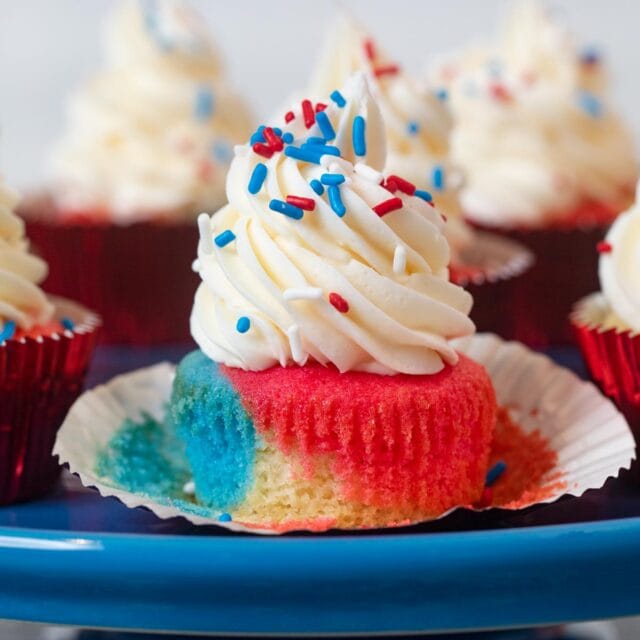
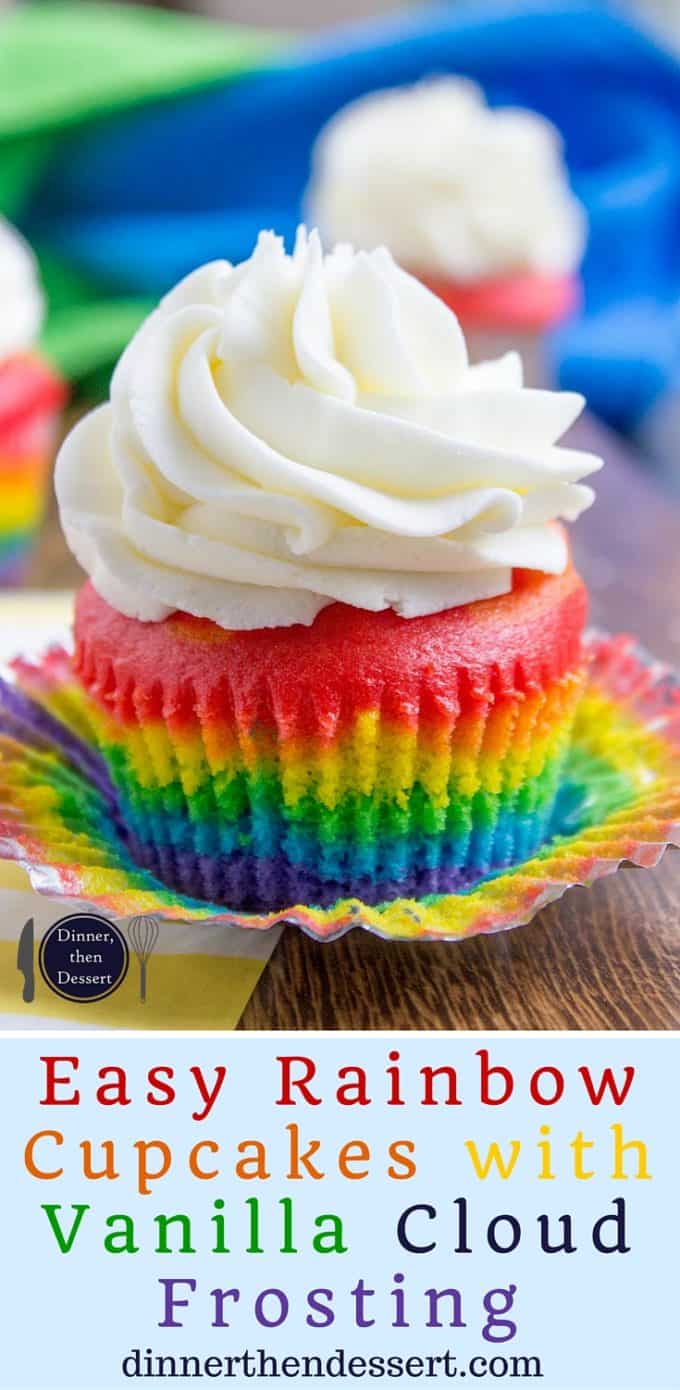
Rainbow Cupcakes with fluffy cloud-like frosting that is guaranteed to make all who see them smile. Perfect for birthdays and St. Patty’s!
A perfectly fun Cupcake recipe that the kids will love to help make and eat with no hesitation! The kids will love my Red Velvet Cupcakes and Unicorn Cupcakes when they try them too!
Sabrina’s Rainbow Cupcakes with Vanilla Cloud Frosting Recipe
Rainbow Cupcakes have been a long time in the making. They are one of my absolute favorite desserts to make. When I would make surprise cakes or birthday cakes for my favorite clients I would usually make them towering rainbow cakes. They are perfect for celebrating St. Patrick’s Day with a little rainbow magic!
Recipe Card
Ingredients
- 1 cup butter , softened
- 2 1/3 cups sugar
- 5 egg whites
- 1 tablespoon vanilla
- 3 cups flour
- 4 teaspoons baking powder
- 1/2 teaspoon salt
- 1 1/2 cups milk , warmed for 30 sec in microwave to bring to room temp
- Rainbow colors of Gel food coloring
- 1 cup butter , (2 sticks), softened
- 4 cups powdered sugar , sifted
- 1 tablespoon clear vanilla , (if you use normal vanilla it will not be as white, but will be just as delicious)
- tiny pinch salt
- 3 tablespoons milk
Instructions
- Preheat the oven to 350 degrees.
- In your stand mixer cream the butter and sugar together until much lighter in color, like a easter-y spring yellow (2-3 minutes).
- Add in the egg whites and vanilla until totally combined.
- Add the salt and baking powder to the flour.
- Add in the dry ingredients and the milk alternating 1 cup of flour and ½ cup of milk at a time.
- Add one cup of the batter to 6 different bowls. Color each bowl with your gel food coloring in red, orange, yellow, green, blue and purple. Mix until the colors are fully combined.
- Your choice here: Spoon or Ziploc bags. Either add the batter to 6 sandwich size Ziploc bags and pipe just enough to make a thin layer of each color (maybe ¼ inch tall batter layers) OR with a small spoon, spoon just under a tablespoon of batter into each cup.
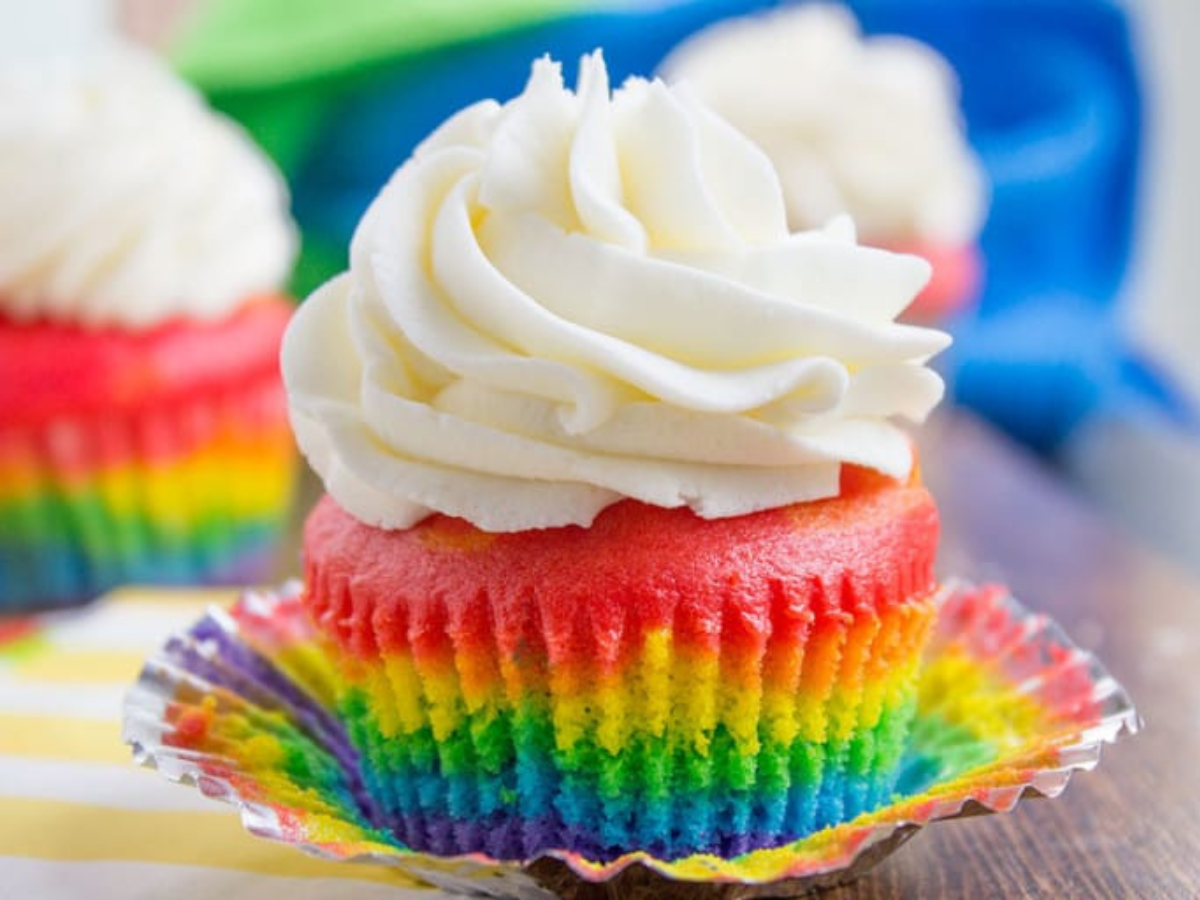
- Start with purple, then blue, then green, then yellow, then orange and finally red.
- Bake for 18-20 minutes.
- To make the frosting:
- Whip the butter in your stand mixer with your Paddle Attachment until you see the butter is lighter in color (1 minute).
- Add in the vanilla.
- Add in the powdered sugar in 1 cup increments with the milk 1 tablespoon at a time, ending with powdered sugar.
- Mix on high for 1 minute after each addition. Your frosting should be SUPER light and fluffy, just like a delicious vanilla cloud.
- Using a Closed Star Tip and Decorating Bag, pipe your frosting onto the cooled cupcakes.
Nutrition
Want to save this recipe? Create a free account to easily save your favorite recipes
Table of contents
About this Recipe
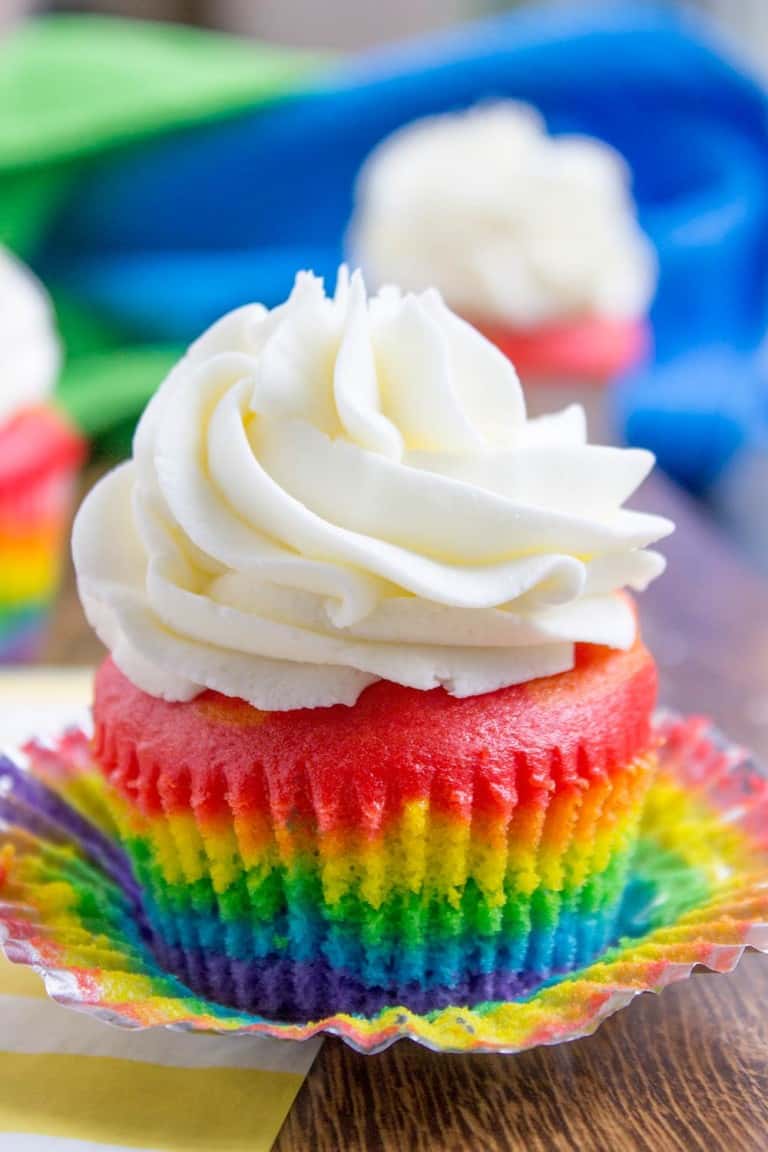
Rainbow Cupcakes with fluffy cloud-like vanilla frosting that is guaranteed to make anyone who sees them smile. The part of this recipe that I adore is how easy it is in spite of the lack of cake mix. The batter is a delicious white vanilla cake base with gel food coloring to brighten things up and the cloud-like frosting is made with clear vanilla and lots and lots of butter.
Recipe Tips & Tricks
- Don’t bother weighing out the batter to ensure it is evenly dispersed. Use a 1 cup measure and any little bit left over can be extra of your favorite color. This isn’t a cake, so if one layer is a bit more prominent in some, no big deal.
- If you would like to bake these without the cupcake wrappers, I highly recommend a silicone muffin tin.
- Use Ziplock Bags to pipe them into the muffin tins. This is much easier than spooning and spreading each layer.
- Clear Vanilla keeps your frosting a bright white! If you want blindingly white frosting swap out your butter for shortening. Butter tastes better though.
- Don’t overbake, you don’t want the tops turning brown.
- Use a large closed star decorating tip for your frosting.
Related Recipes
More Cupcake Recipes
Photos used in previous posts:


Texture is great, colours are nice. Taste is intense! So sweet it’s nauseating. I love sugary cakes etc but this was just too much.
If you make this cut the sugar wayyyy down.
So easy such a great result daughter loves them but think I loved the effect more
Tasted good
Is there soya in the cup cake?
Did u use yolk in this recipe or just white thanks
Just the whites. Enjoy!
I was looking for gluten free version of rainbow cupcakes for my daughters 10th birthday and this came up in my search because someone asked if they could use almond flour to make this recipe gf. I was so intrigued by this recipe and the comments I decided to give it a try replacing the four with Bob Mills 1 to 1 cup gf flour (FYI not safe for nut allergy).
As we started to split the batter into separate bowls to add food coloring the batter didn’t look quite right, I thought I probably should of mixed it a little longer, as some gf recipes call for a little added mixing time. The process of layering the batter in the cupcake liners was time consuming and I was wishing I did not start this project, but we persevered. I am so glad we did! The cupcakes were amazing and both of my daughters were ecstatic to break open the cupcakes and see the layers of color. I was also very happy with the results. Then we made the frosting following the directions exactly and did not needing to tinker with adjustments of more milk or sugar. My daughters friend tried one and said “how did you make this? It is the best frosting I have had.”
I do not usually add comments to blogs but I had to let others who need to bake gluten free that this recipe was a winner. In addition 2 days later the cupcakes were as moist as when they came out of the oven, which is another downfall of gf baking things don’t have the same shelf like, you need to bake and eat or bake and freeze or it gets dry and crumbly!
Thanks so much for the feedback!
i really loved this recipe,
my only complain is it sais it takes 50 minutes, however it took me 1.5 hours
Question the gel food coloring do you need to mix colors to get the purple and the yellow or do they sell the individual colors? Also when you say combine the vanilla and egg whites that doesn’t mean stiff peaks right?
Final question how far in advance can I make the cupcakes and frost prior to serving ? Would I freeze them or can they be in an air tight container stored in refrigerator for about 6 days ? Tia
I would not keep them for more than a day, the frosting will really dry out and even after a few days the cupcakes will too. The gel colors I buy I don’t have to mix, I buy these Gel Food Colors. No on the egg white stiff peaks too, just until they’re well incorporated.
I tried making this recipe and the cupcakes did look pretty, but my icing was VERY runny. I did not want to add more sugar because it was already so sweet. The flavor of the cupcake was ok otherwise, and the cupcake looked pretty. I did add food coloring to the icing to try and make them even more prideful, but even before that the icing was runny. Next time I might look at not adding any milk. I brought them in to work and people got really excited so I guess things worked out ok in the end. Despite it not being a complicated recipe it was still very tiring in how long it took to get all the colors right and then into the cupcake pans.
Hello, dear.
I’m just a simple queer young adult planning ahead for next Pride. They surely look rainbow, but I have one concern. Won’t the batter mix and the colours bleed into each other? How do you do that? Otherwise, it’s probably safe to say I’ll pin this. 🙂
Thanks in advance,
Yuna McHill
I used a gentle touch when piping in the batter and didn’t have any issue with them bleeding. Definitely give it a try!!
This is the best homemade cupcake recipe I’ve made. Always a crowd pleaser. Any tips on how to convert this to a cake instead of cupcakes? Same baking temp, just longer in the oven? TIA.
So glad you enjoy it so much. https://dinnerthendessert.com/rainbow-poke-cake-with-whipped-cream/
Absolutely delicious my daughter made this and all of the kids enjoyed it 5+ star rating for me!
Thanks, Abby!
Hi! I want to make these for my son’s 4th birthday but was wondering if I could use liquid egg whites instead of separating them myself (I’m horrible at that!!) and if so, how much would I use? Thank you!
Sure you can. Use 2 tablespoons of liquid egg whites for every fresh egg white. I hope he loves them!
My first time making a homemade cake batter. It taste good but looks grainy and I believe runnier than it should be.
Sorry to hear that! I’m glad it tasted good but not sure why it would have been grainy. If you want to trouble shoot, you can always email contact@ dinnerthendessert. com
OMG!! I want to make this. The colors look so bright..What food coloring brand did you use??
I use Gel food coloring, the brand doesn’t matter as much as making sure you use gel to get the color as bright.
how much butter should I put in the cake and in the frosting. it wasn’t very clear
Both the cake and the frosting require 1 cup of softened butter each. They’re both listed in the ingredient list. Enjoy!
How much gel food coloring do you use?
It depends on how vibrant you want the color. Start with a few drops and add until it reaches the shade you want. 🙂
Tried these cupcakes a little while ago but they are without a doubt the best cupcakes I’ve ever eaten. So light and fluffy and just great all around. Definitely going to use this recipe again.
These cupcakes are very pretty but incredibly bland and the frosting is overly sweet would not make again. They were also a little dry and tough but that could be from over mixing/baking on my part. Very time consuming to make.
The cupcakes turned out amazing!!! But the instructions were a little hard to understand. I might know because I’m 21and I needed a rainbow recipe.
Do you have the measurements in grams rather than cups?
Thanks!!
If you click on metrics below the ingredient list, it’ll change it to grams. 🙂 It’s highlighted in green. Enjoy!
These look amazing. Just double checking that you can use premade cake mix and still follow the directions with layering and frosting. I tried to look through the comments and didn’t see how it turned out with cake mix. Or is using cake mix a terrible idea? Trying to save a little time in the preparation for my son’s birthday party. Thanks!
I’ve not tried it but I don’t see why it wouldn’t work in a pinch. Let me know how they turn out if you decide to try. Thanks!
I LOVE these cupcakes! They are soooooo amazing and delicious. I am a 13 year old girl scout and I have made these cupcakes for my gs events twice now. One thing I did notice was that I can only get 21 regular sized cupcakes and I get 3 half cupcakes. That is most likely just me though but I just wanted to put it out there Incase anyone else has the same issue. Thank you for sharing this recipe!!!!???
Just made them and had the same issue.
What is the best way to store these? I’m making them the day before my daughters birthday…should I refrigerate them or can I leave them at room temp the night before?
I would make the cupcakes ahead of time and leave them out but covered (not in the fridge). You can always make the frosting ahead of time but frost the cupcakes the day of by leaving it in the piping bag in the fridge. Then in the morning take out the icing 30 minutes before you’re ready to go, snip off the end and ice. I even sometimes just roll the icing bag (assuming you haven’t snipped the end and you’ve rubber banded the end of it) on the counter to soften it faster. Don’t microwave or heat the icing to speed up the warming though. Enjoy!
I love these cupcakes so much!!!!! They came out beautiful and delicious and I used them to come out to my parents as lesbian today because of pride month!!!!! It may be just because of the positive experience I know affiliate with them, but I will always love these cupcakes now, so I want to say thank you
I love this!! Thanks so much for coming back to let me know, Francisca.
These are delicious and gorgeous! I used buttercream instead of the frosting in the recipe, it was easier and still tasted good, but was yellowish. I made them because it’s pride month and I actually used them to come out to my parents as a lesbian! It went super well and I’ll always love this recipe, thank you
I made these cupcakes 2x already for my daughter’s class and her classmates and friends would request for them whenever my daughter’s birthday comes around. It’s my go to recipe for holidays since I can always change the color combination depending on the occasion.
Thank you for sharing!
This makes me so happy! I’m glad you love it so much.
These are not worth the time it takes to make them. They look really cool, but taste like nothing but sugar. I threw most of them away.
These look super good!! Definitely will try them someday!!
These are a lot of work but totally worth it. The colors are amazing and the cake tastes great!! If you follow the recipe exactly everything comes out great. Read a poor review and got nervous to make these but thought what the heck I’ll try it. Worth a shot. Not sure what went wrong with that persons cake. These cooked just fine. Not too dense and not too moist as the reviewer had indicated. Wish you could delete that review 🙂 Thanks for the recipe!
Thank you so much for trying it and coming back to let me know how much you enjoyed them. I really appreciate the 5 stars.
My friends and i love this cake, its send such good vibes.Were craving these in class right now! How did you get them so bright? Mine turned out quite dull colour
I used gel food coloring so that might have made the color more vibrant. So glad you enjoyed them!
Really was looking forward to making these, the pictures are beautiful! I followed the recipe closely, only difference is I mixed by hand. Frosting was delicious, (obviously not whipped and fluffy) I used cream instead of milk. NBD. The cake though was dense and ‘wet’ so I put them to bake for 5 more mins and – I think it’s the amount of egg whites? – it is just yuck and I’m not too picky.
For the amount of work that went into these (I wish I halved the recipe) I’m really dissappointed
Last thing I’m thinking is that I used liquid color instead of gel, about 15-18 drops per color, I’m not experienced enough with food color to know? Maybe that changed the density of the cake? It was heavy. ..
I’ll been looking for a new recipe for rainbow cakes. My daughter’s LOVE rainbow!
I’m so sorry that happened. If the cake was dense, it seems like maybe it was overmixed. So sorry.
Would I be able to use almond flour for a gluten free option? If so should I arrange other aspects to keep the consistency and quality of the cupcakes? Thanks for sharing!
I haven’t tested it so I’m not really comfortable give a recommendation. I do know that if you use almond flour as a substitute you may need to add more egg to adjust. If you decide to try, I’d love to know how it turns out. Good luck!
These are amazing. Made these for my little rainbow baby’s first birthday to rave reviews. Not only were they beautifully colorful they really tasted lovely too! Thank you so much.
How amazing! Thanks for taking the time to come back and let me know!
Will these freeze well? Made and frosted for my daughters bday and now she’s sick?.
Oh no, poor girl! I would freeze them uncovered at first to avoid them from squished and help keep the frosting shape, take them out, individually wrap them and place them back into the freezer in a storage safe container. Hope she gets better soon!
These look amazing. I’m so excited to try them. How long do they keep and how do you store them. I was hoping to make them 2 days ahead for a party.
I would make the cupcakes ahead of time and leave them out but covered (not in the fridge). You can always make the frosting ahead of time but frost the cupcakes the day of by leaving it in the piping bag in the fridge. Then in the morning take out the icing 30 minutes before you’re ready to go, snip off the end and ice. I even sometimes just roll the icing bag (assuming you haven’t snipped the end and you’ve rubber banded the end of it) on the counter to soften it faster. Don’t microwave or heat the icing to speed up the warming though. Enjoy!
You have butter listed twice, making it 4 sticks of butter. Is that correct or should it just be 2 sticks of butter?
Sorry about the confusion.
Everything after the food coloring gel on the ingredients list is for the frosting. So you’ll need 2 cups of butter total for this recipe.
Hope this clears things up.
Plain and simple, these are fun cupcakes and delicious! The recipe is perfect as written and requires no improvement.
Two questions: Instead of the colors being a straight line, mine sunk down in the center. Any tip to prevent that from happening? The cupcakes separated from the wrapper. Did I overspray with pam?
Thank you for a great recipe!
I’m so glad you loved them!! The only thing I can think of suggesting when it comes to the layers is to be very gentle when either piping or spooning each layer so they have a better chance of staying in layers. As far as them separating, it’s either from underbaking or allowing them to cool while still inside the tin. Make sure to remove them from the tin to cool. Hope this helps for next time!
The recipe is a good tasting cake and frosting flavor. However, it made more than 24. By tge time I figured it out, my 24 cupcakes were overflowing the pan, and I had to use and lot of frosting to cover the rough edges, so not as pretty an outcome as I had hoped for.
You can use a moist cake mix? Still divide the cake batter… and add the colors?
I don’t see why that wouldn’t work. Good luck!
Making these today for our pride party we’re hosting tomorrow! They look gorgeous! I’m sure our kids will love these too! Thanks for the recipe!
You’re welcome!
Hi Sabrina
I will definitely try for my daughter’s cake sale at school. This is so awesome and know this will be sold out first!
Amazing taste and so easy to make. But my top colour (red) oozed down through the cupcake and ended at the bottom?
Oh my goodness. I never write comments but I’ve been baking my whole life and I swear these are some of the best cupcakes I’ve ever had!! They were super moist and the frosting was so light. Instead of putting the batter in bowls I lined cups with the ziplock bags and just dumped the batter in. Then I kneaded the closed bag to get the colors to mix. The colors came out so vibrant and I didn’t have any clear vanilla extract so I used titanium dioxide instead. I’m definitely making these again!
Love it!! Thank you so much for letting me know.
How did you keep the colors from mixing? I layered them using a spoon as suggested, and every single one of the colors became mixed up. Instead of looking like a layered rainbow, it looked more like a colorful marble. Any suggestions to prevent this from happening? Thank you!
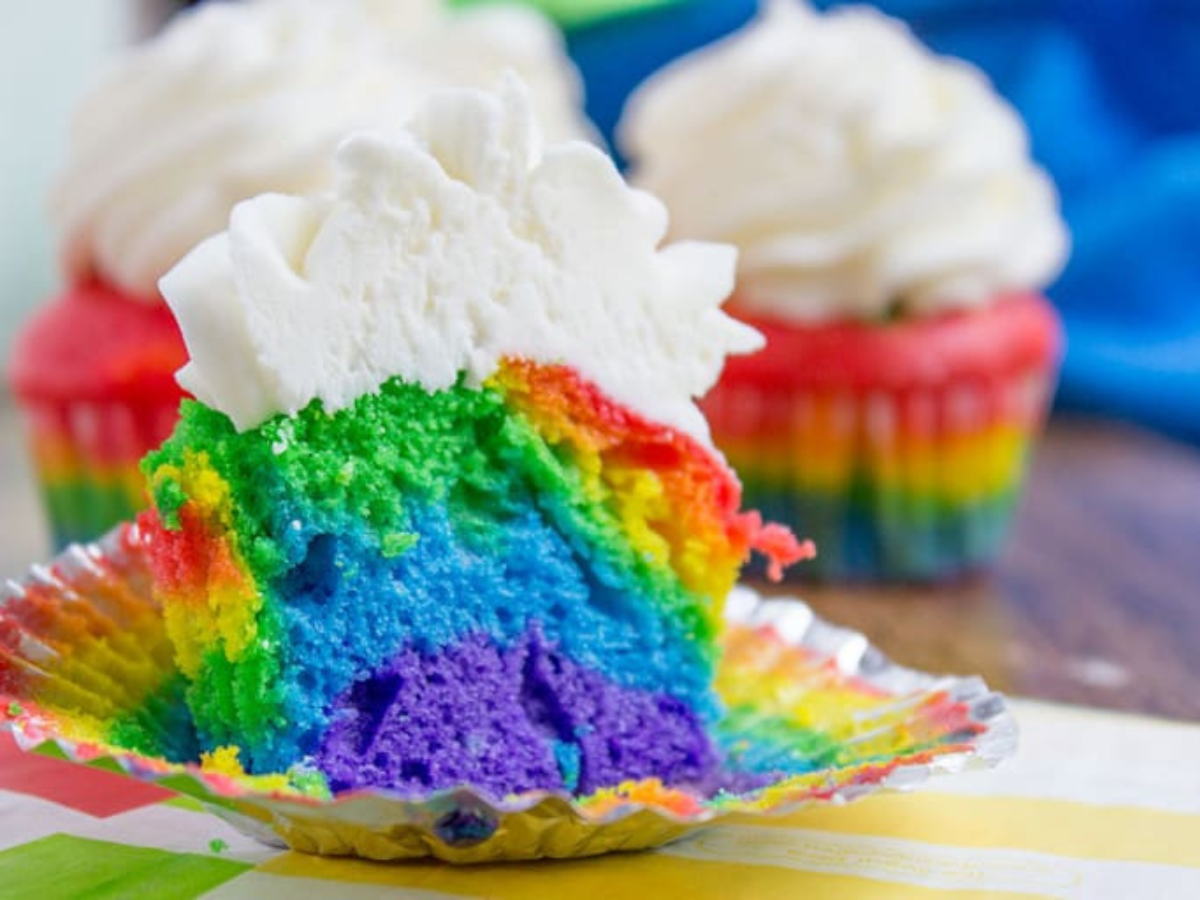
When you cut it from the inside, mine also look marbeled. 🙂 You just have to gently spoon in the colors for the layered look on the outside. I’ve tried every way possible for it be layered all the way through and unfortunately it never worked….though it was a yummy experiment, haha!
These cupcakes were amazing! I made them for my daughter’s birthday party and they were a big hit. My daughter especially loved the rainbow colors. Definitely the best cupcakes I have ever made. Thank you for the recipe!
How awesome! So glad she loved them!
We really enjoyed this recipe, it may very well be a staple. We made this diabetic friendly, using a Splenda Naturals instead of sugar. The batter came out fantastic and it made great cupcakes. I didn’t use a lot of Coloring Gel, so my colors were more pastel. The only obstacle was the frosting. I didn’t have any confectioners, so I made my own. I ended up using all of remaining Splenda Naturals on the batter, so I used Ideal with a cornstarch blend. It just didn’t combine well with the butter and became very granular. The taste is fine, it just feels different in your mouth. That just gives me an opportunity to try something different for the next time. I still had a very happy 4yr old, as she was able to help and her wish for rainbow cupcakes came true.
Thanks for the feedback substitutions to make it diabetic friendly. Glad she enjoyed them!
I made this as instructed but used chocolate ganache for the frosting instead and it was a hit. The colors were so vibrant, made everyone feel happy – it’s moist and not to sweet! Thank you for sharing this recipe!
You can never go wrong with chocolate ganache! Great idea!!
Hi, can I use cake flour for this recipe? If so, would I still use the same portion?
I’ve never tested it before but the recommendation for substituting cake flour for AP flour is to add an additional 2 tablespoons for every cup. I’d love to know how it turns out if you decide to try.
Hi! These are absolutely gorgeous! I want to try to make these the night before a potluck and was just wondering how should they be stored? Do they need to be refrigerated or can we leave them out overnight? Thank you!
I would leave the cupcakes out but covered. Then I’d ice them the day you meant to eat them because there is milk in the frosting.You can make the icing the night before and leave it in the piping bag. Then in the morning take out the icing 30 minutes before you’re ready to go, snip off the end and ice. I even sometimes just roll the icing bag (assuming you haven’t snipped the end and you’ve rubber banded the end of it) on the counter to soften it faster. Don’t microwave or heat the icing to speed up the warming though.
Just wondering what would be the baking time for miniature cupcakes?
I’d say 13-15 minutes is safe. Check them at 13 🙂
Thank you! ?
I’m so excited to make these for my daughters 5th birthday , can I make the frosting the night before or should I make it the day of her birthday party?
Personally, I would make it the day of but if you have to make it prior swap out the milk in the frosting with water so the milk doesn’t go rancid overnight. ? Hope she loves them!
Is it 350 degrees FAHRENHEIT or CELSIUS?
Fahrenheit 🙂
Not tried making these cupcakes yet but they look awesome. Going to make them for my daughters rainbow and unicorn themed birthday. I’m from Scotland and we have plain flour or self raising flour. The recipe just says flour. What one would i be best using? Thanks.
I used all purpose flour (AP Flour) for this recipe so I would assume the plain flour you have in Scotland would be the same. Sounds like our daughters are very much alike!!