Italian Rainbow Cookies are delightful, layered cookies with sweet jam between colorful layers of almond cake topped with chocolate. Try now!
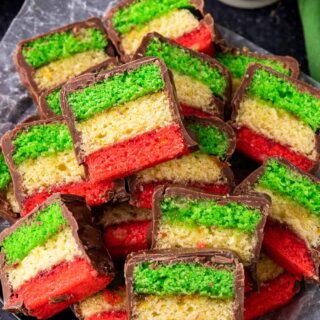
Italian Rainbow Cookies, also known as Venetian or Tricolor Cookies, are a beloved Italian dessert. These visually stunning cookies are often served on special occasions. These tri-color cookies are the perfect Dessert to add to your cookie platter for a pop of color. If you like this recipe, be sure to bake my Italian Pignoli Cookies and Italian Wedding Cookies next.


Sabrina’s Italian Rainbow Cookie Recipe
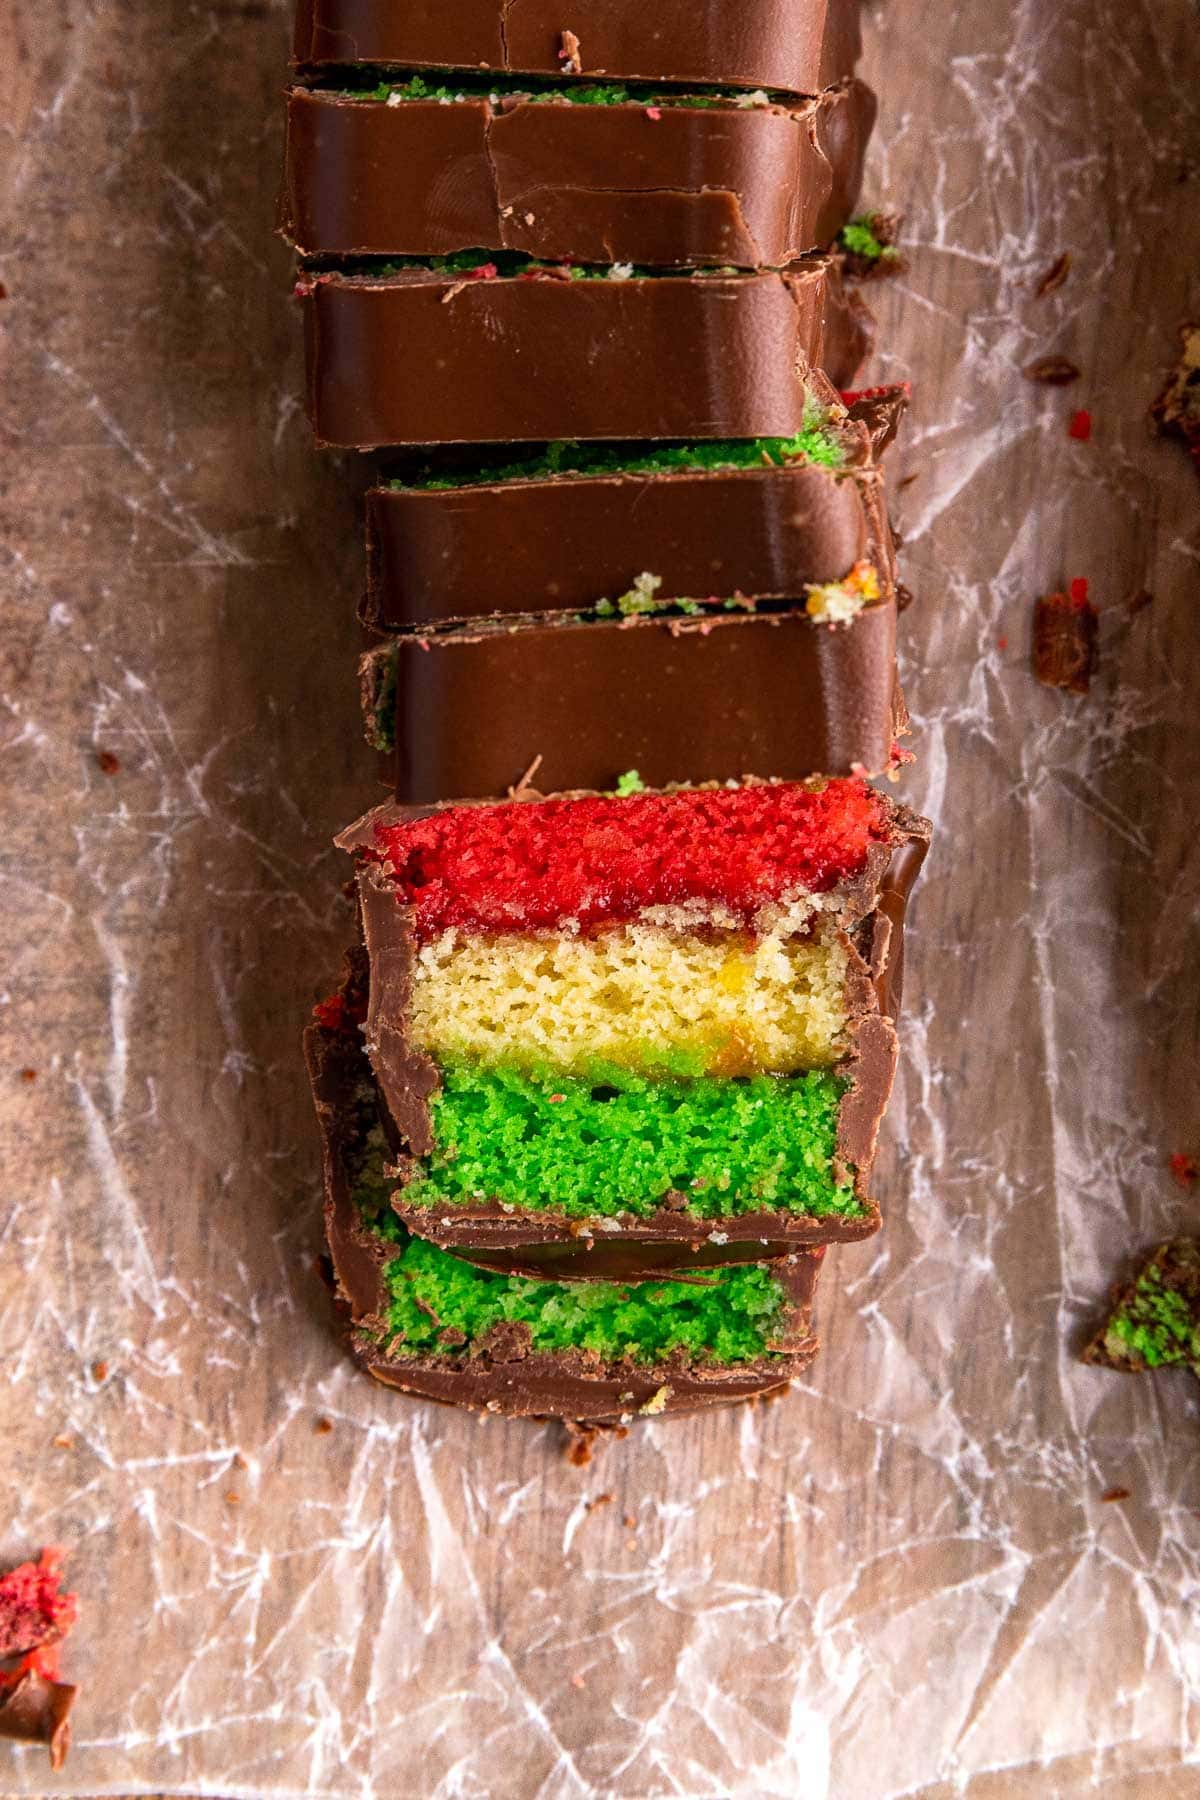
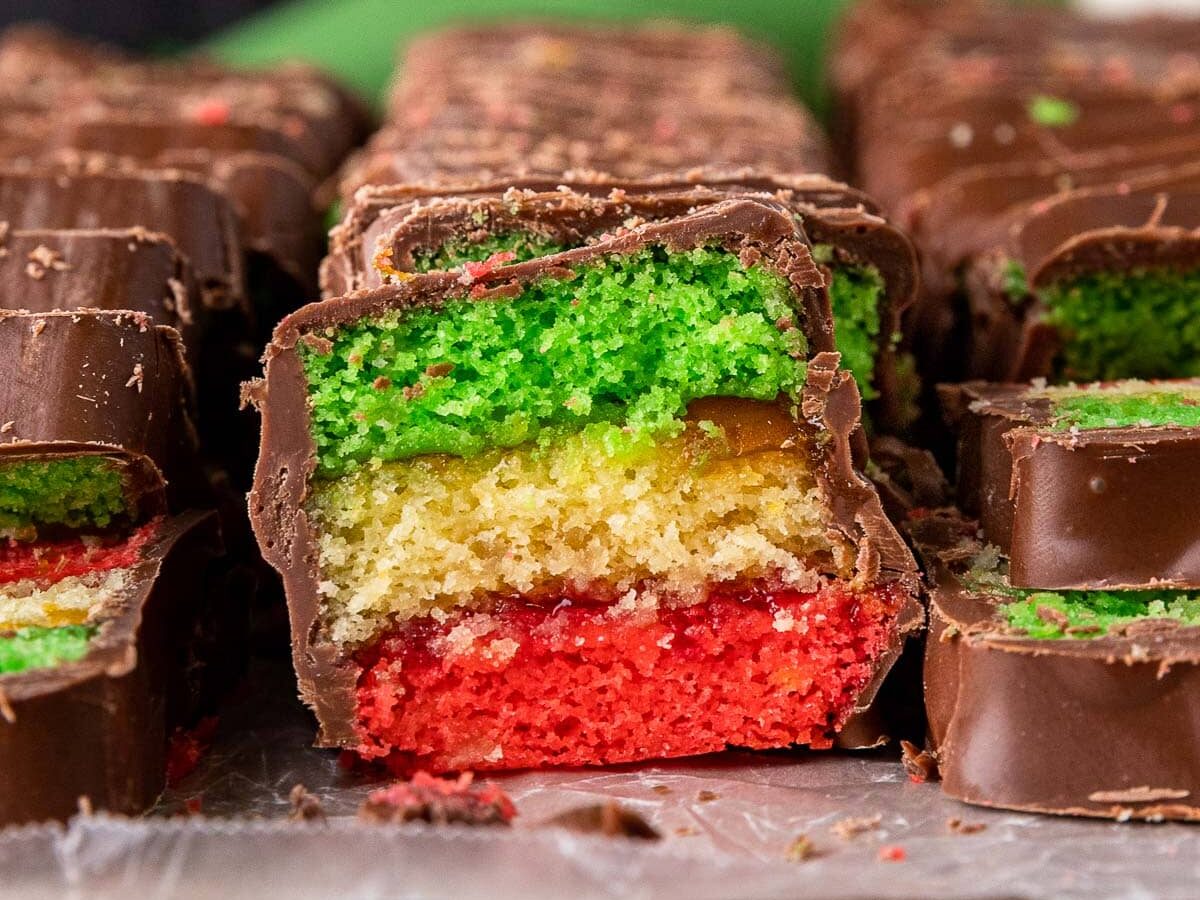
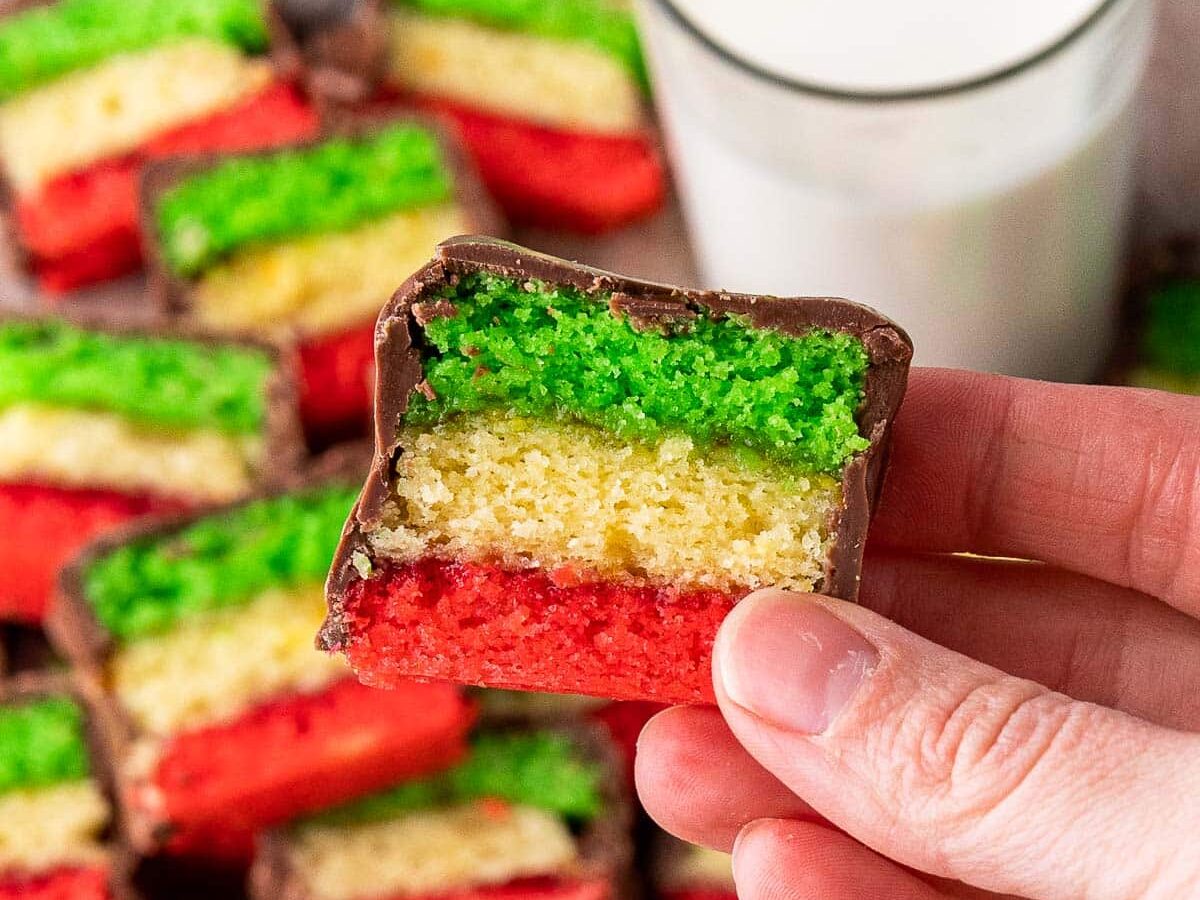
You can also call these cookies Italian Flag Cookies. They get their name from the distinct colored layers of red, white, and green on every bite-size cookie. This recipe is somewhere between a cake and a cookie. Once you’ve baked all the colors, you assemble each one like you would make a layered rainbow cake. But then you add a layer of chocolate to harden the outside and slice them into small pieces. The color of these cookies also make them perfect for the holidays.
Recipe Card
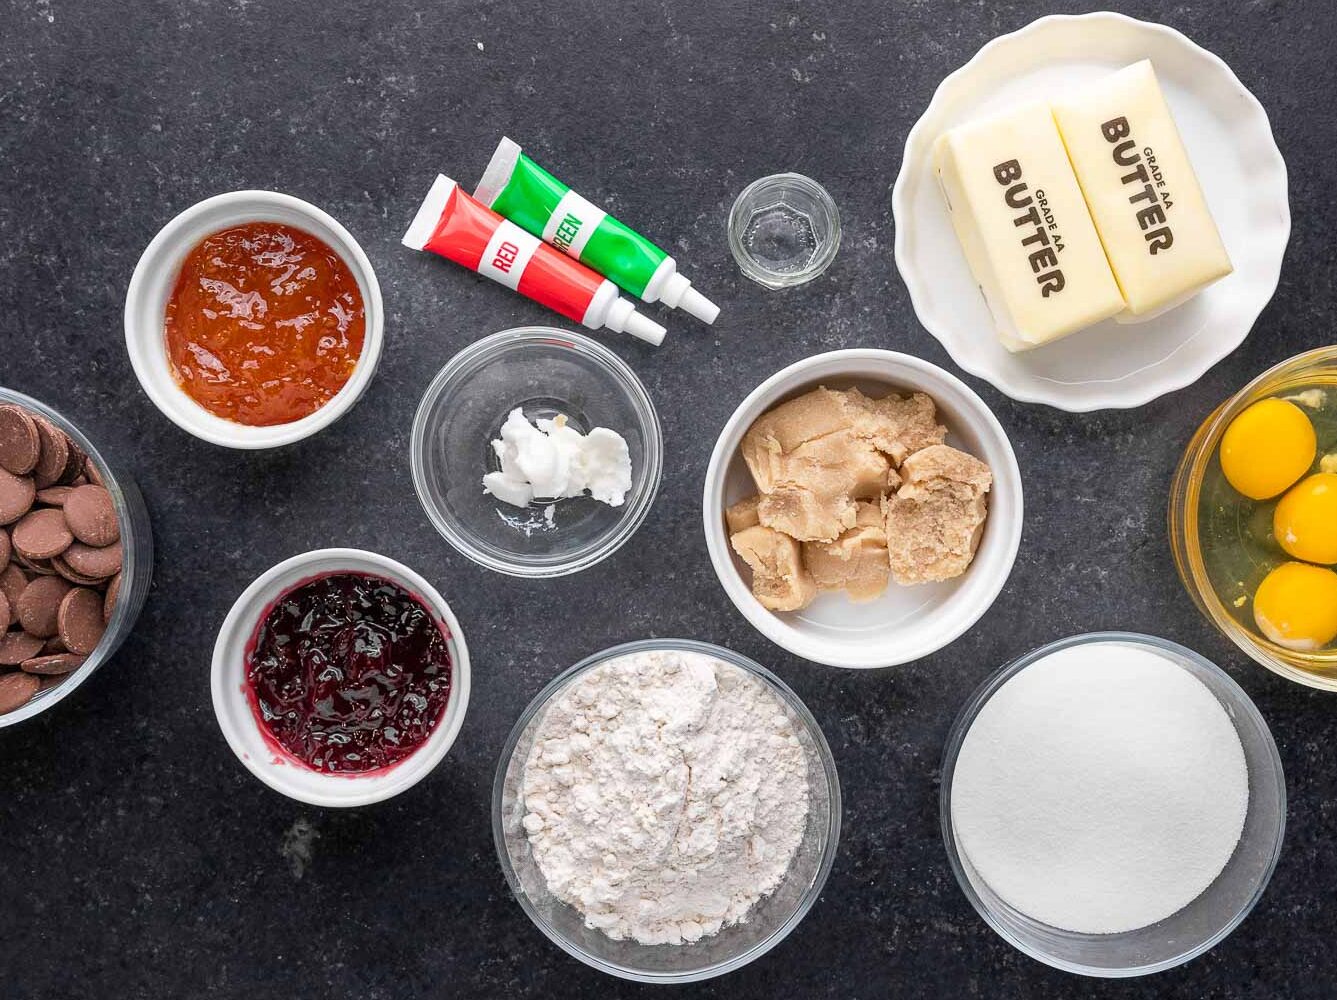
Ingredients
Rainbow Cookie Dough:
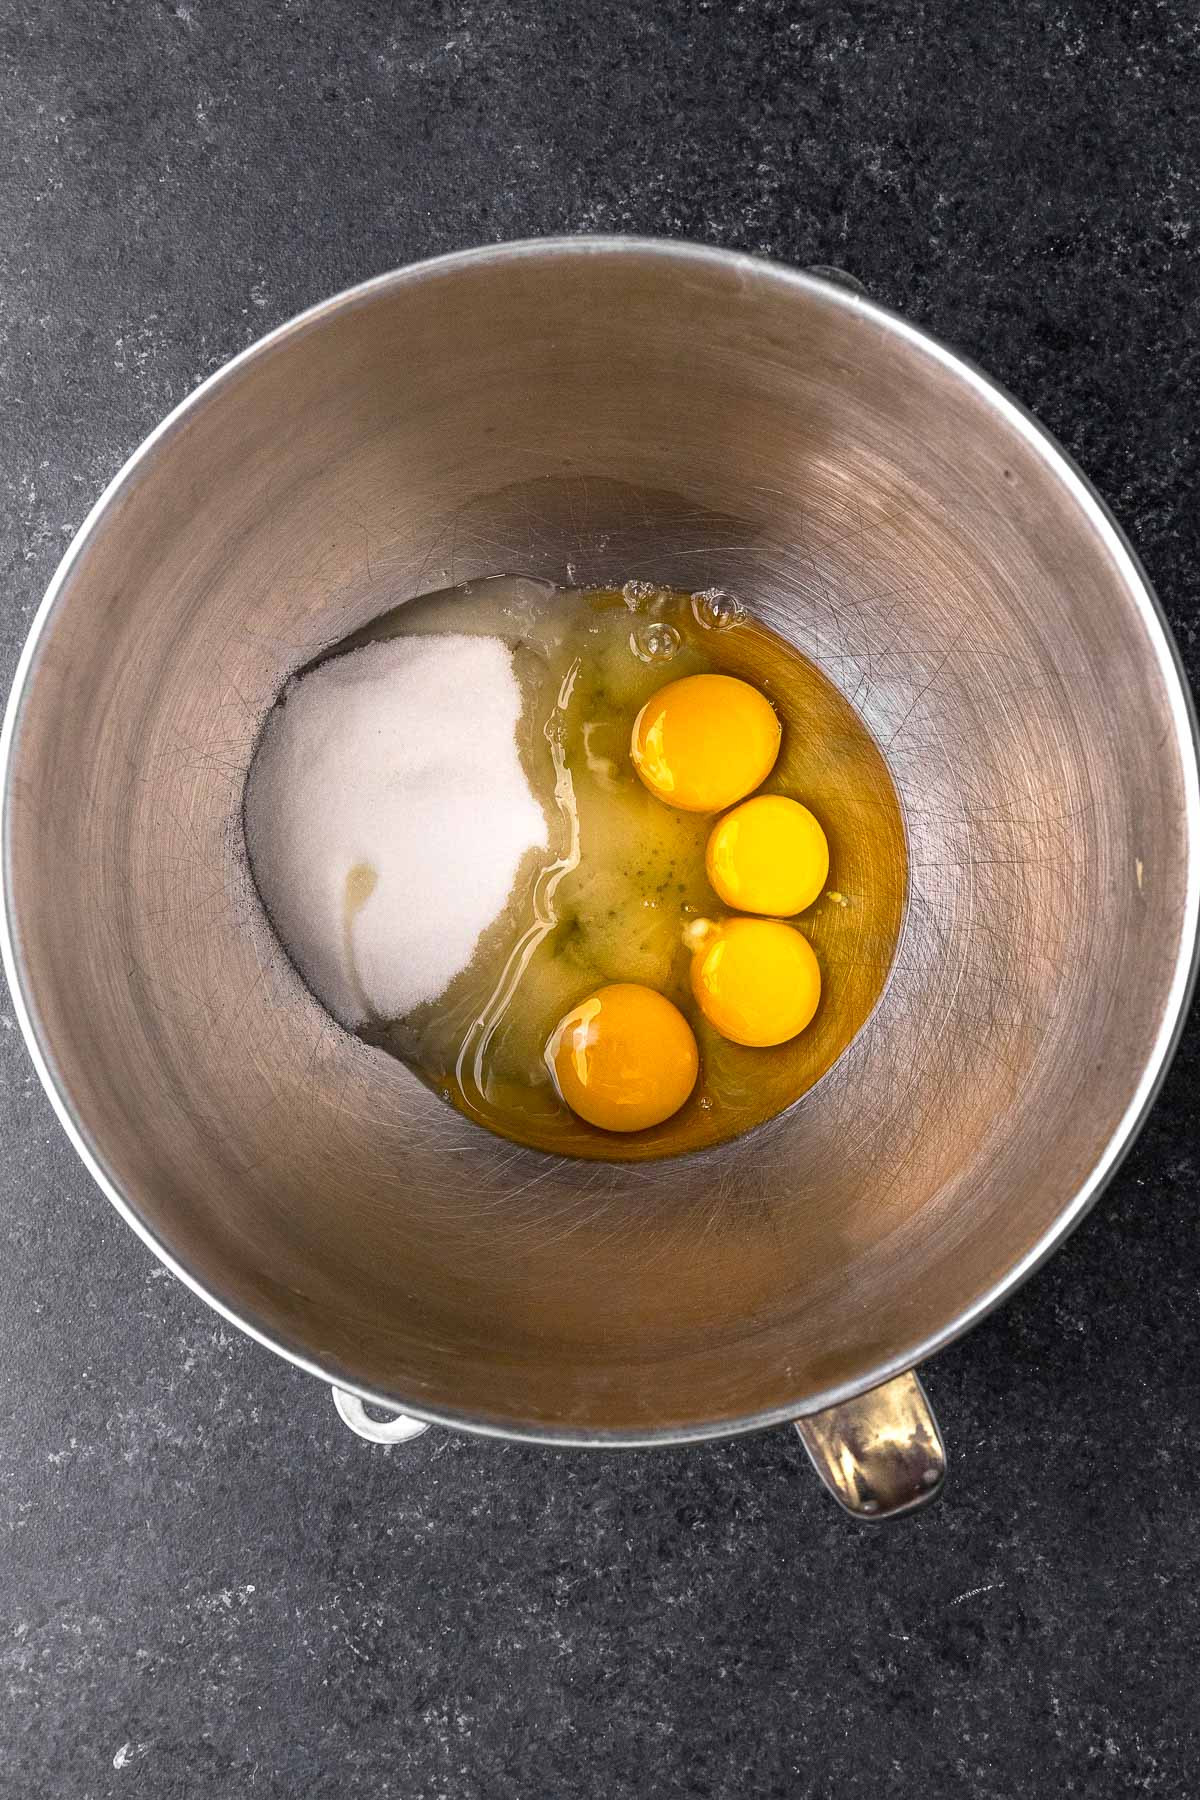
- 4 large eggs
- 1 cup sugar
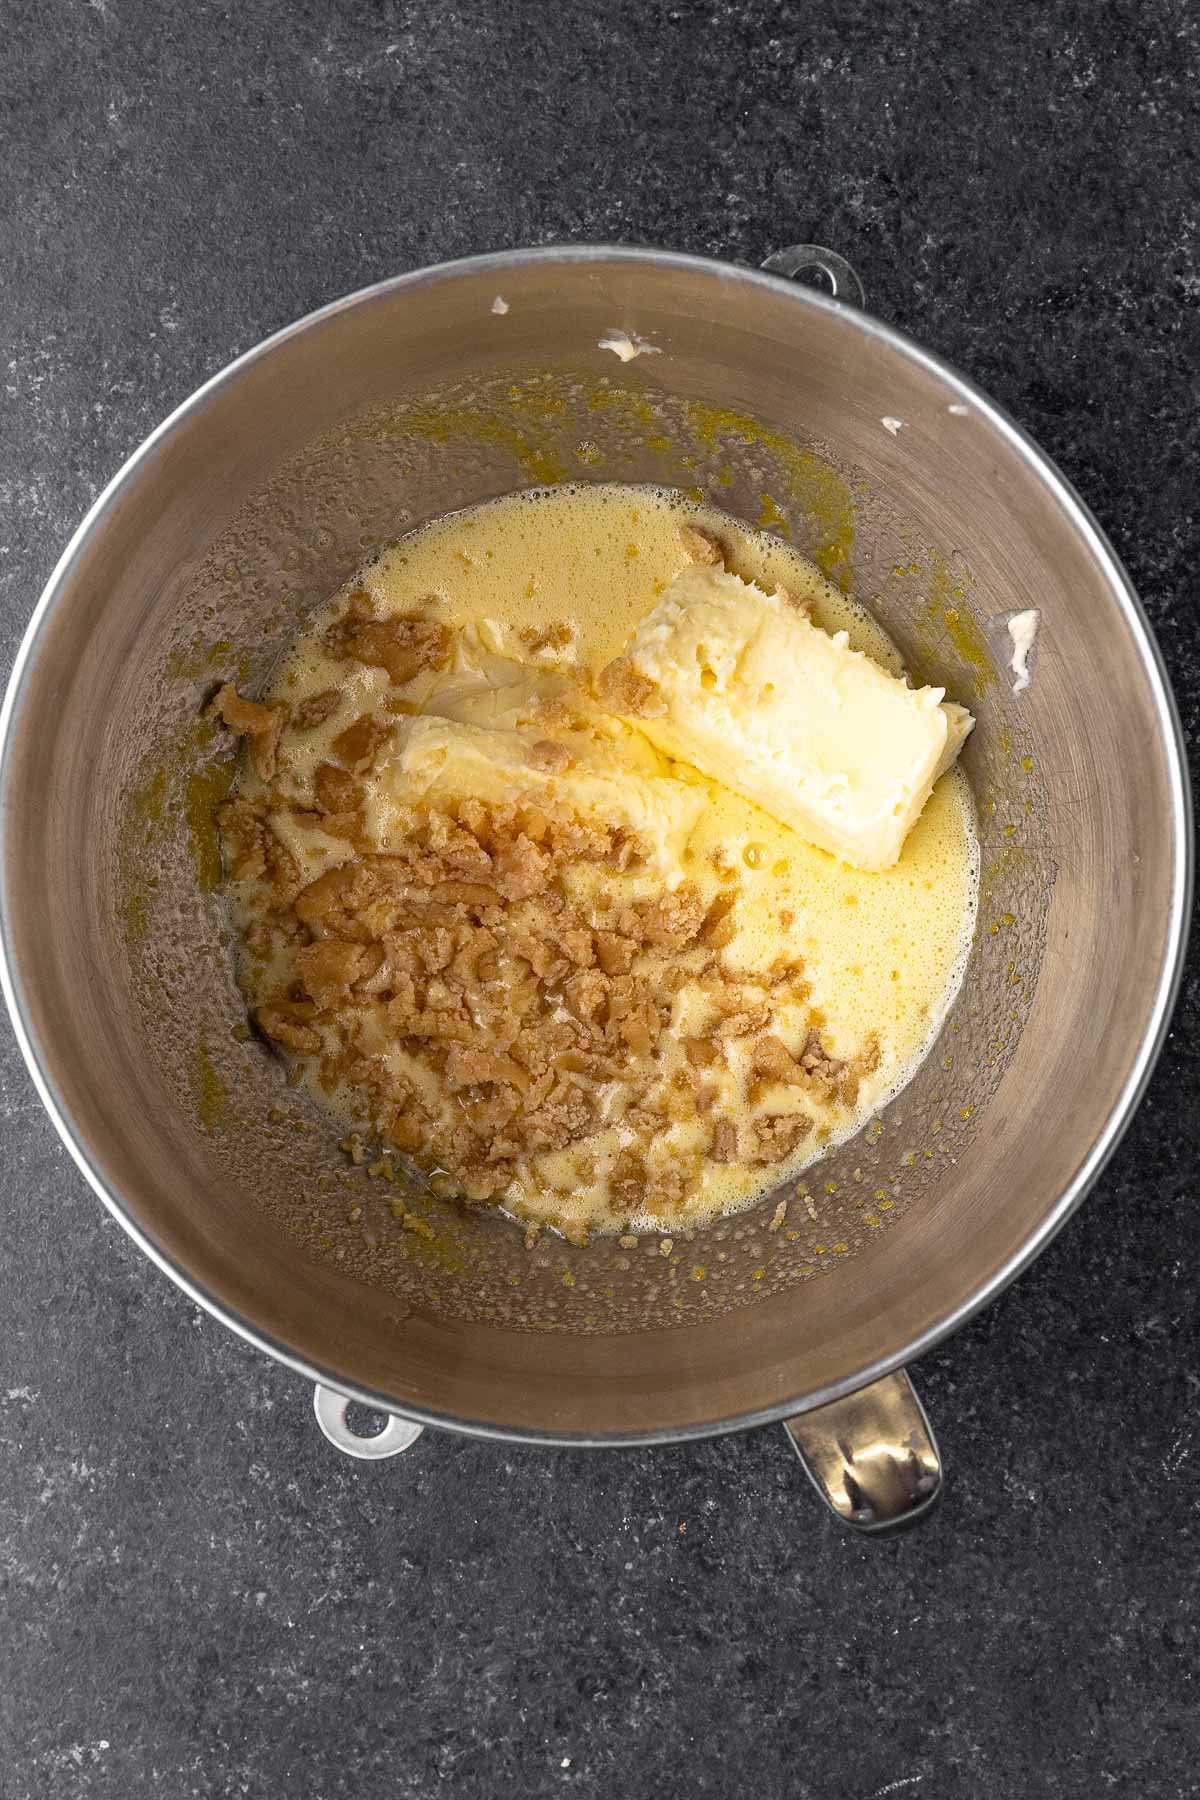
- 4 ounces almond paste
- 1 cup unsalted butter , softened
- 1/2 teaspoon almond extract
- 1 cup flour
- 1/2 teaspoon salt
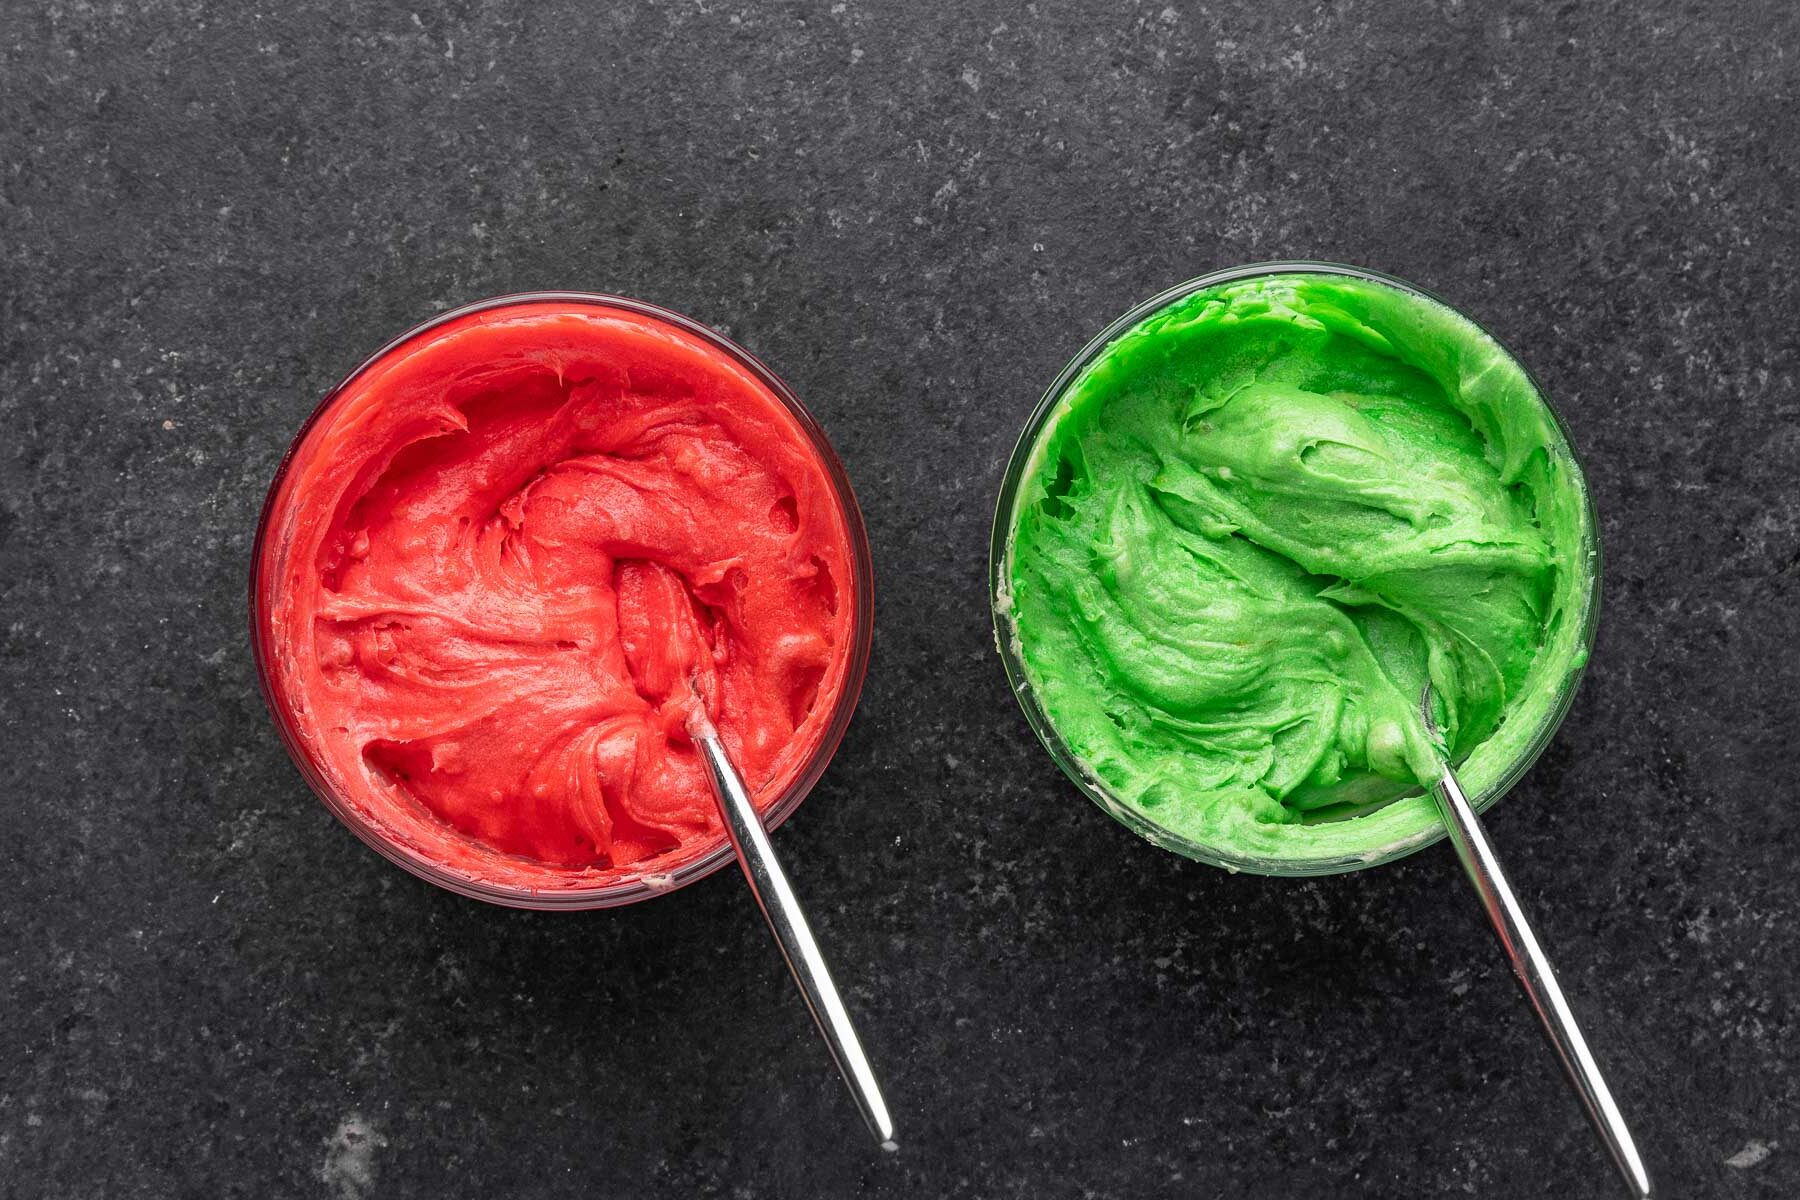
- 1/2 teaspoon red food coloring , more if needed for vibrant color
- 1/2 teaspoon green food coloring , more if needed for vibrant color
To Assemble:
- 1/4 cup seedless raspberry jam
- 1/4 cup apricot preserves
- 2 cups semi-sweet chocolate melting disks
- 2 teaspoons shortening
Instructions
- Preheat oven to 375 degrees and line a 10×8-inch pan with parchment paper (cut three pieces of parchment paper, you'll be baking three times unless you have three similar-sized pans).
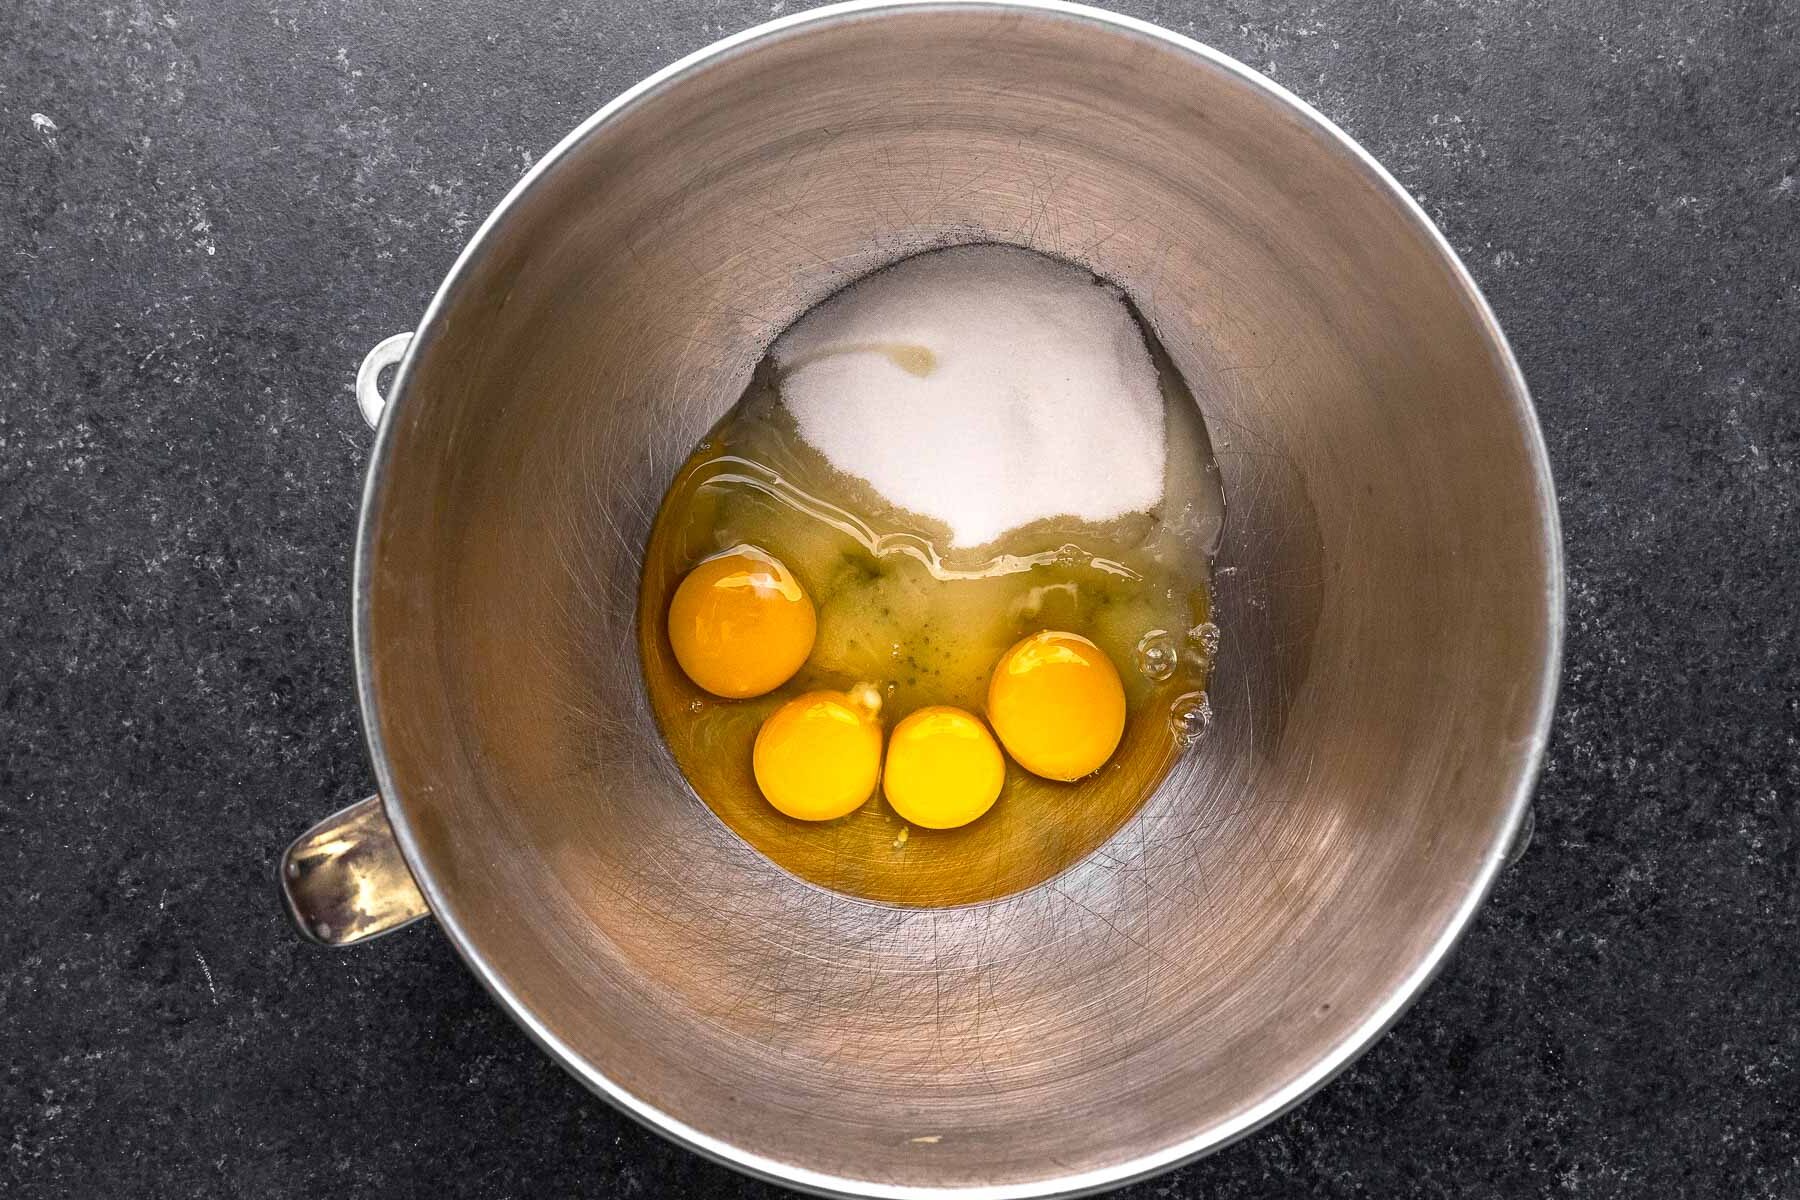
- To your stand mixer add the eggs and sugar on medium speed until combined.
- Turn up to high speed and beat for 3-4 minutes until eggs are lightened in color and the mixture makes a thick ribbon.
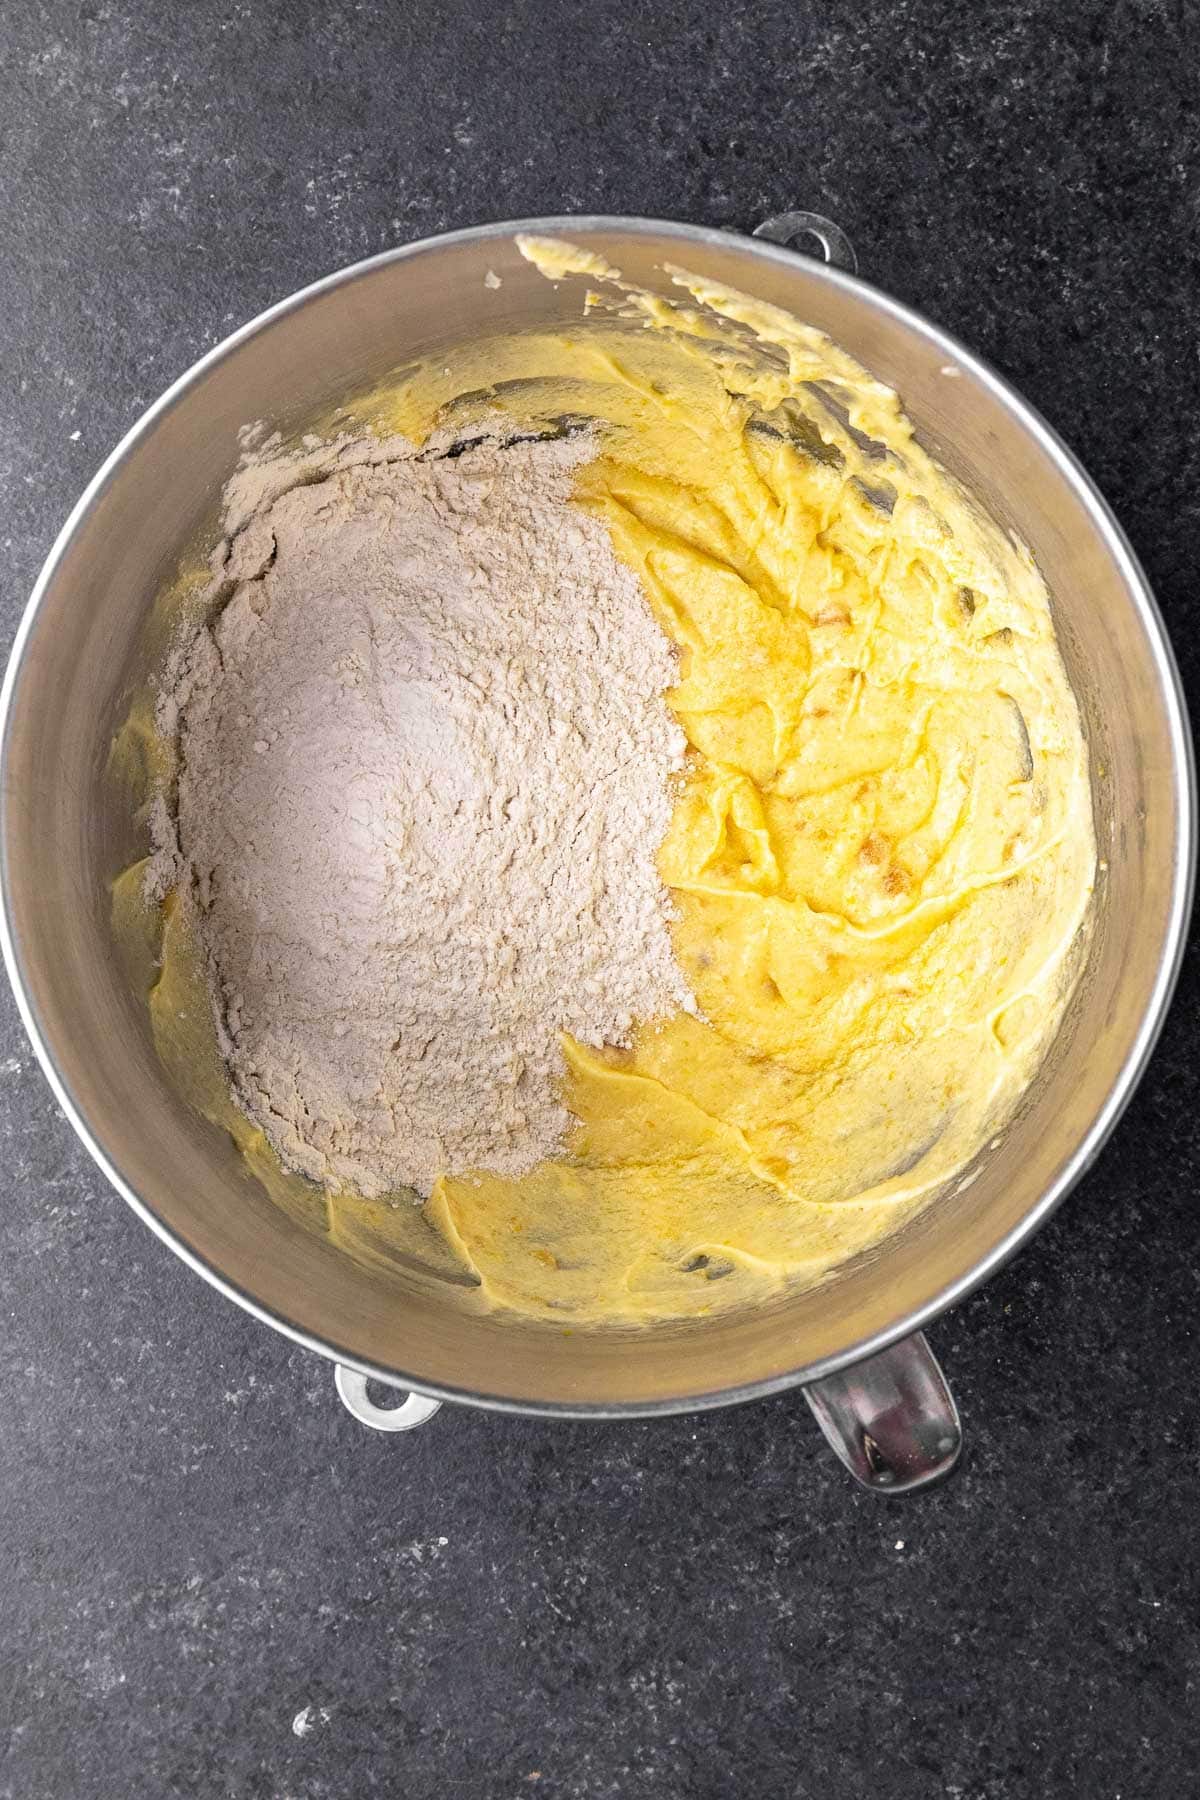
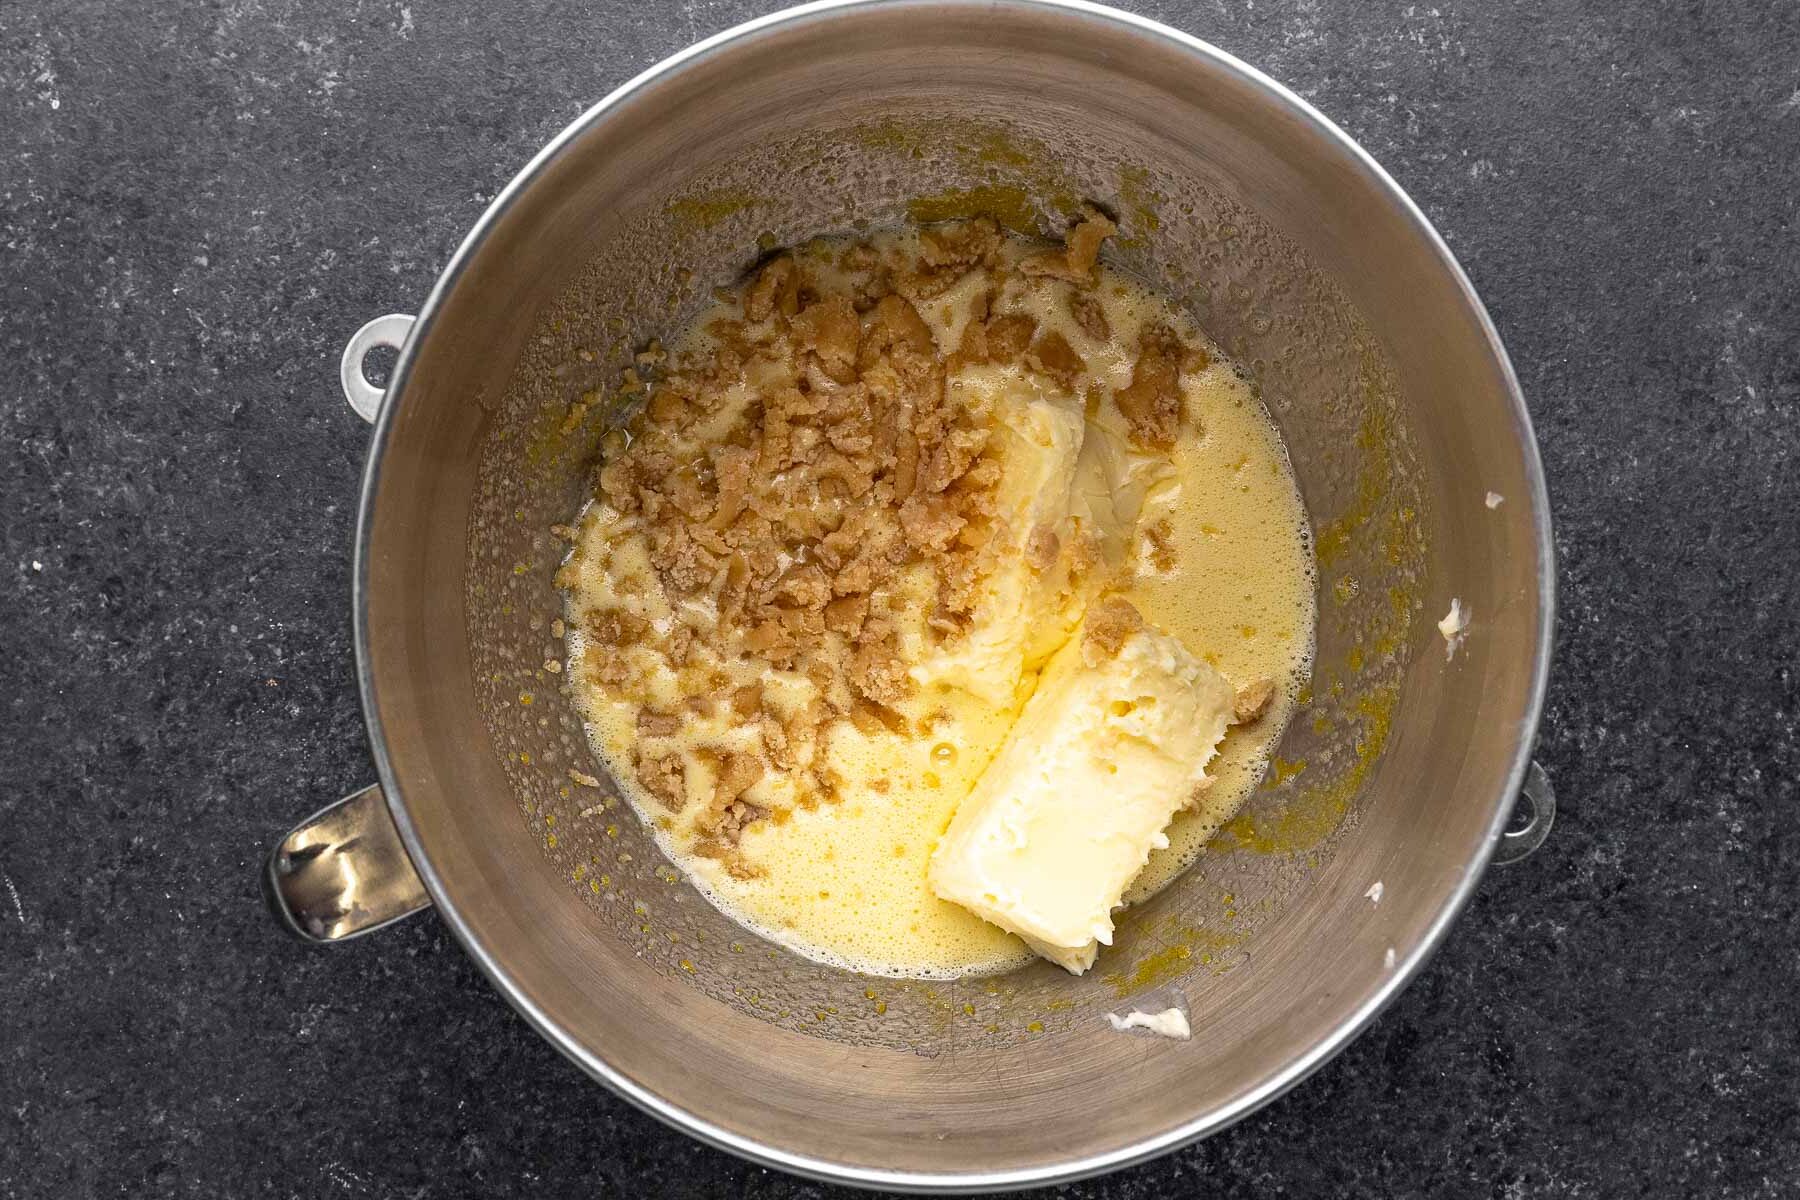
- Mash the almond paste in your hand to break it apart then add to the stand mixer with the softened butter and almond extract.
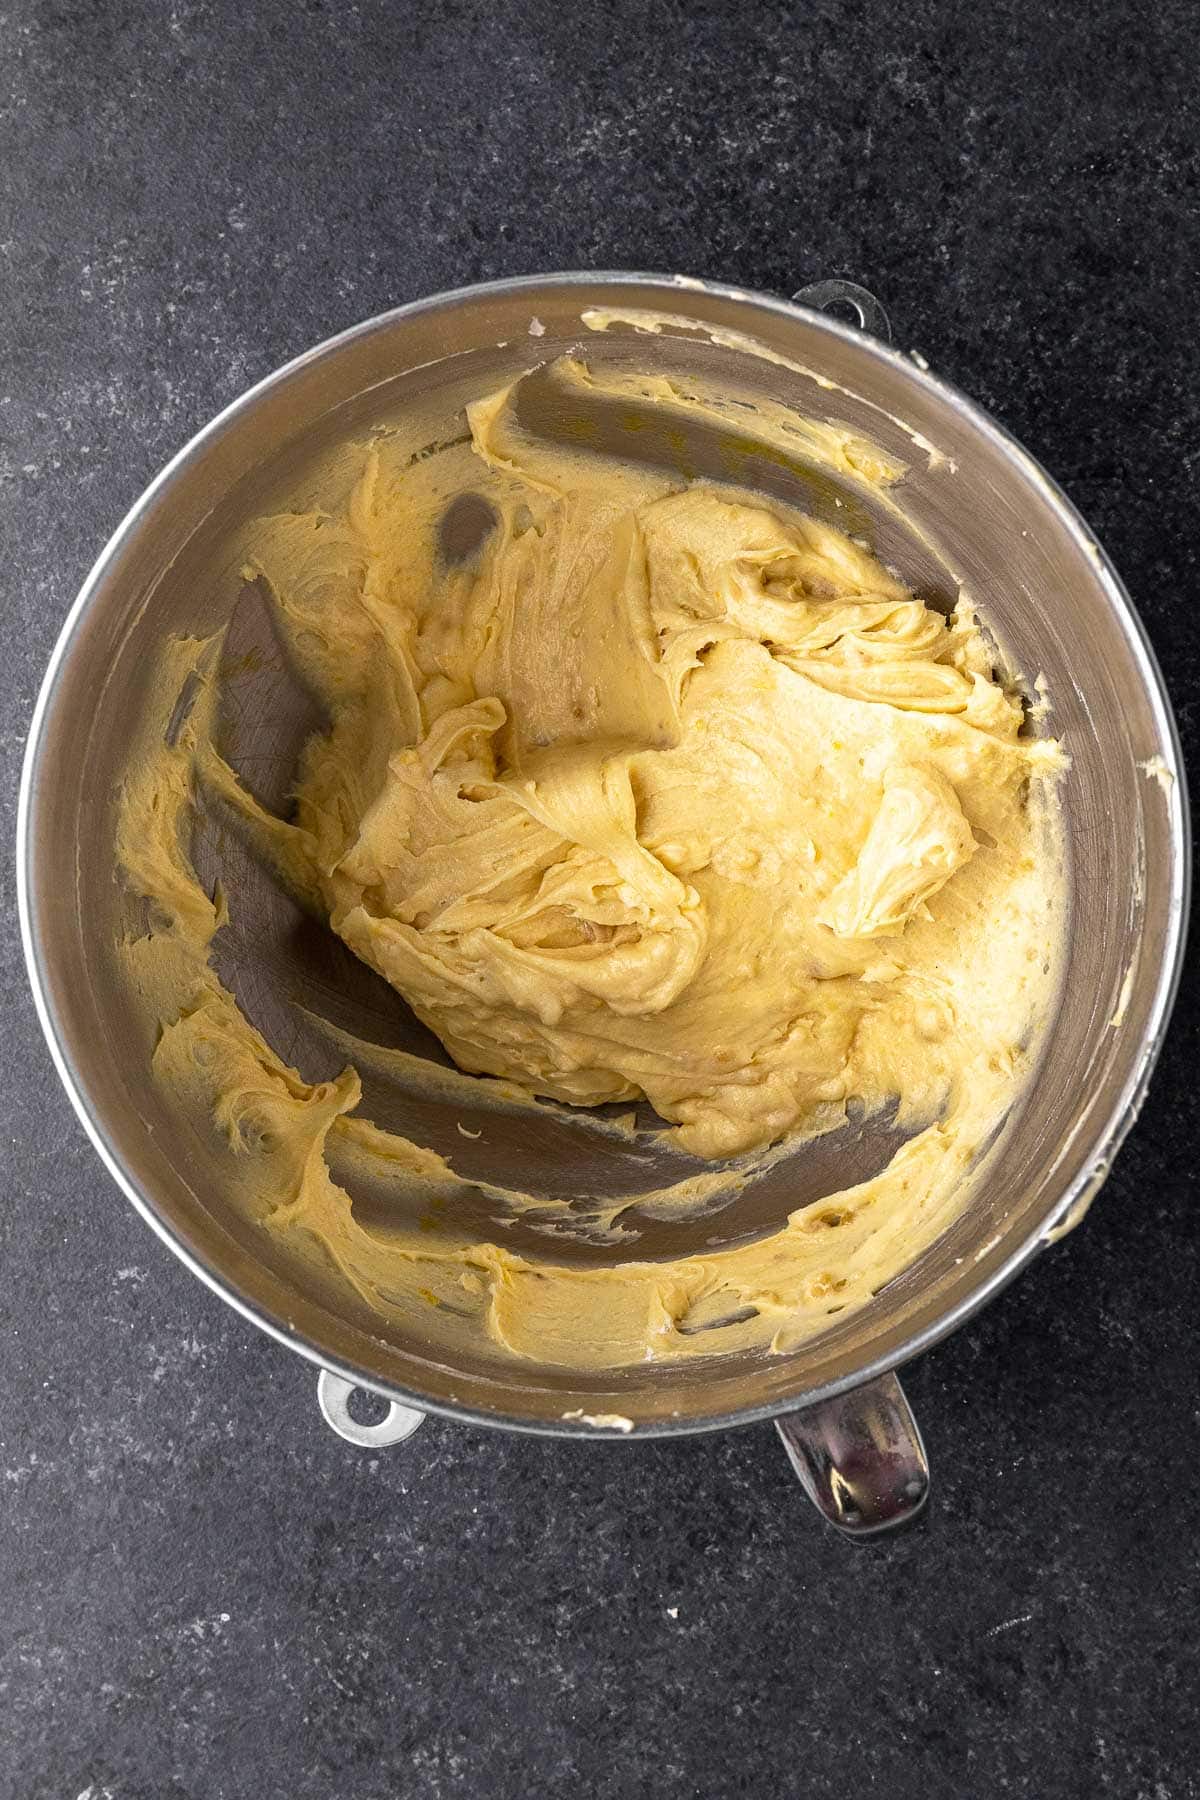
- On medium speed, beat until well mixed in.
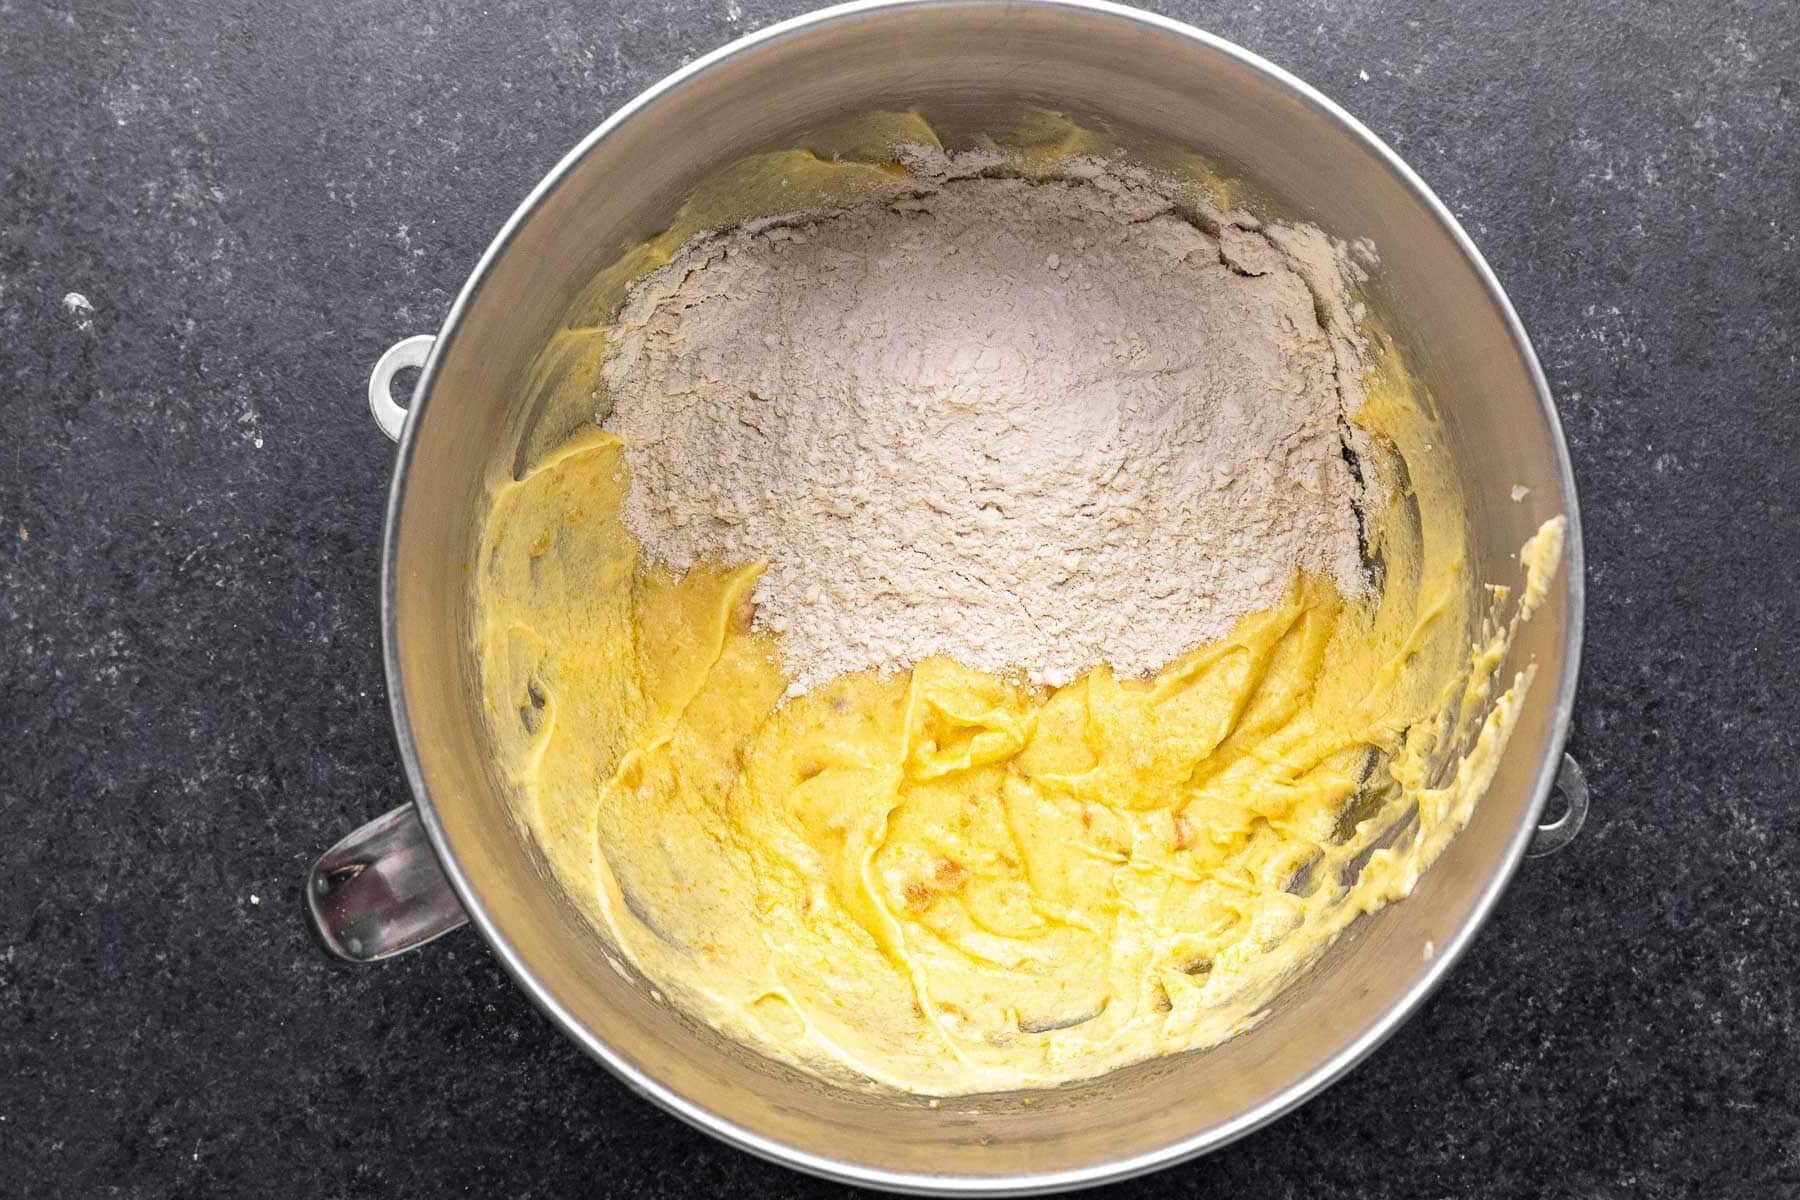
- Sift together flour and salt and add to the stand mixer on the lowest speed setting until just combined.
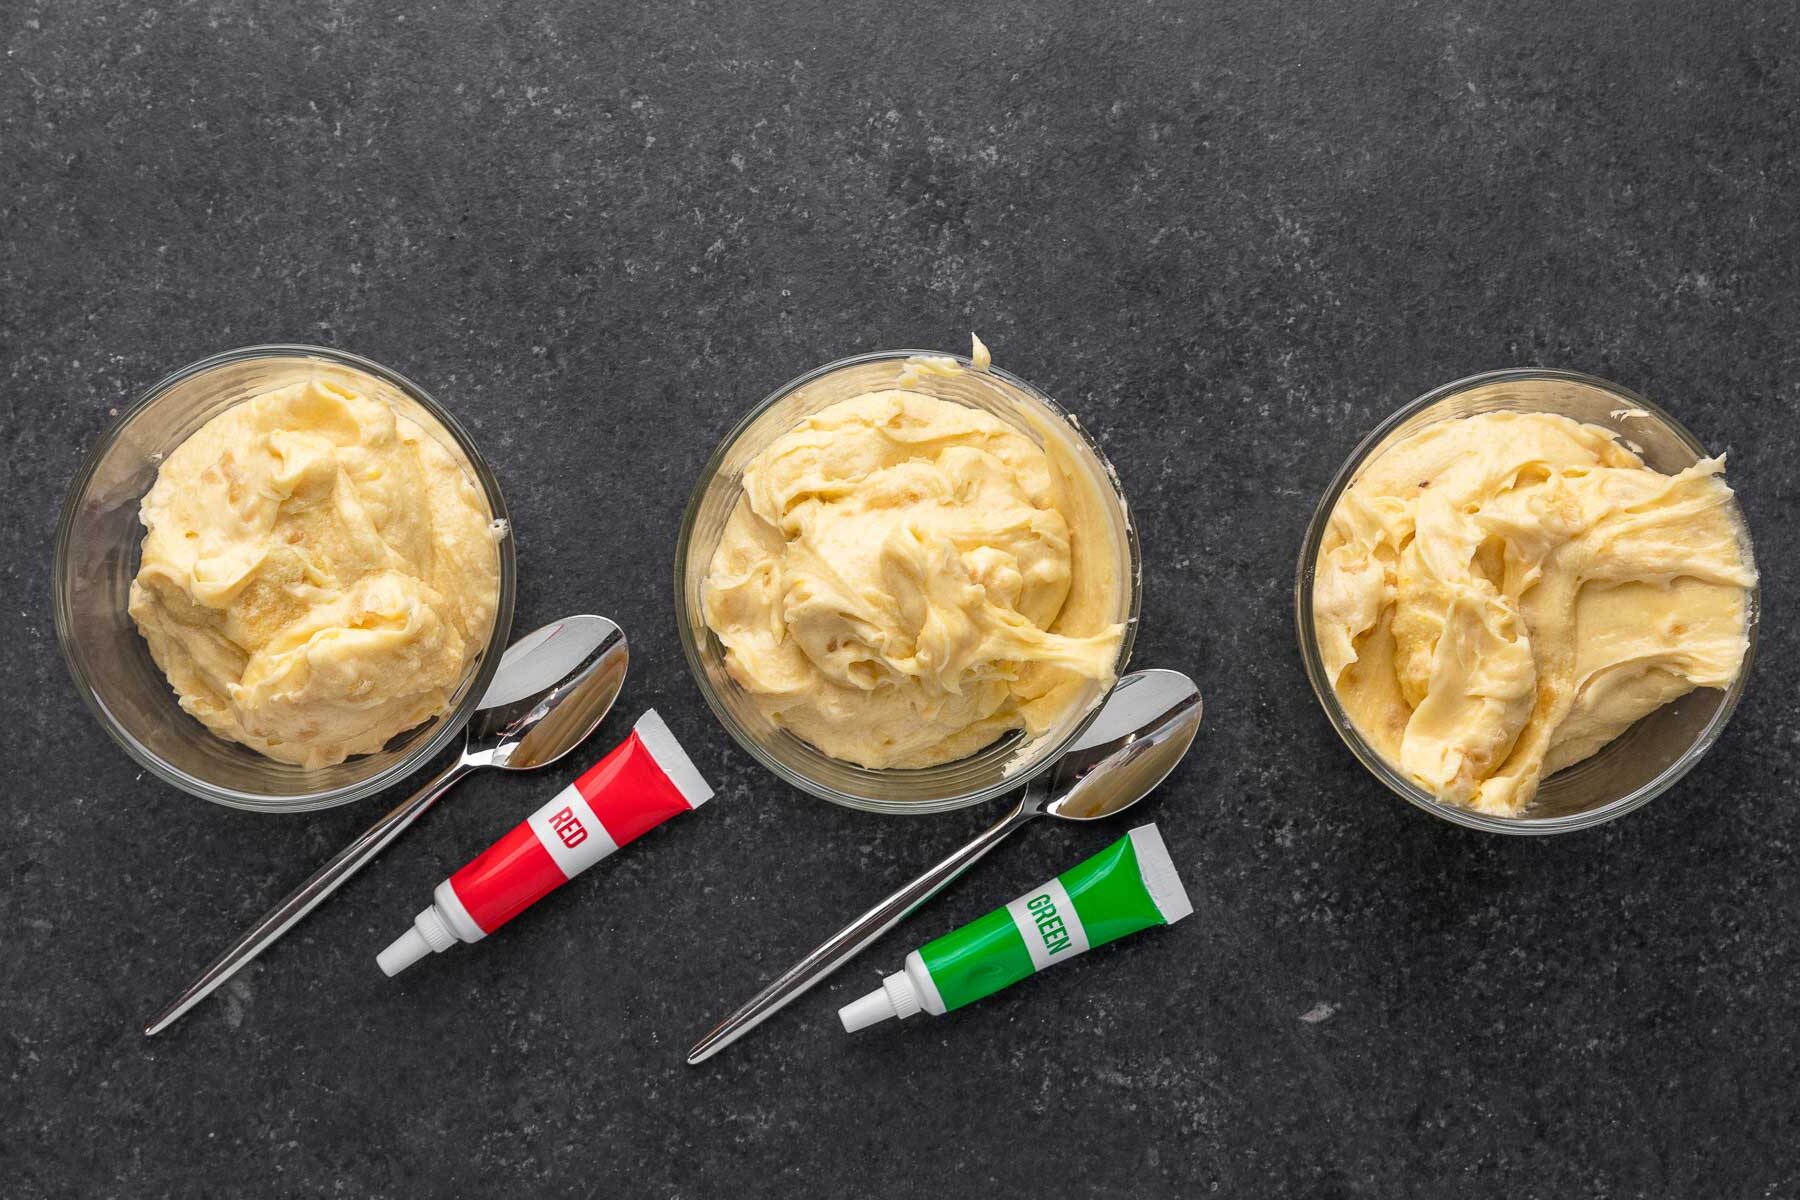
- Separate the batter into three different bowls evenly (we use a small kitchen scale for this).
- Pour the first bowl into the prepared baking pan and bake for 8-10 minutes until just done, with edges barely browning.
- While the first one is baking, add in the food coloring to the other two bowls, one with red and one with green.
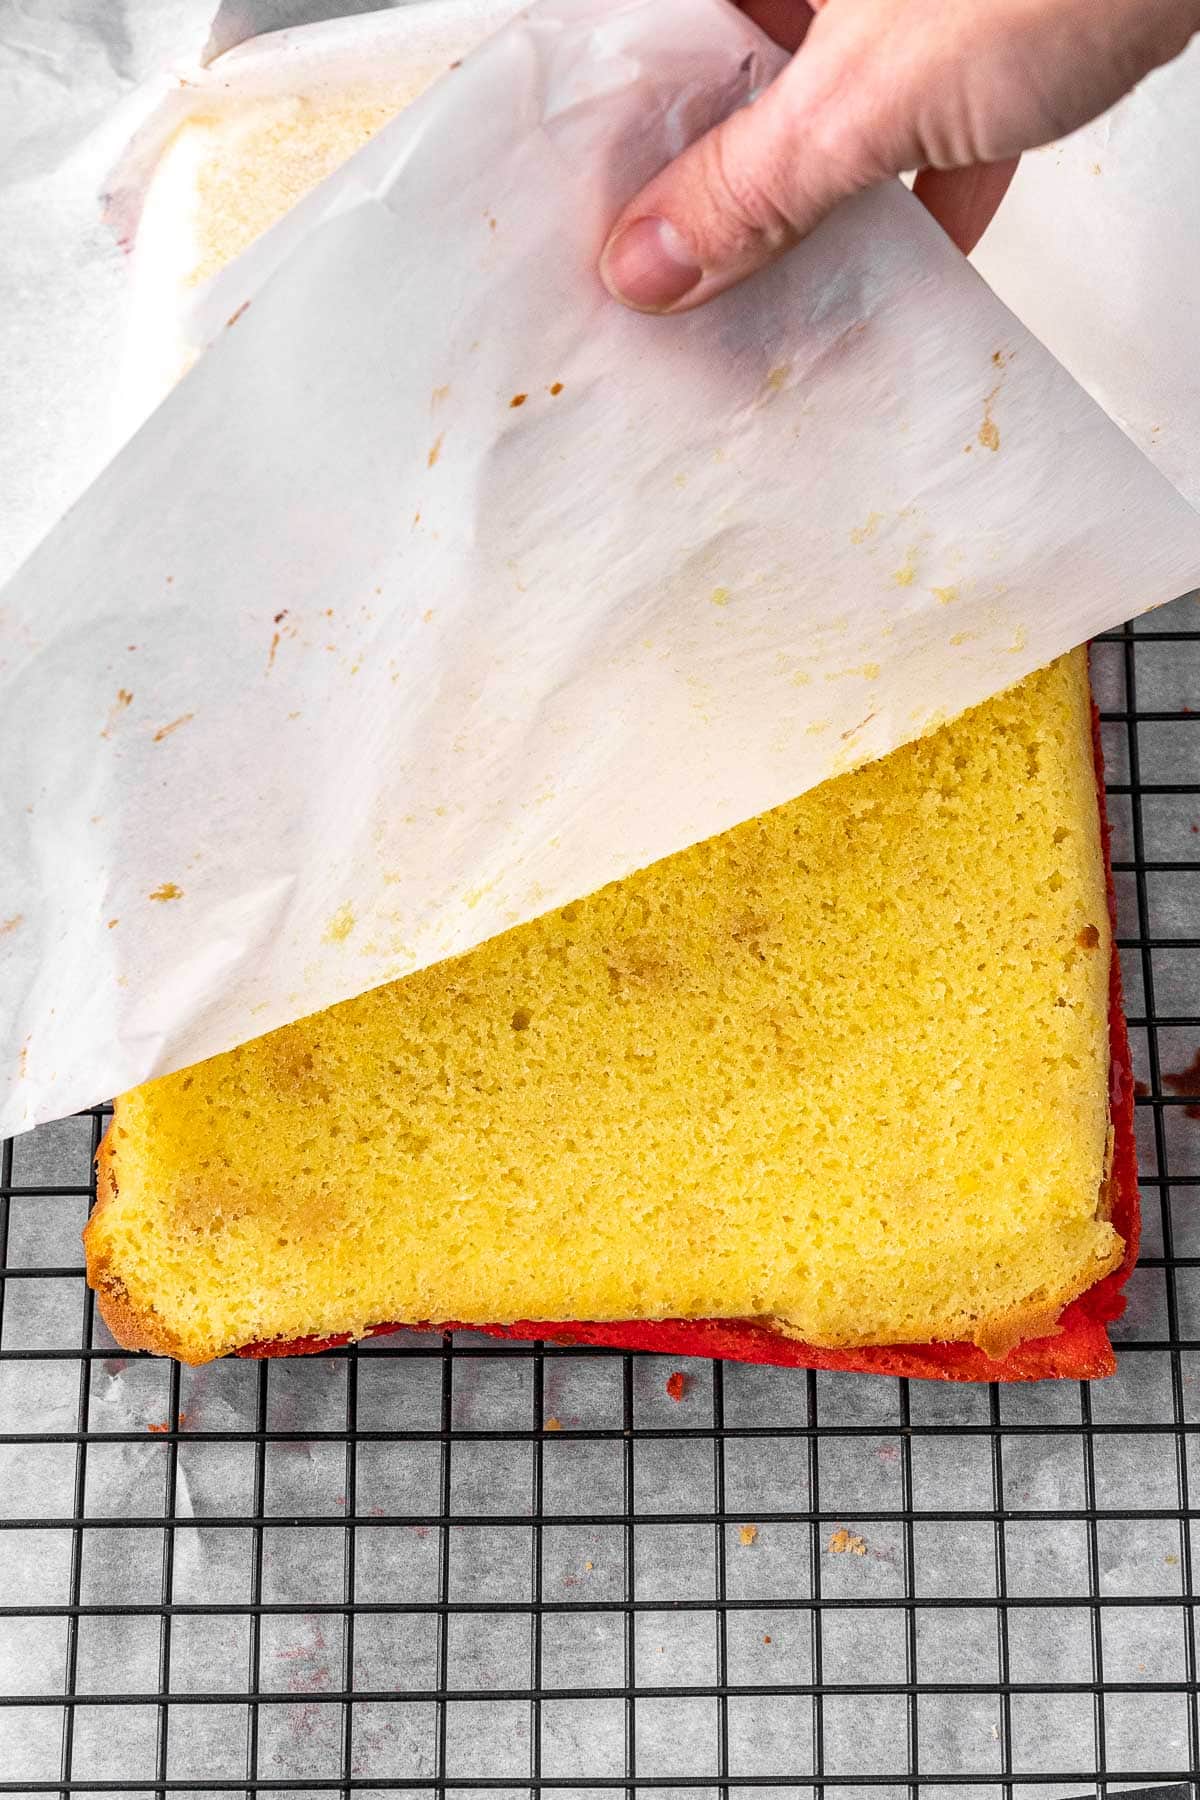
- When the first one is done baking, let it cool for 5 minutes.
- Remove the layer, add next piece of parchment paper and bake the second layer 8-10 minutes.
- Cool again for 5 minutes then add third piece of parchment paper and bake the third layer, 8-10 minutes.
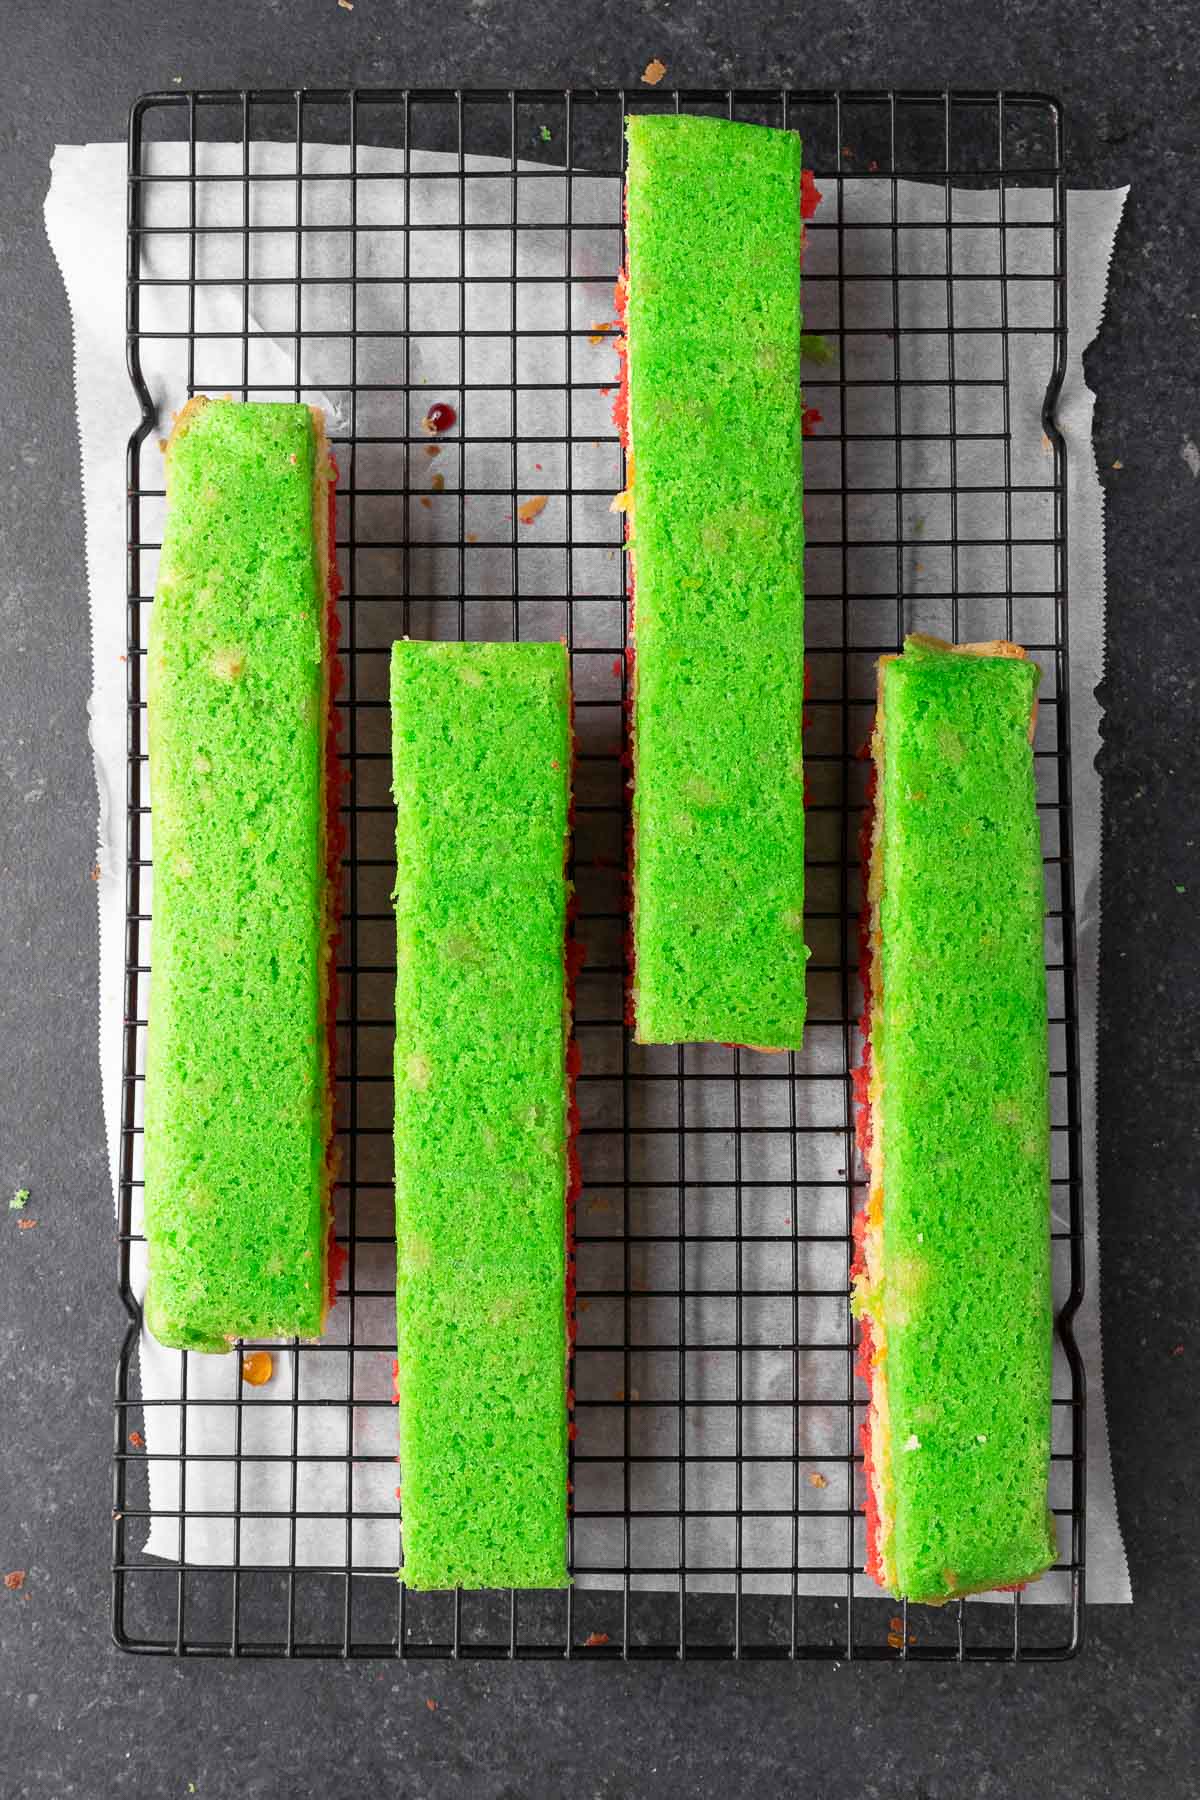
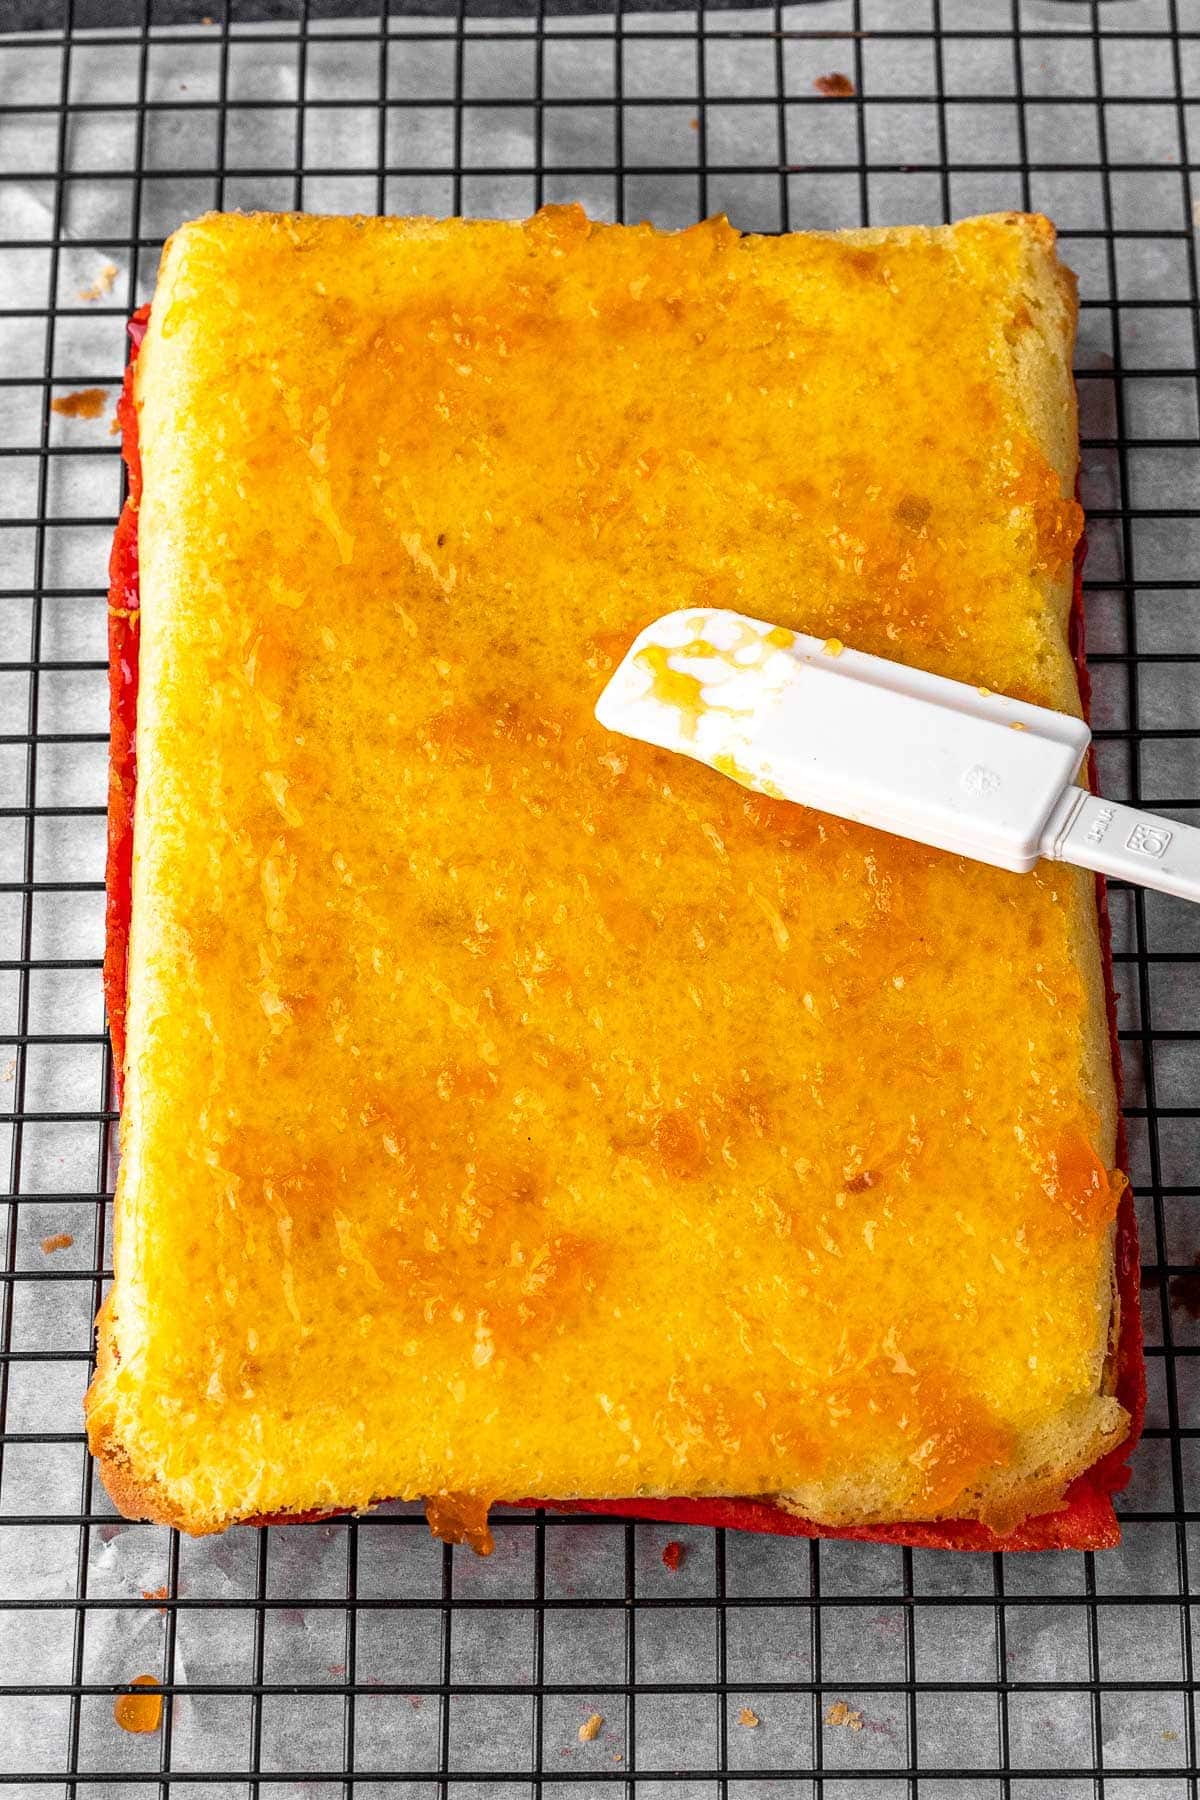
- When all three layers are done baking and cooled, add the red layer to a cooling rack.
- Spread raspberry jam over the red layer.
- Add the uncolored layer carefully on top (the easiest way would be to carefully invert the layer with the parchment paper still attached, then pull the layer off the back once you've flipped it).
- Spread the apricot preserves over the uncolored layer.
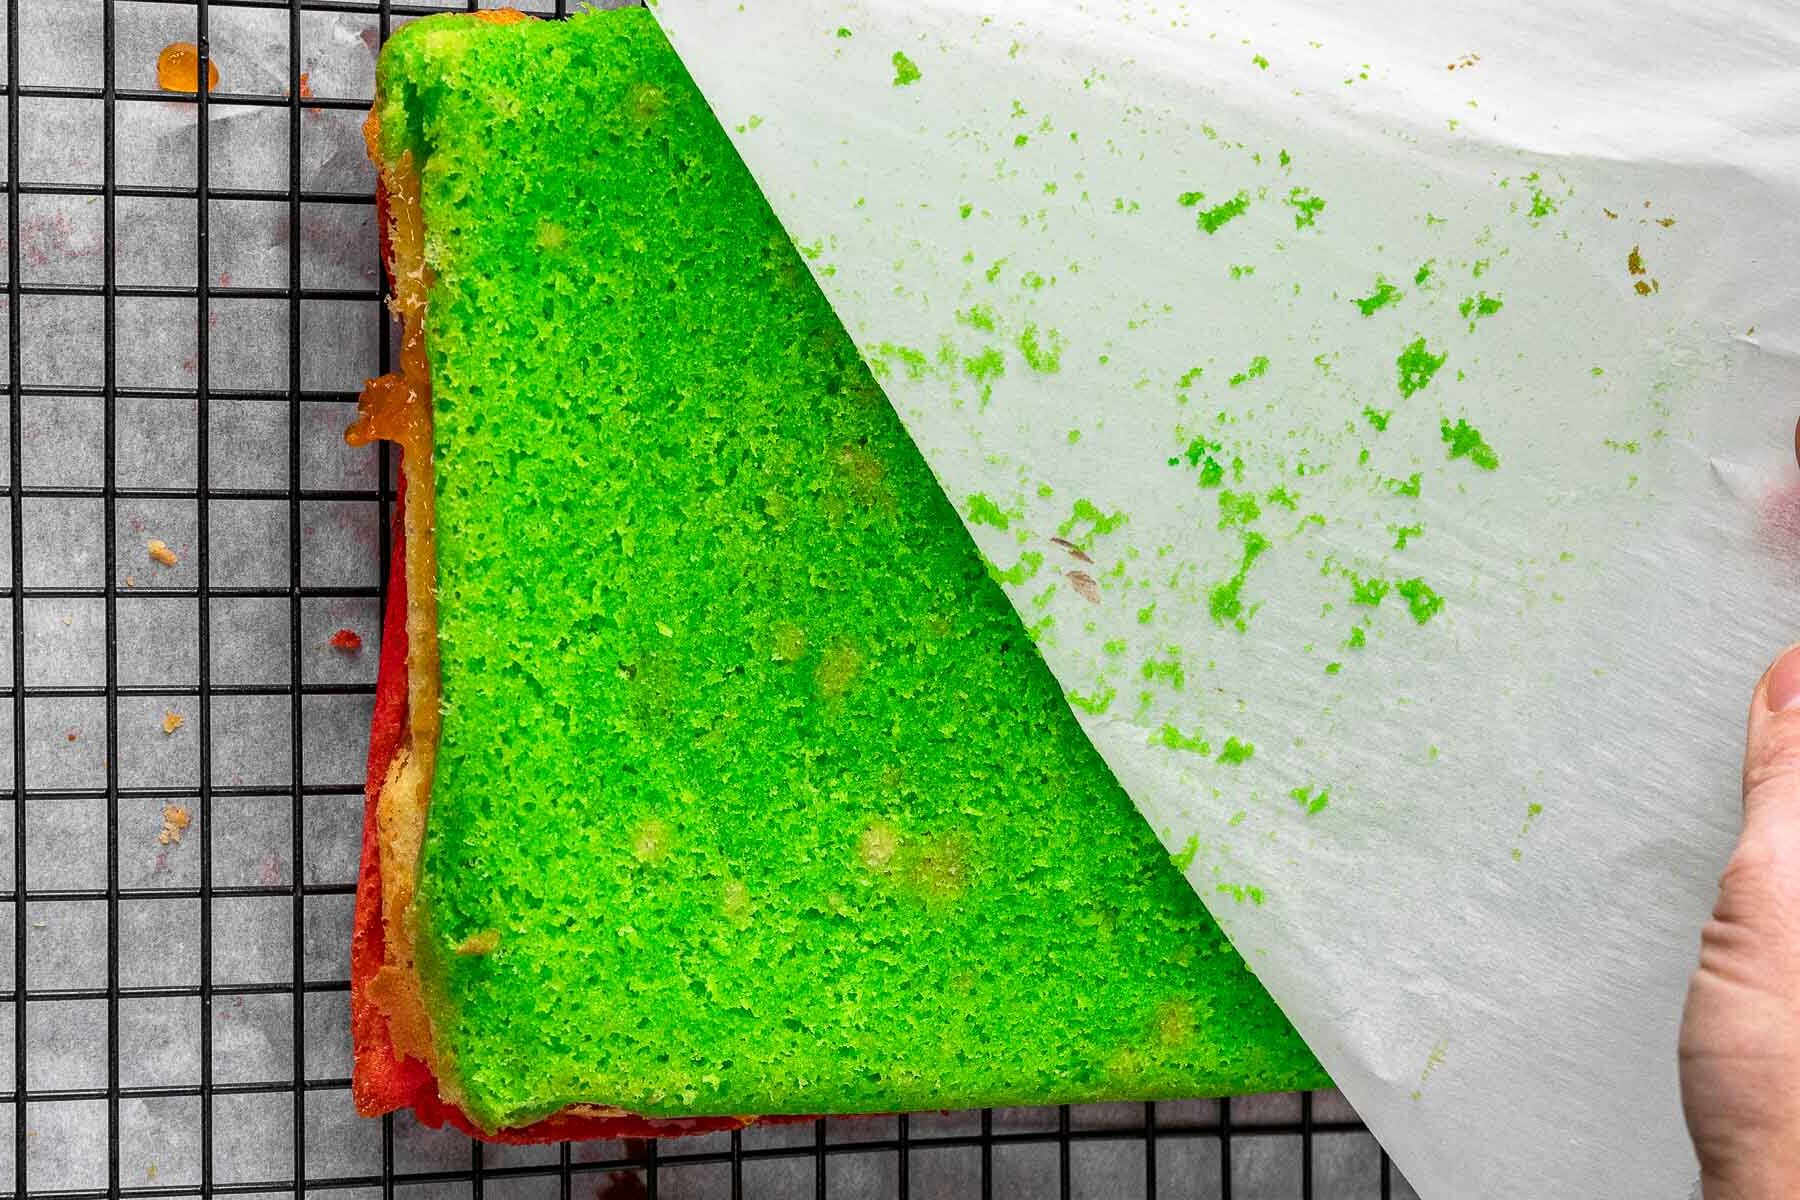
- Carefully add the green top layer and press down gently.
- Cut the layers into 4 even, long pieces.
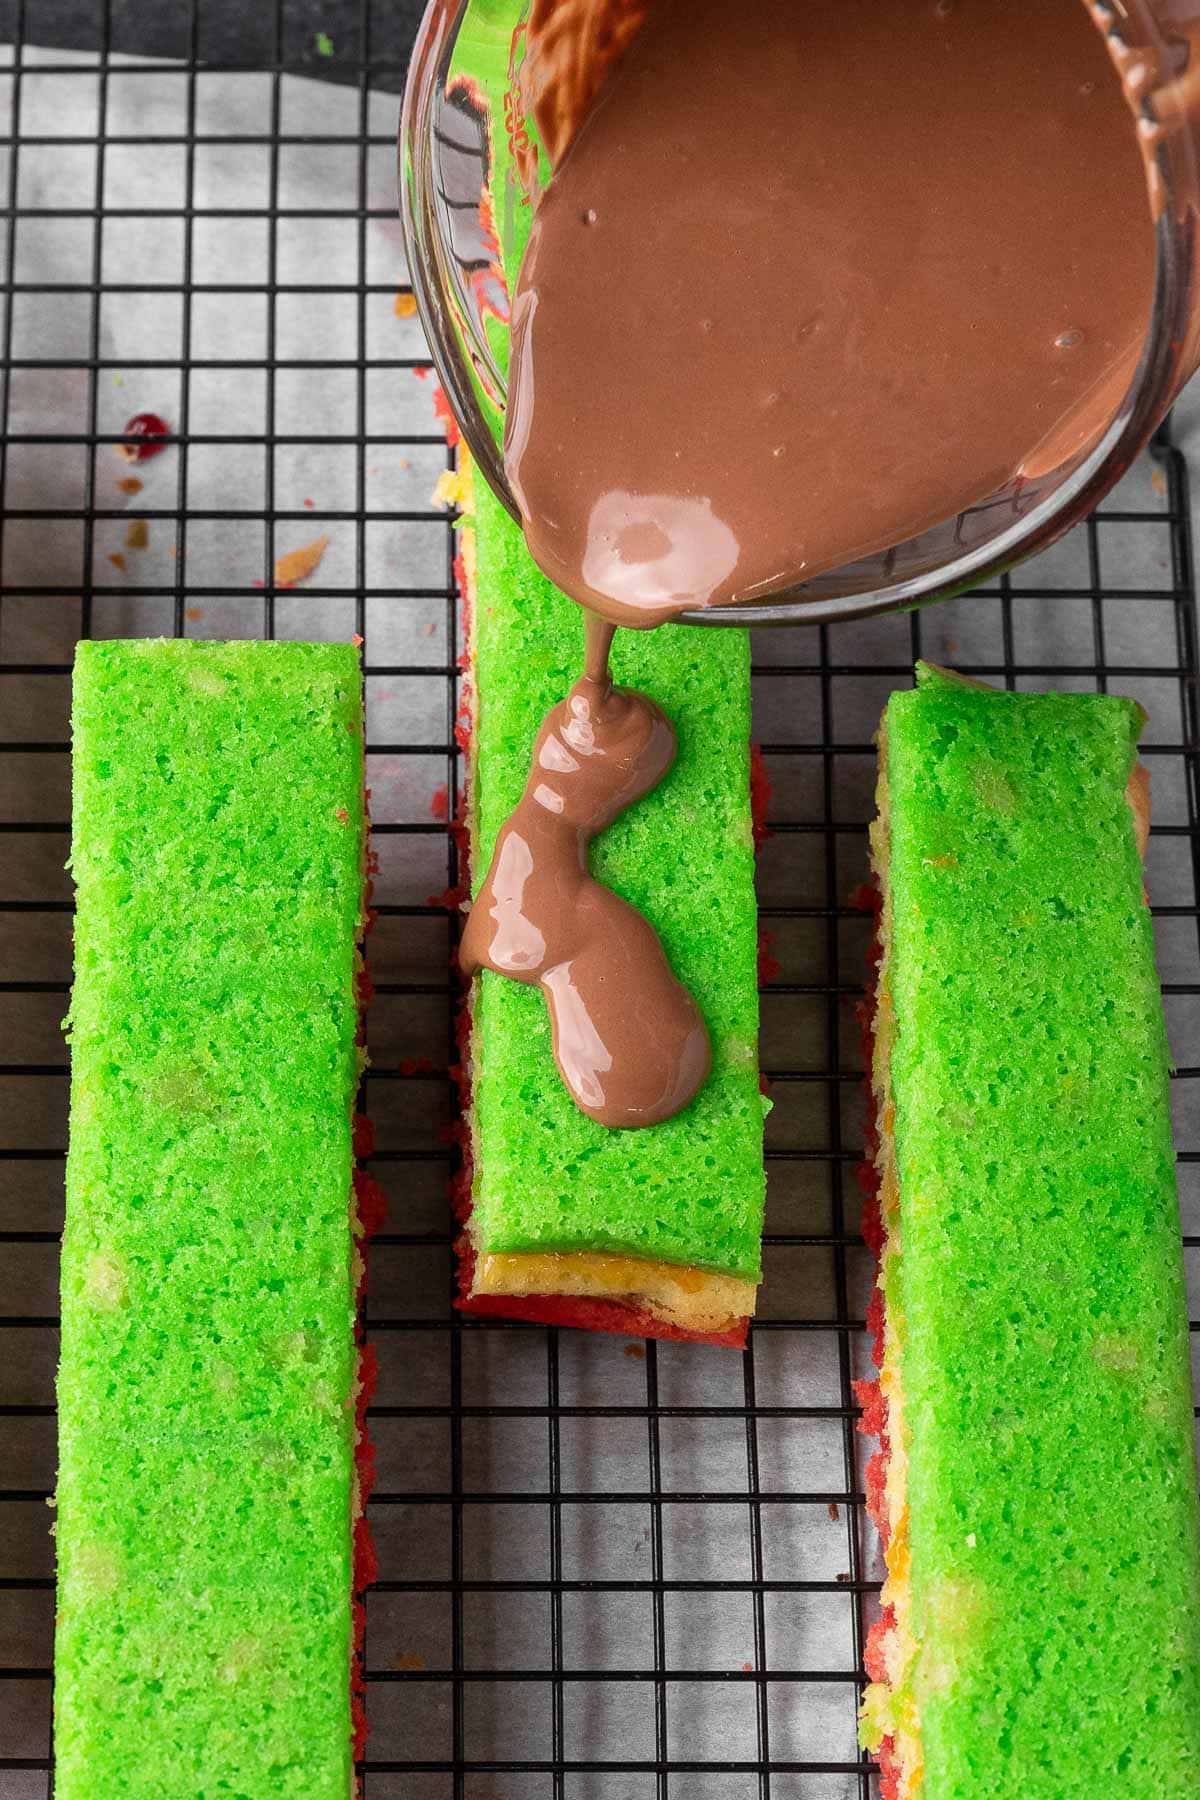
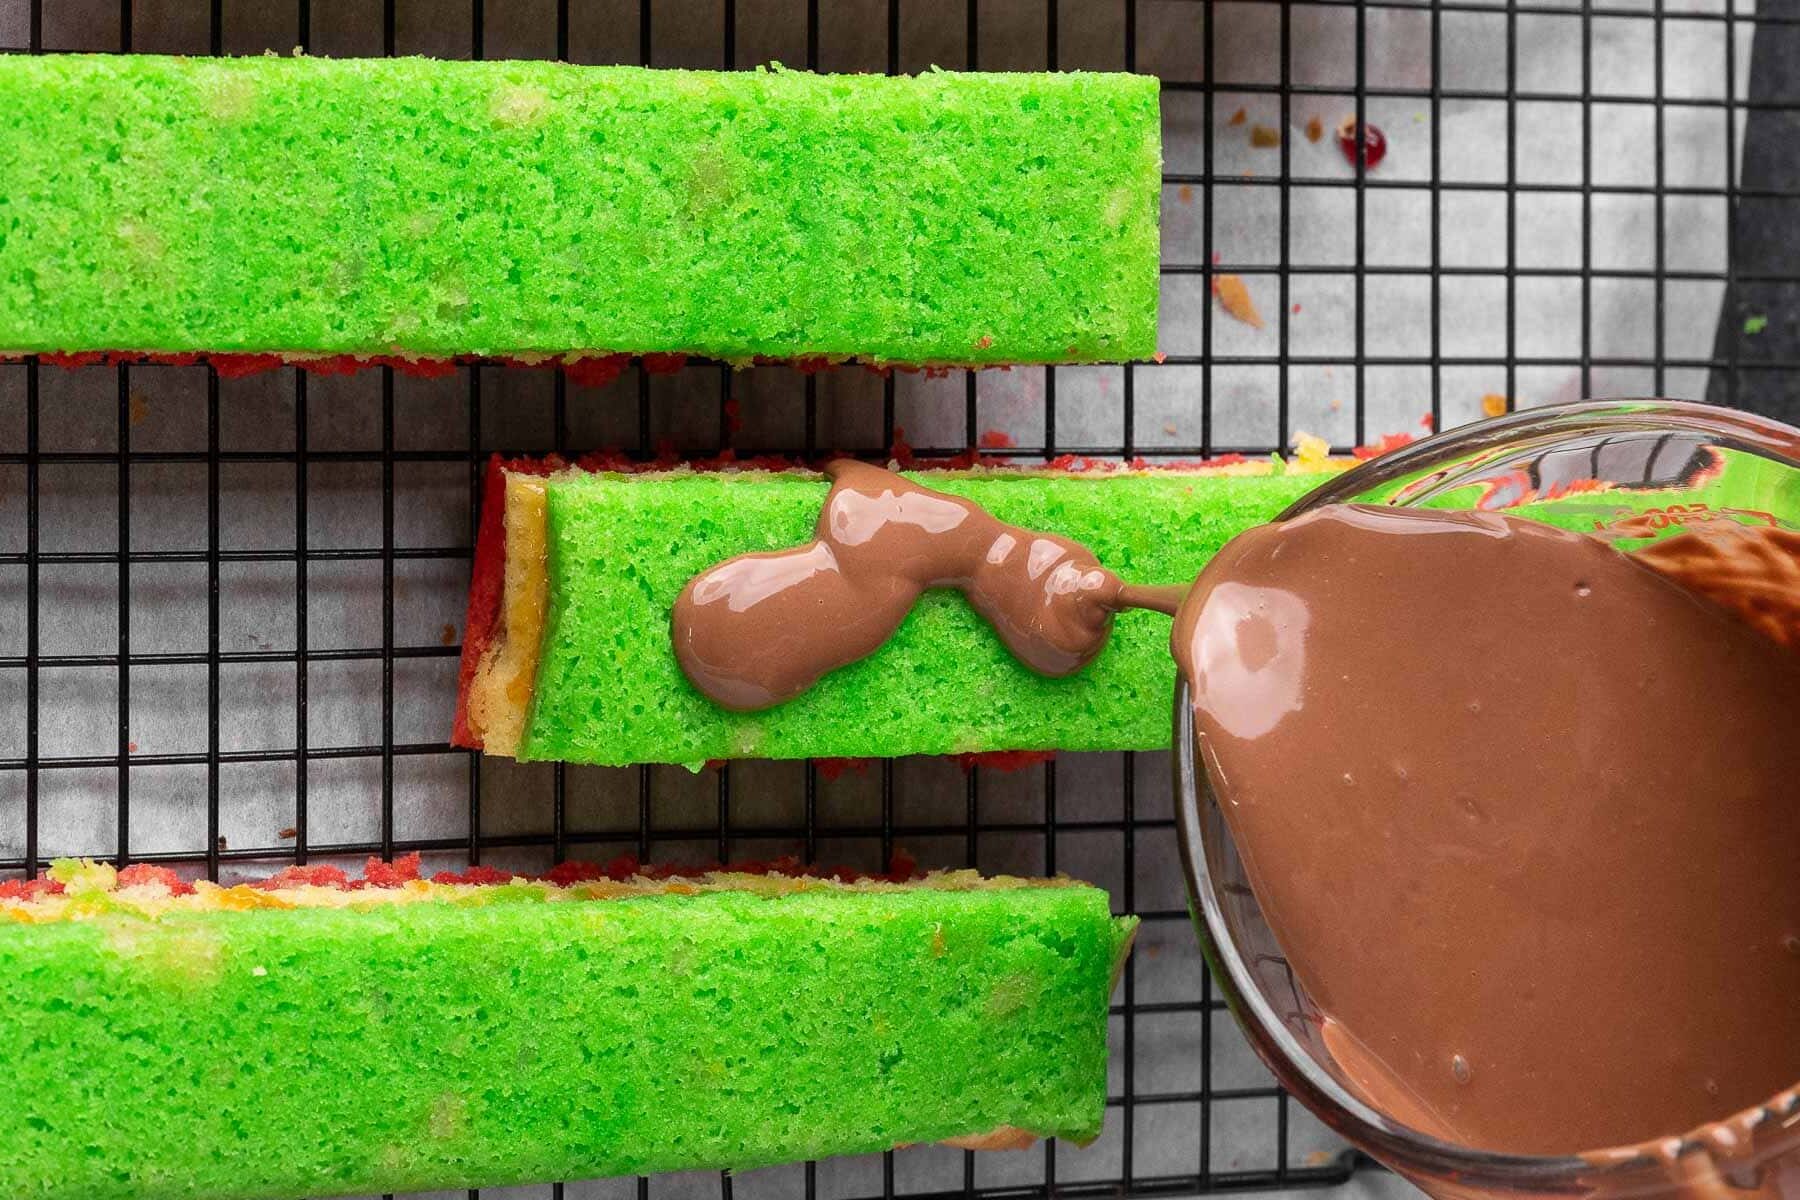
- Melt the chocolate in the microwave in a large glass bowl in 30 second increments.
- Stir between each heating cycle until smooth.
- Stir in the shortening until well mixed in.
- Spread each piece out on the cooling rack.
- Pour the melted chocolate in a thin layer over each piece so the top and sides are covered (don't cover the front and back of the pieces.)
- Let the excess chocolate drip down the sides.
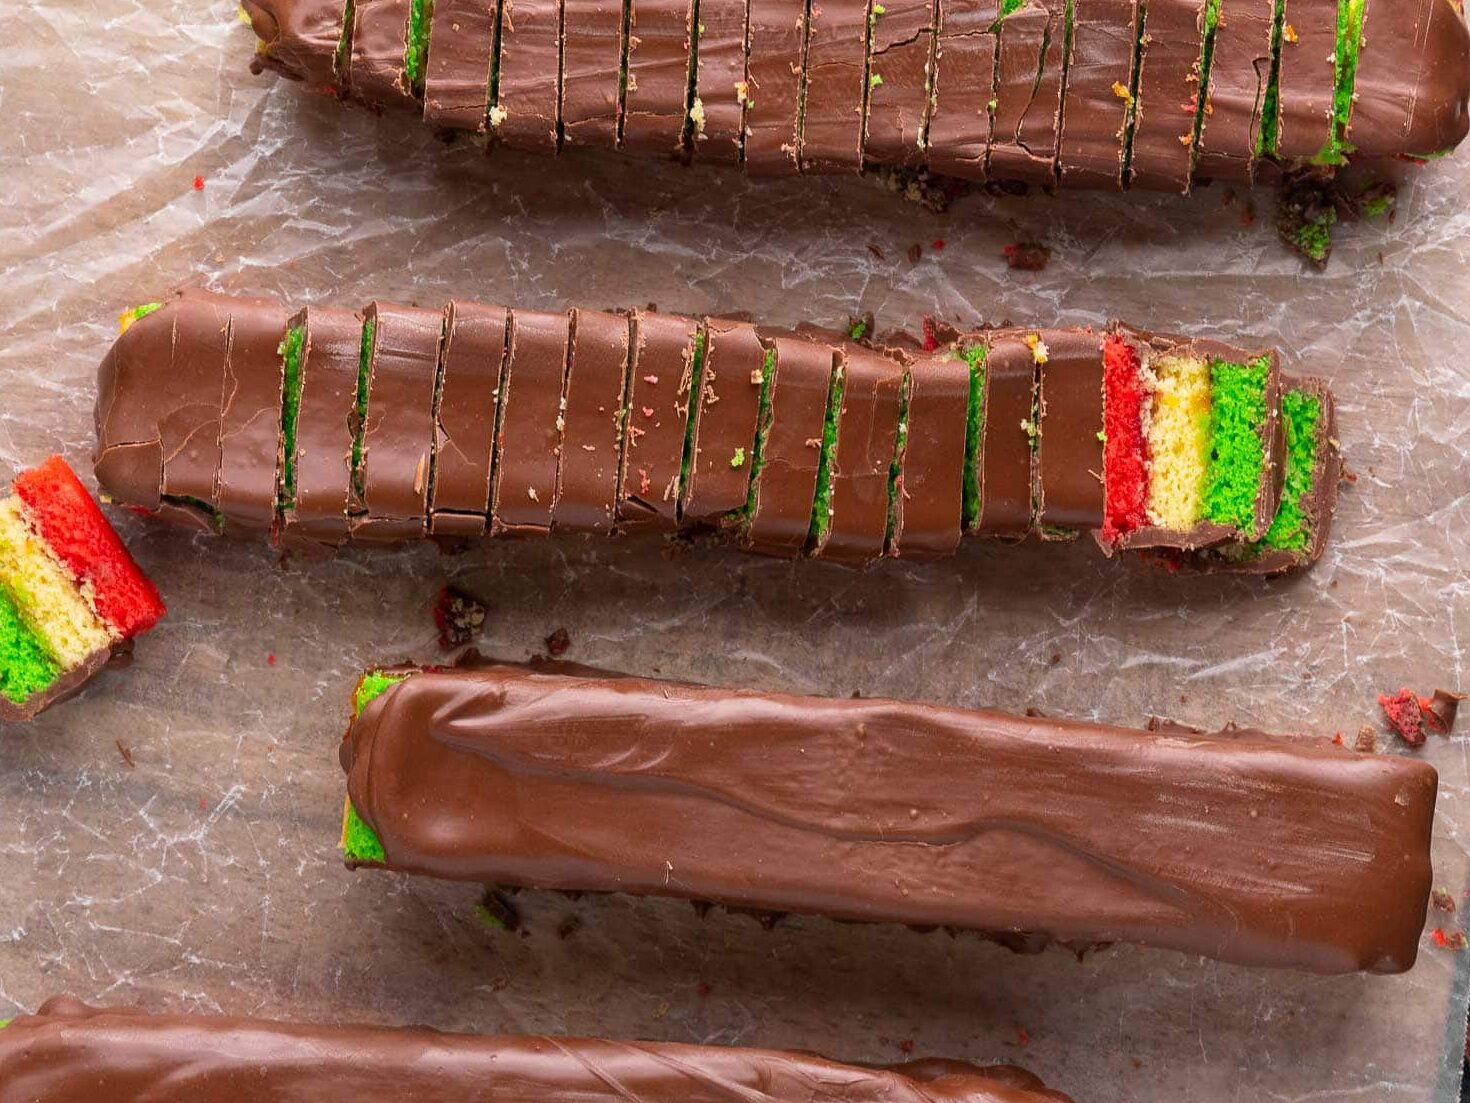
- Let harden for 20 minutes then remove each piece to a clean cutting board.
- Slice the rainbow cookies in 1/2-inch thick slices.
- Store in a covered container.
Nutrition
Want to save this recipe? Create a free account to easily save your favorite recipes
Table of Contents
About this Recipe
Italian Rainbow Cookies feature layers of almond-flavored dough in vibrant red, green, and uncolored hues. The combination of almond paste, raspberry jam, and chocolate creates a delightful flavor combination. Although they may seem intricate to make, these cookies are family-friendly and perfect as after-dinner treats. Their striking appearance makes them a hit at parties and holidays. In Italian culture, Rainbow Cookies are a symbol of festivities and are enjoyed during many special occasions. So, have fun with it!
Ingredients
Rainbow Cookie Dough:
- 4 Large Eggs: Eggs provide structure, moisture, and help bind the ingredients together. For egg alternatives, consider flaxseed or chia seed “eggs” for binding.
- 1 cup Granulated Sugar: Sugar sweetens the cookies and contributes to their texture. You can use alternative sweeteners like honey or maple syrup for a different flavor profile.
- 4 ounces Almond Paste: Almond paste infuses the dough with a rich almond flavor and provides moisture. You can substitute it with marzipan or almond extract for a similar taste.
- 1 cup All-Purpose Flour: Flour gives the dough structure. Gluten-free flour blends can be used as a substitute for those with gluten sensitivities.
- ½ teaspoon Almond Extract: Almond extract enhances the almond flavor in the cookies. You can adjust the quantity based on your taste preference.
- ½ teaspoon Salt: Salt balances the flavors and enhances the overall taste. Use sea salt or kosher salt as alternatives.
- ½ teaspoon each Red and Green Food Coloring: Red and green food coloring adds vibrant color to two of the cookie layers. Natural alternatives like beet juice or spinach juice can be used for coloring.
To Assemble:
- ¼ cup each Seedless Raspberry and Apricot Jam: Raspberry and apricotjam adds fruity sweetness and moisture between the cookie layers.
- 2 cups Semi-sweet Chocolate Melting Disks: Semi-sweet chocolate disks create a luscious chocolate coating that complements the cookie layers.
- 2 teaspoons Shortening: Shortening is added to the melted chocolate to ensure it sets properly and creates a glossy finish on the cookies. Coconut oil or butter can be used as substitutes for a different texture.
Recipe Tips & Tricks
- Room Temperature Ingredients: Ensure your eggs and butter are at room temperature. This allows for better incorporation of ingredients and a smoother dough texture. Cold ingredients can result in lumps and uneven mixing.
- Almond Paste Preparation: When adding almond paste to your mixer, break it into smaller pieces by hand. This facilitates even mixing and prevents large chunks from interfering with the dough’s consistency.
- Cooling and Slicing: Allow the chocolate-coated cookies to cool on a rack, ensuring excess chocolate drips off. Once hardened, use a sharp knife and a clean cutting board to slice the cookies into even pieces.
- Overmixing the Dough: Avoid overmixing the dough as it can result in tough cookies. Mix until ingredients are just combined to maintain a tender texture.
- Skipping Parchment Paper: Using parchment paper when baking and assembling is crucial to prevent sticking and ensure easy removal.
- Neglecting Cooling Time: Rushing the cooling process can lead to chocolate smudging and uneven slicing. Allow ample time for the cookies to set.
What to Pair With
You can throw them in the mix with your Gingerbread and Sugar Cookie Recipes for more baking fun this holiday season. After all, these cookies are so good that you’ll want any excuse to make them.
How to Store
- Store: For freshness, keep your cookies in an airtight container at room temperature or in the refrigerator. Use parchment or wax paper between layers to prevent sticking. Refrigeration is advised in warm or humid conditions to maintain the chocolate coating.
- Freeze: To extend storage, ensure cookies are fully cooled before freezing. Freeze slices on a baking sheet until firm, then transfer to an airtight container with parchment paper between layers. They will stay fresh for up to three months. When ready to enjoy, allow them to thaw at room temperature for about 20 minutes.
Frequent Questions
Some people believe these Classic Rainbow Cookies didn’t come from Italy at all, but from Italian-American immigrants who wanted to honor their heritage. However, according to Italian Sons and Daughters of America, you can find these classic cookies in some Italian bakeries around the holidays. They are also sometimes called Venetian Cookies.
Almond flavoring is common in Italian desserts, and it’s important to this one. Along with the staple pantry ingredients like eggs, granulated sugar, and flour, you’ll also need almond paste and almond extract. Though you may not have used it before, you should find almond paste in the baking supplies aisle of your grocery store.
If you prefer natural coloring, there are options using beet juice and spinach juice which can be used for red and green hues, respectively. These options provide a vibrant, chemical-free alternative.
To achieve even slices, use a sharp knife and a clean cutting board. If the chocolate coating is too hard, allow the cookies to sit at room temperature for a few minutes before slicing. Wiping the knife between cuts helps create neat slices.
Variations
- Dark Chocolate: If you prefer a more bittersweet flavor, you can make the chocolate layer using dark chocolate instead of semi-sweet.
- Rainbow Italian Rainbow Cookies: You may have noticed that this tri-color cookie recipe isn’t actually a rainbow. While it may be colorful, it’s not the seven colors in a rainbow. If you have any rainbow-obsessed children, they may be disappointed when the rainbow cookies don’t look like they expect. I wouldn’t recommend trying to make seven-layer rainbow cookies. The layers would get very thin and break easily. However, you can always change the colors of the three layers you do have. To give it more of a rainbow look, try using a layer of red, blue, and purple instead.
Related Recipes
More Yummy Cookie Recipes


Photos used in previous posts