
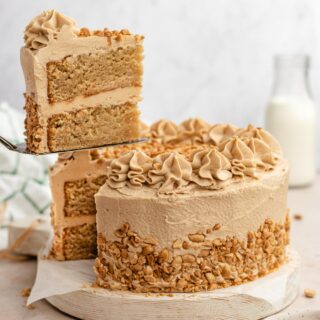
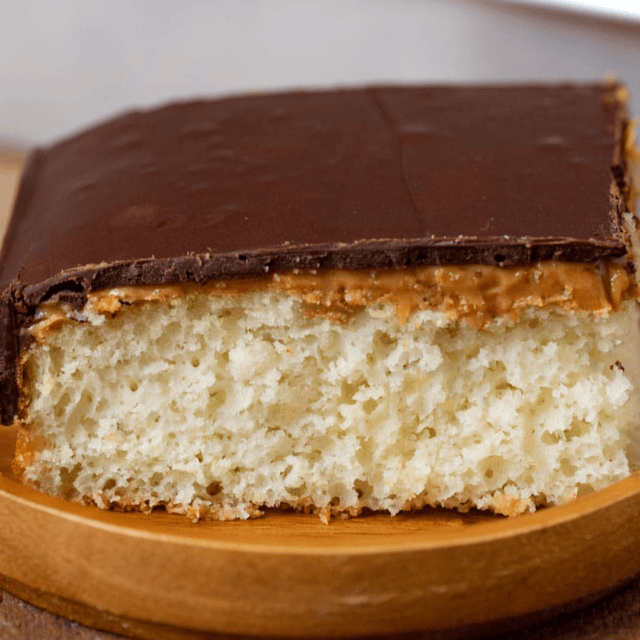
Peanut Butter Layer Cake with double layers of classic peanut butter cake, a dreamy peanut butter frosting, and topped with crunchy peanuts.
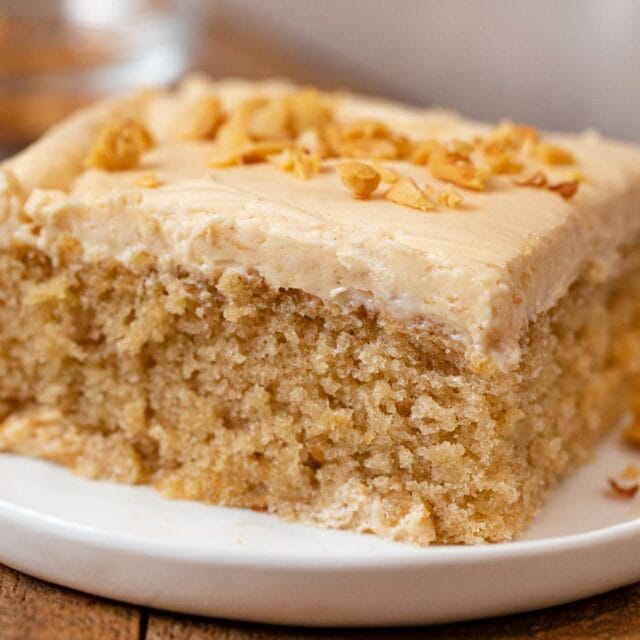
This Peanut Butter Sheet Cake and Peanut Butter Pie are a crowd-pleasing favorites for potlucks that will never disappoint. When you want a peanut butter Dessert with maximum peanut buttery goodness, this is another must bake Cake recipe.
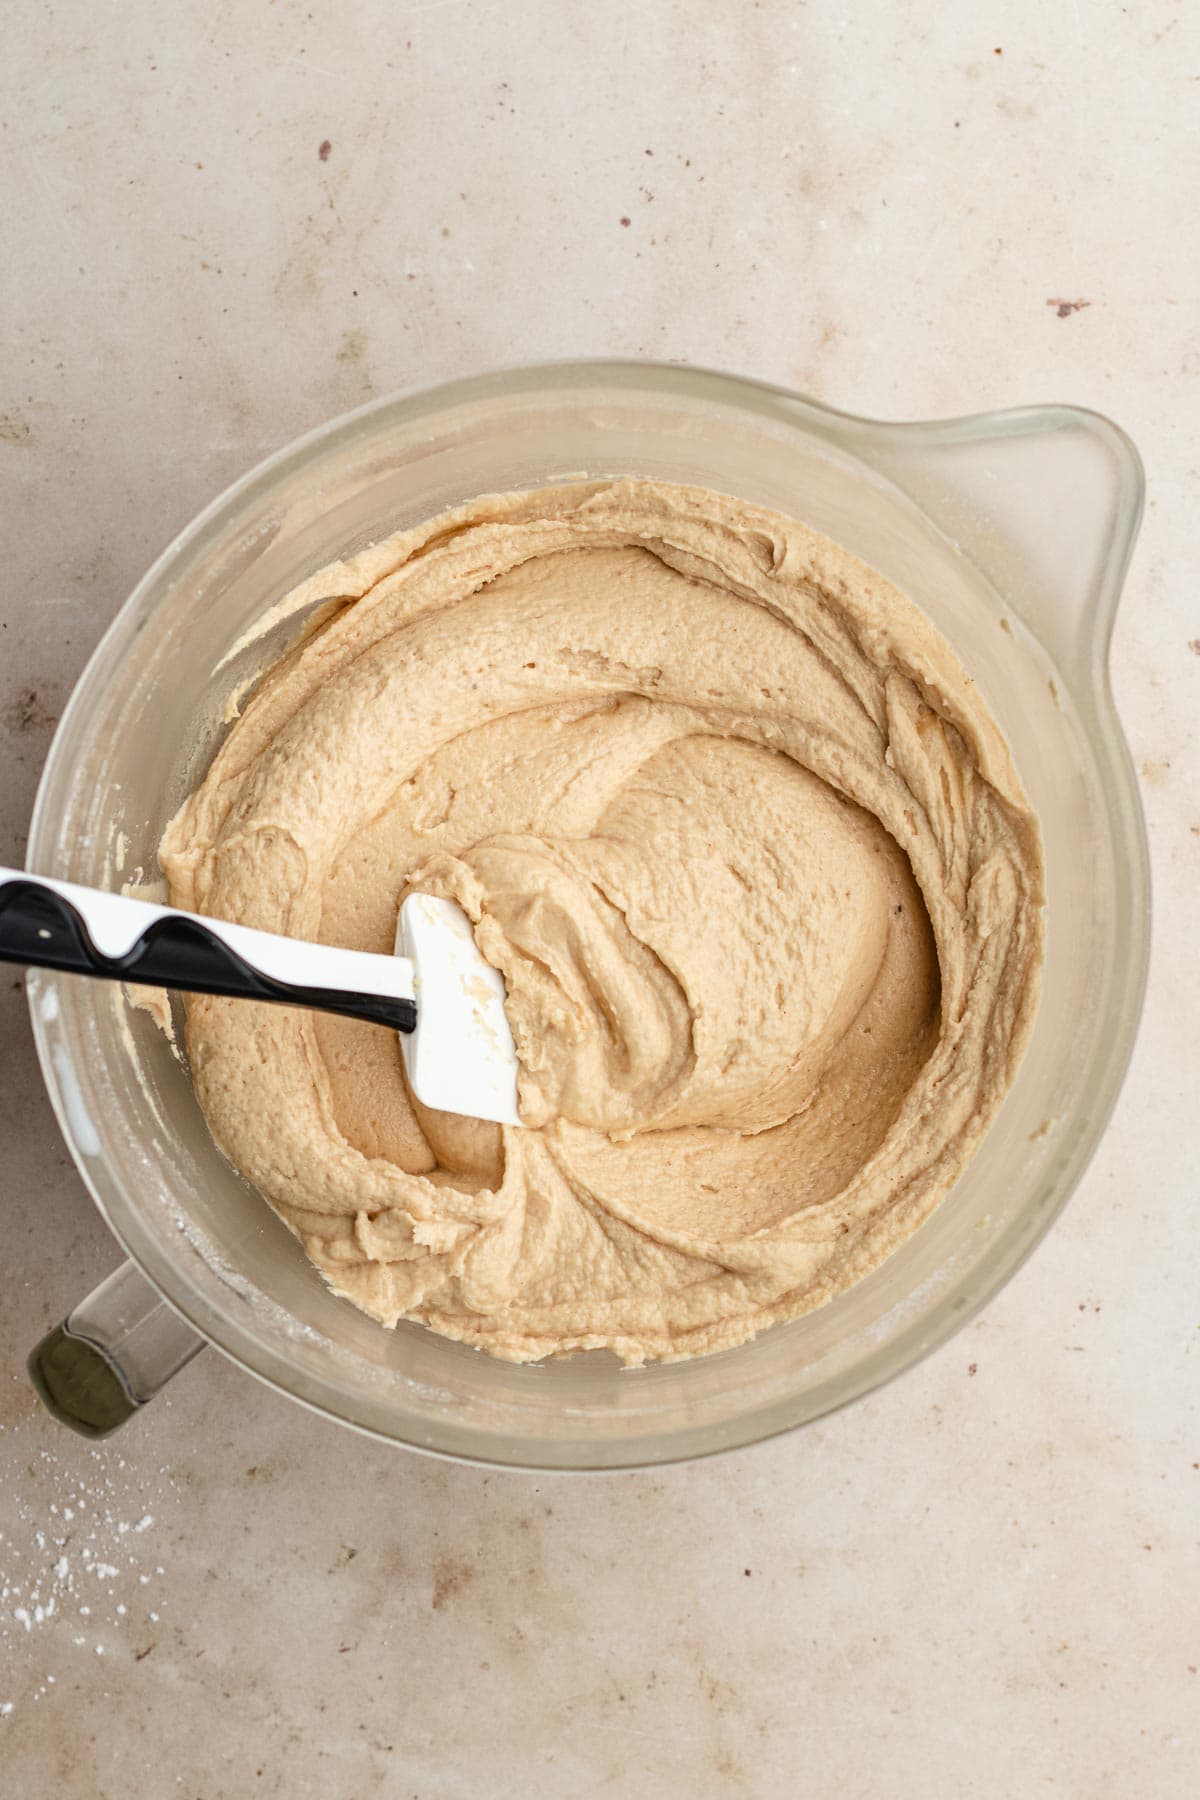
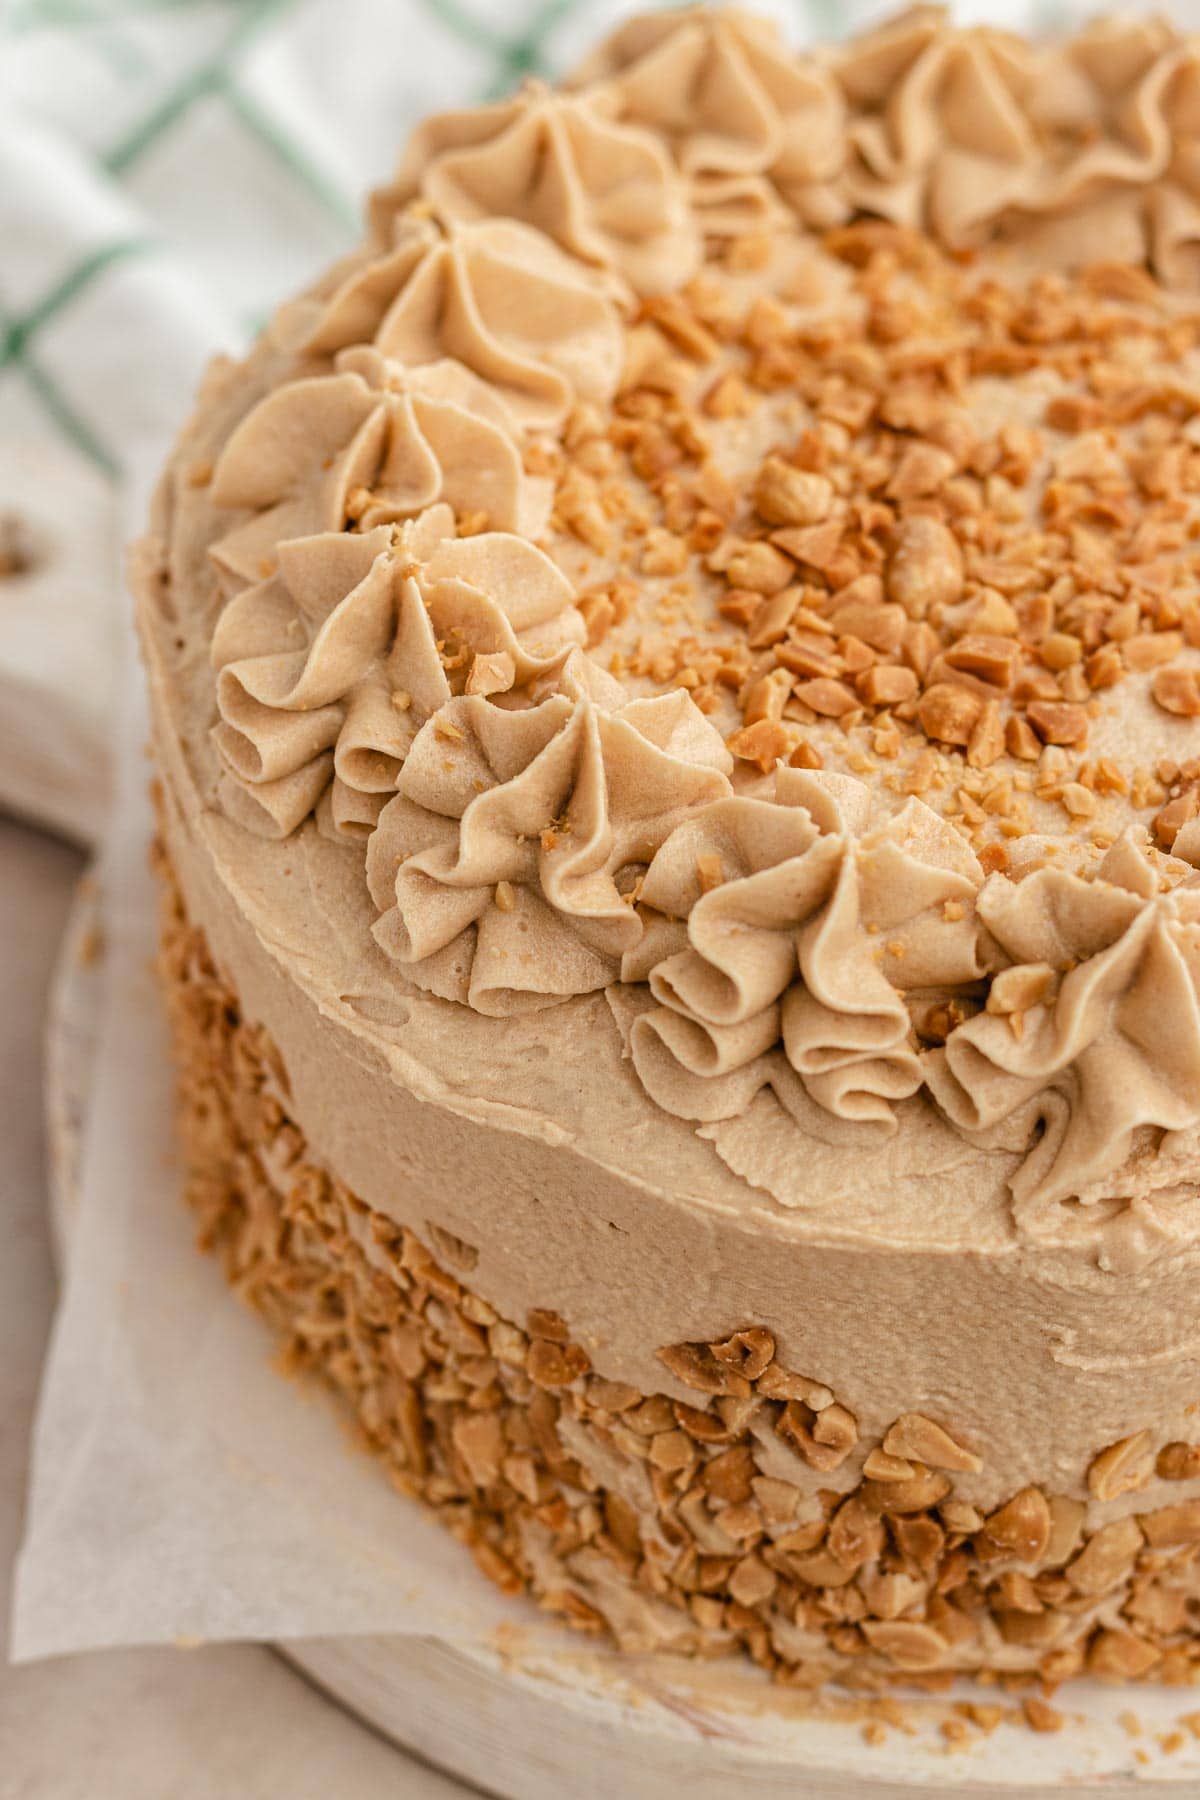
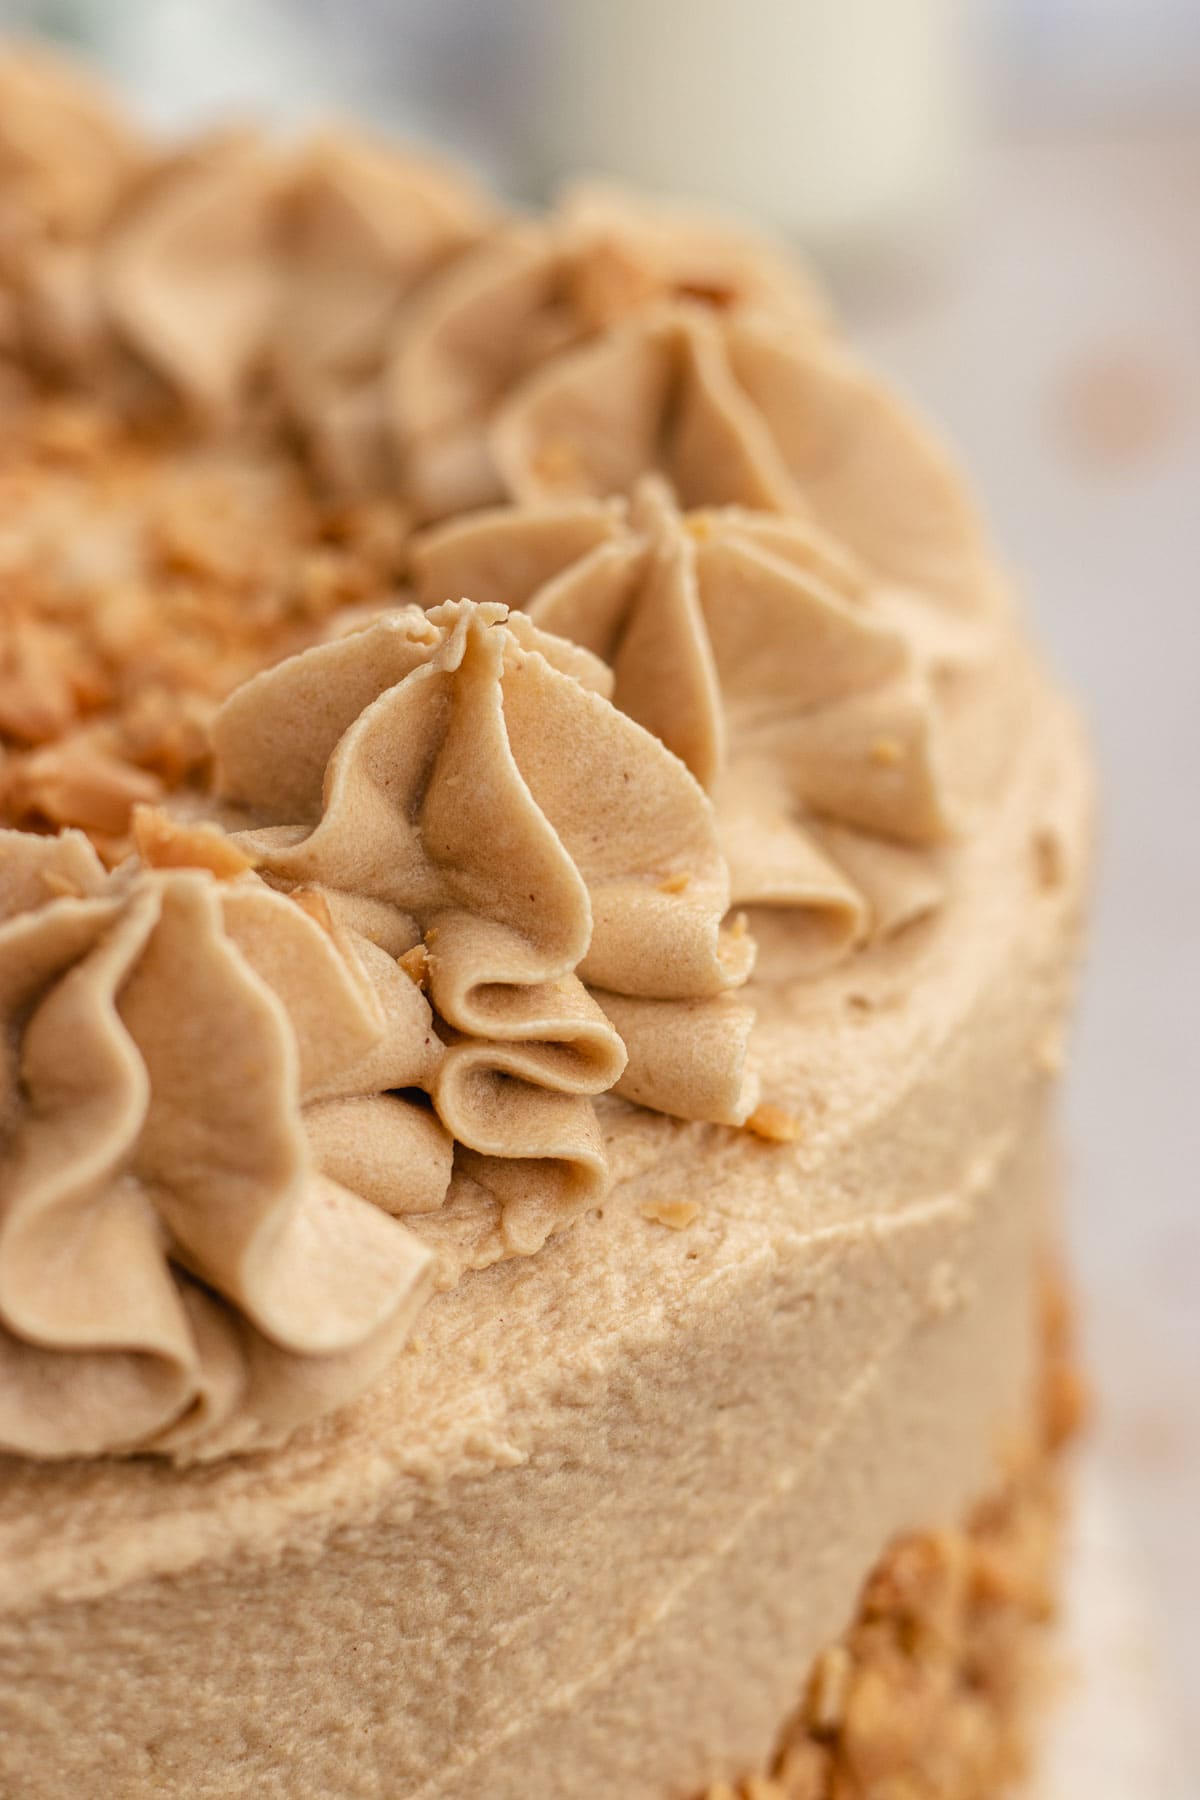
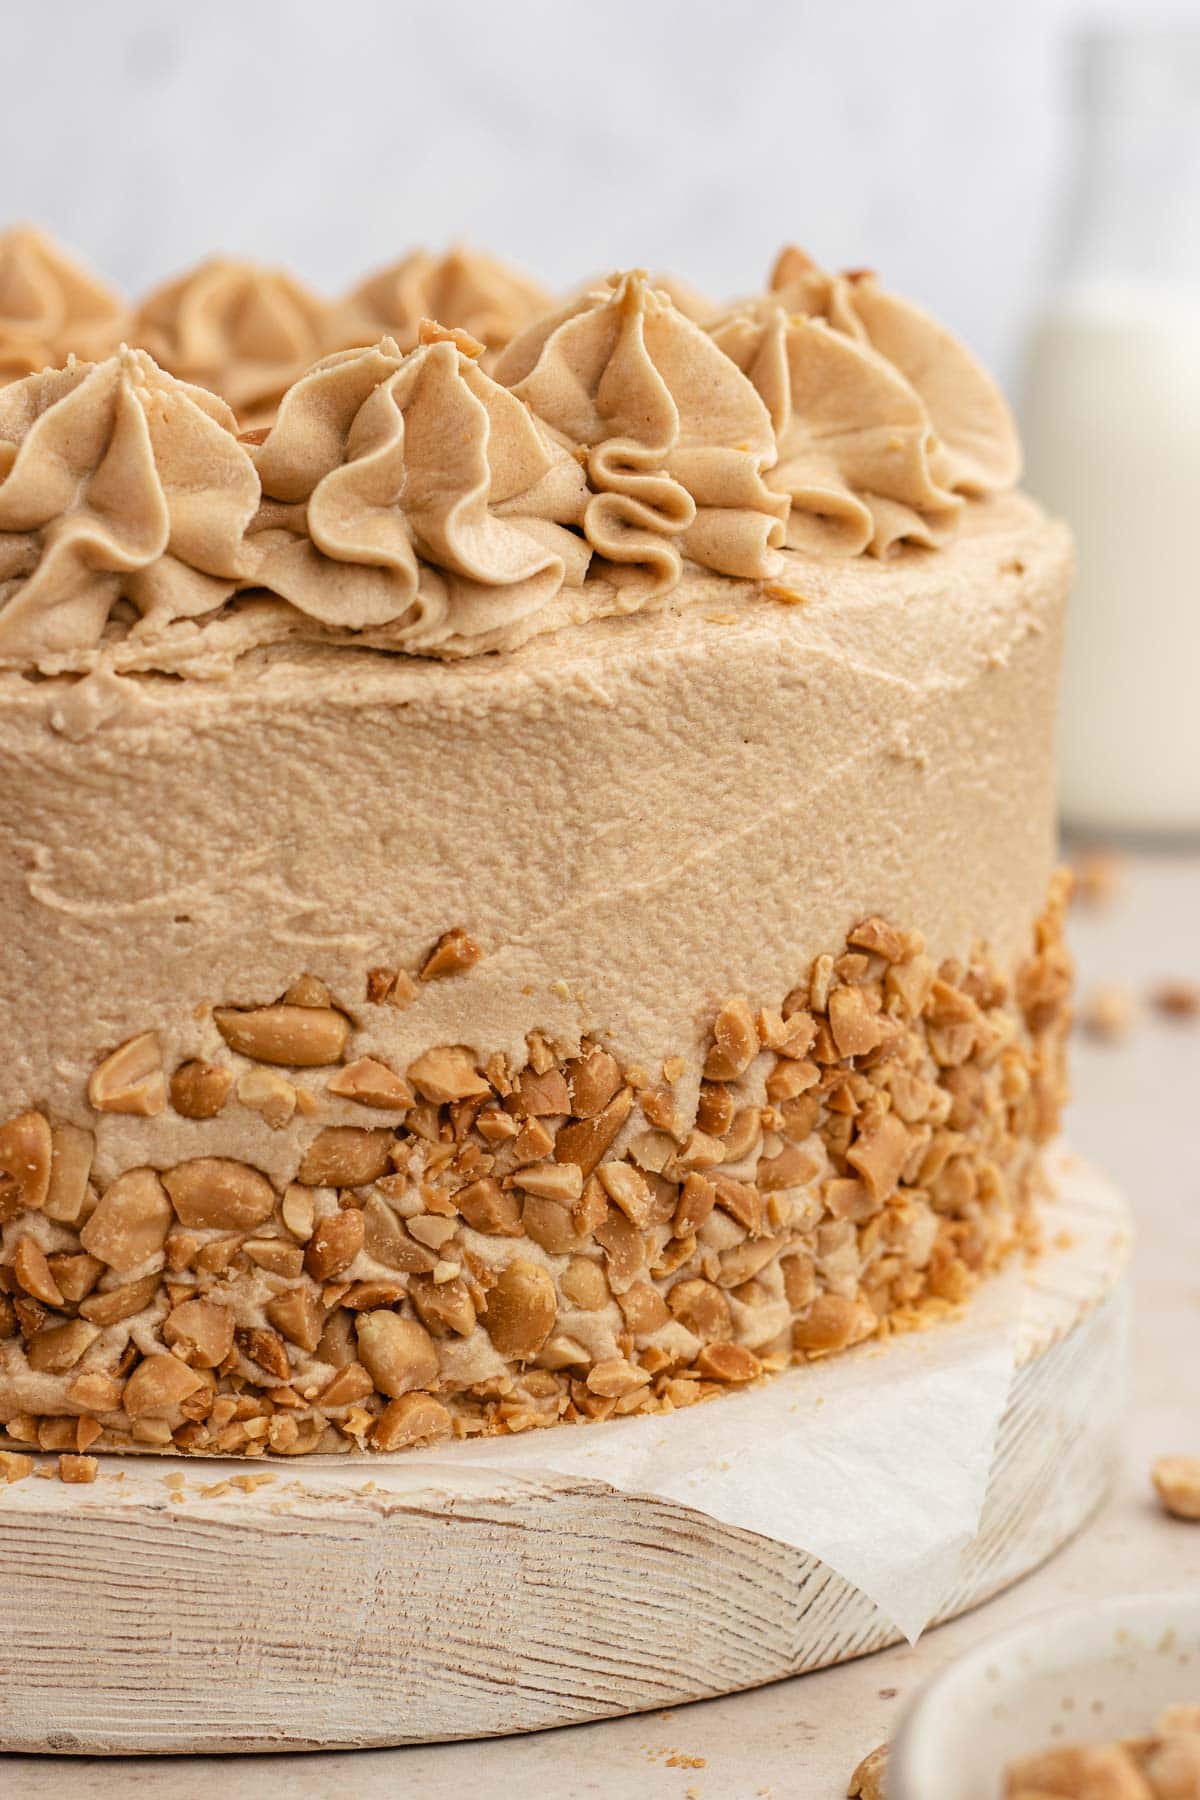
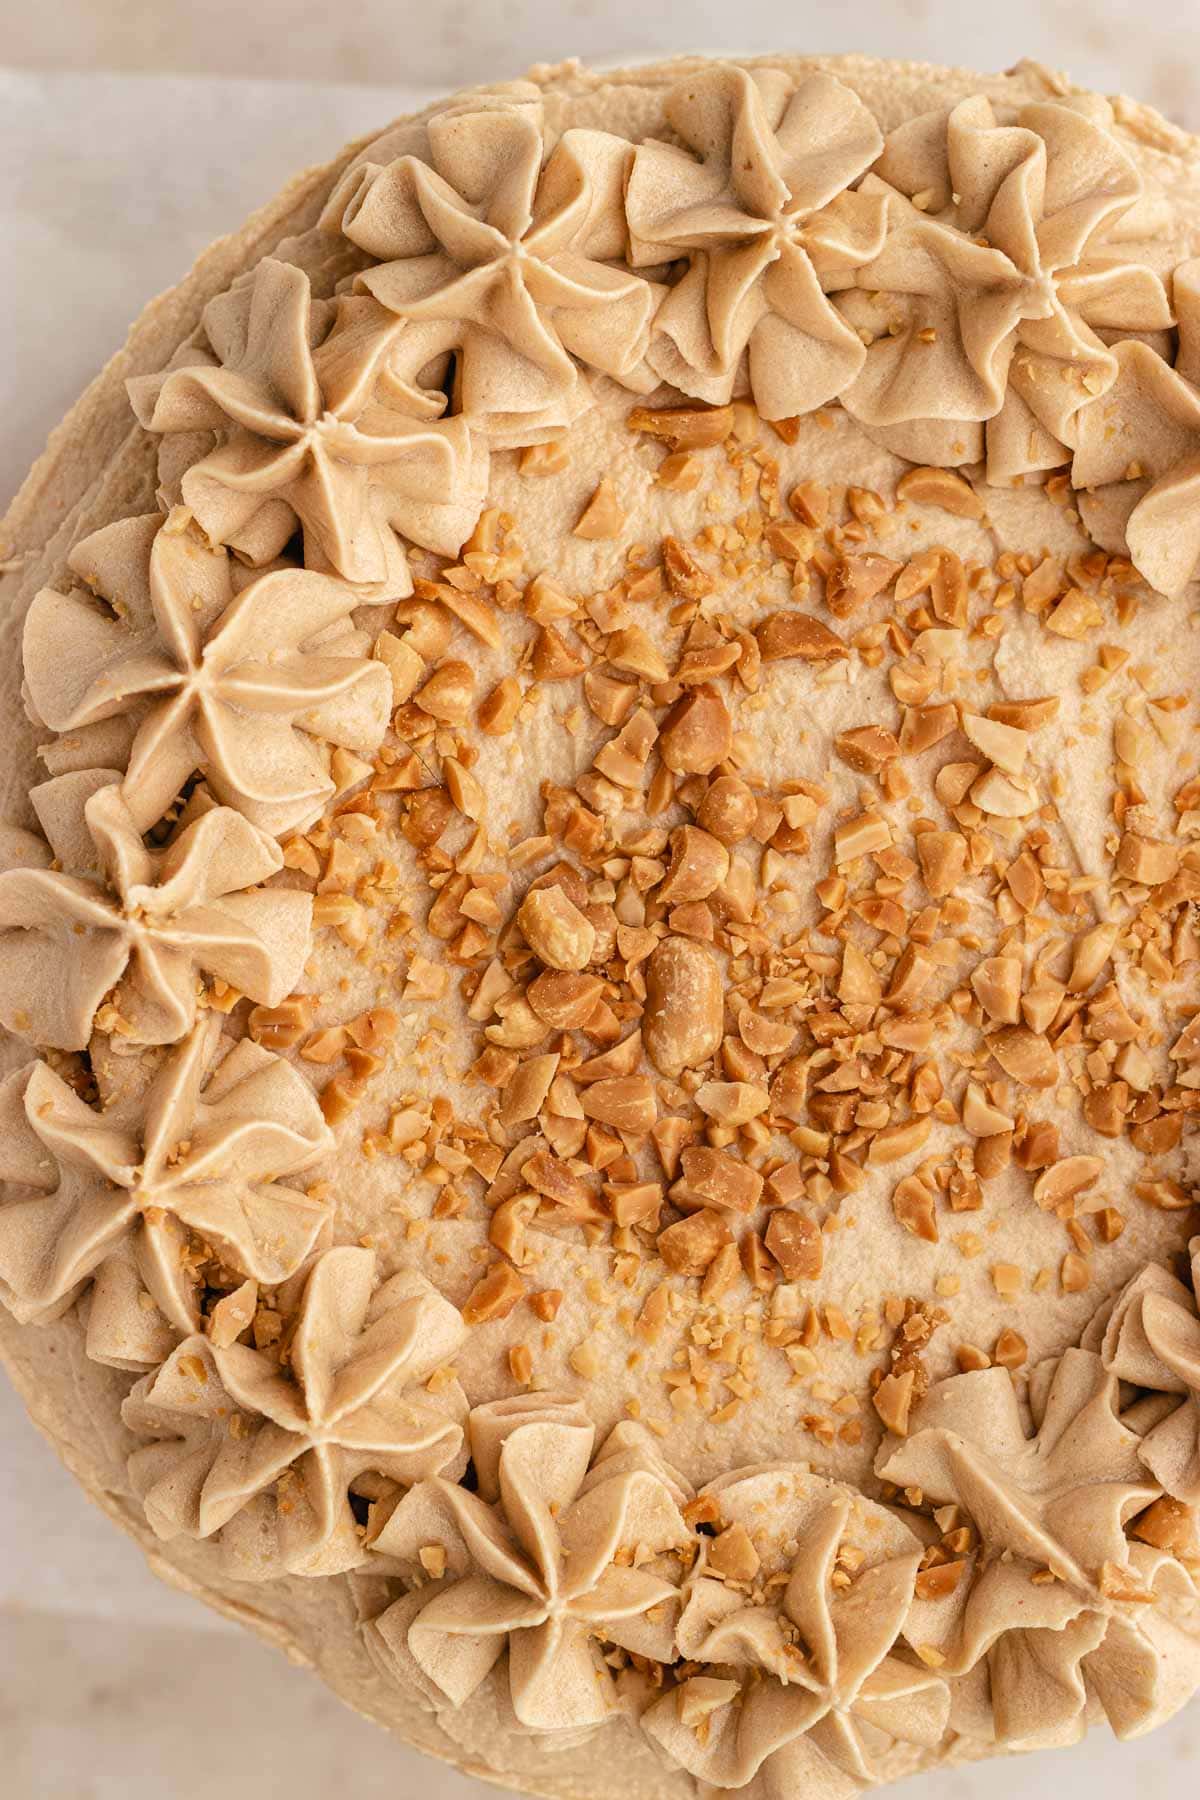

Table of Contents
Sabrina’s Peanut Butter Layer Cake Recipe
This loaded Peanut Butter Layer Cake packs a punch of peanut butter flavor in every bite! It starts with a tender, moist classic peanut butter cake recipe baked in round baking pans. Those cakes then get a thick layer of frosting, but not just any frosting! It’s a rich, smooth peanut butter buttercream frosting that goes inside and outside the entire cake. Finally it’s finished with a simple decoration of chopped peanuts and thick mounds of even more frosting on top. It’s non-stop peanut butter in every layer.
A boatload of peanut butter in one cake might sound like a lot, especially if you aren’t the biggest peanut butter lover. Don’t worry, the heaps of peanut butter actually makes this cake incredibly moist and the flavors are perfectly balanced, not too sweet but also not like eating straight out of a jar of peanut butter. The cake has the familiar peanut butter flavor for sure, but it also has a buttery cream flavor too.
Why Should You Make Peanut Butter Layer Cake?
If you are a true peanut butter lover, obviously this is a dream cake for you to make asap! It’s packed with a triple punch of creamy, nutty delicious peanut butter flavor, incredibly moist and tender, and has just the right amount of sweetness. Not to mention, it is simply gorgeous to look at! This is the perfect dessert for folks who aren’t fans of chocolate too, since this peanut butter cake recipe isn’t made with any chocolate.

Ingredients
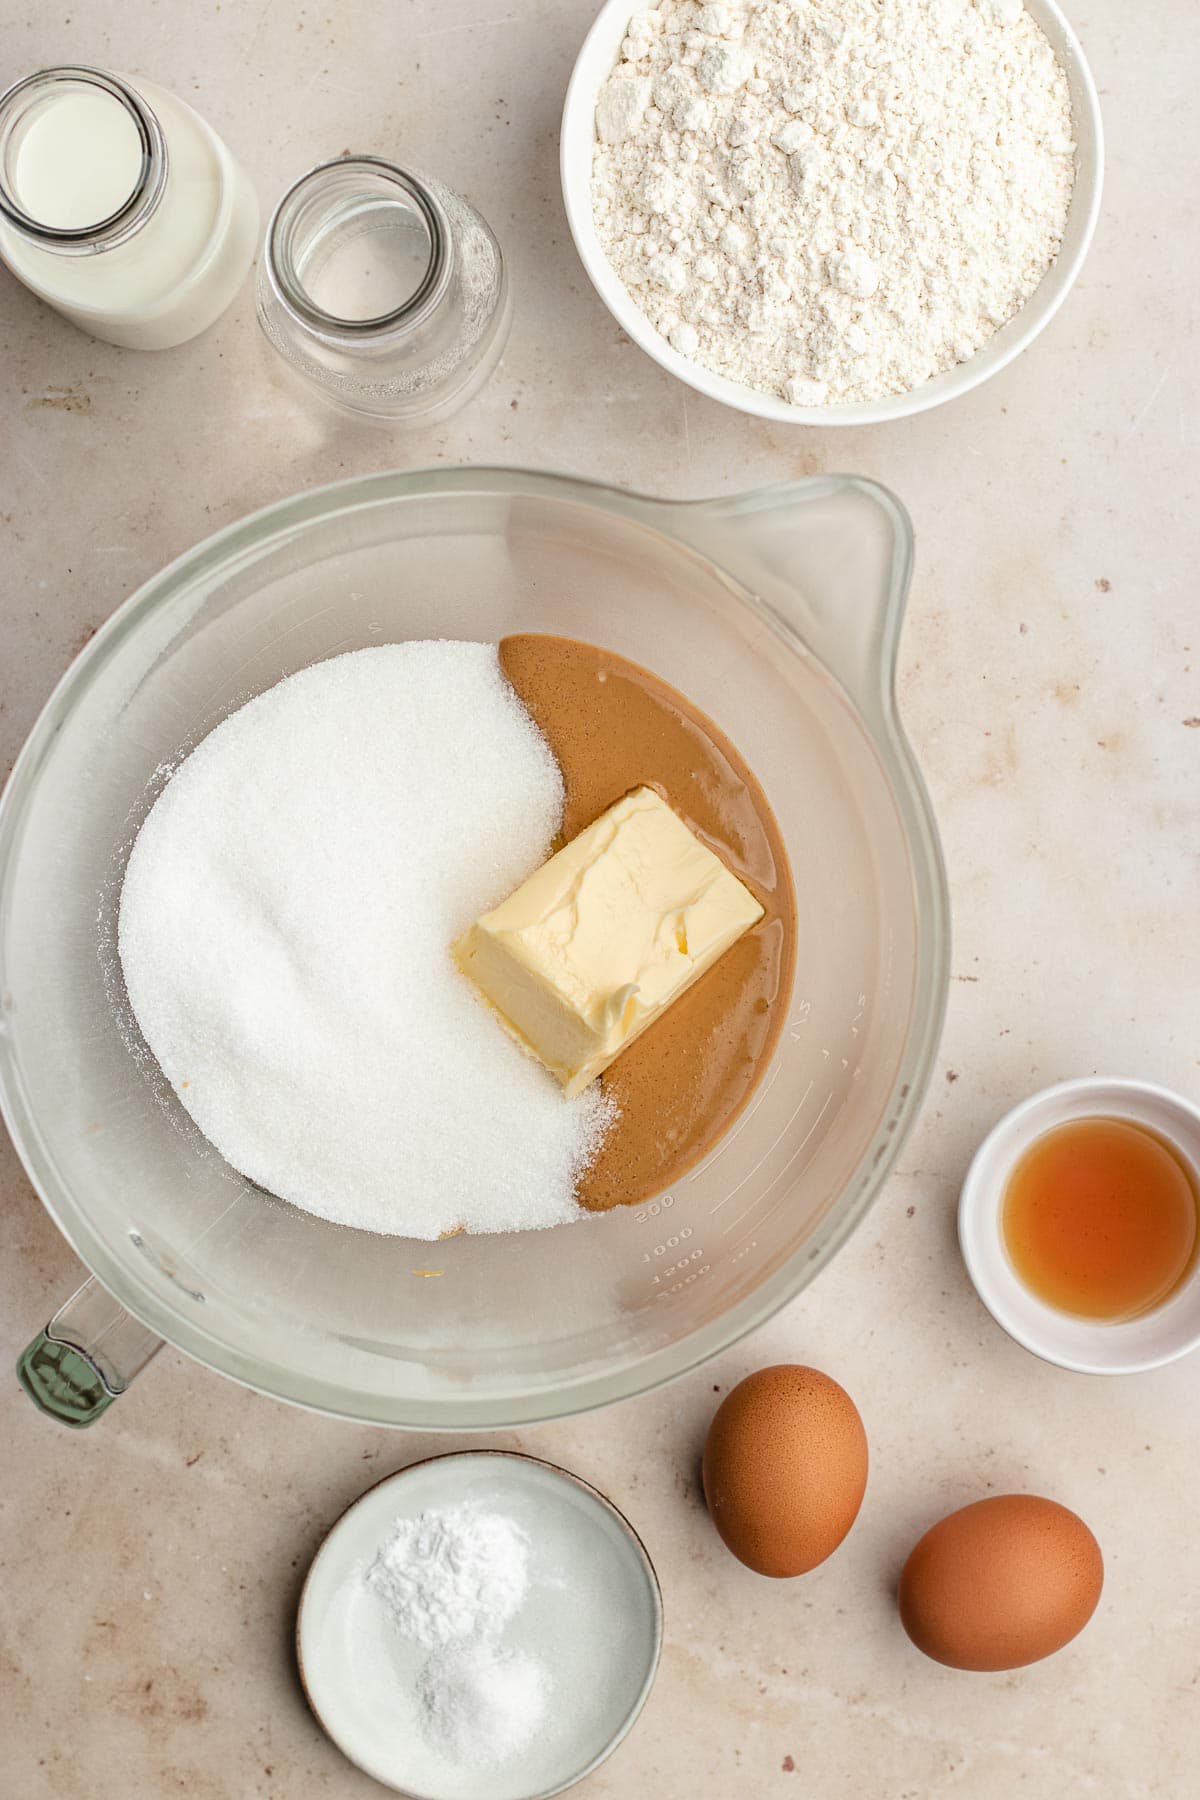
- Peanut Butter: Over 2 cups total give this layer cake maximum peanut butter punch! Plus the soft peanut butter adds moisture for super tender cake. Do use creamy, smooth peanut butter and don’t use the natural kind with oil separated on top.
- Sugar: For the cake layer, granulated sugar not only brings sweetness but keeps the cake soft and tender. Did you know that water and sugar bond during the baking process to lock in moisture? For a richer, more caramel flavor you can swap in brown sugar for the white sugar, or use a combination.
- Butter: You should use butter instead of oil in this peanut butter cake batter because peanut butter already contains oil. The butter causes steam to release as the cake bakes to help it rise for a more airy texture than you’d get using vegetable oil.
- Eggs: Eggs are what hold all the ingredients together, they add moisture and whipping them makes your cake lighter.
- Milk: This peanut butter cake is already super moist from the butter, eggs, sugar, and peanut butter that it doesn’t need an acidic dairy like buttermilk or sour cream. Whole milk works just fine for a moist crumb and won’t weigh down the cake.
- Water: Water not only bonds with sugar molecules to trap moisture in your cake batter, but it also helps break down the other ingredients so they bind together easier.
- Powdered Sugar: Powdered sugar is so fine that it easily mixes in with ingredients like butter for the smoothest frosting. Powdered sugar also has a bit of cornstarch in it to keep it from caking and that cornstarch helps thicken your frosting.
Kitchen Tools & Equipment
- Round Cake Pans: You’ll use 2 round 8-inch cake pans to make your double layer cake, that way you can bake them both at the same time.
- Baking Spray: Use baking spray to coat your pans. This is a really easy tool to use as it contains oil and flour.. If you don’t have any baking spray you can use butter and dust some flour in the pan. Tilt each pan and tap it to spread the flour all over the pan.
- Stand Mixer with Paddle Attachment: Your stand mixer will come in very handy for this recipe. If you don’t have one, you can use a handheld electric mixer or simply mix by hand.
- Sifter: A sifter will blend and aerate your dry ingredients to make an evenly fluffy, delicious cake.
- Wire Rack: Cooling your cakes on a wire rack allows air to flow all around the cake, including underneath it for fast and even cooling.
- Serrated Knife: You’ll need a knife to level your cakes, which means to trim the top so that it is nice and flat for frosting, rather than rounded like how it is fresh out of the oven. The best knife for this is a serrated knife because it will glide through the fluffy cake much more easily than other types of knives. Each serrated point works to make a fresh, clean cut through the cake.
- Offset Spatula: The best tool for frosting your cake will be an offset spatula. The angle is just perfect for holding it in your hand and gliding it evenly over the cake nice and flat.
- Measuring Cup and Spoons: Grab your favorite measuring cup and spoon set to carefully measure all of your ingredients. When baking, accuracy is super important so watch closely.
How to Make Peanut Butter Layer Cake
Time needed: 3 hours
- Prep
Preheat the oven and grease your pans. Microwave peanut butter (for cake) in a bowl until runny and pourable.
- Begin Batter
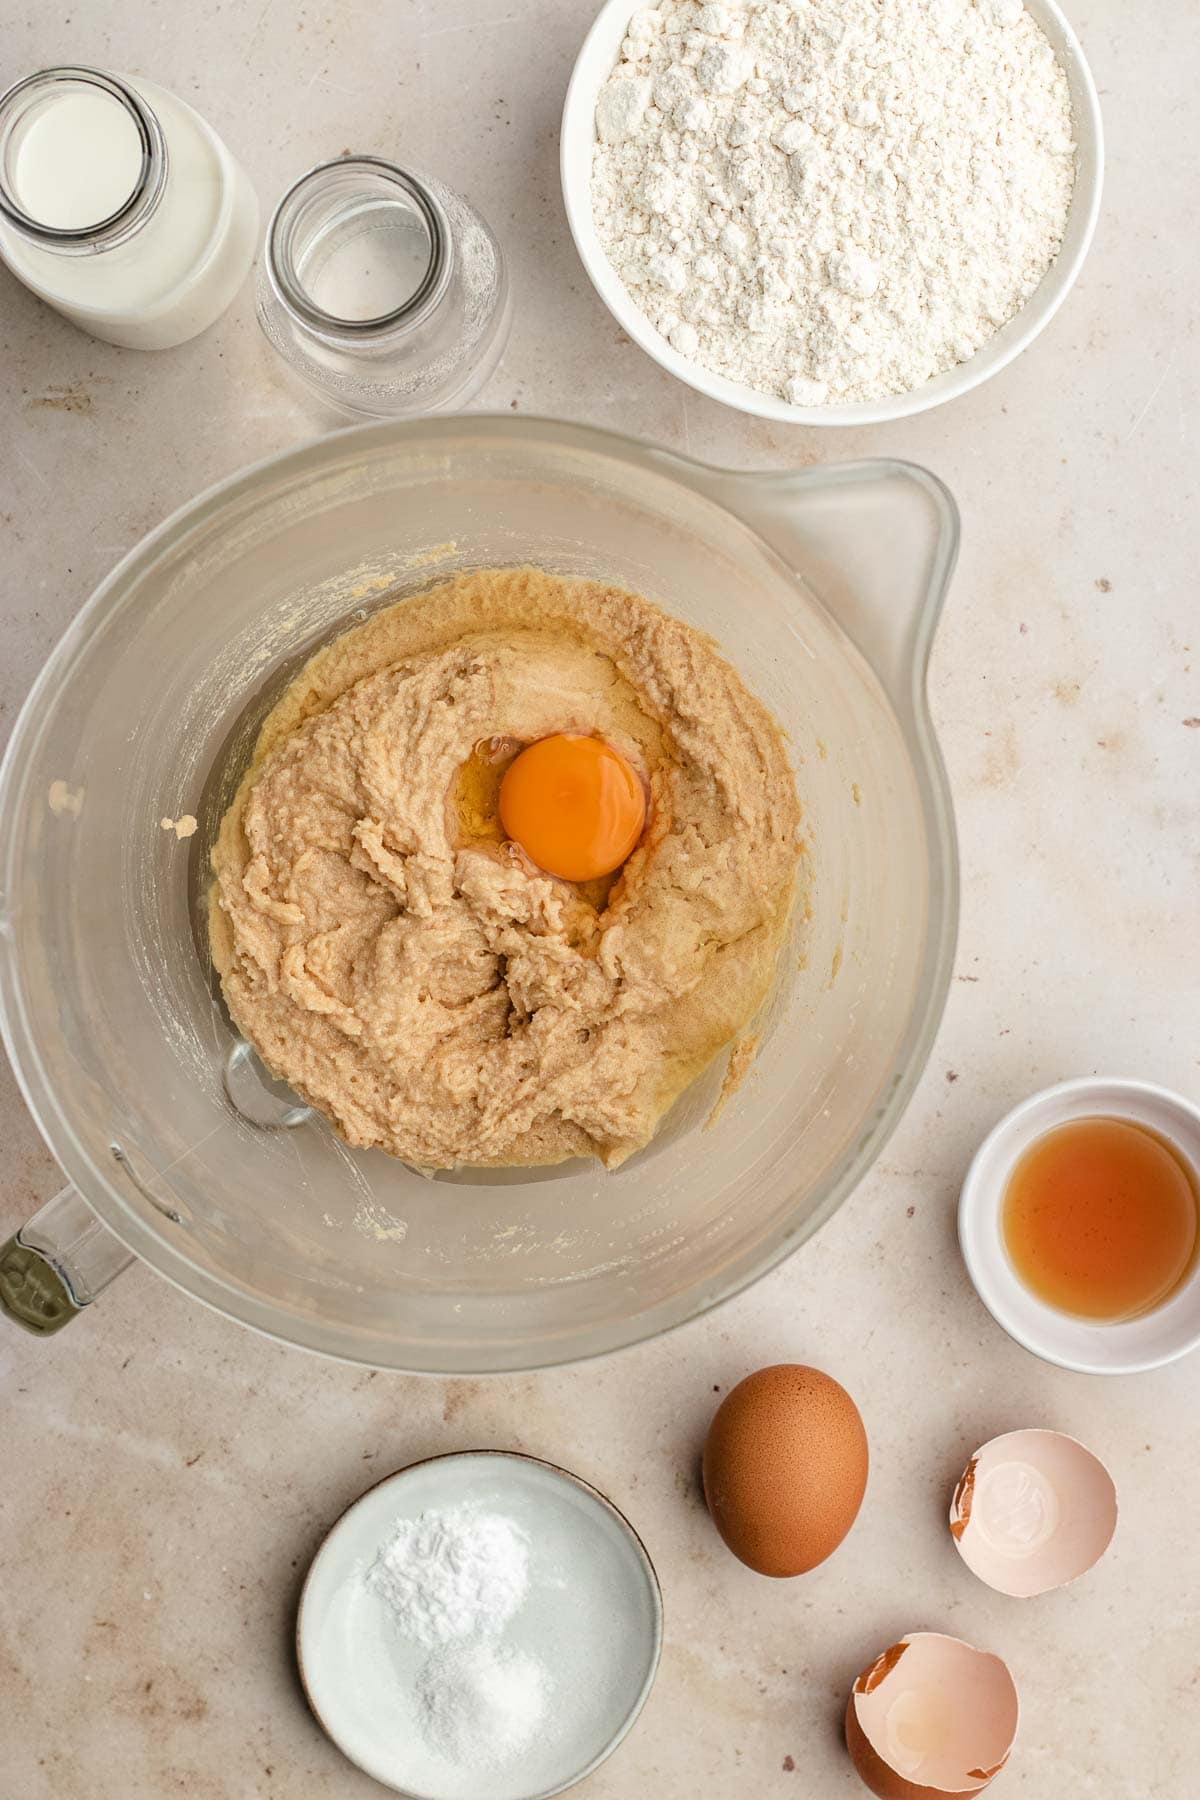
Cream peanut butter, butter, and sugar on high in a stand mixer.
- Wet Ingredients
Add the eggs and vanilla.
- Milk
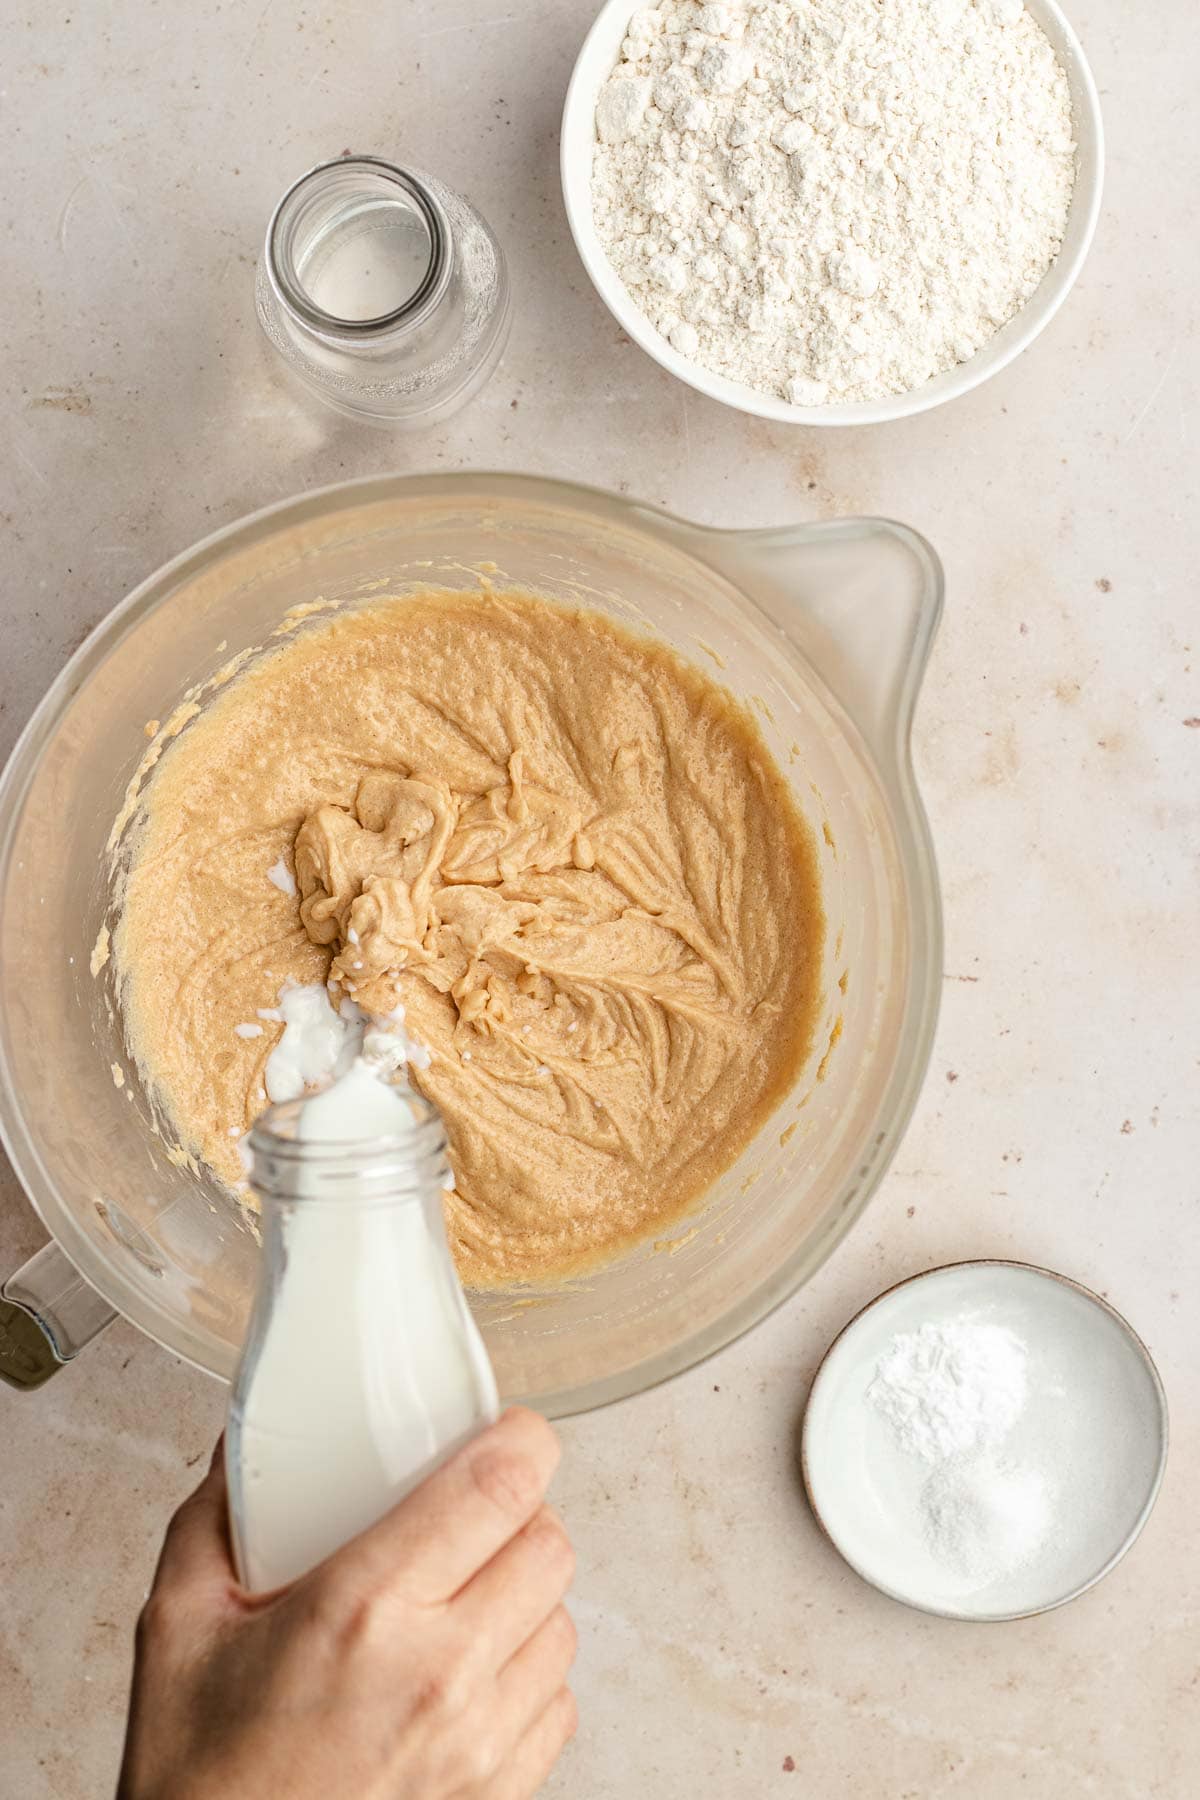
Turn to lowest speed and add milk.
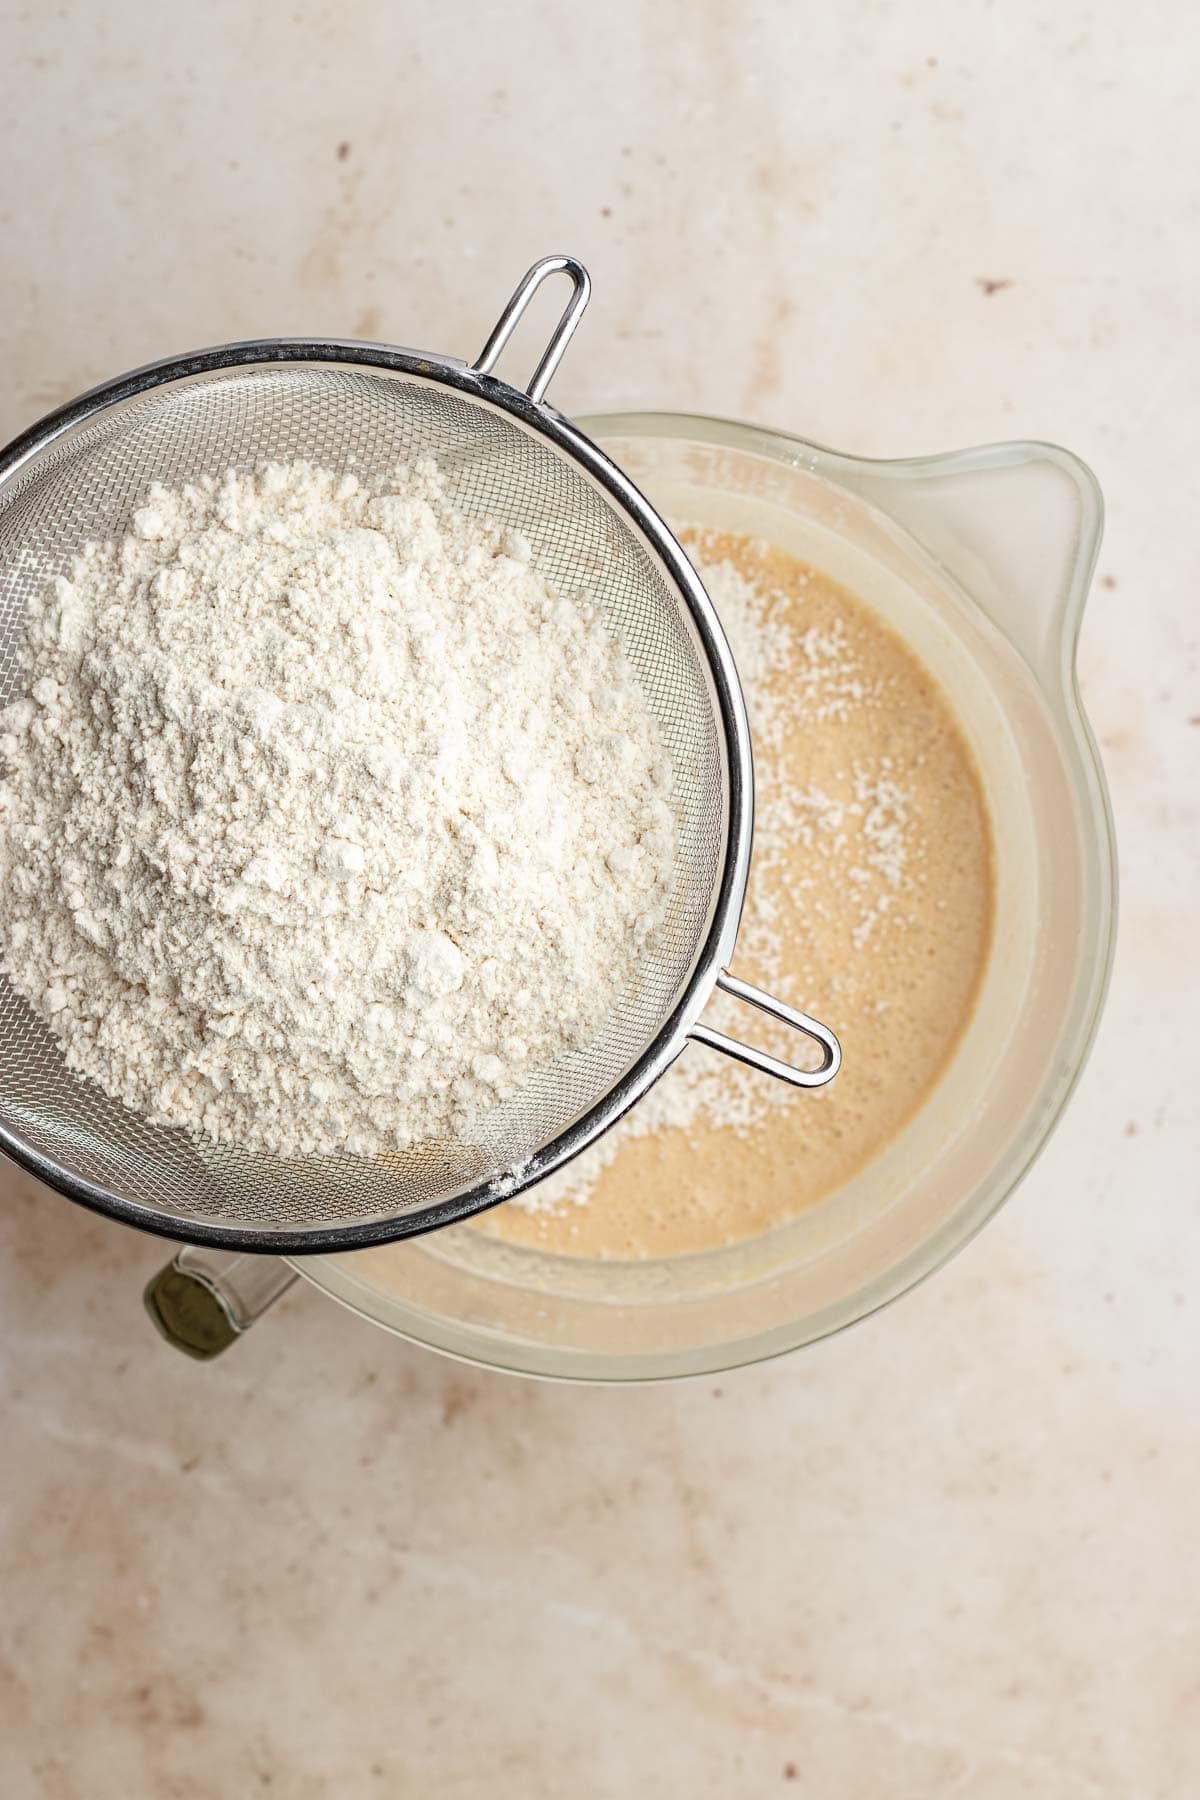
- Dry Ingredientws
Sift dry ingredients then add to peanut butter mixture in batches.
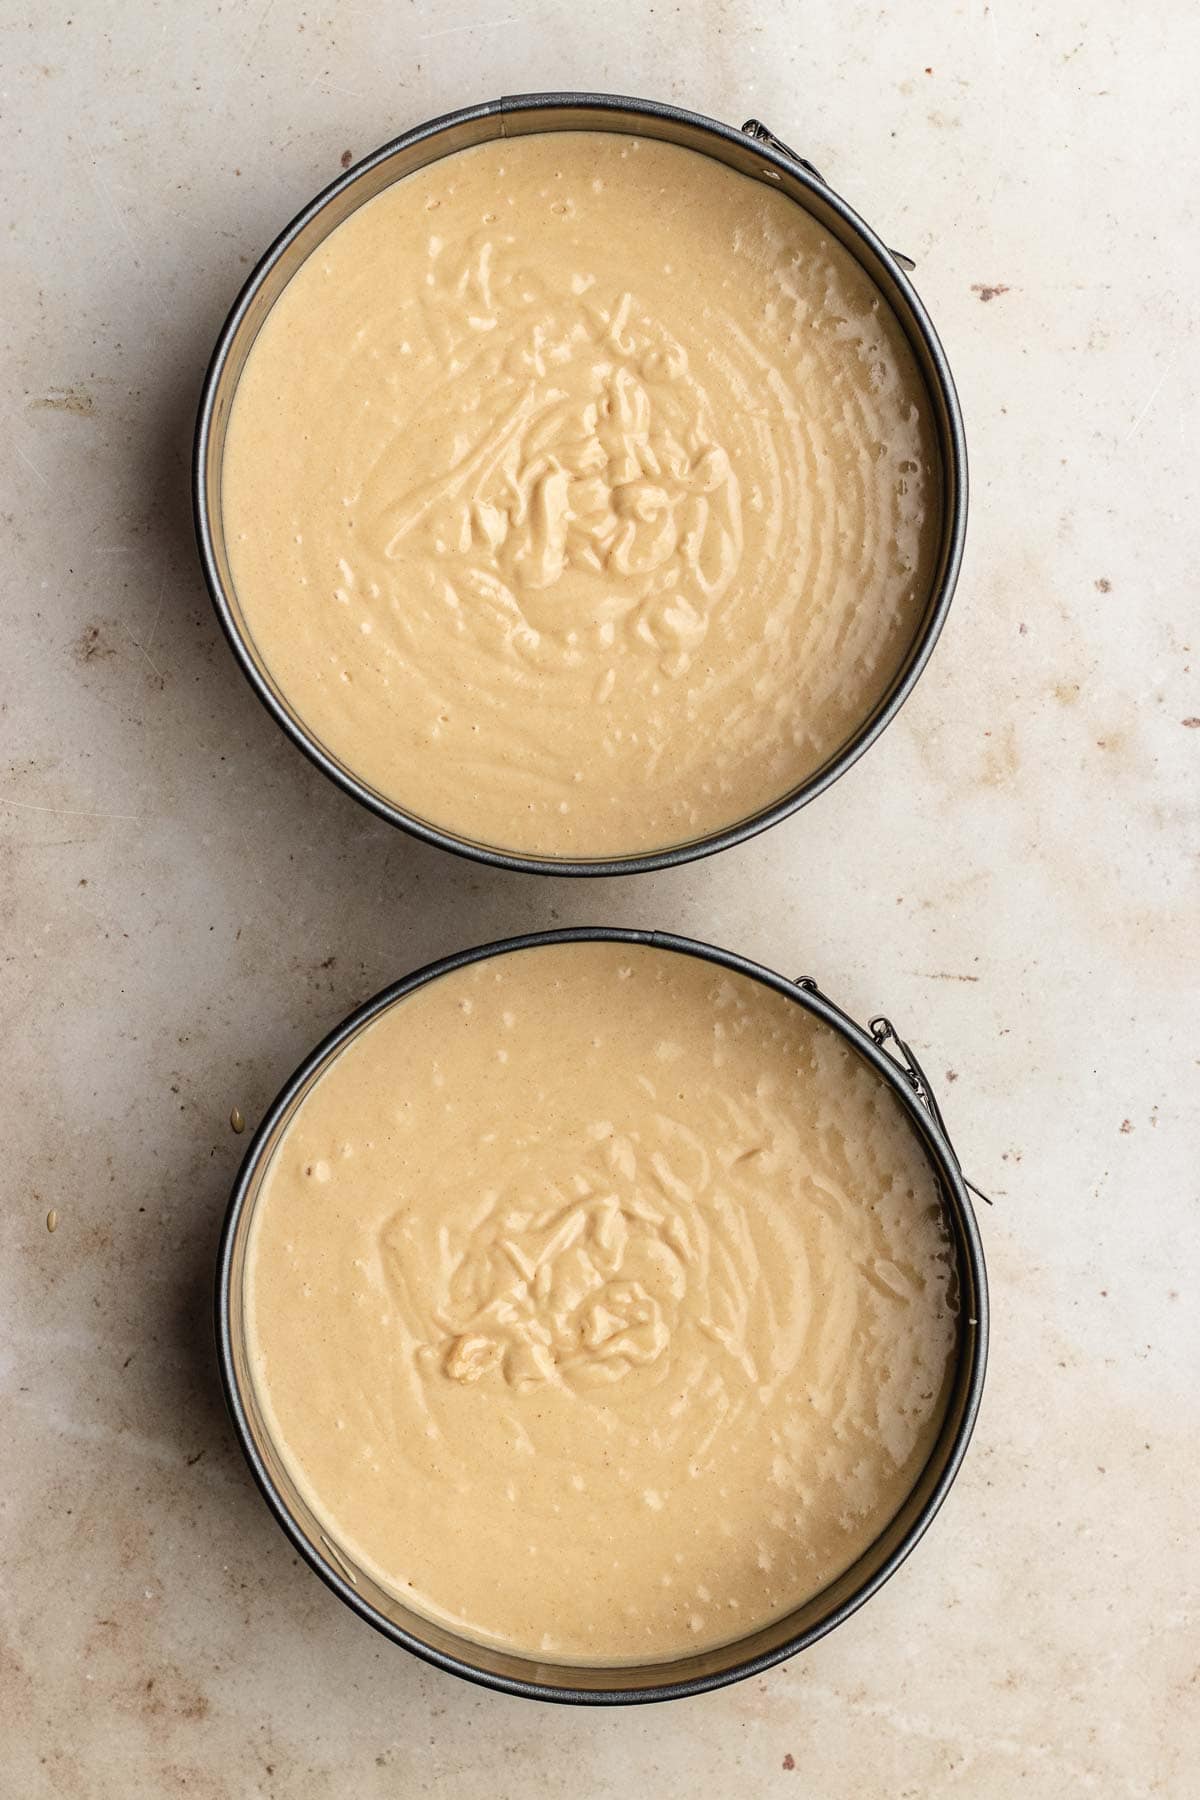
- Bake
Divide between pans and bake until a toothpick comes out clean with moist crumbs.
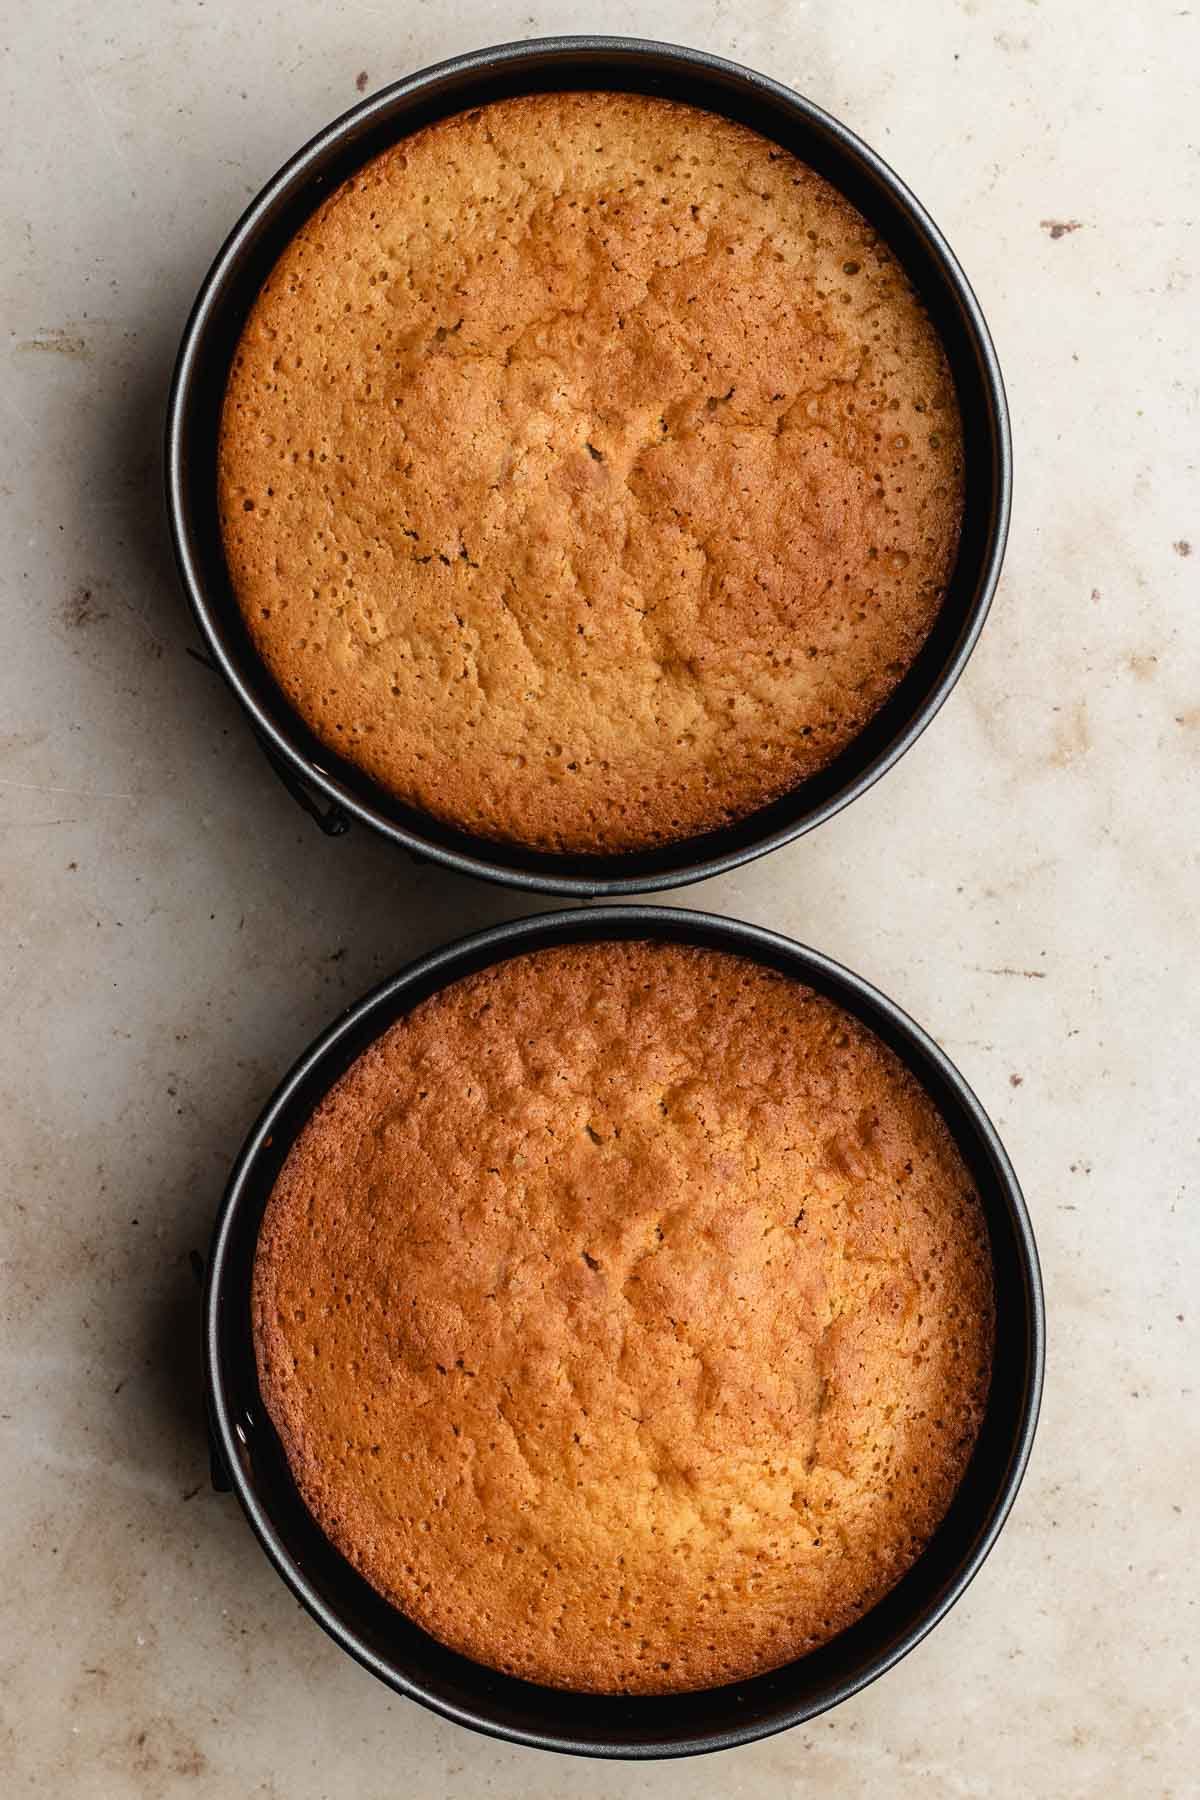
- Cool
Let pans cool on a wire rack for 15 minutes, then remove cake from the pans and place cakes on racks to finish cooling completely.
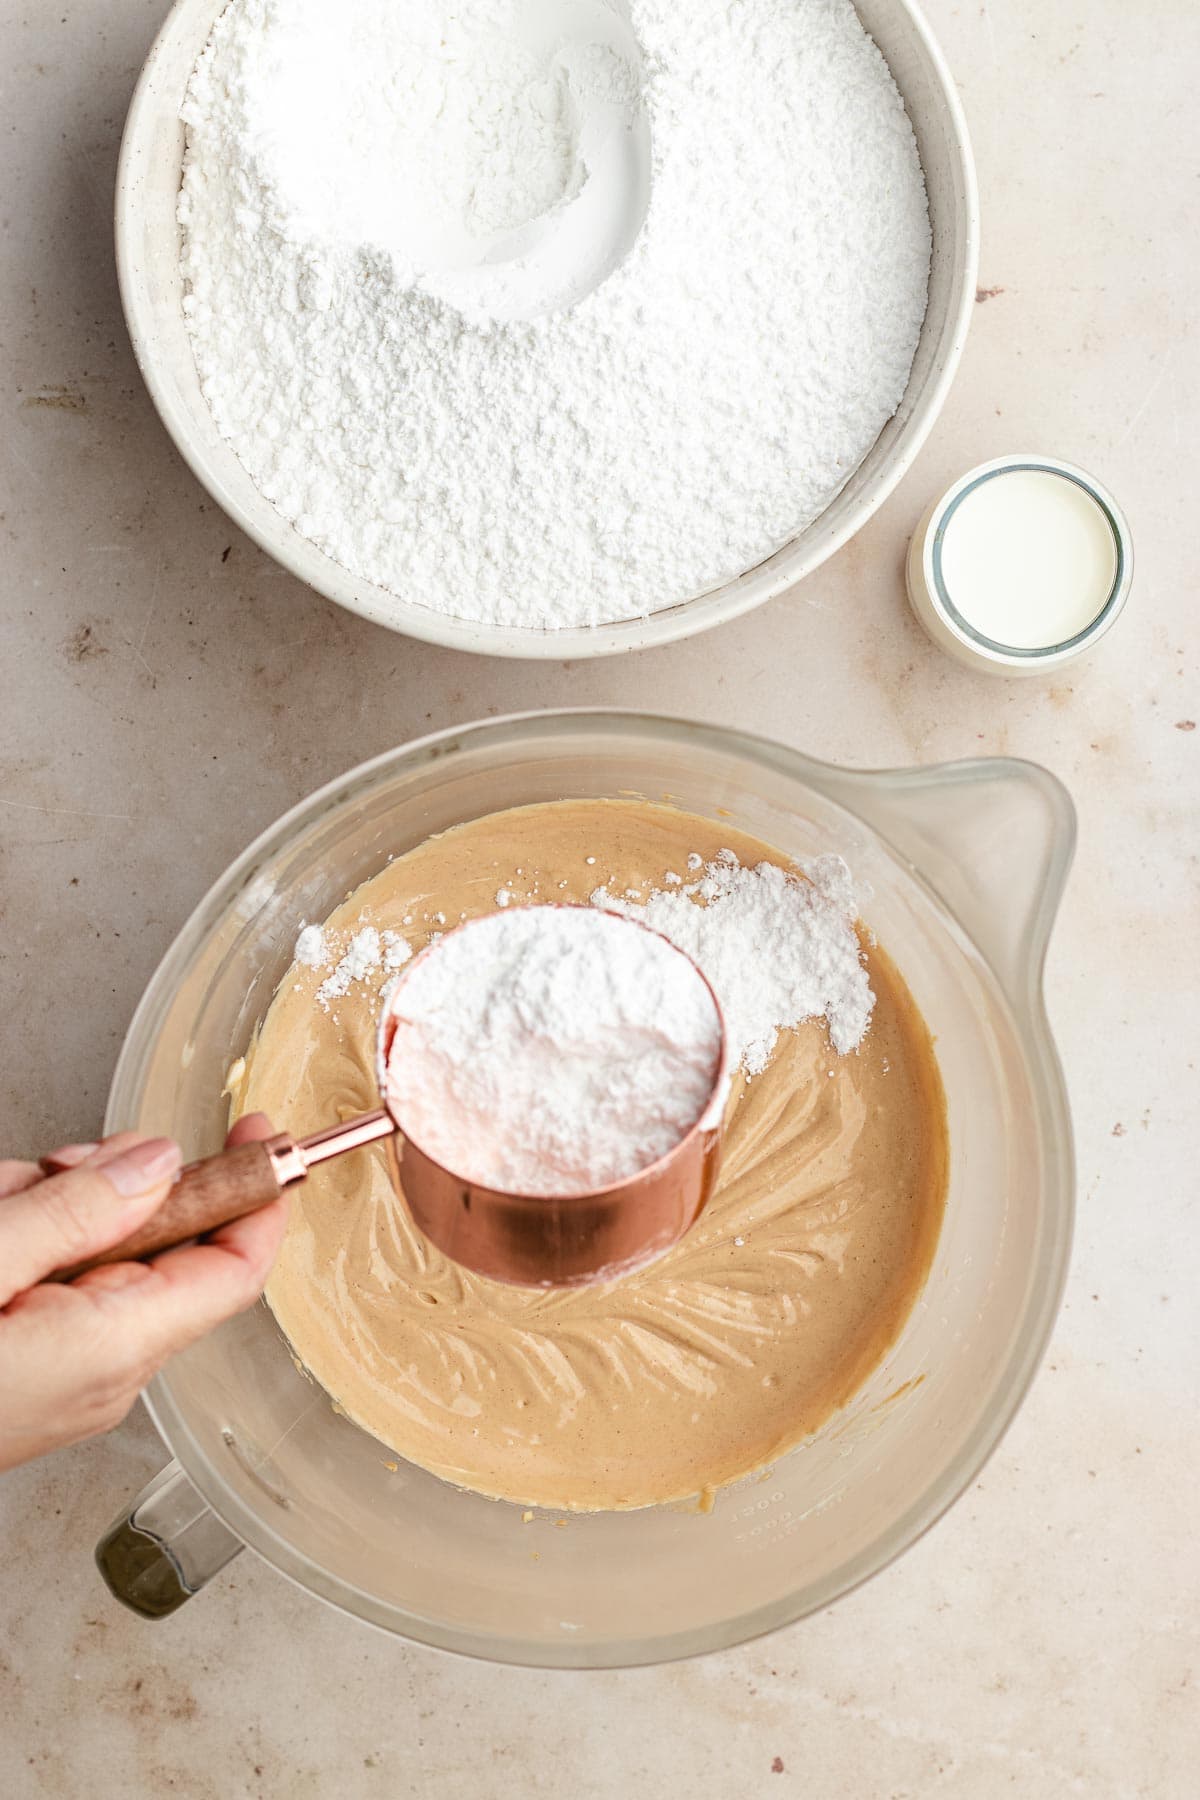
- Make Frosting
Beat butter and peanut butter on medium speed until combined. Turn speed to low and add powdered sugar in batches, alternating with milk until light and fluffy.
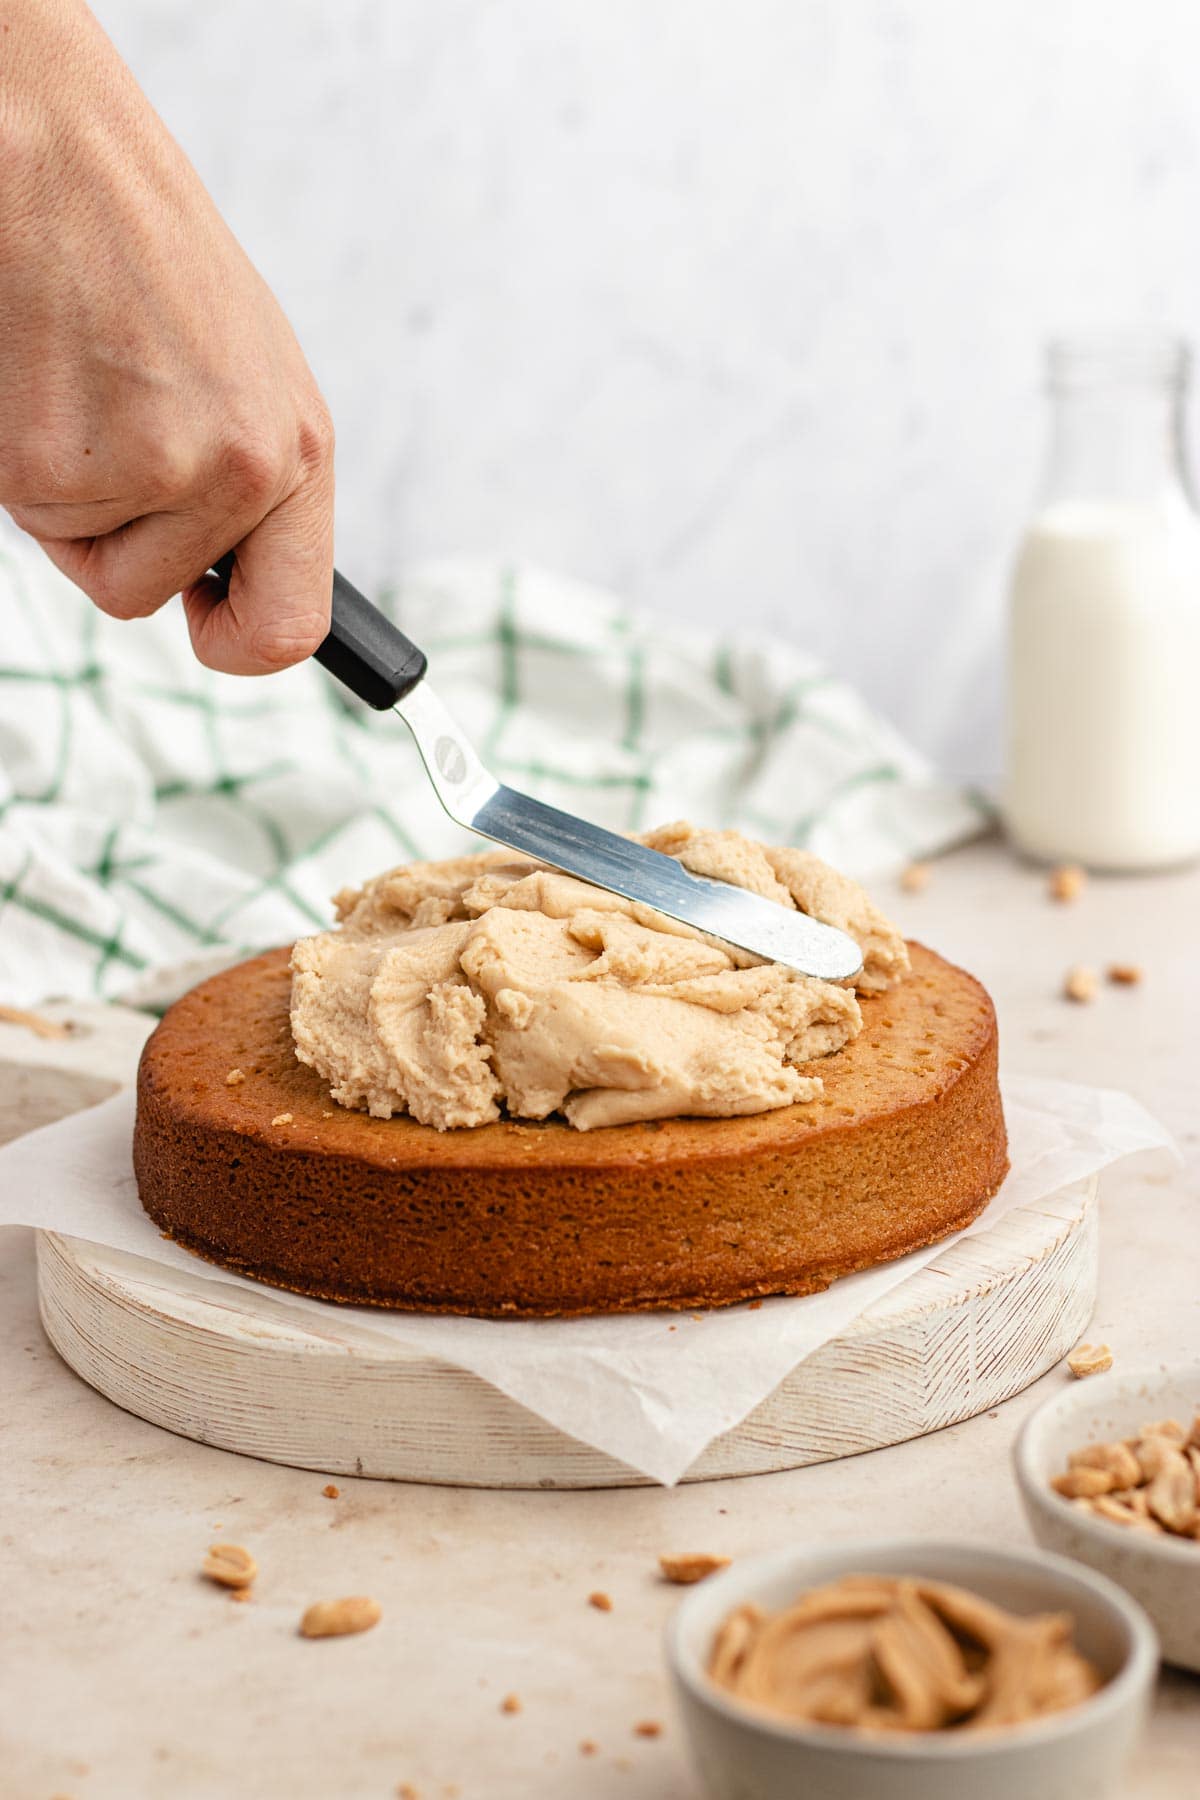
- Frost Layer 1
Add a dollop of frosting to the center of a cake stand. Level cakes and discard extra pieces and crumbs. Place the first cake layer on the stand. Top with frosting.
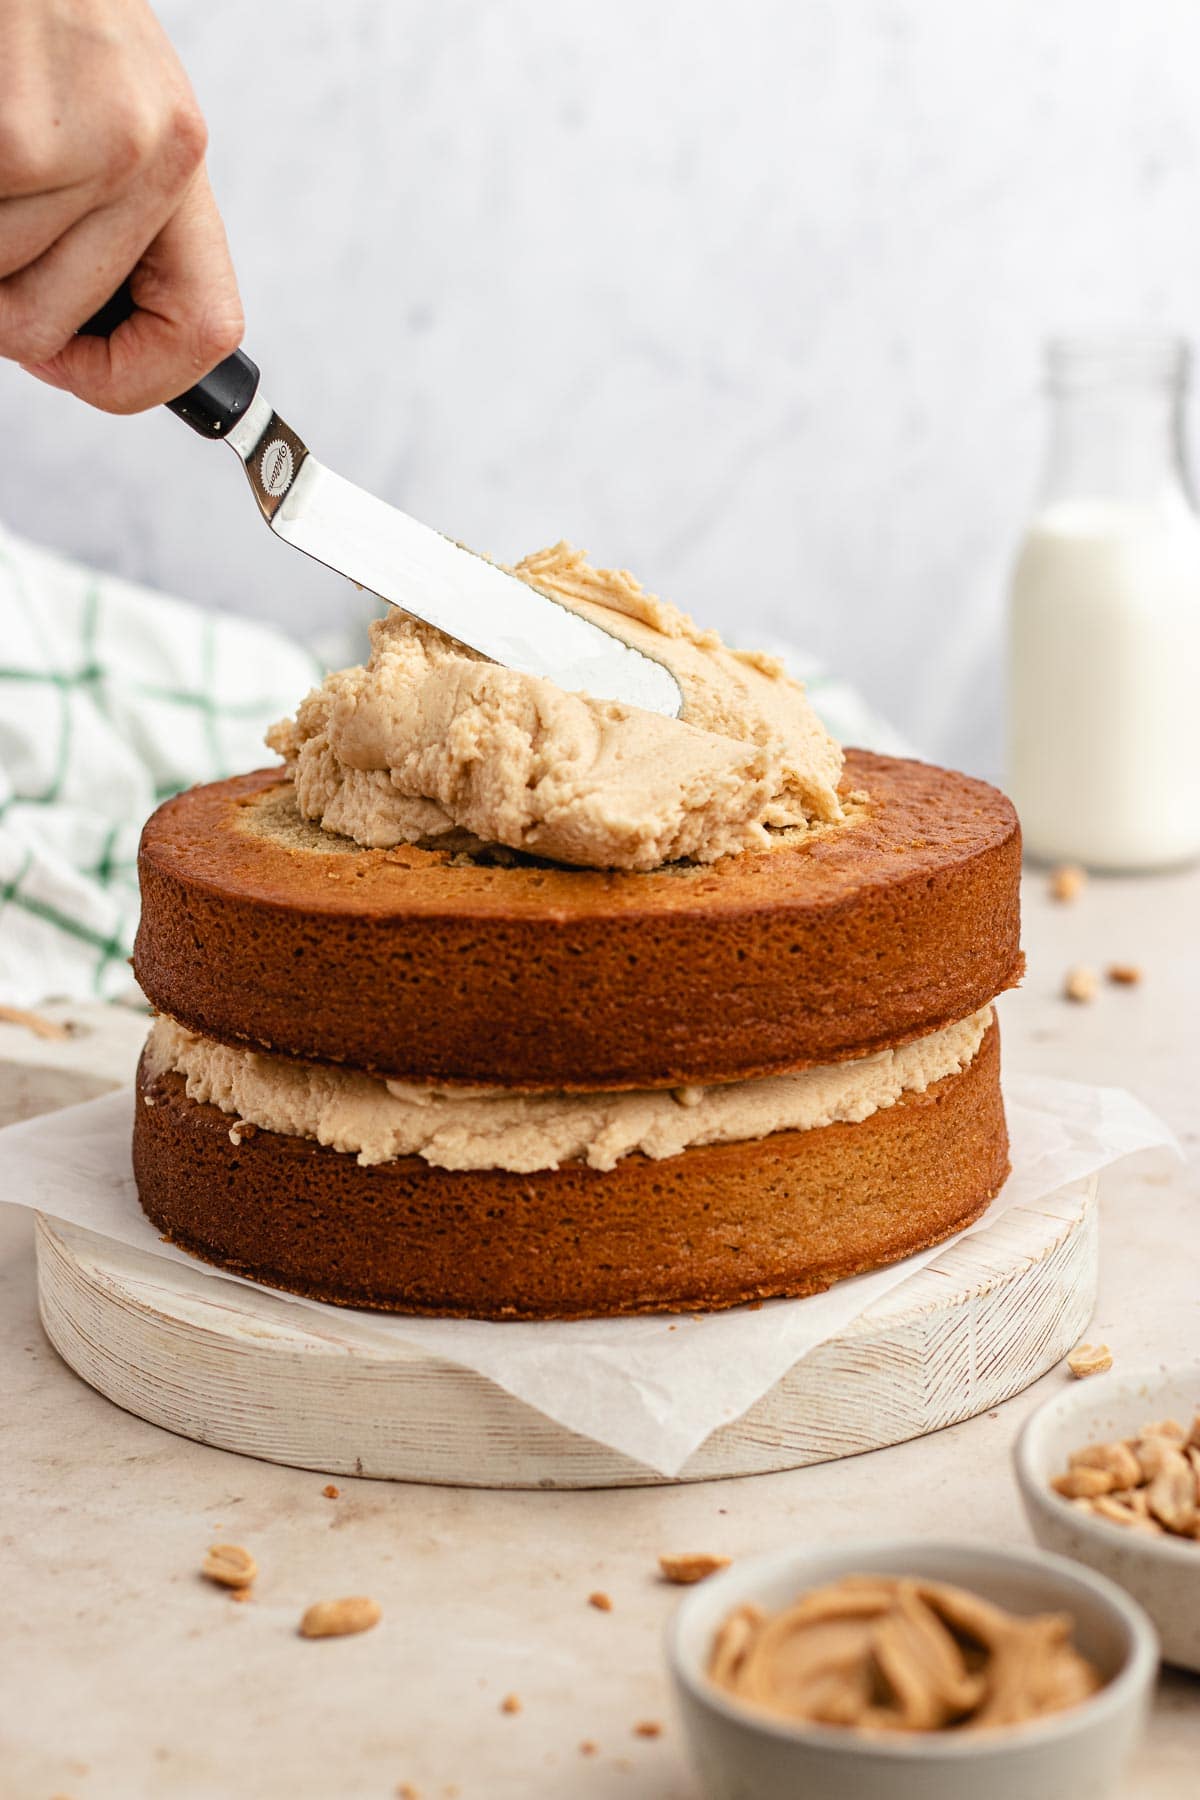
- Frost Layer 2
Top with the second cake layer and frost.
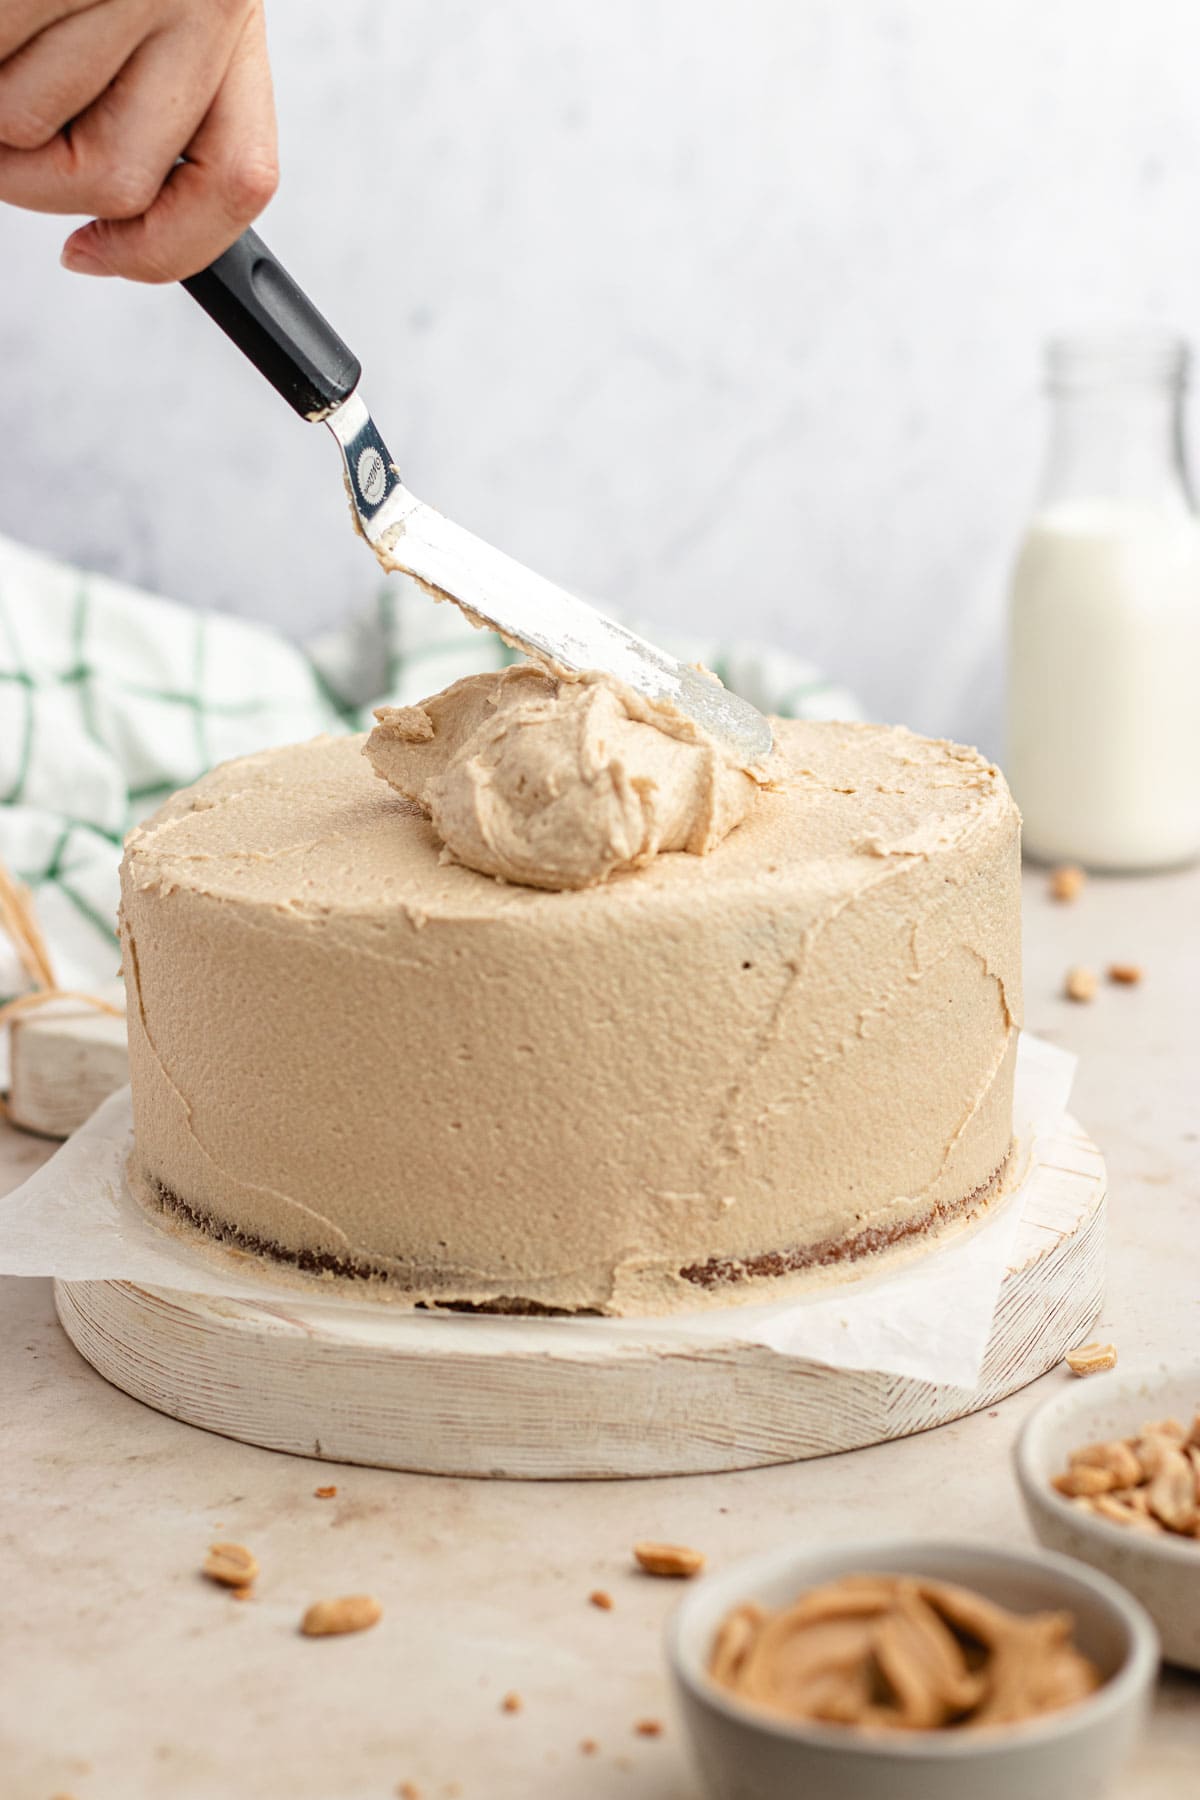
- Frost Final Layer
Coat the entire cake evenly with frosting then chill until frosting has hardened. Using half the remaining frosting, frost the cake again evenly.
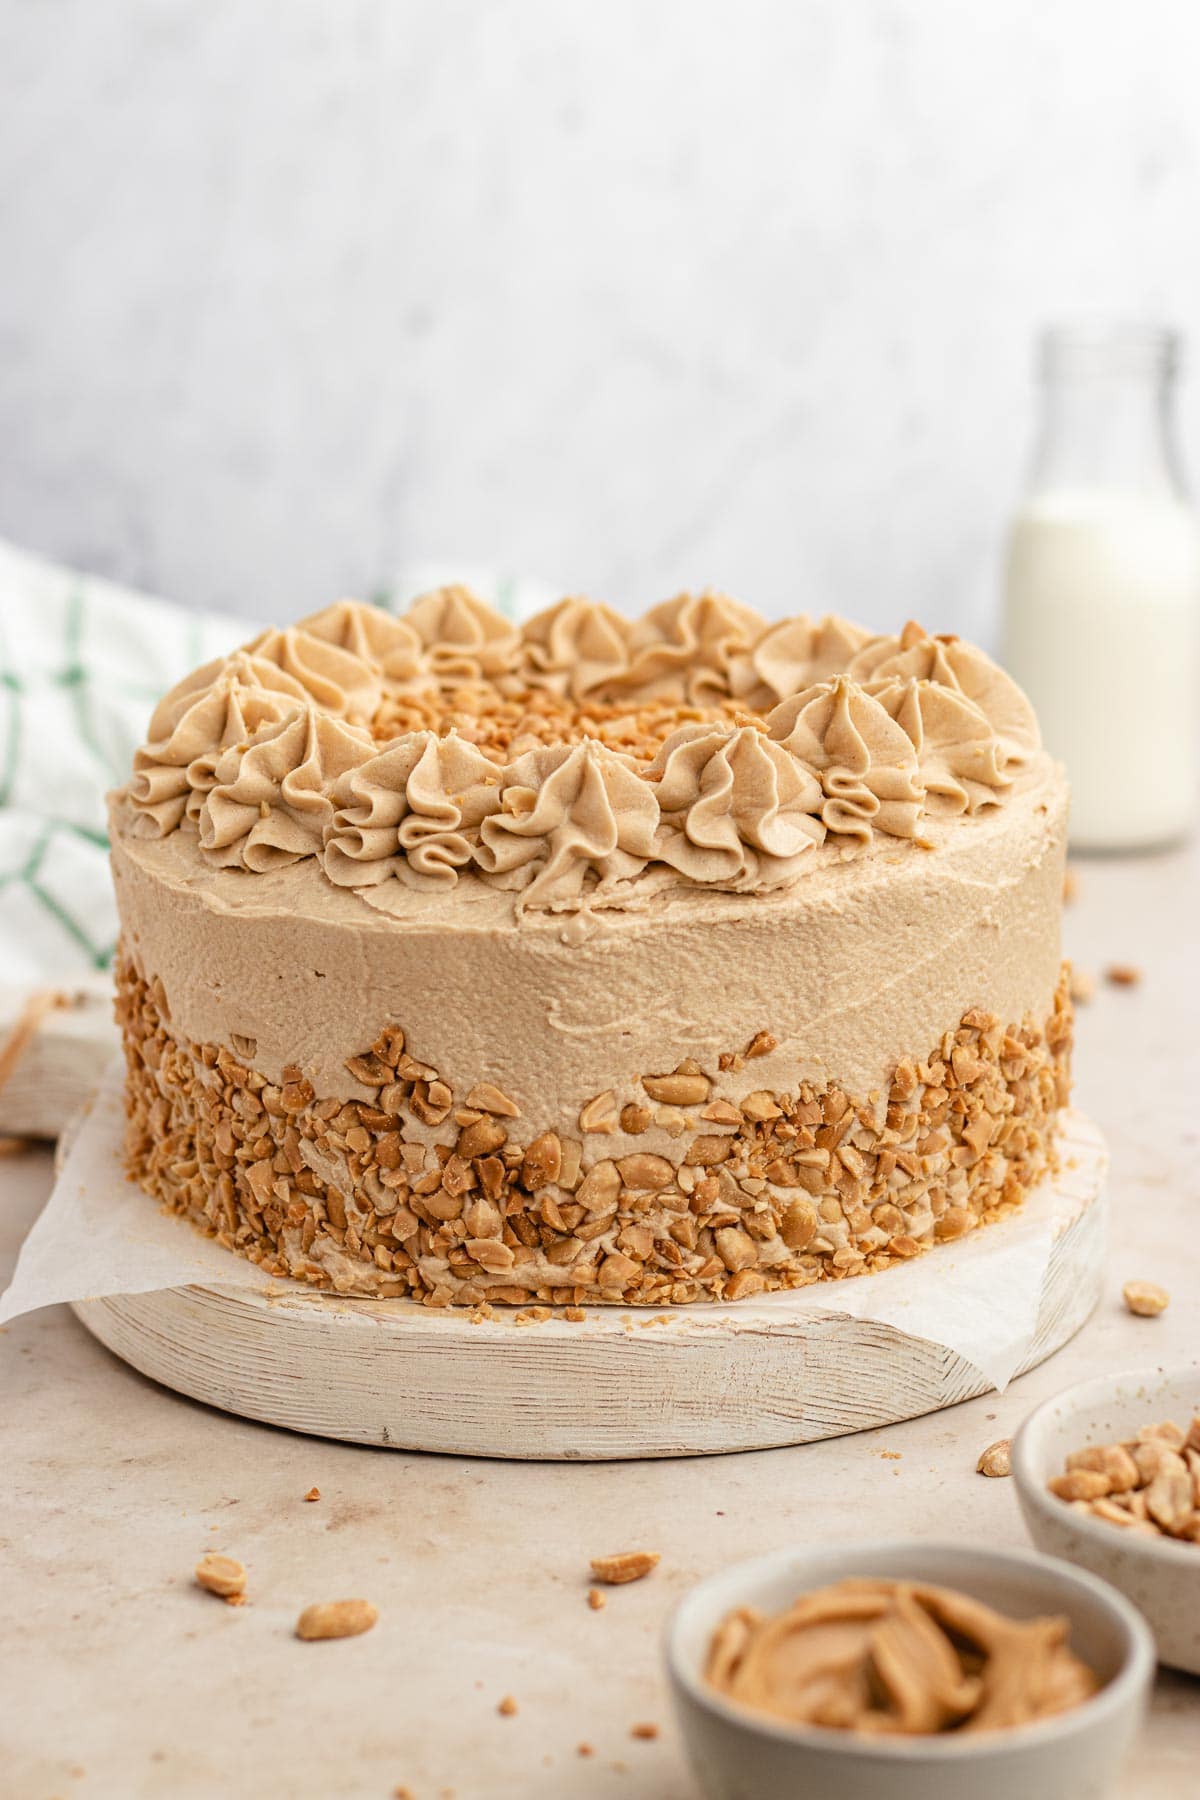
- Decorate
Decorate the cake with remaining frosting and peanuts.
Can I make this cake ahead of time?
Peanut Butter Layer Cake can be made ahead of time and either refrigerated or you can freeze it for up to 6 months, but it is freshest within the first 3 months. To freeze a frosted cake, leave off the nuts and the decorative frosting, then put it in the freezer for 1 hour or until frosting is hardened. Wrap the frozen cake tightly with a couple layers of plastic wrap and store in the back of your freezer. When you are ready to serve, thaw it overnight in the refrigerator, then bring to room temperature and decorate it like usual.
Nutritional Facts
Baking Tips & Tricks
This recipe will be a ‘piece of cake’ if you follow these helpful tips.
- Gently Stir the Dry Ingredients
- When you stir the dry ingredients into the egg mixture, it begins pushing the air out which is why it is important not to stir too much or you’ll get a dense cake.
- Only Cut Cake when Cooled
- You should always cut or level your cake once it has completely cooled to prevent breakage and excessive crumbs. Warm cakes are much more fragile because the steam released as you cut breaks down the delicate sponge.
How to Store
- Serve: Peanut Butter Layer Cake is best at room temperature so the frosting is nice and soft. As long as it’s not hot enough to melt the frosting, your cake can be at room temperature for up to 5 days. Cover with an upside down large bowl or tent aluminum foil over the cake and seal the edges.
- Store: Cover the cake with foil or put slices in an airtight container and store in the refrigerator for 1-2 weeks. Bring to room temperature before enjoying.
- Freeze: Cake with or without frosting should be wrapped as tight as possible in plastic wrap before freezing for 3-6 months. Thaw the cake overnight in the fridge before frosting (as needed) and serving.
Ideas to Serve Peanut Butter Layer Cake
This is a very impressive cake on its own, but you could play with the toppings in so many ways that you could serve a unique cake each time you make it! Decorate the top with peanut butter chips, chocolate chips, or a combination of the two. You could blend the chips with the peanuts so you keep that nutty crunch on the cake. Bring a cookie crunch onto the cake by replacing the nuts with crushed cookies, or put a Nutter Butter cookie on top of each frosting mound.
Frequently Asked Questions
For typical peanut butter desserts, you always want to use regular creamy peanut butter, like a Jif or Skippy. Don’t use natural peanut butter because the oils separate and you will end up with an oily, dense cake. Crunchy peanut butter won’t mix easily so it doesn’t work well either. Stick to the creamy jar of peanut butter and add chopped peanuts to the cake batter if you want texture. Also since the recipe uses over 2 cups of peanut butter, grab a large jar of peanut butter while shopping.
Chopped peanuts are on this cake for decoration, for crunchy texture, and to give a hint what flavor of yummy cake is inside when you look at it. If it’s too much peanut for you or you aren’t a fan, go ahead and leave them off. Instead try peanut butter chips, chocolate shavings, crushed graham crackers, or toasted crumbs from the leftover cake pieces.
Recipe Card
Ingredients
Peanut Butter Cake:
- 3/4 cup peanut butter , do not use natural
- 1/2 cup unsalted butter , softened
- 2 cups sugar
- 2 large eggs
- 2 teaspoons vanilla extract
- 1 cup milk
- 1 cup water
- 2 cups flour
- 1 teaspoon baking soda
- 1/2 teaspoon salt
Peanut Butter Frosting:
- 1 cup unsalted butter , softened
- 1 1/2 cups creamy peanut butter
- 6 1/2 cups powdered sugar
- 1/2 cup milk
To Finish:
- 2 cups dry roasted peanuts finely chopped
Instructions
Peanut Butter Cake:
- Preheat oven to 350 degrees and spray two 8-inch cake pans with baking spray.
- Microwave your peanut butter for 30 seconds in a microwave safe bowl (covered with a wet paper towel) until runny.
- To your stand mixer, add peanut butter, butter, and sugar and cream on high speed for 1 minute.
- Add in the eggs and vanilla until well combined.
- On the lowest speed setting add in the milk and water until smooth.
- Sift together flour, baking soda, and salt.
- On lowest speed setting add in flour in batches until just combined.
- Pour into baking dish and bake for 30-35 minutes or until a toothpick comes out clean.
- Cool pans on racks for 15 minutes, remove cake and finish cooling completely before frosting.
Peanut Butter Frosting:
- To your stand mixer add the butter and peanut butter and beat on medium speed for 2 minutes until fully combined.
- Lower the speed to low and add in the powdered sugar 1 cup at a time, alternating with 2 tablespoons of milk (starting and ending with sugar) until light and fluffy, about 2-3 minutes.
To Finish:
- To your cake stand add a spoonful of peanut butter frosting.
- Level the cakes with a large serrated knife and discard the cake pieces.
- Brush off excess crumbs.
- Add the first layer of the peanut butter cake to the cake stand.
- Top with 1 cup of peanut butter frosting, spread evenly.
- Top with second layer of peanut butter cake.
- Coat the outside of the cake with 1 cup of peanut butter frosting.
- Refrigerate for 30 minutes to allow to harden.
- Frost the cake with half the remaining frosting.
- Pipe swirly mounds onto the top of the cake.
- Press the peanuts up against the side of the cake coming up halfway on the sides of the cake.
- Sprinkle a few more peanuts over the top of the piped swirly mounds.
Nutrition
Want to save this recipe? Create a free account to easily save your favorite recipes
Variations
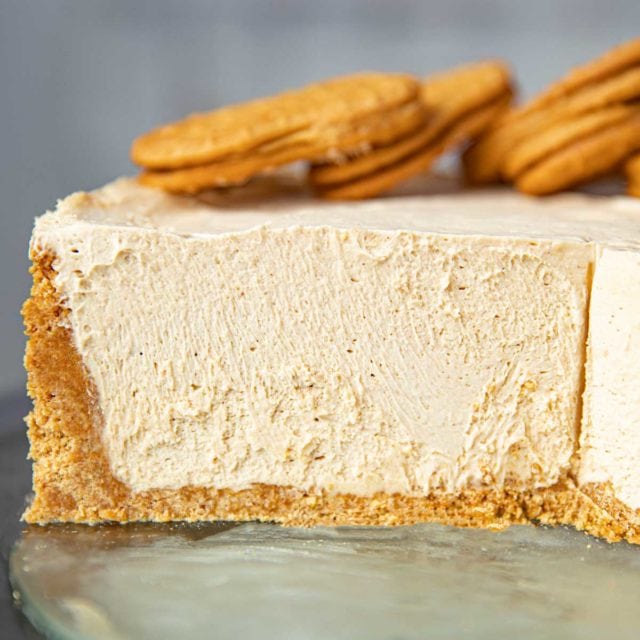
- Chocolate: The combination of peanut butter and chocolate is arguably one of the best pairings ever. Add a chocolate ganache layer as a filling and/or topping. Top your chocolate peanut butter cake with chopped up peanut butter cups or add mini chocolate chips to the chopped peanuts. If you love this flavor combo, you should also try my Chocolate Peanut Butter Pie.
- Banana: Another classic flavor combo with peanut butter is bananas. Use 1 cup mashed ripe bananas and only ½ cup of milk in the cake batter. Place thinly sliced bananas coins in the center of the cake on top of the frosting, then add more sliced bananas on top of the frosted cake in the center.
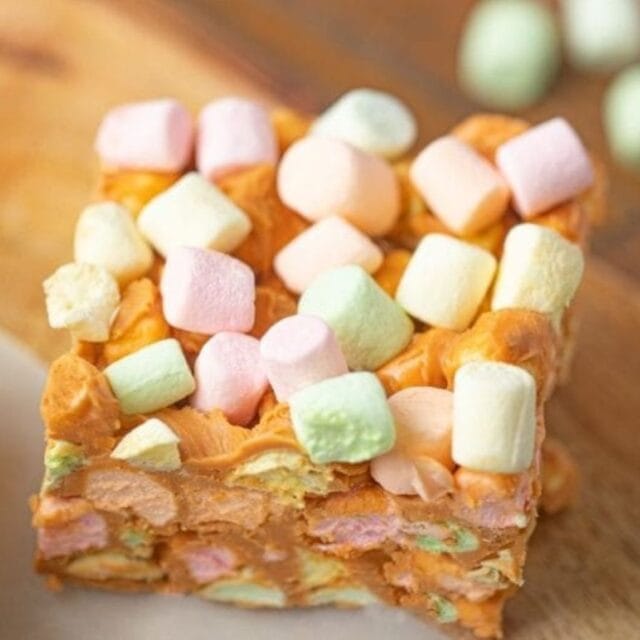
- Fluffernutter: Fluffernutter Bars are a dessert favorite, so of course you might want to add marshmallow fluff to peanut butter desserts whenever you can. Replace 1 cup of peanut butter in the frosting with 1 cup marshmallow fluff. For the filling spread ½ cup marshmallow fluff to the cake layer first, then top with ½ cup of the marshmallow peanut butter frosting.
- Toppings: You can add a layer of Salted Caramel Sauce or chocolate sauce on top of the frosted cake using a drip pattern, before adding the swirls of frosting. Trade 8 ounces cream cheese for the butter to make a Peanut Butter Cream Cheese Frosting.
Related Recipes
More Peanut Butter Desserts


This might be the best peanut butter dessert I’ve ever made ? the frosting alone deserves its own recipe page
LOL! Thanks Chris for the kind review and the five stars 🙂
Super tasty and delicious, as I’m not well versed in the kitchen it took me some time to frost the cake accordingly but I loved the final result. Thanks for sharing, Sabrina!