
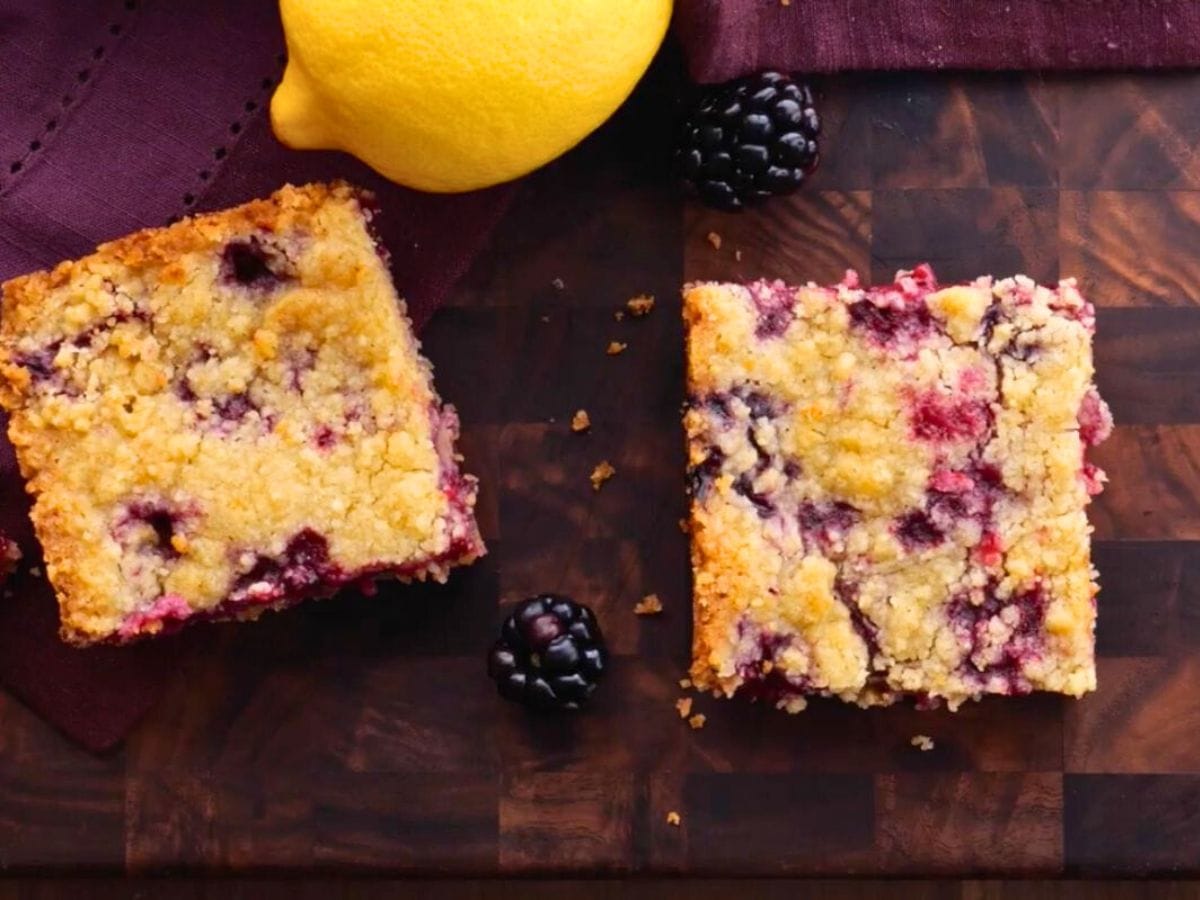
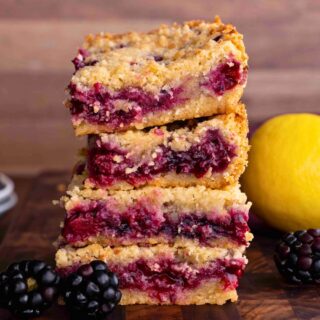
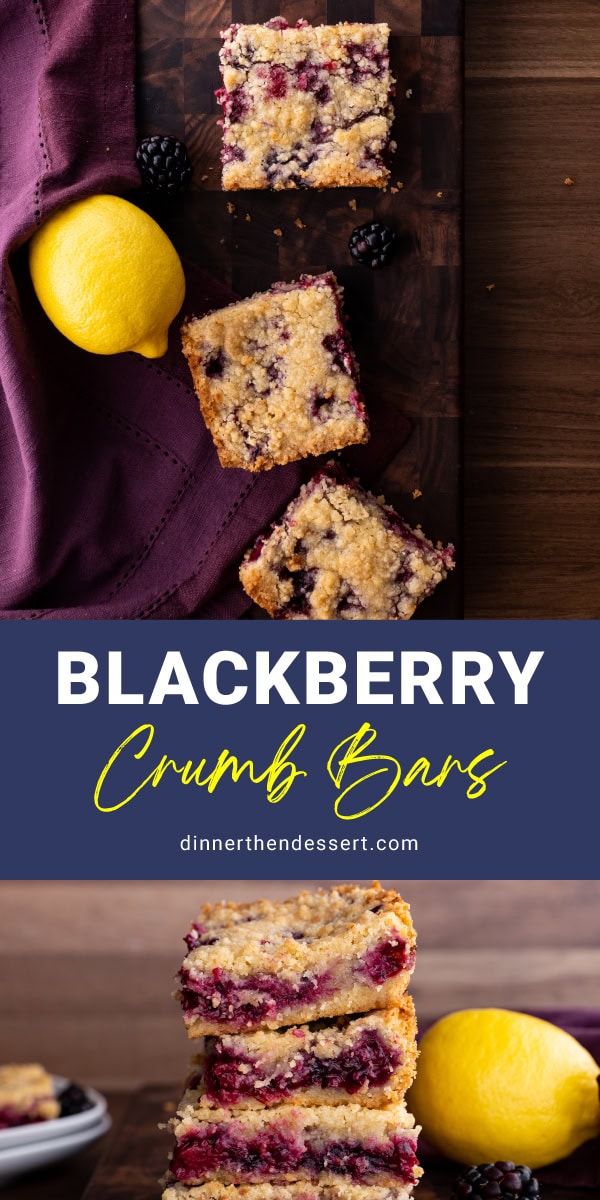
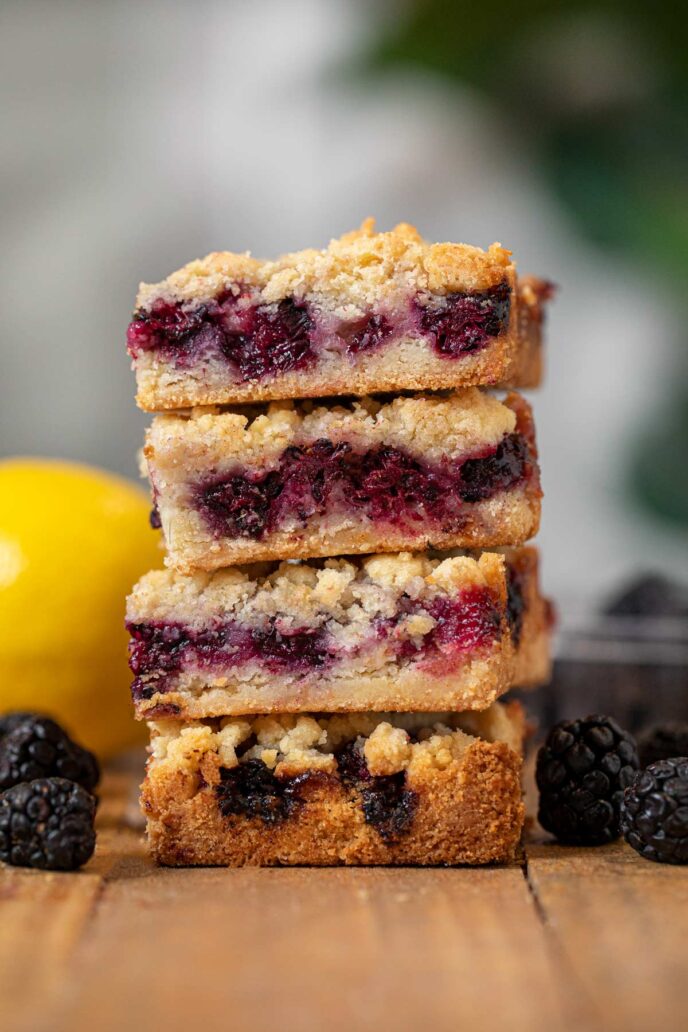
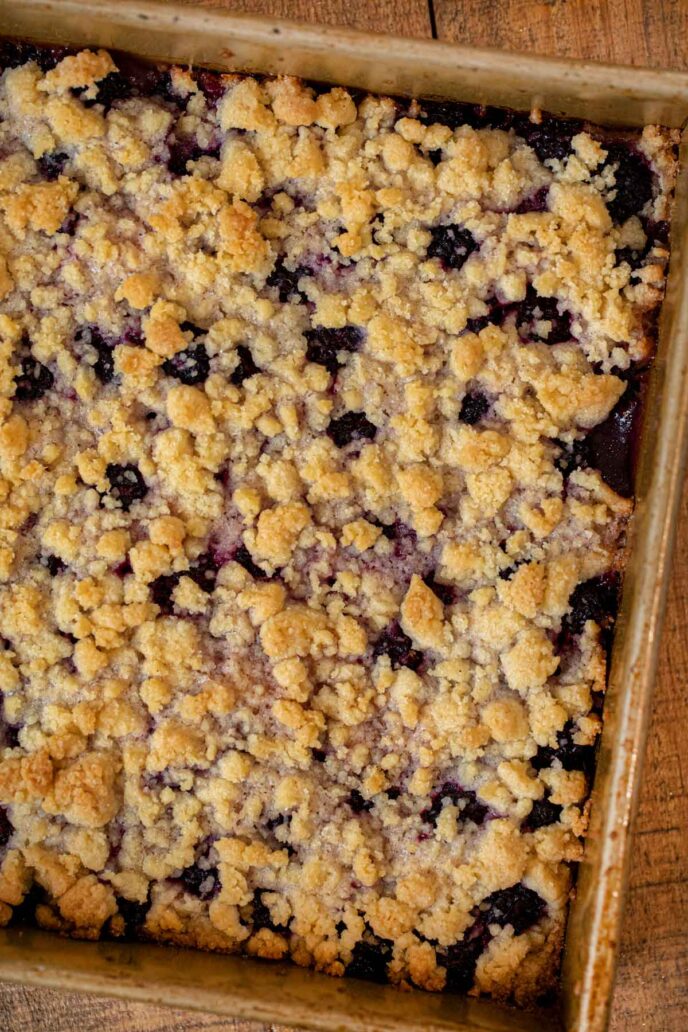
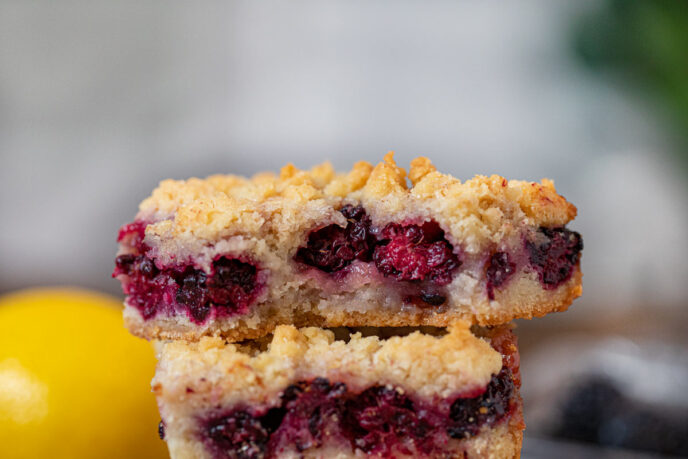
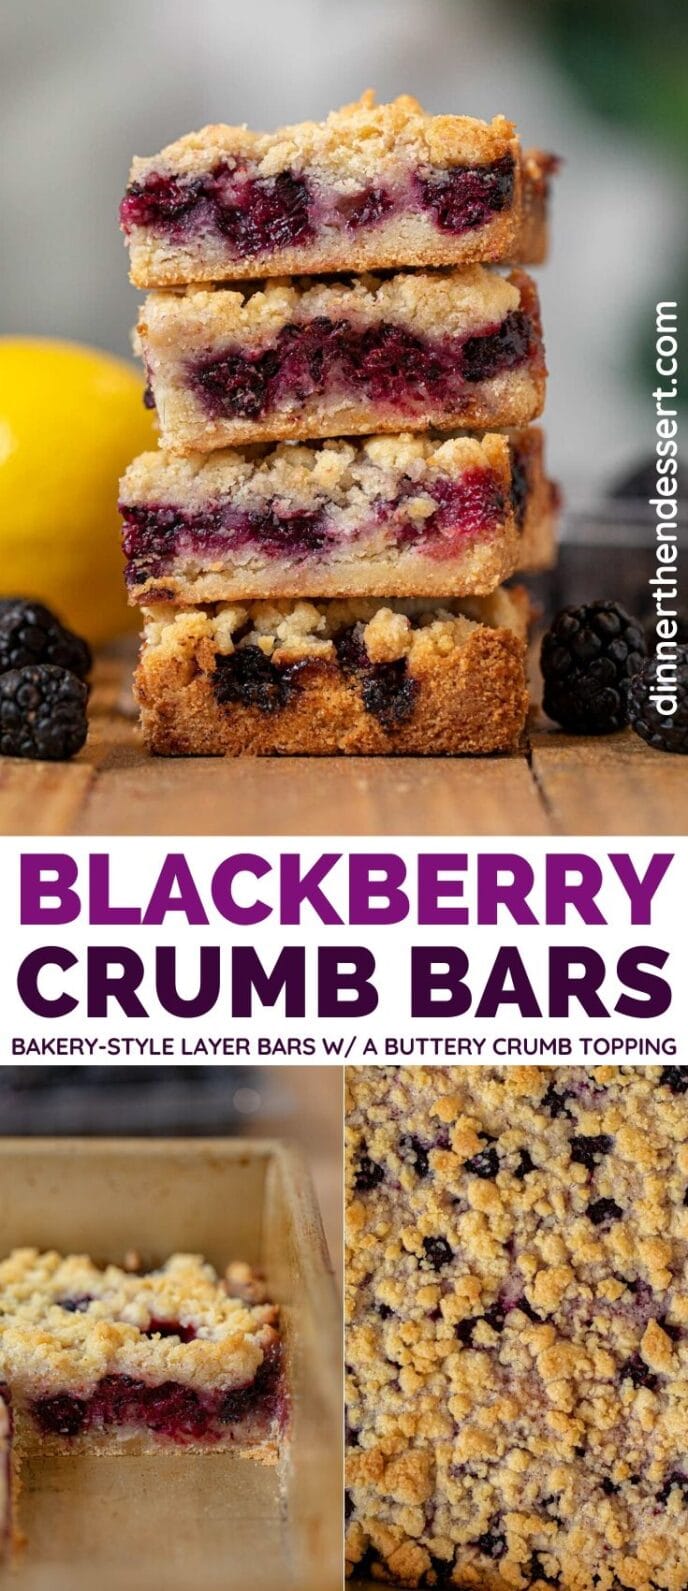
Blackberry Crumb Bars are an easy, sweet summer dessert. Bakery-style layer bars with a buttery crumb topping and fresh blackberry filling.
What happens when buttery Crumb Cake meets fruity Blackberry Pie? This delicious and easy Baked Good Recipe that is perfect for breakfast on-the-go, brunch, or a light summer dessert!
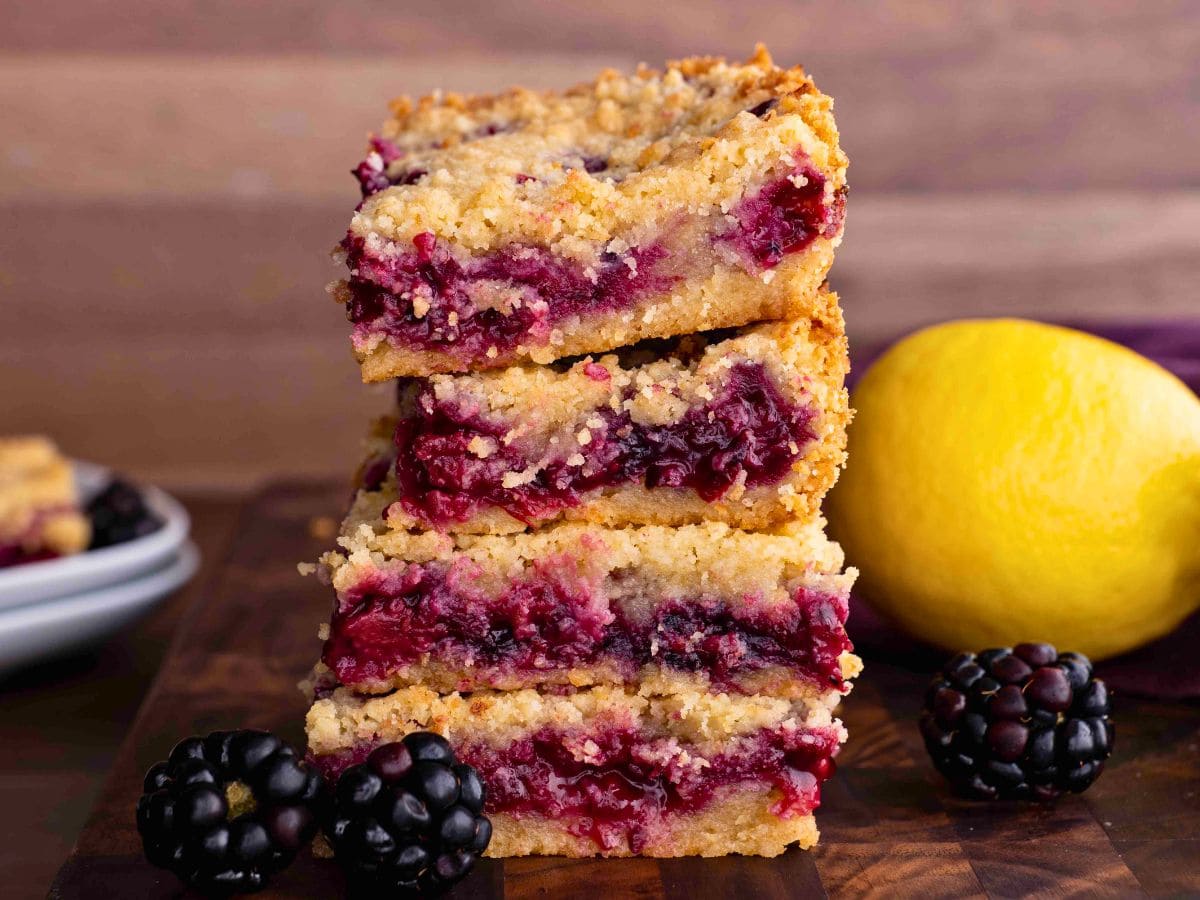

Sabrina’s Blackberry Crumb Bars
Like my Creamy Lemon Crumb Bars, this is a great recipe for bakery treats made at home. These Blackberry Bars are just as delicious and simple to make with a pastry crust made from common ingredients that doubles as the crumb topping.
Recipe Card
Ingredients
Dough Mixture:
- 1 1/2 cups flour
- 1/4 cup sugar
- 1/4 cup brown sugar , packed
- 1/2 teaspoon baking powder
- 1/8 teaspoon salt
- 1/2 cup unsalted butter
- 1 large egg yolk
Blackberry Mixture:
- 2 cups blackberries , (fresh)
- 1 tablespoon lemon juice
- 1/4 cup sugar
- 1 tablespoons cornstarch
Instructions
- Preheat the oven to 375 degrees and spray an 8×8-inch pan with baking spray.
- Add flour, ¼ cup sugar, brown sugar, baking powder, salt, butter, and egg to a food processor and pulse until a crumbly dough starts coming together.
- Add half the dough to your baking pan and press down in an even layer gently.
- In a large bowl mix the blackberries, lemon juice, ¼ cup sugar, and cornstarch.
- Pour mixture over the crust.
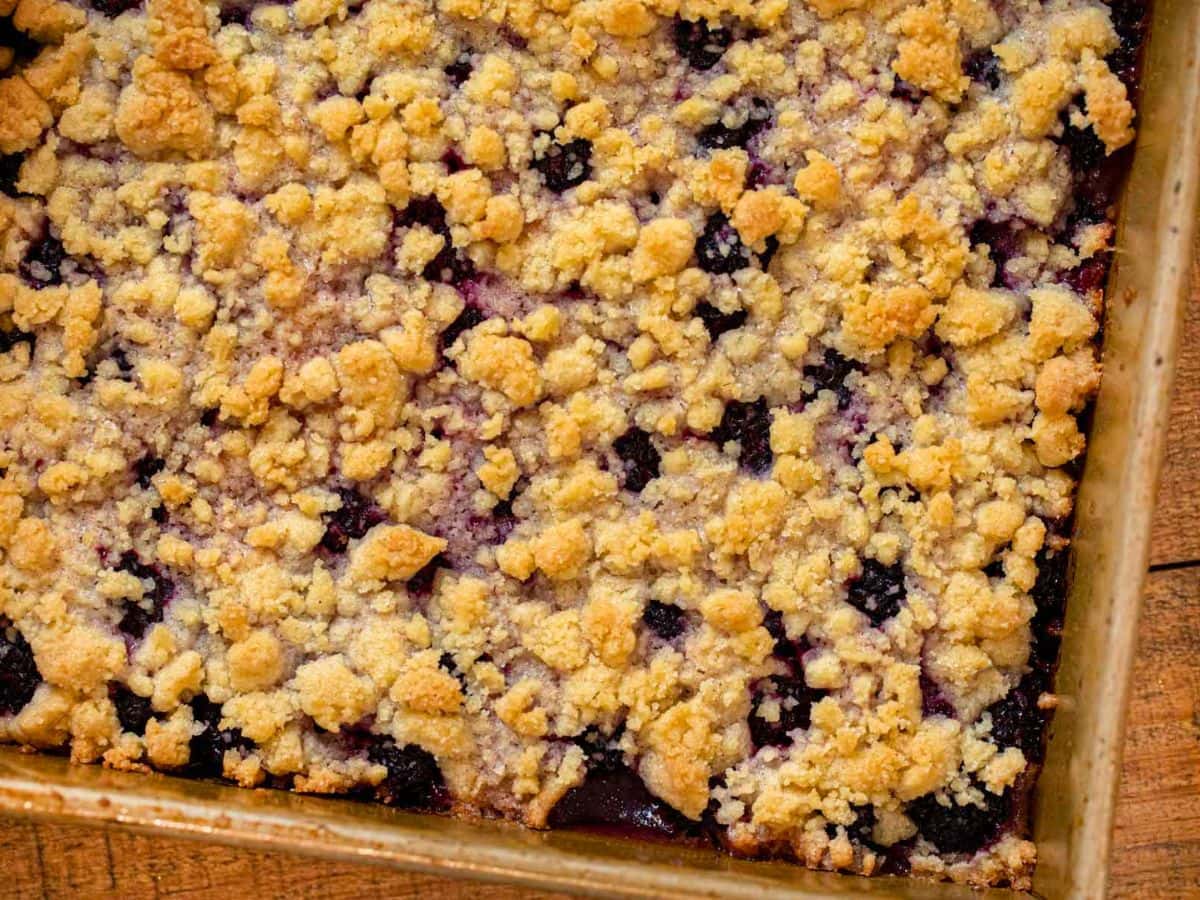
- Crumble the remaining flour mixture over the top of the blackberries.
- Bake for 40-45 minutes until golden brown.
Video
Nutrition
Want to save this recipe? Create a free account to easily save your favorite recipes
Chef’s Note:
This is one of the easiest baked goods recipes I make. No need for a stand mixer, adding ingredients slowly, or even softening butter. The dough is made in a food processor, and if you don’t have one, you can use a pastry cutter, forks, or butter knives, just like you would a pie crust.
Table of Contents
About this Recipe
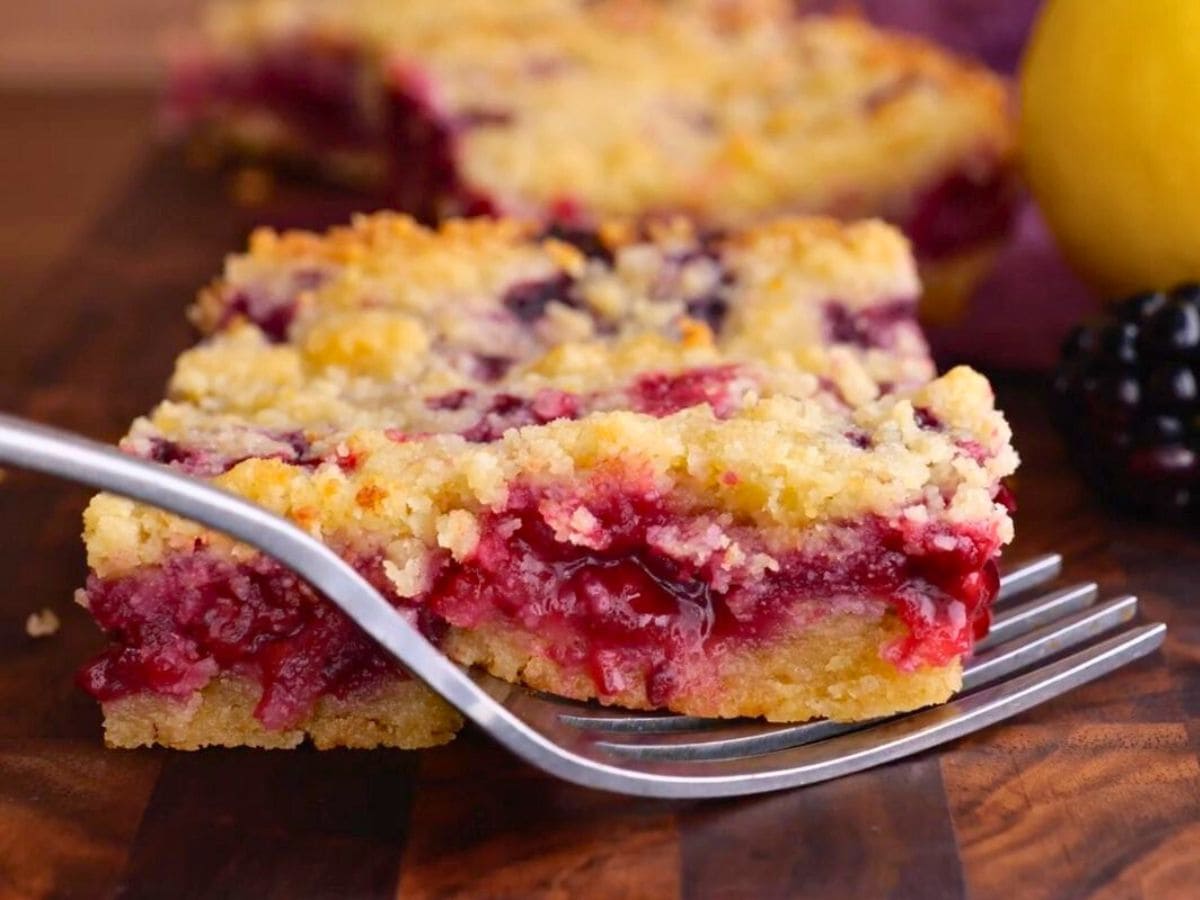
Blackberry Crumb Bars have a mildly sweet crust to allow the natural sweetness of the fresh berries to come through. The crust is soft and light, but thick enough that the bars can be eaten by hand. It’s like a cross between a cake and a pie crust, making it perfect for fresh fruit fillings! This is a great dessert for summer cookouts, picnics, and potlucks.
Can I make this ahead of time?
Yes, they actually taste better the next day. Prep the dough, store covered in the fridge, then assemble the bars the day you want to serve them. I wouldn’t recommend assembling and refrigerating before baking because the crust mixture could get soggy.
Baking Tips and Tricks
- You can use canned blackberry pie filling, but don’t add the sugar. You still want to add lemon juice and cornstarch for flavor and thicken the filling.
- Fresh blackberries cost about twice as much when out of season. They’re also usually more tart and less juicy. To make these off-season, use frozen blackberries.
- If using frozen blackberries, thaw and drain thoroughly and pat dry so your bars won’t get too gooey.
How to Store
- Serve: These bars are best at room temperature or warm from the oven, cooled about 10 minutes before serving.
- Store: Line an airtight container with a paper towel to absorb moisture. Layer parchment paper between bars if stacking. Keep these at room temperature for up to 4 days.
- Freeze: Once cooled, place in a sealed container with parchment paper between layers. Freeze up to 3 months and thaw overnight on the counter to serve.
Frequently Asked Questions
Use seasonal fruit and berries all year round. I like to make these with sliced peaches, apple pie filling, strawberries, blueberries, mulberries, and even apricots. Try mixed berries for a fun twist!
Add crunch to the crumb topping with ¼ cup rolled oats or chopped pecans after you have pressed the crust into the baking pan. You can sprinkle extra sugar over the crumb topping for more sweetness.
Related Posts
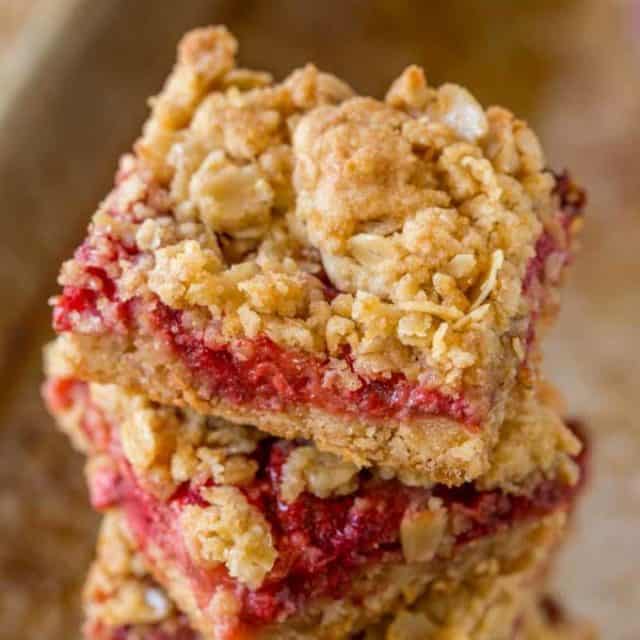
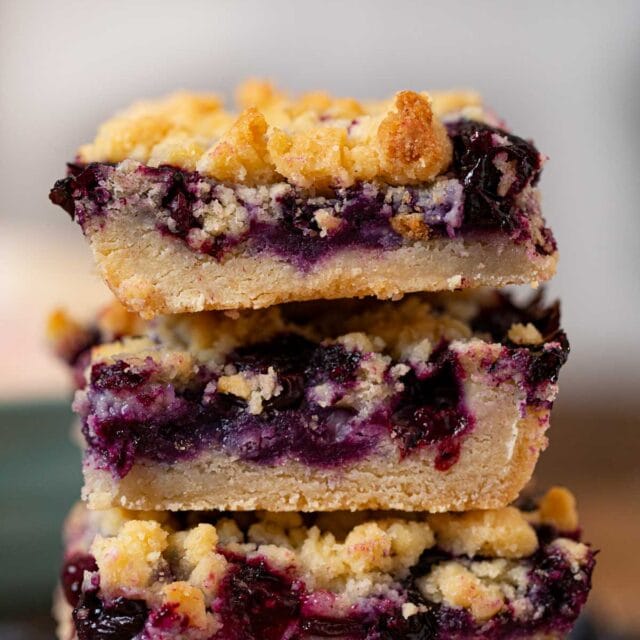
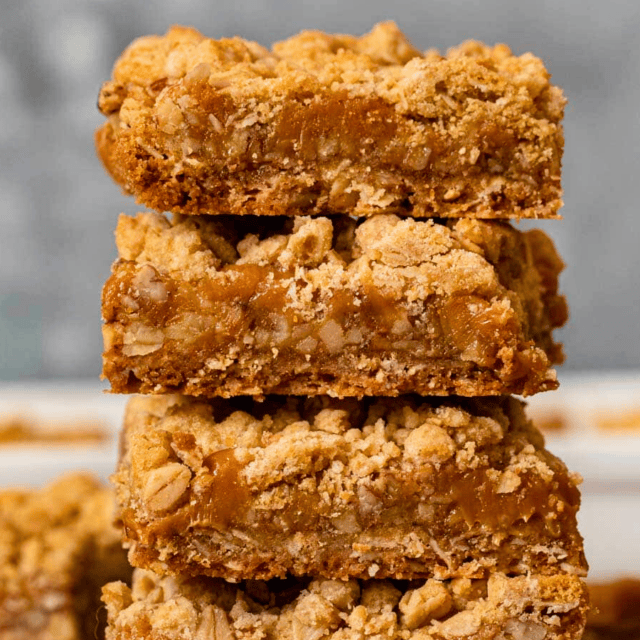
More Amazing Crumb Bars
Photos from a previous versions of this post:


Loved this recipe, perfect amt sugar for me. Added fresh blueberries too which was delicious.
Great idea! Thanks for the five star review Laura!
This was quite cake-like, spongy, not really like the picture. My husband said it wasn’t sweet enough, although it looked lovely.
Oh! So sorry you were disappointed. You certainly can add “sweetness” as needed.
Can I make these gluten free and do you have any advice for it? Thanks!
I’ve never tested this recipe using gluten free products. If you decide to try, please let us know how the recipe turned out!
Could I use salted butter?
you can, however I would recommend cutting back on the 1/8 teaspoon of salt a little.
Tip this with a little lemon curd to put it over the top!
That does sound delish!
These are so yummy, I doubled the dough amount though!
This recipe is so easy and taste delicious. I will make this recipe again
Easy and tasty. The dough became more doughy than the picture in the recipe because I did blender a little too much. But I spread the dough anyway and baked them for 50 minutes. It was so delicious and not too sweet. Thank you so much for sharing your recipe!
Black font on a black background doesn’t work. Pics look good though!
These are delicious! I followed the recipe exactly (other than all I had on hand was salted butter, but I prefer that flavor)…and I probably used more than 2 exact cups of berries since I freeze them in “heaping” cupfuls. The recipe was easy to follow and it came out exactly as expected after baking for 40 minutes. The bars came out perfectly held together! I have picked 18 cups of wild blackberries this summer and I will definitely use this recipe again!
Easy to make, without blender!
Turned out perfectly first time !
My hubs assures me that this recipe is a “keeper.” [All recipes are judged “interesting” or “keepers” 🙂 ] We have lots of cultivated blackberries of several varieties in our garden so I’ll be making this often. I did make a few changes to the recipe however: added 1 teaspoon cinnamon to the crust. Then, I needed 3 cups blackberries to cover the entire bottom of the 8×8 pan so I then used 2 tablespoons lemon juice, 1/3 cup sugar, and 2 tablespoons cornstarch. It came out perfectly delicious and I cut it into 12 pieces.
After reading through the comments, I thought I would add a little more…I used about 60% of the crust mixture on the bottom and pressed firmly with my hands, and had a solid base that I could cut with a metal spatula. I think about a 1/2 tsp. of cinnamon or nutmeg will give a little kick. I did use a whole egg for a double batch, and it comes out like moistened sand. Real butter, not substitutes. And I “measured” my berries by putting handfuls into the pan until I had a full single layer, which ended up about 2 2/3 cups for my fresh, fat, berries.
I needed a summer dessert to take to a church picnic. I selected this recipe because I had just picked about a gallon of boysenberries, and I thought it would be something that could handle sitting out in 100 degree weather after baking. My trial batch was pretty good, but the amount of berries didn’t cover the entire pan, so I added another handful (hence the 4 stars). I also added some cinnamon to the fruit mixture since I like a little spice in my fruit. Using a parchment paper liner made it easy to cut and serve. My double batch is now in the oven using a jelly roll pan and looks like a five star treat.
Tasty. I saw a trick on ATK to press the crust down with bottom of a measuring cup. This really helps the bar stay together. My 2 C blackberries did not cover the entire 8×8 pan. I’d do 1 cup more next time. I also may throw in the whole egg as I agree it was dry using the food processor. I think if mixed with a wooden spoon it may have made the crust come together a little better as is.
If I don’t have unsalted butter can I use plain butter
Yes. It will be slightly saltier. You can also tweak the added salt and lower the amount.
Recipes are generally a guideline not the law. You can adjust and tweak as needed (like adding extra spices or backing for 5 min more to get a darker crust). The only time when you need to follow exactly is if you’re making something technical like a soufflé or candy caramels (exact temperatures are needed).
Hope this gives you more confidence!
Excellent
This is delicious! I did add more blackberries! Came out perfect!?
I loved these! I was looking for a recipe where I could use a whole bunch of homegrown and harvested blackberries, because we had a lot and didn’t want them to go to waste, and this was perfect (fast, easy and delicious)! I thought maybe some spices would have to be added, but the flavour was great just as the recipe indicates. The only thing I would say is that I would add next time like an extra 1/4 or 1/2 cups of blackberries to really cover the whole 8×8 area.
How would you adapt this recipe using frozen blackberries? Please show temp. and baking time if possible.
Thaw the berries first off.
Second- reserve the juices that come off of the thawed fruit. You can use the juices for a later recipe (like lemonade, pancakes, salad dressing)
Bake the same way as stated
Delicious! Perfect for breakfast or dessert. Will definitely make these again.
If I wanted the same flavors as a pie instead, any tips to make the dough a little firmer?
This recipe looks very tempting.
I only just found your site and browsing through,
I truly wish you would add weight or normal purchase units,
i.e. 2 Cups Blackberries (??? baskets or ??? ounces)
or just read through your Popeye’s copycat coleslaw (6 cups chopped cabbage
(??? ounces or ??? size head of cabbage)
Really a pain to have to then Google — same as British recipes
not giving both metric and U.S.
But, I won’t live long enough to try all your tempting recipes. Love ‘ya.
A cup is a standard unit of measurement so I’m not sure why you’re confused.
Cups- American measuring cups. It’s an actual unit of measuring food/liquid.
A cup is equal to 8 ounces of water. So how ever many black berries that fit into a 16 ounce container (a pint)
Dough/pastry dry and gritty and sandy. Topping the same. Needs something to pull dough togther. A little cinnamon would help for flavor. Impossible to cut into bars. Crumbly mess. Awful.
Can homemade blackberry pie filling be used in this recipe?
Sure! I haven’t tried that yet but it sounds delicious!
I forgot to add my stars in last post… these bars are the Bomb!!!
Thank you very much, Sue!
There are the Bomb!!! I doubled the recipe-which made a little more dough than needed but it was tasty too!!! They were easy to make & so tasty… I took some to friends & received this text “OMG! These blackberry bars are absolutely amazing! Thank you soooo much!”
Thank you for sharing your awesome recipe!!
Sue thank you for this lovely message. I’m so glad you and your family enjoyed this so much.
I made these with a gluten free flour blend for the 4th of July–they were great. I took one liberty: the dough seemed dry after pulsing, so I added the whole egg, and it seemed just right. This was a big hit with my family, and I will repeat it because I have quite a few handpicked bags of blackberries in my freezer.
Really like it. But .. why isn’t mine falls apart? What did I not do?
Did you press in your bottom crust layer? Use a glass with a flat bottom to really press it in
Easy and delicious! This was the perfect thing to do with some blackberries my sister in law gave me from her garden. YUM!
Homegrown berries are the best! Thank you Katie!
It might be nice to include the size of the pan in the instructions.
It’s listed in the first step, 8×8 pan.
I realize this comment is very old, so I am so sorry for the delay in replying.
I believe it said 8×8
My entire family enjoyed this very much!
Sabrina, These look delicious! If I wanted to make these for a crowd, in a half sheet pan, would I double or triple the recipe? I’m looking forward to post pandemic family parties, and 8 x 8 won’t be nearly enough. I can’t wait to try them!! Thank you!
I am so sorry, I am just seeing this tonight. I am sure the recipe has long been cooked/or not but I still want to try to help.
Yes! double in a 9×13 pan! Half sheet pan could be tough because of the height of the wall of the pan. How tall is your pan?
If you double the recipe to a 9 by 13 pan do you have to leave them in the oven longer
Yes, you can double the recipe. For a 9×13 pan, it will take a bit longer to cook, I would just keep an eye on it.
Excellent recipe! I go berry picking often in the summer and this recipe is great. The first time I made it I didn’t have enough blackberries so I mixed in fresh blueberries and it was delicious. We like crunchy toppings so I mixed pecans and oats (total a little over 1/4 cup) the 2nd time and that came out great. So easy to make.
This is awesome, so glad you added your own little touches to it!
These are easy and really tasty – just the right level of sweetness!
Thanks, Judi.
I picked way too many blackberries last weekend and now I’m trying different recipes. Loved this recipe, Sabrina. Just the right size. My first attempt with a different recipe resulted in a very juicy version that required a spoon. And ice cream. Tasted great but not what I was going for. Your recipe made it to the family boat (none came back). The bars held together for easy serving. Thanks!
Yay!! I’m glad you all enjoyed it!
These blackberry crumb bars are so good! They’d also be amazing made with blueberries I think.
Oh, definitely!
The best! So easy to throw together and perfect for using up fresh berries!
Thanks, Suzy!
these are the best! I can never eat just one because I’m always craving more
I can totally relate! Thanks for the 5 stars.