
Rocky Road Ice Cream is a classic favorite for chocolate lovers. Easy to make at home, no need to buy it from the store again! Try it today!
Chocolate lovers get ready to enjoy this well-loved chocolate classic Ice Cream. You can easily recreate other flavors at home just like my Strawberry Ice Cream or this classic favorite, Butter Pecan Ice Cream!
Sabrina’s Rocky Road Ice Cream Recipe
Once you start making ice cream at home, it’s hard to stop. Homemade ice cream is way more decadent than anything you’ll find in the freezer aisle. Plus, the not-so-secret thing about ice cream is it’s incredibly easy to make, especially if you have an ice cream maker. If you don’t have an ice cream maker, I have you covered with two additional methods at the bottom of this post. Get ready for some churn-quality ice cream!
Recipe Card
Ingredients
- 8 large egg yolks , lightly beaten
- 3/4 cup sugar , divided
- 1 cup milk
- 1/4 teaspoon salt
- 2 tablespoons unsweetened cocoa powder
- 2 cups heavy cream
- 1 teaspoon vanilla extract
- 1 cup almonds , chopped
- 2 cups mini marshmallows
Instructions
- In a medium bowl whisk egg yolks and ¼ cup sugar well. Set to the side.
- In a medium saucepan add the sugar, milk, salt and cocoa powder on medium heat.
- Whisk non-stop and bring to a simmer, then reduce heat to low.
- Add half of the chocolate mixture from the pot in a very slow thin stream to the egg yolk and sugar mix while whisking quickly to avoid cooking the eggs (do not stop whisking).
- Pour the egg/chocolate mixture back into the original pot with the remaining chooclate slowly while whisking constantly.
- Cook until mixture is thickened, about 8-10 minutes (do not let boil or milk will taste scalded).
- Turn off heat and whisk until smooth.
- Let cool completely, then refrigerate (covered) for 2 hours.
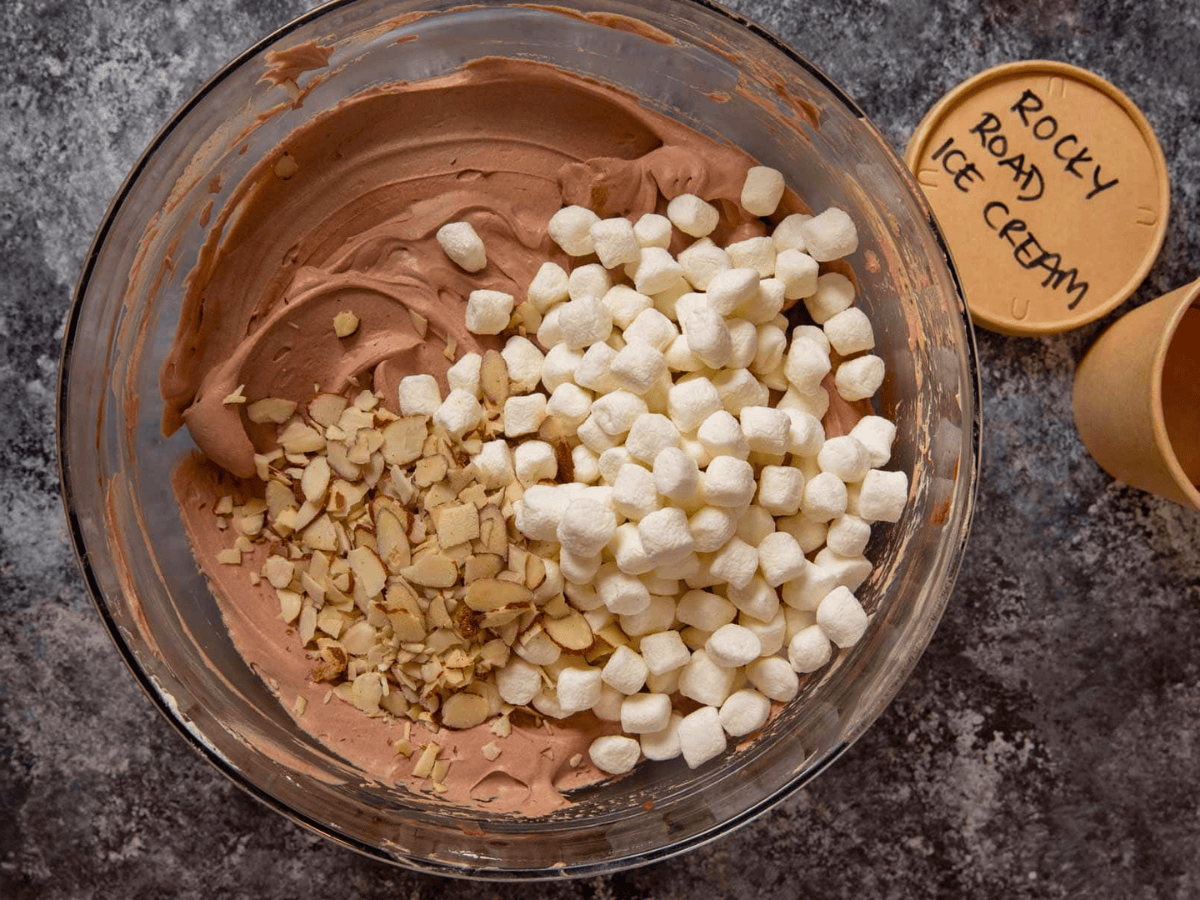
- Whisk heavy cream and vanilla into the chocolate mixture.
- Stir in almonds and mini marshmallows.
- Add chocolate custard to your ice cream maker (per machine instructions) then freeze for at least 3 hours to harden before serving.
Nutrition
Want to save this recipe? Create a free account to easily save your favorite recipes
Sabrina’s Tips
I recommend sticking to the original ice cream base, if possible, since making substitutions can change the flavor and texture. If you want to customize this recipe, I usually swap out mix-ins instead for the best results.
Table of contents
About this Recipe
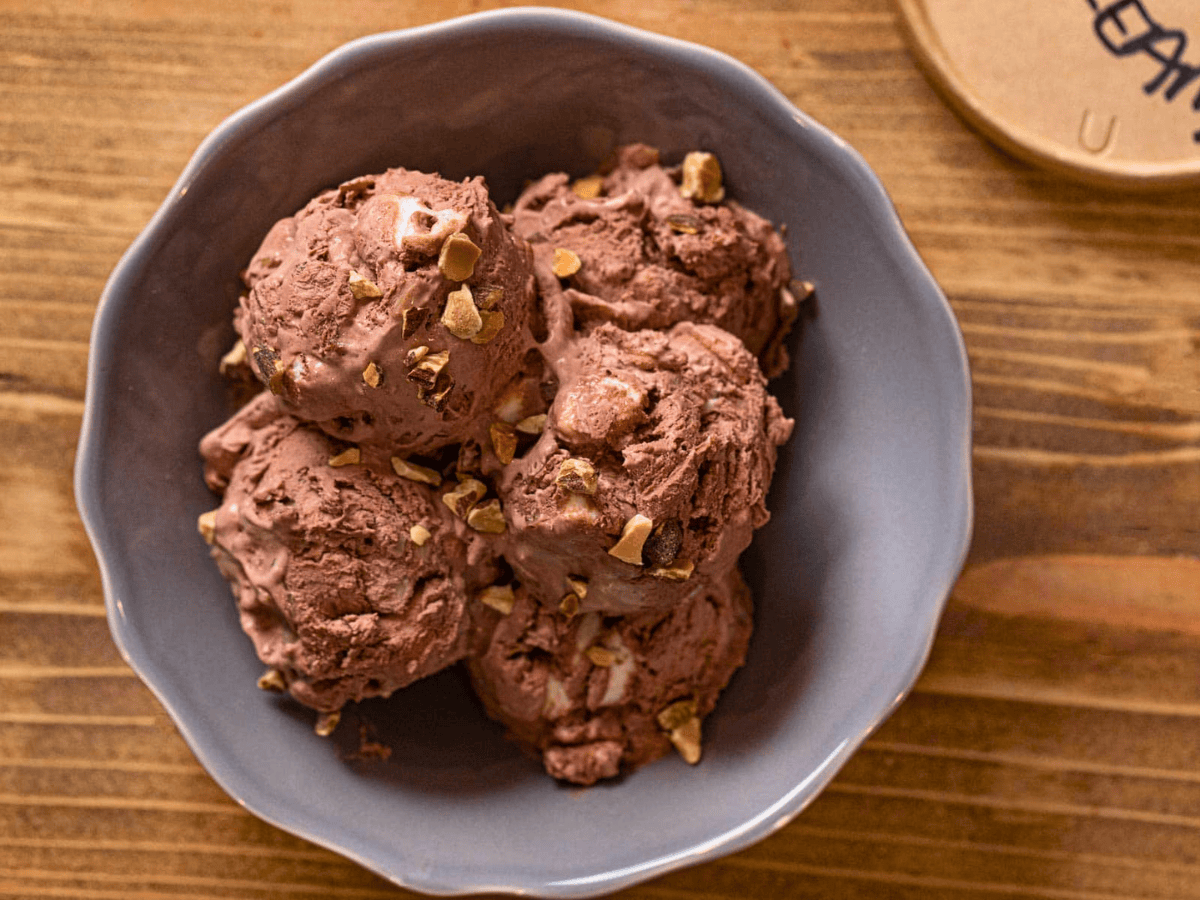
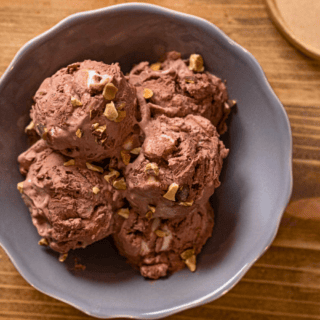
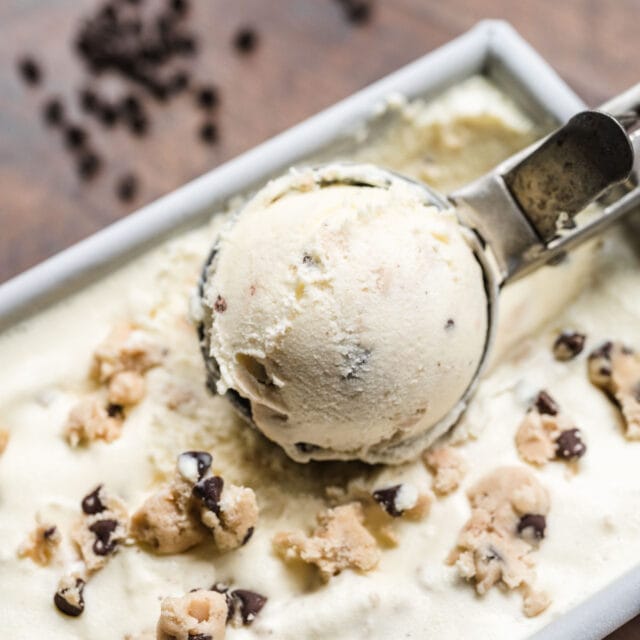
Homemade Rocky Road Ice Cream is more than just a flavor combination, it’s a perfect blend of every texture. The creamy, rich chocolate flavor is balanced with crunchy almonds and chewy marshmallows and makes the best chunky ice cream. This homemade custard ice cream stays slightly softer than regular ice cream so every heavenly bite melts in your mouth and just might easily become your favorite ice cream! And yes, I do add a pinch of salt to the mix, which makes it even more delicious!
Ingredients
- 8 Large Egg Yolks: Egg yolks are important for creating a smooth and creamy texture in the ice cream. They help stabilize the ice cream as it freezes.
- 2 cups of Heavy Cream: Heavy cream also contributes to the rich, creamy texture. Additionally, it adds fat to the mixture, which helps to give the ice cream a smooth and creamy mouthfeel.
- 2 Tablespoons of Unsweetened Cocoa Powder: Cocoa powder provides the chocolate flavor in this recipe. It’s important to use unsweetened cocoa powder, as the sugar in the recipe will provide the necessary sweetness.
- ¾ cups of Sugar: Sugar is essential for sweetening your ice cream. It’s divided in this recipe and added to both the egg yolks and the warm milk mixture. You can use any regular granulated sugar.
- Add-Ins: The almonds and mini marshmallows add incredible texture and a bit of yummy flavor to the ice cream. The almonds provide a crunchy texture and nutty flavor, while the mini marshmallows add a chewy texture and sweetness. You don’t want to skip these as they are essential to all things “Rocky Road”.
Can This Be Made Ahead of Time?
Yes. In fact, it’s recommended to prepare it in advance, as the ice cream needs time to freeze and set properly. Once it is churned and has set in the freezer, it can be stored in an airtight container in the freezer for up to two weeks. Just be sure to take it out of the freezer and let it sit at room temperature for a few minutes to soften before serving.
How to Store
- Serve: Freeze Rocky Road Ice Cream until firm, at least 3 hours before serving. To prevent ice crystals, cover the container with plastic wrap and wipe down any moisture before securing the lid.
- Freeze: Keep the ice cream for up to 3 months in an airtight container. For longer-lasting ice cream, store it in the back of the freezer so the ice cream temperature stays consistent. I recommend eating it up within two weeks for the best taste!
Alternative Cooking Techniques
Electric Mixer Ice Cream Method
- Freeze a large glass or metal mixing bowl for at least 12 hours, or overnight.
- Prepare the Rocky Road Ice Cream up until the almonds and marshmallows (do not add).
- Pour the chocolate ice cream mixture into the prepared frozen bowl.
- Freeze for 30 minutes. Place it in the back of the freezer and try to keep the door closed.
- Use an electric mixer on medium-high speed for 2-3 minutes to mix ice cream every 30 minutes until it is almost too stiff to mix.
- Fold in almonds and marshmallows and beat one last time before freezing for at least 4 hours.
Shaken Salt and Ice Method
- Fill a large container (big enough to hold a gallon size bag plus ice) halfway with ice and ¼ cup rock salt.
- Prepare the Rocky Road Ice Cream mixture with almonds and marshmallows.
- Pour the ice cream mixture into a gallon-sized plastic bag and remove as much air as you can before sealing it tightly.
- Place the bag into the ice and salt mixture and seal the lid of the container.
- Shake (or roll) the container for at least 10 minutes, until the mixture becomes more solid ice cream consistency.
- Remove the bag from the container and scoop the ice cream into a container with a lid and freeze for at least 3 hours.
Frequent Questions
No. These are all common ingredients. To make this ice cream at home, you need heavy cream, whole milk, granulated sugar, unsweetened cocoa powder, vanilla extract, salt, mini marshmallows, and chopped almonds. Having chopped chocolate pieces is optional.
Technically, yes substitutions can be made for some ingredients. For example, you can use coconut sugar or honey instead of granulated sugar. However, substitutions can affect the final taste and texture of the ice cream.
It takes about 30-40 minutes to churn the ice cream in an ice cream maker, and then a few more hours to freeze it until it reaches the desired consistency. Overall, it can take about 6 hours to make Rocky Road Ice Cream at home. It’s a fun all-day event the whole family can be involved in!
Variations
- Nuts: Swap the almonds for other chopped tree nuts like cashews, walnuts, or pecans, or use a mixed nut blend. For more chocolate goodness, add chopped Chocolate Covered Almonds.
- Toasted Nuts: Use roasted almonds for a crunchier texture. Toasting the almonds will bring out the nutty, earthy flavor and make them slightly softer. Let the toasted almonds cool completely before adding them in.
- Mix-Ins: Try other mix-ins in Rocky Road Ice Cream like pretzel pieces, chocolate-covered raisins, Edible Cookie Dough, chopped peanut butter cups, or peanut butter baking chips.
- Chocolate: Fold in up to a ½ cup of semi-sweet chocolate chips, chocolate chunks, or chopped milk chocolate bars for chocolate bursts. You can also add a Hot Fudge swirl halfway through freezing. Any version of these in dark chocolate to the chocolate cream base is always a good option too!
- Marshmallows: After the ice cream has been freezing for about an hour (so it’s firmer but not frozen solid), stir in melted marshmallow creme for a marshmallow swirl. For crunchy sugary marshmallows, use mallow bits instead of mini marshmallows. You could also use Homemade Marshmallows for a completely made-from-scratch Rocky Road Ice Cream!
Related Recipes
More Awesome Ice Cream Recipes

Photos used in a previous version of this post:


I think I’m confused, it says turn off heat and quick in chocolate, but there is no chocolate in the ingredient list besides the cocoa powder.