
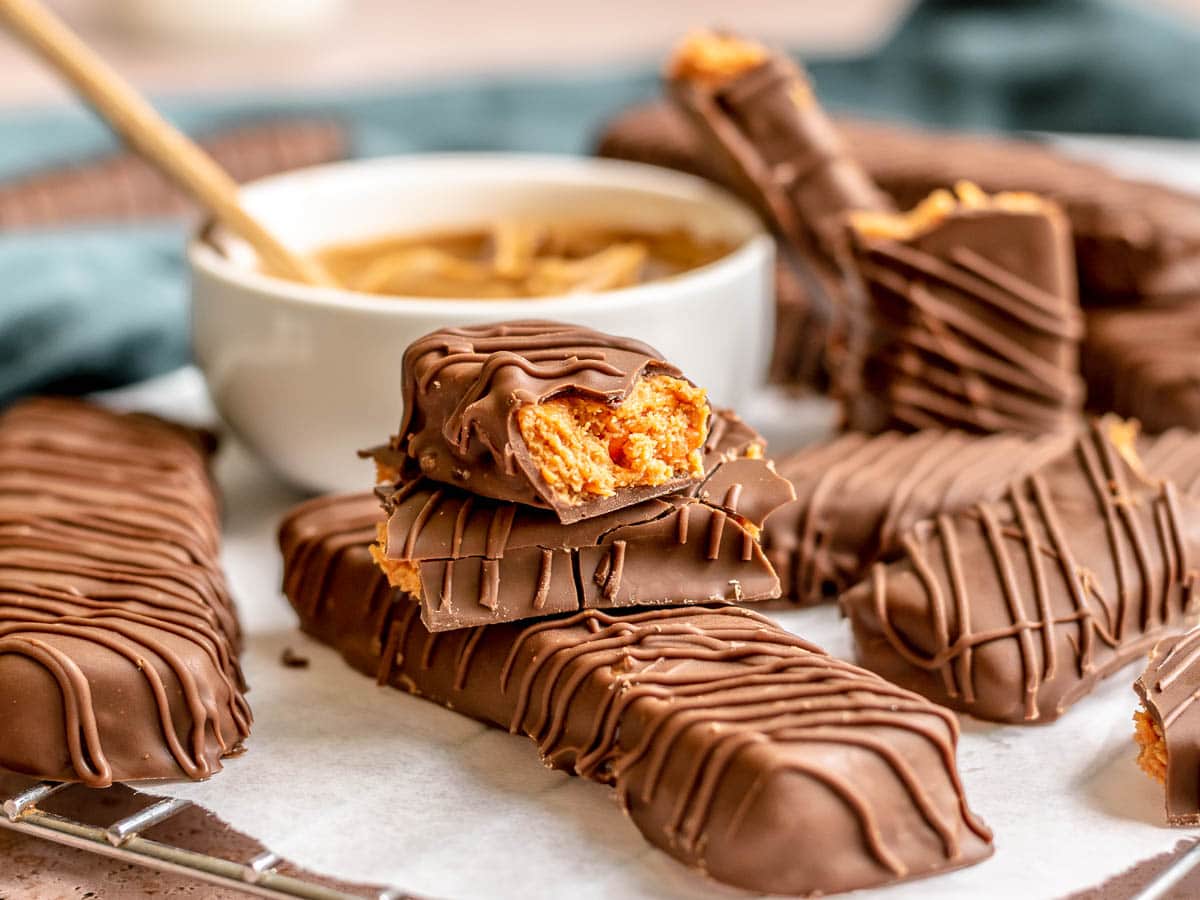
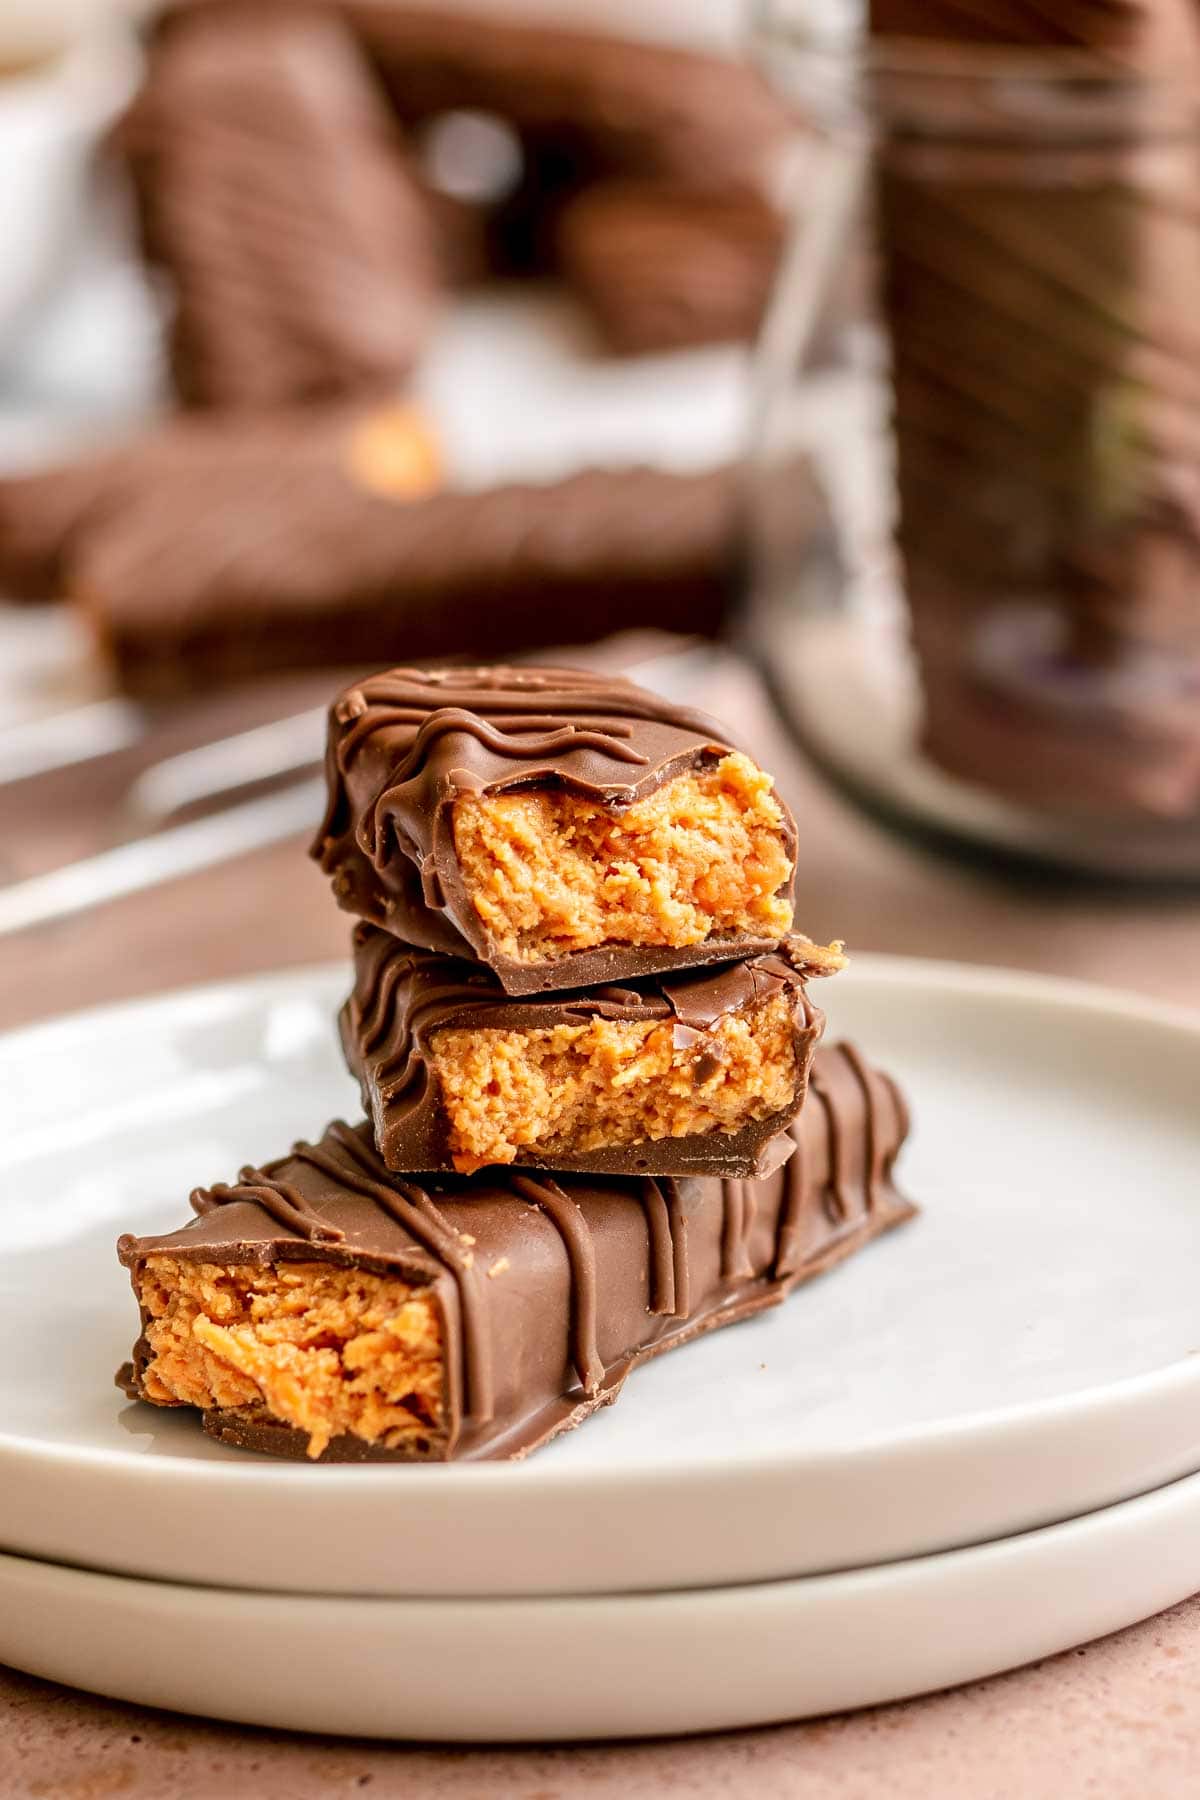
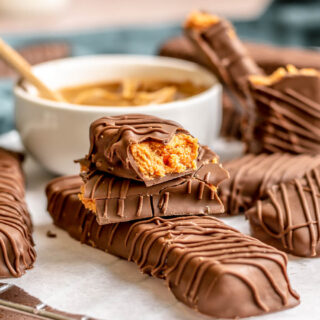
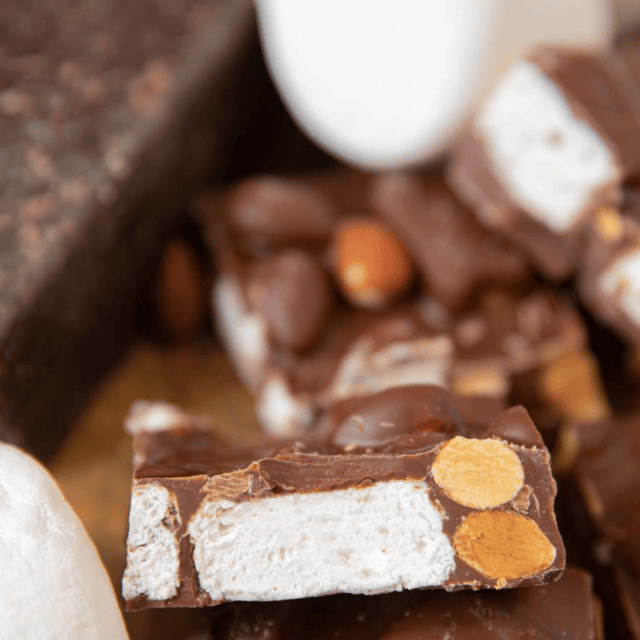
Butterfinger Bars are your favorite candy bar made even more delicious with creamy milk chocolate over a sweet and salty candy filling.
Homemade Candy Recipes make amazing edible gifts or party snacks. Try Leftover Candy Bar Bark, Easy Hard Candy, and Candy Bar Fudge for more delicious homemade treats.

Sabrina’s Butterfinger Bars
If you like classic butterfinger candy bars, then this is the recipe for you. It’s quick and easy with a simple ingredient list. The secret ingredient to the sweet and crunchy peanut butter filling is candy corn. Simply melt down the candies and mix with creamy peanut butter. Then, let the mixture harden before coating in melted chocolate. Every bite is an explosion of sweet chocolate and peanut butter flavor with the perfect level of crunch factor.
Recipe Card
Ingredients
Ingredients
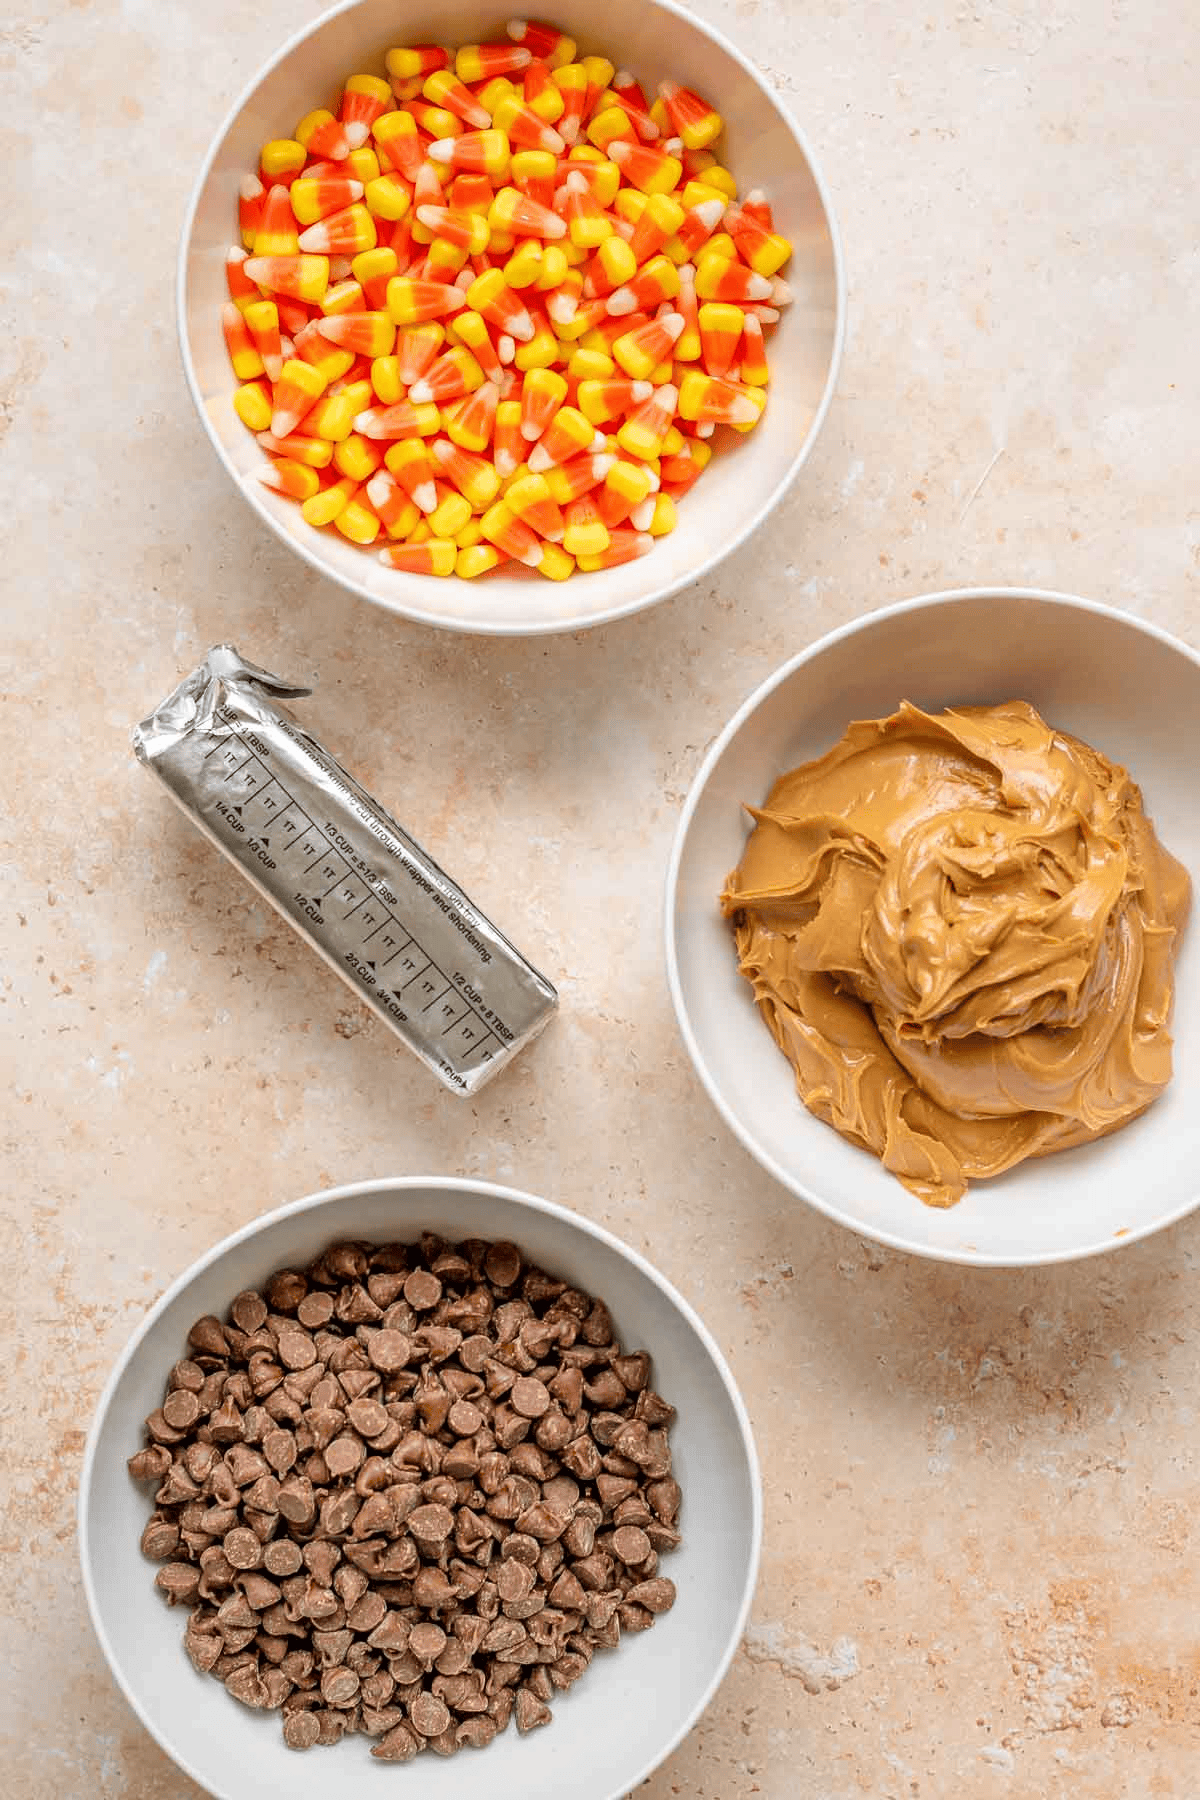
- 1 pound candy corn
- 18 ounces peanut butter , do not use natural
- 12 ounces milk chocolate chips
- 1 tablespoon vegetable shortening
Instructions
- Line a 9×13" baking pan with parchment paper and spray the sides with vegetable oil spray.
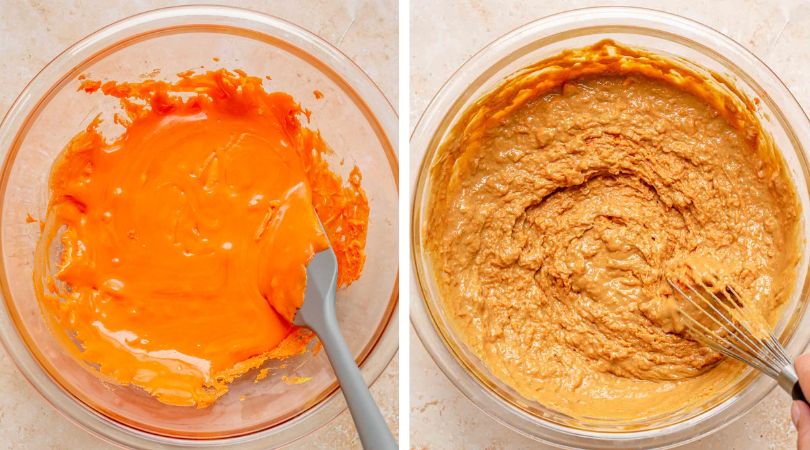
- Add candy corn to a large microwave safe bowl and microwave in 30 second increments, stirring between each time you microwave until the mixture is smooth.
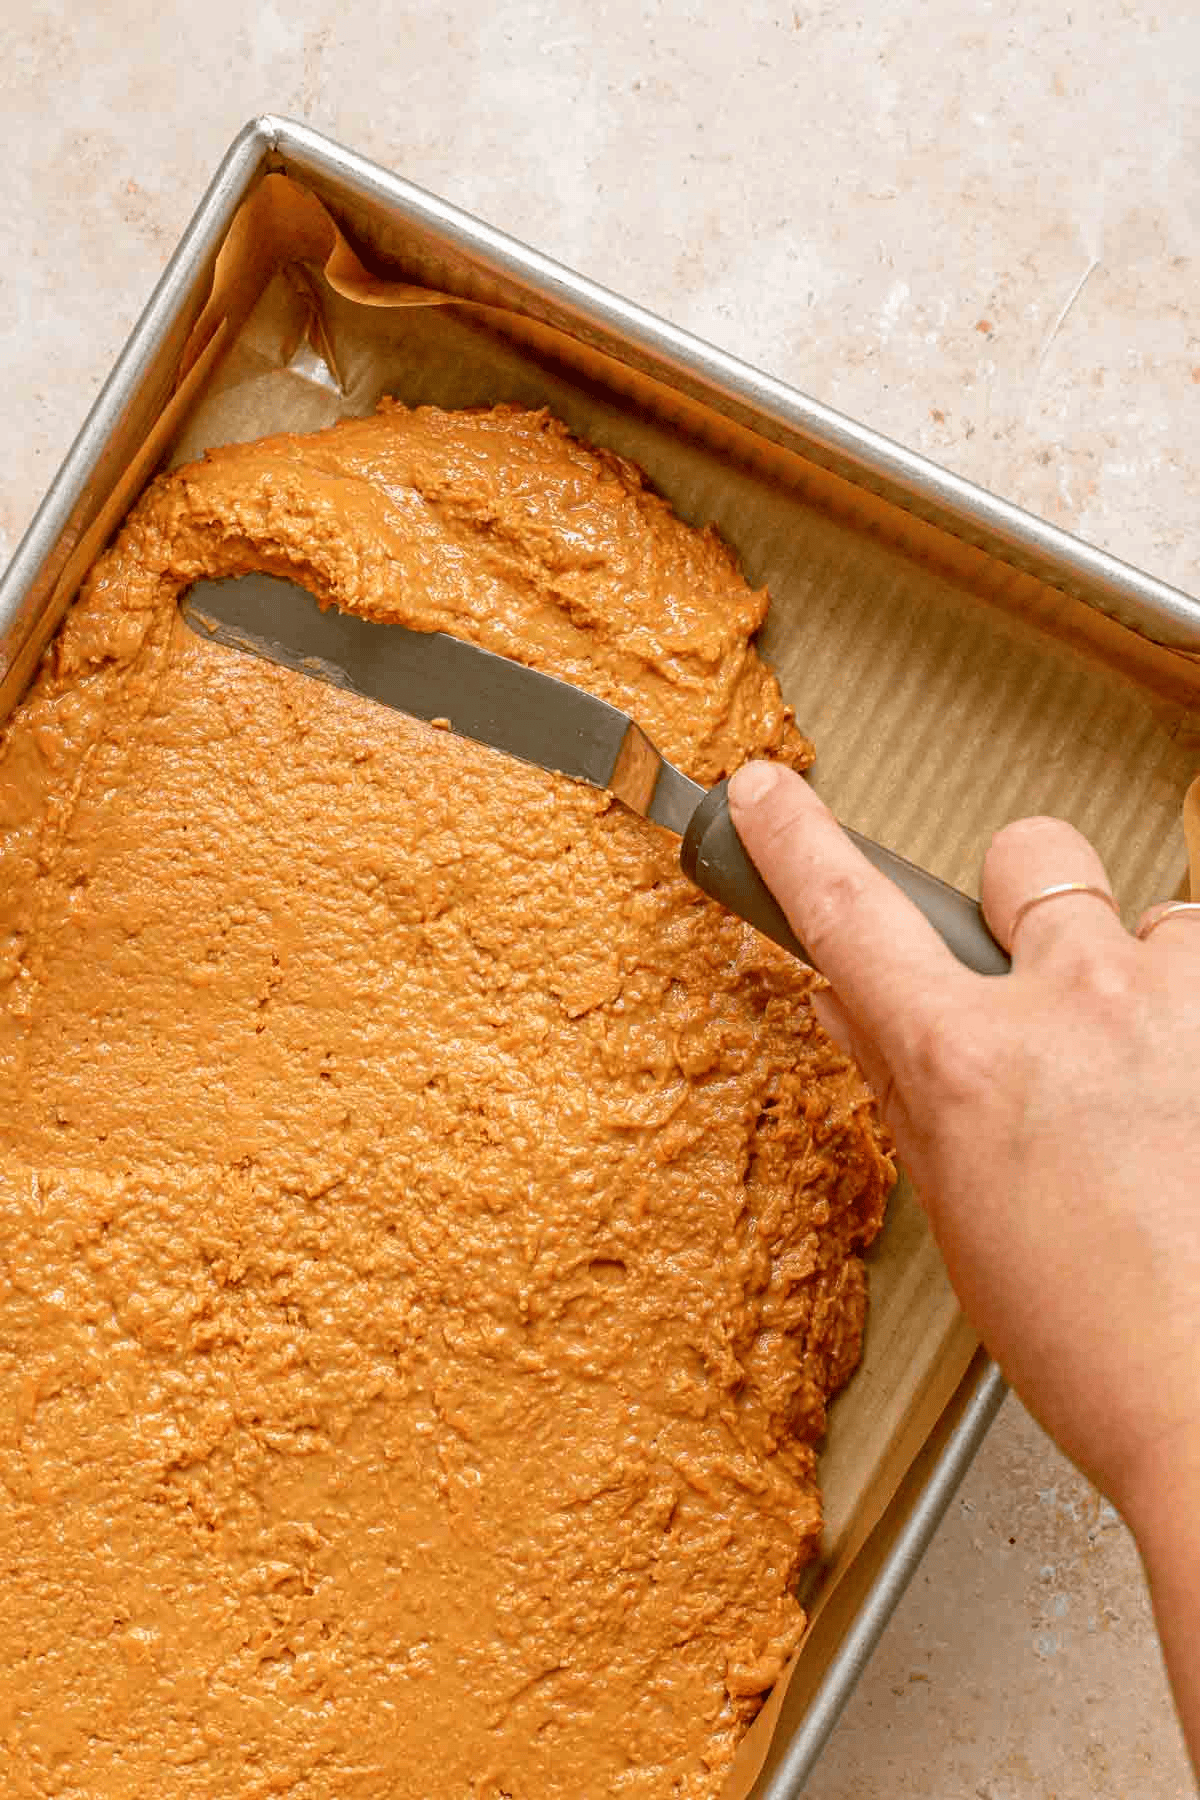
- Add the peanut butter and whisk well until creamy and smooth.
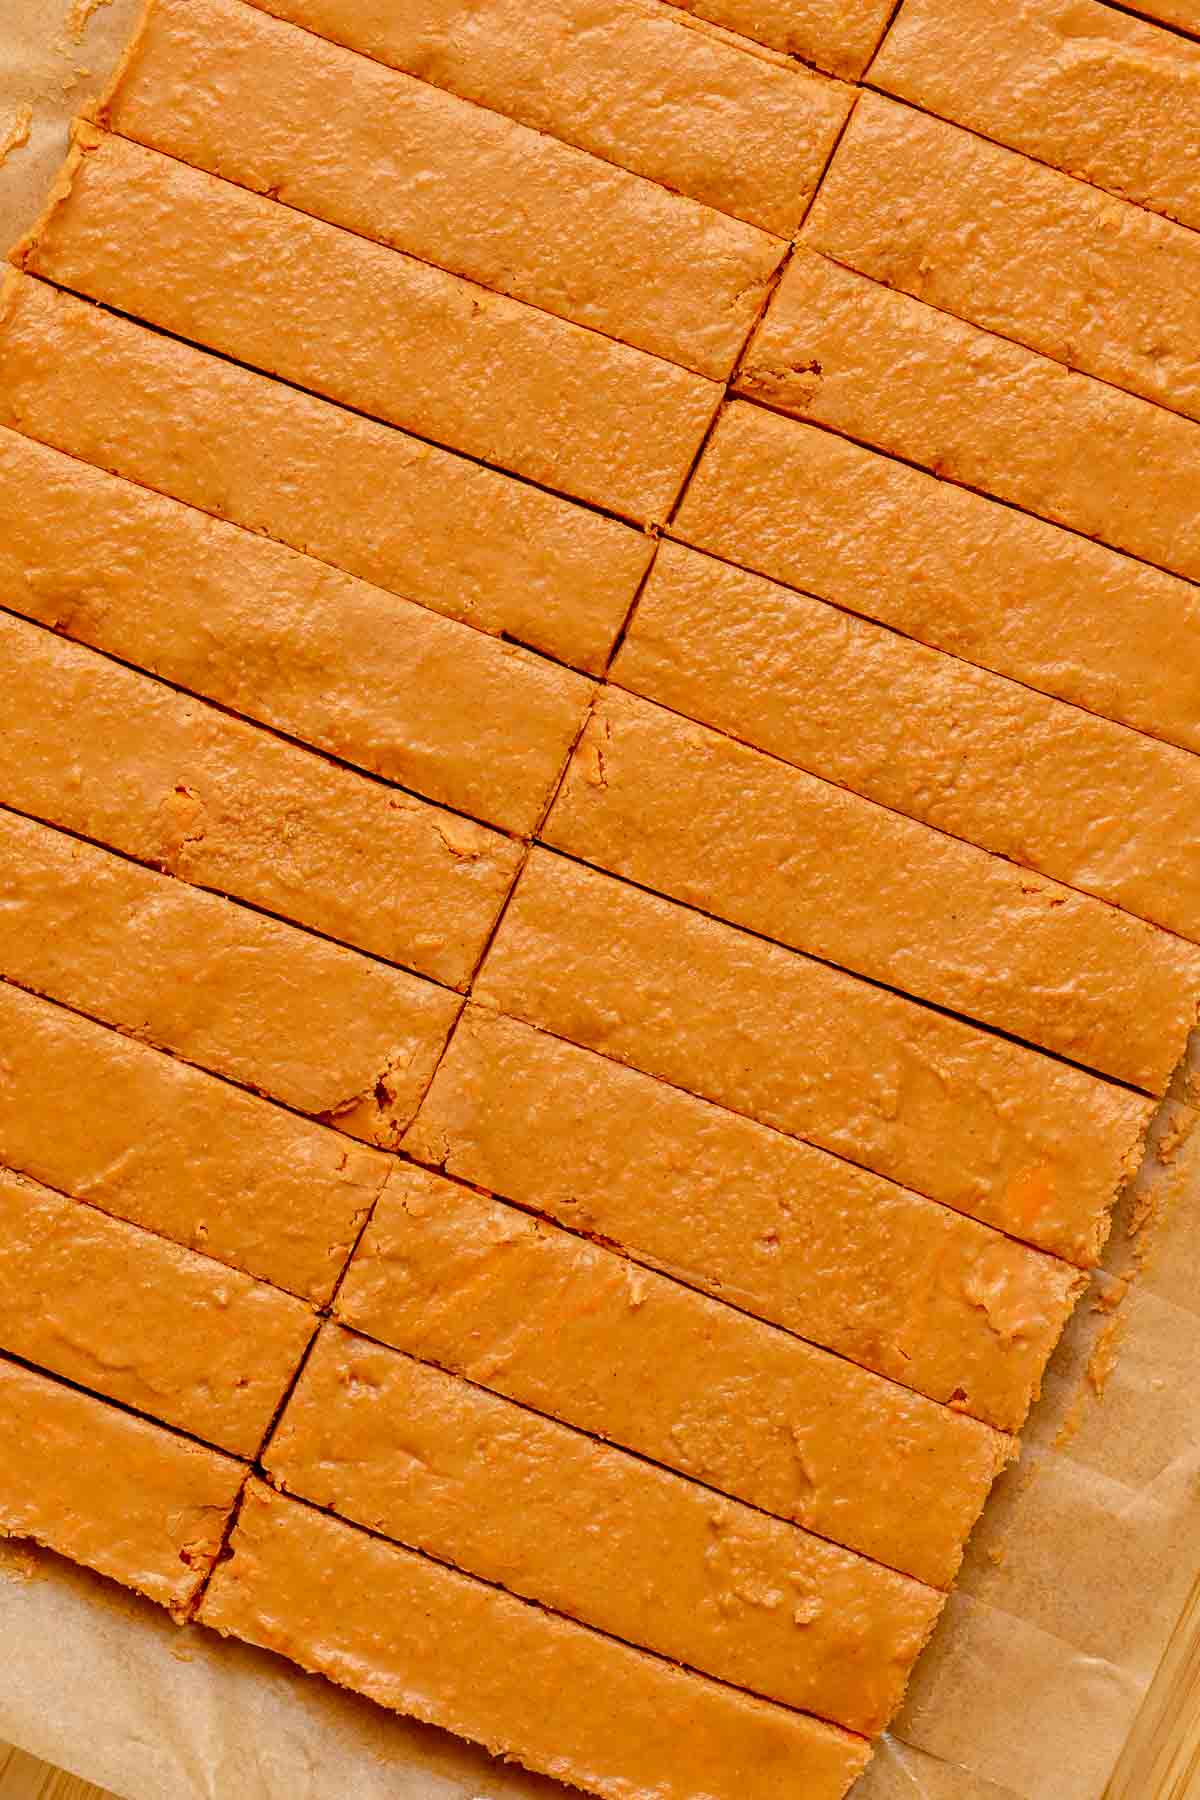
- Pour the mixture into the baking pan and spread evenly and chill for 30 minutes in the refrigerator.
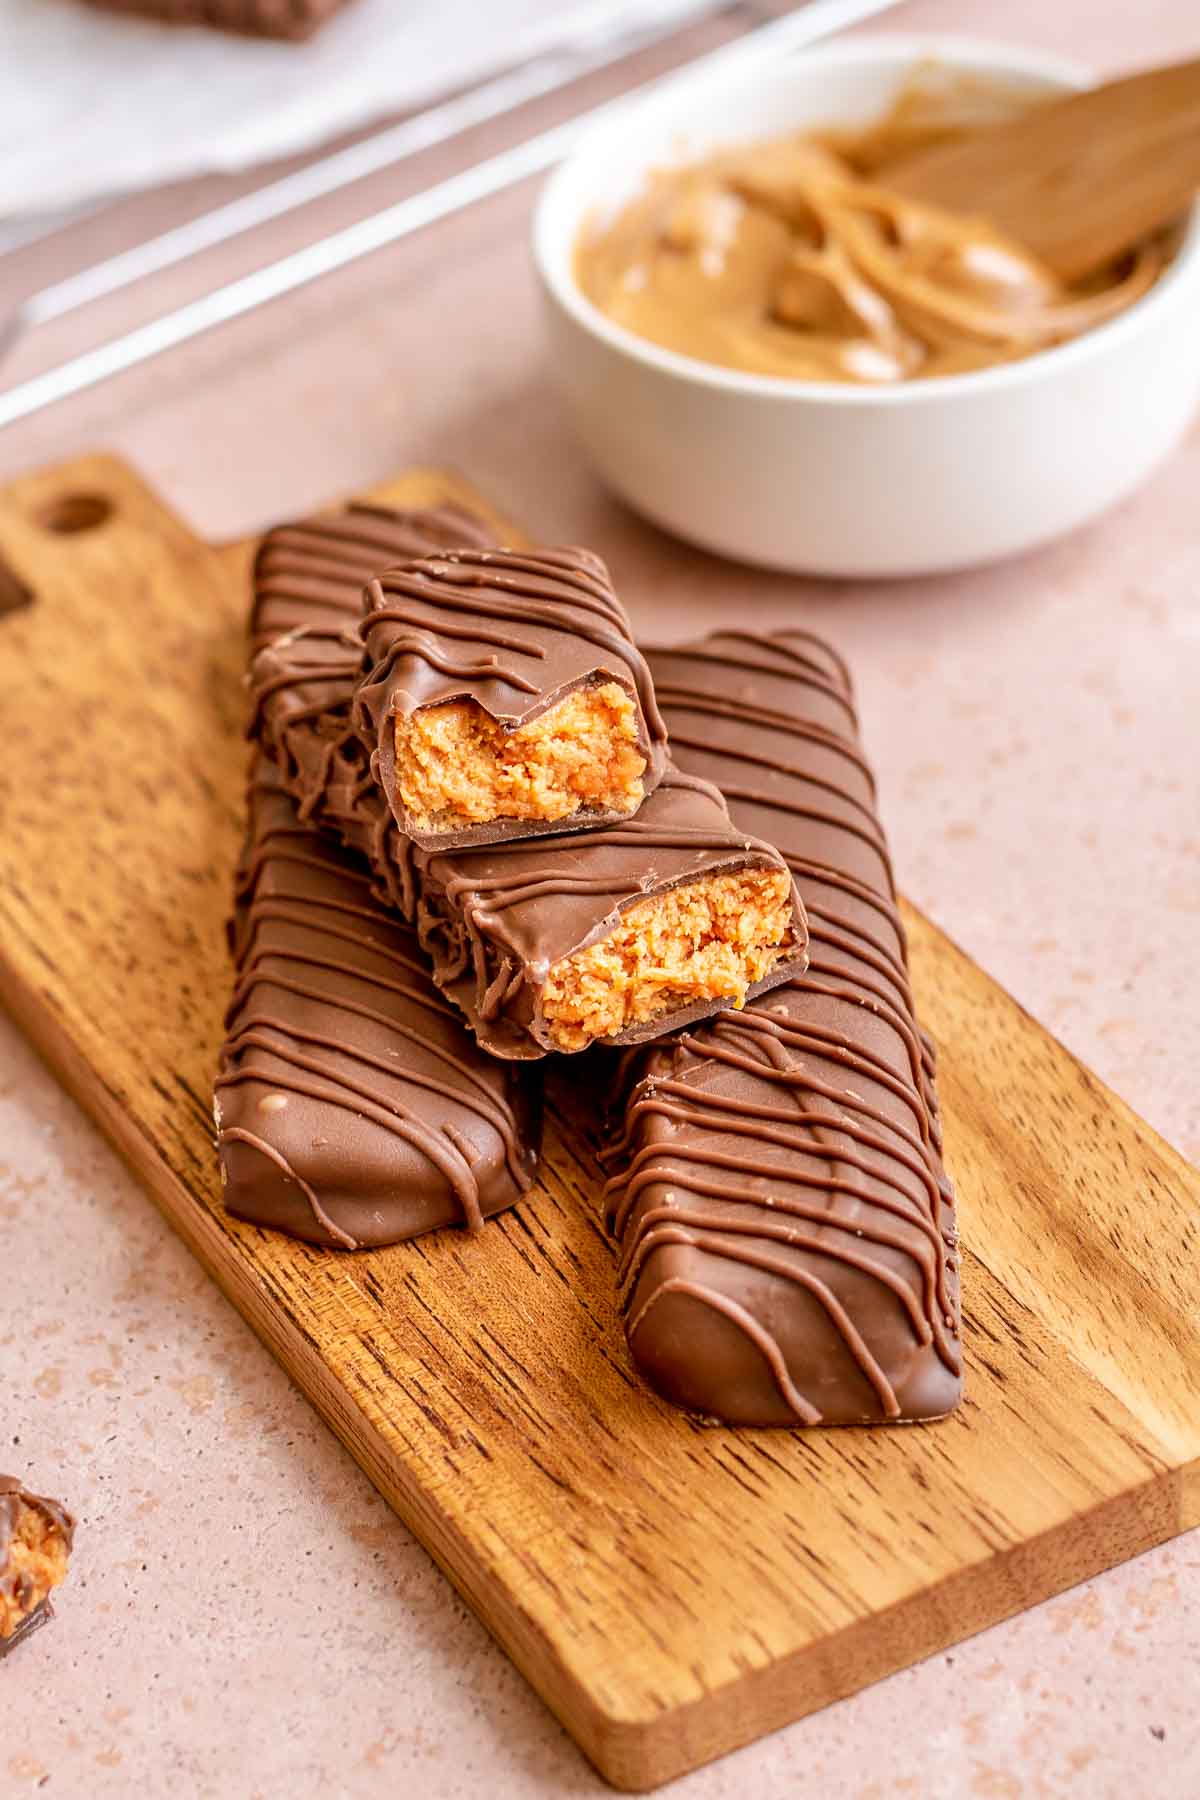
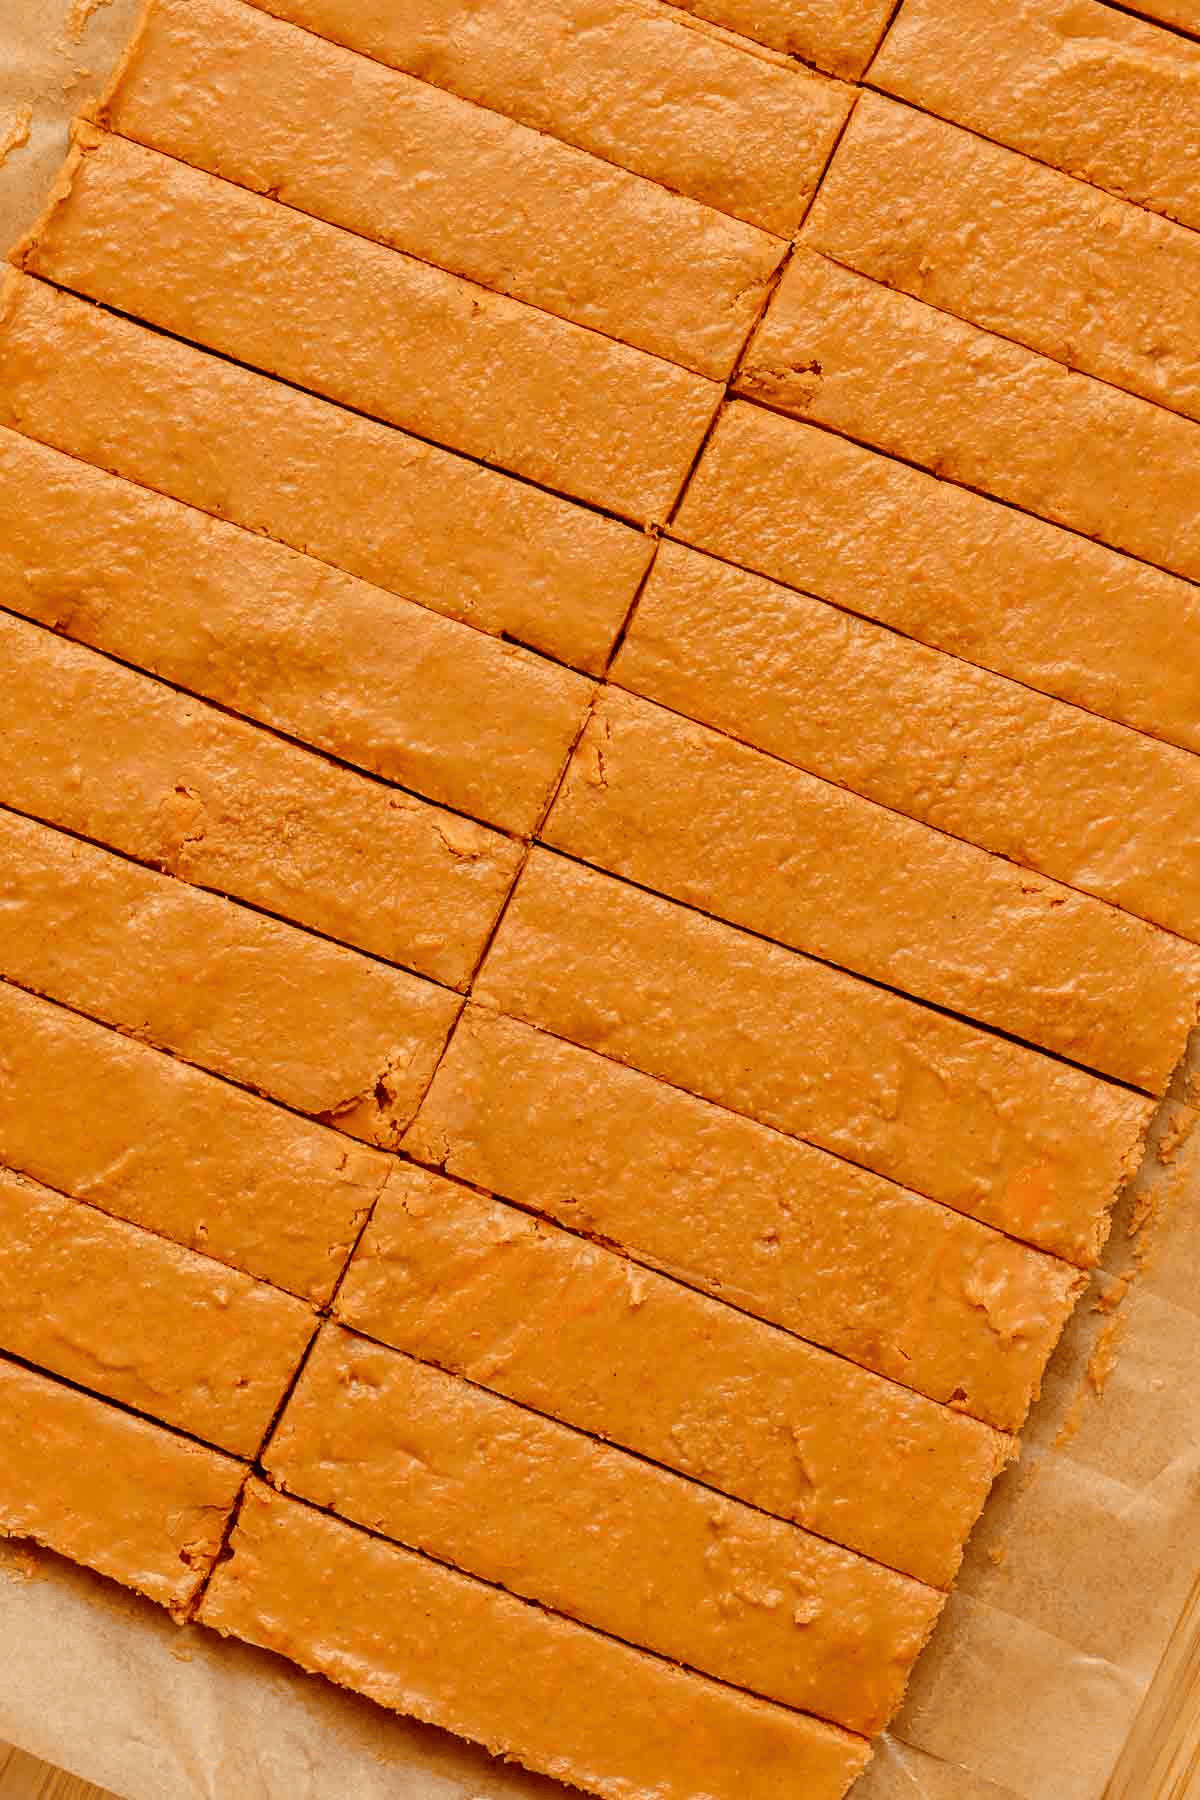
- Cut the bars into long thin strips like a candy bar. You should have about 12 across in 2 rows, for 24 total bars.
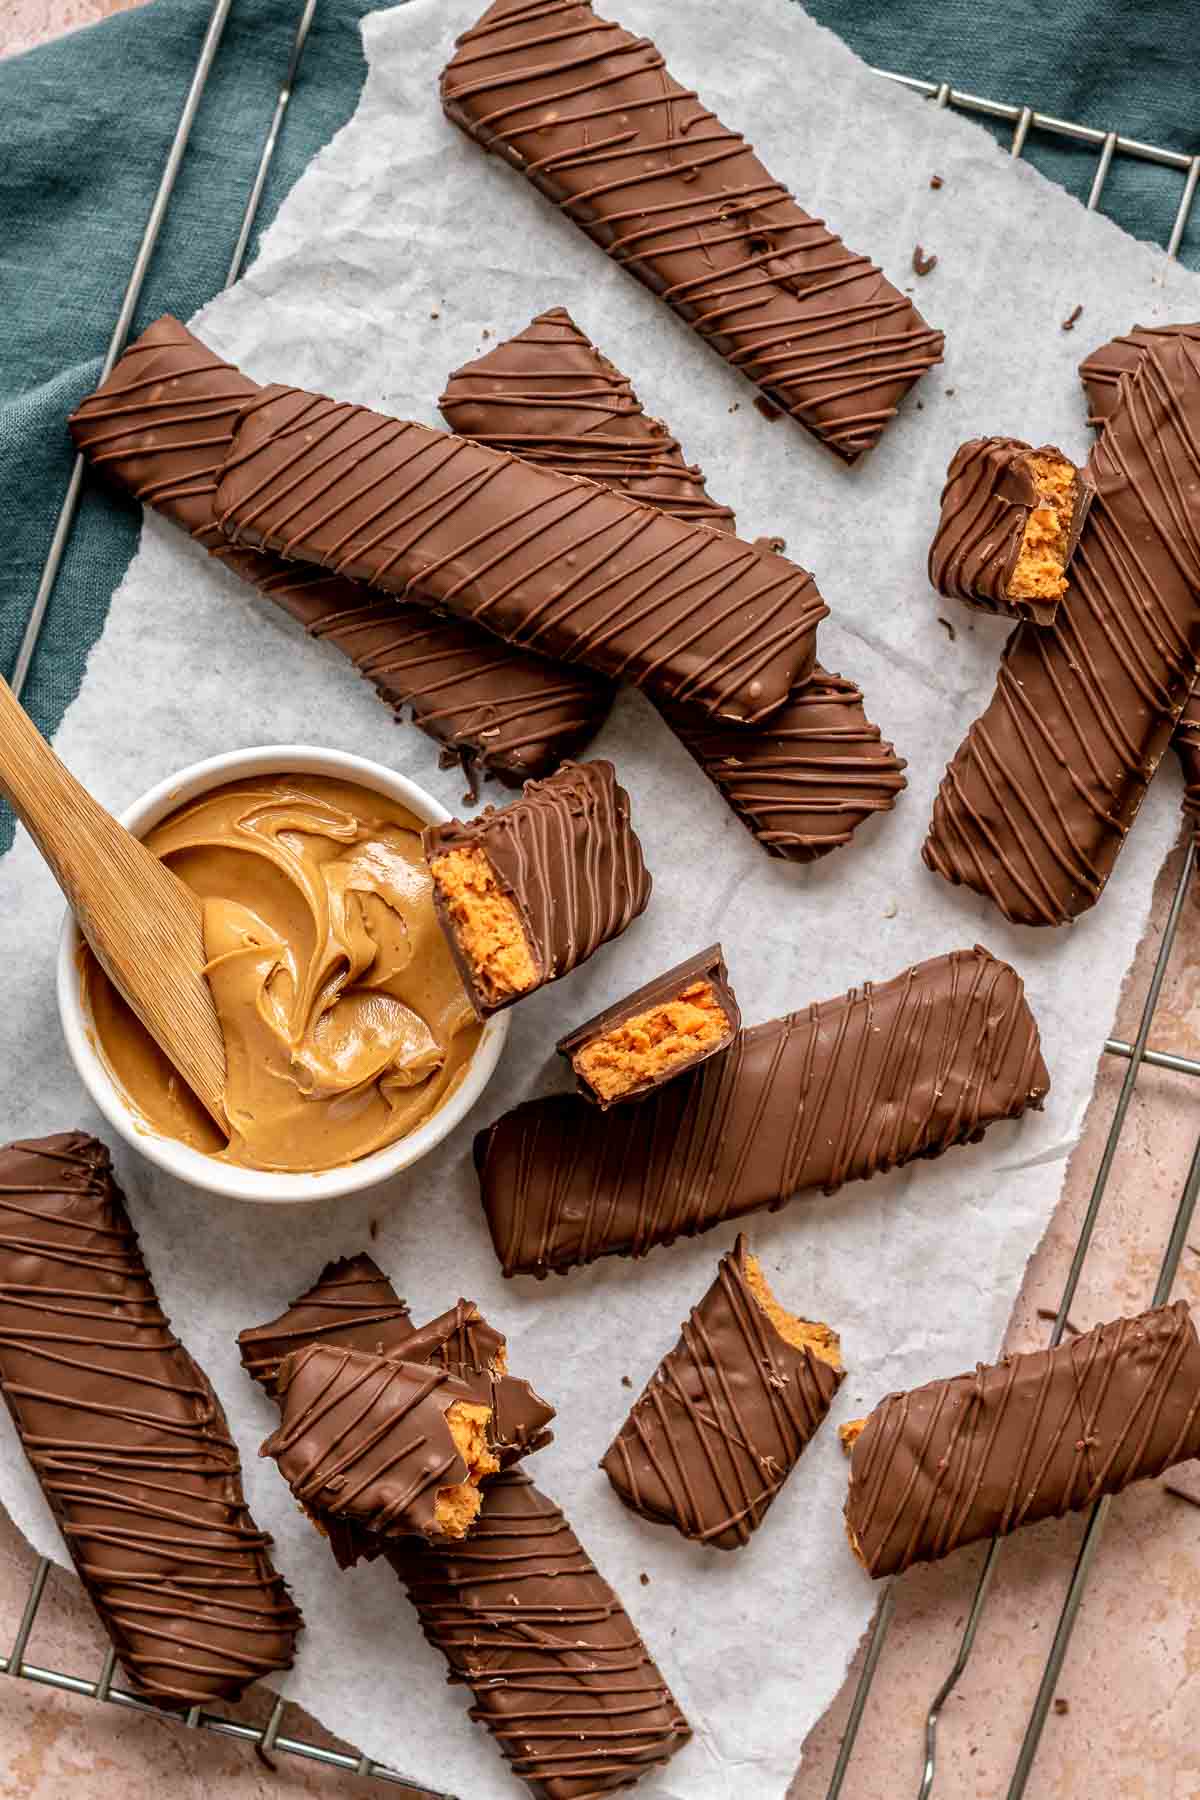
- Add the milk chocolate and shortening to a clean microwave safe bowl and microwave in 30 second increments, stirring between each time you microwave until the mixture is smooth.
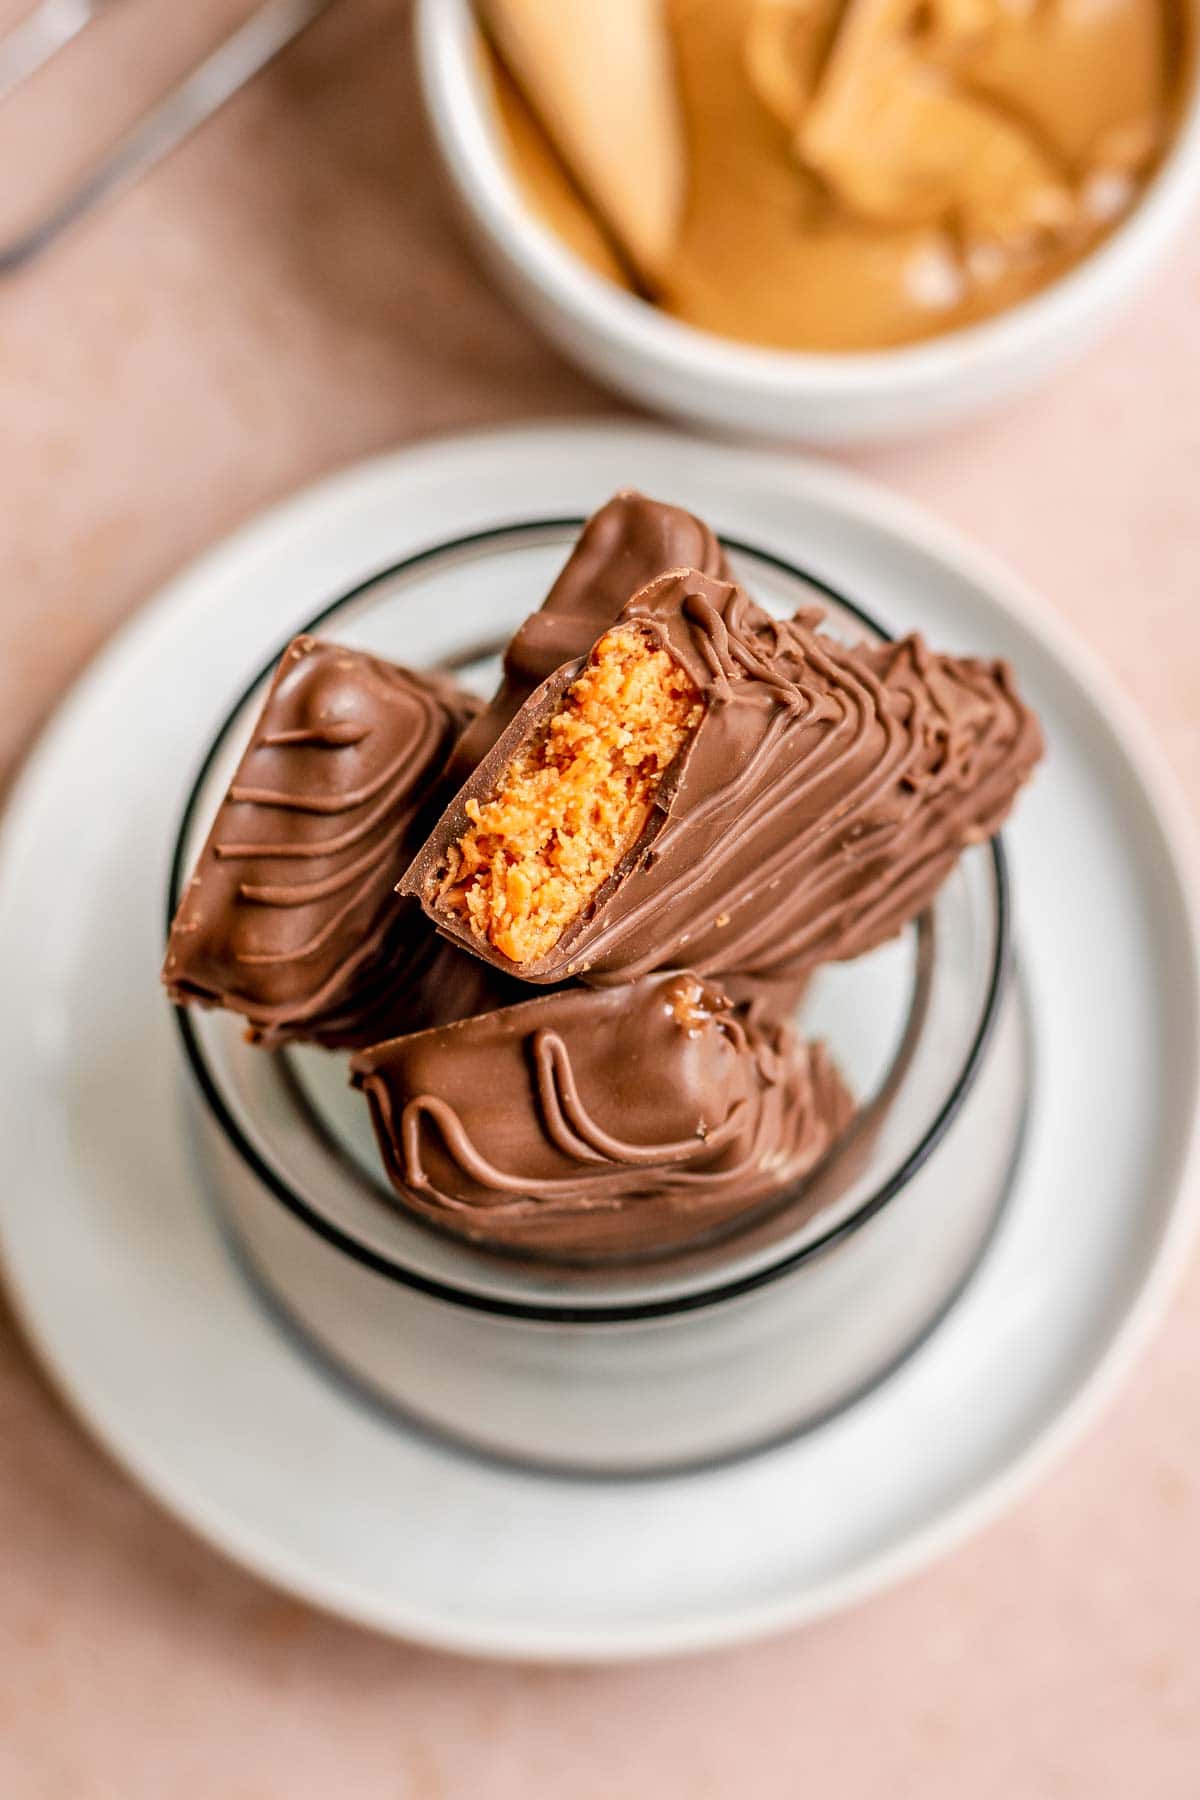
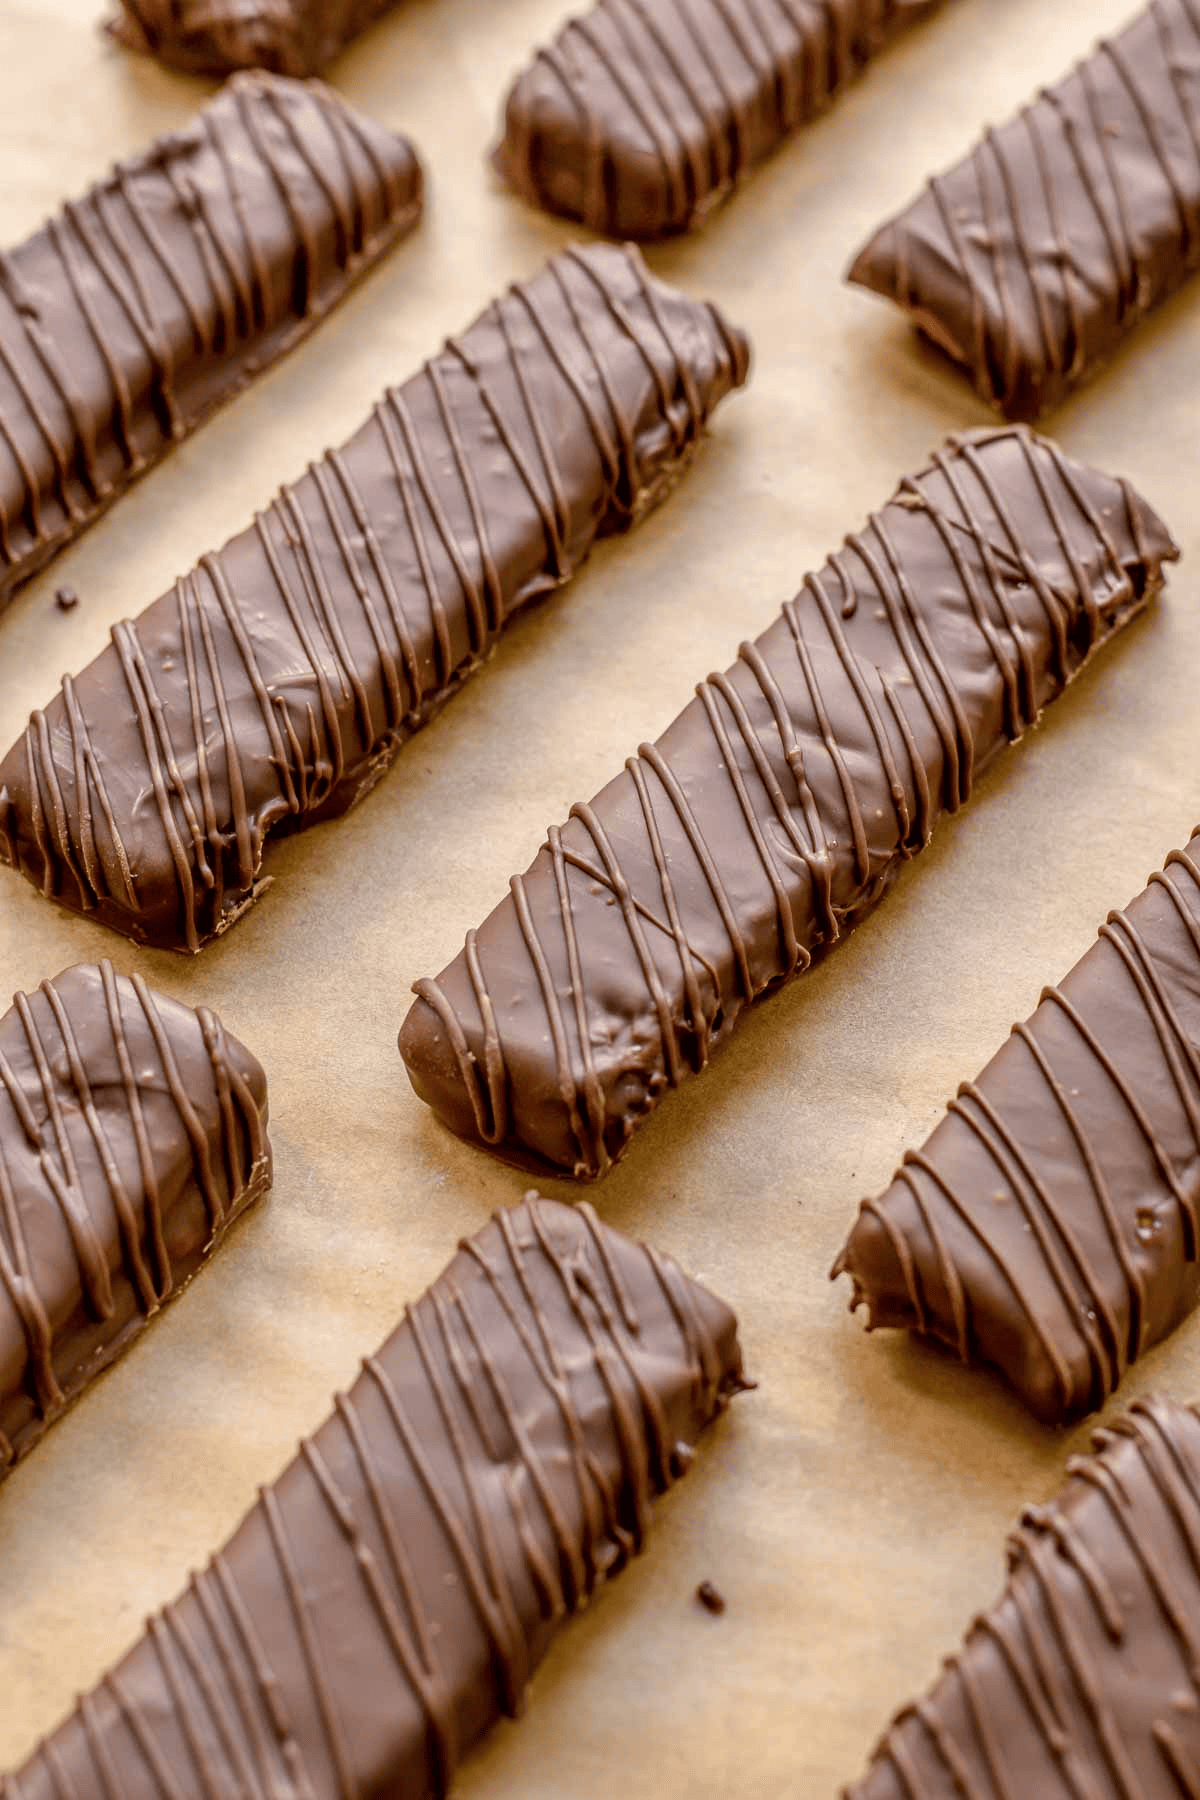
- Dip the bars in the melted chocolate and place on a baking sheet lined with parchment paper.
- Refrigerate for 20 minutesto harden.
Nutrition
Want to save this recipe? Create a free account to easily save your favorite recipes
Table of contents
About this Recipe
Although you can easily buy a bag of butterfingers from the store, this homemade version tastes far better than anything you can get store-bought. The real chocolate coating is sweet and creamy, and the filling has the perfect buttery and crunchy texture. It’s a great way to use up leftover candy corn, and it only takes a few minutes to make. Plus, making your favorite candy bars yourself means that you can avoid added sugar, artificial flavors, and preservatives that often come with prepackaged treats.
Ingredients
- 1 pound candy corn: This is the perfect recipe to use up leftover candy corn. Melt down candy corn pieces until smooth to form the base of the sweet butter finger filling.
- 18 ounces peanut butter: Use your favorite brand of creamy peanut butter to mix with the candy corn mixture and make the sweet and salty filling. Don’t use natural peanut butter, as the oils can easily separate and ruin the texture.
- 12 ounces milk chocolate chips: Coat the candy filling in melted milk chocolate for the perfect homemade Butterfinger Bars.
- 1 tablespoon vegetable shortening: Adding vegetable shortening helps the chocolate to melt more smoothly and gives it a beautiful shine as the candy bars harden.
Kitchen Tools & Equipment
- 9×13″ baking pan: You’ll need one large, rimmed baking pan to let the candy mixture harden in.
- Parchment paper: To keep the candy from sticking to the pan, line the baking sheet with parchment paper.
- Baking spray: Spray the sides of the pan with vegetable oil spray so that the sides of the bars don’t get stuck and crack.
- Large bowl: Use a large, microwave-safe bowl to melt the candy mixture in. You can clean the same bowl and use it to melt the creamy milk chocolate mixture.
- Spatula: Use a rubber spatula to transfer the candy mixture from the glass bowl to the baking pan and spread it into an even layer.
- Knife: After letting the candy harden, use a sharp chef’s knife to cut the crunchy candy sheet into bars.
Can this be made ahead of time?
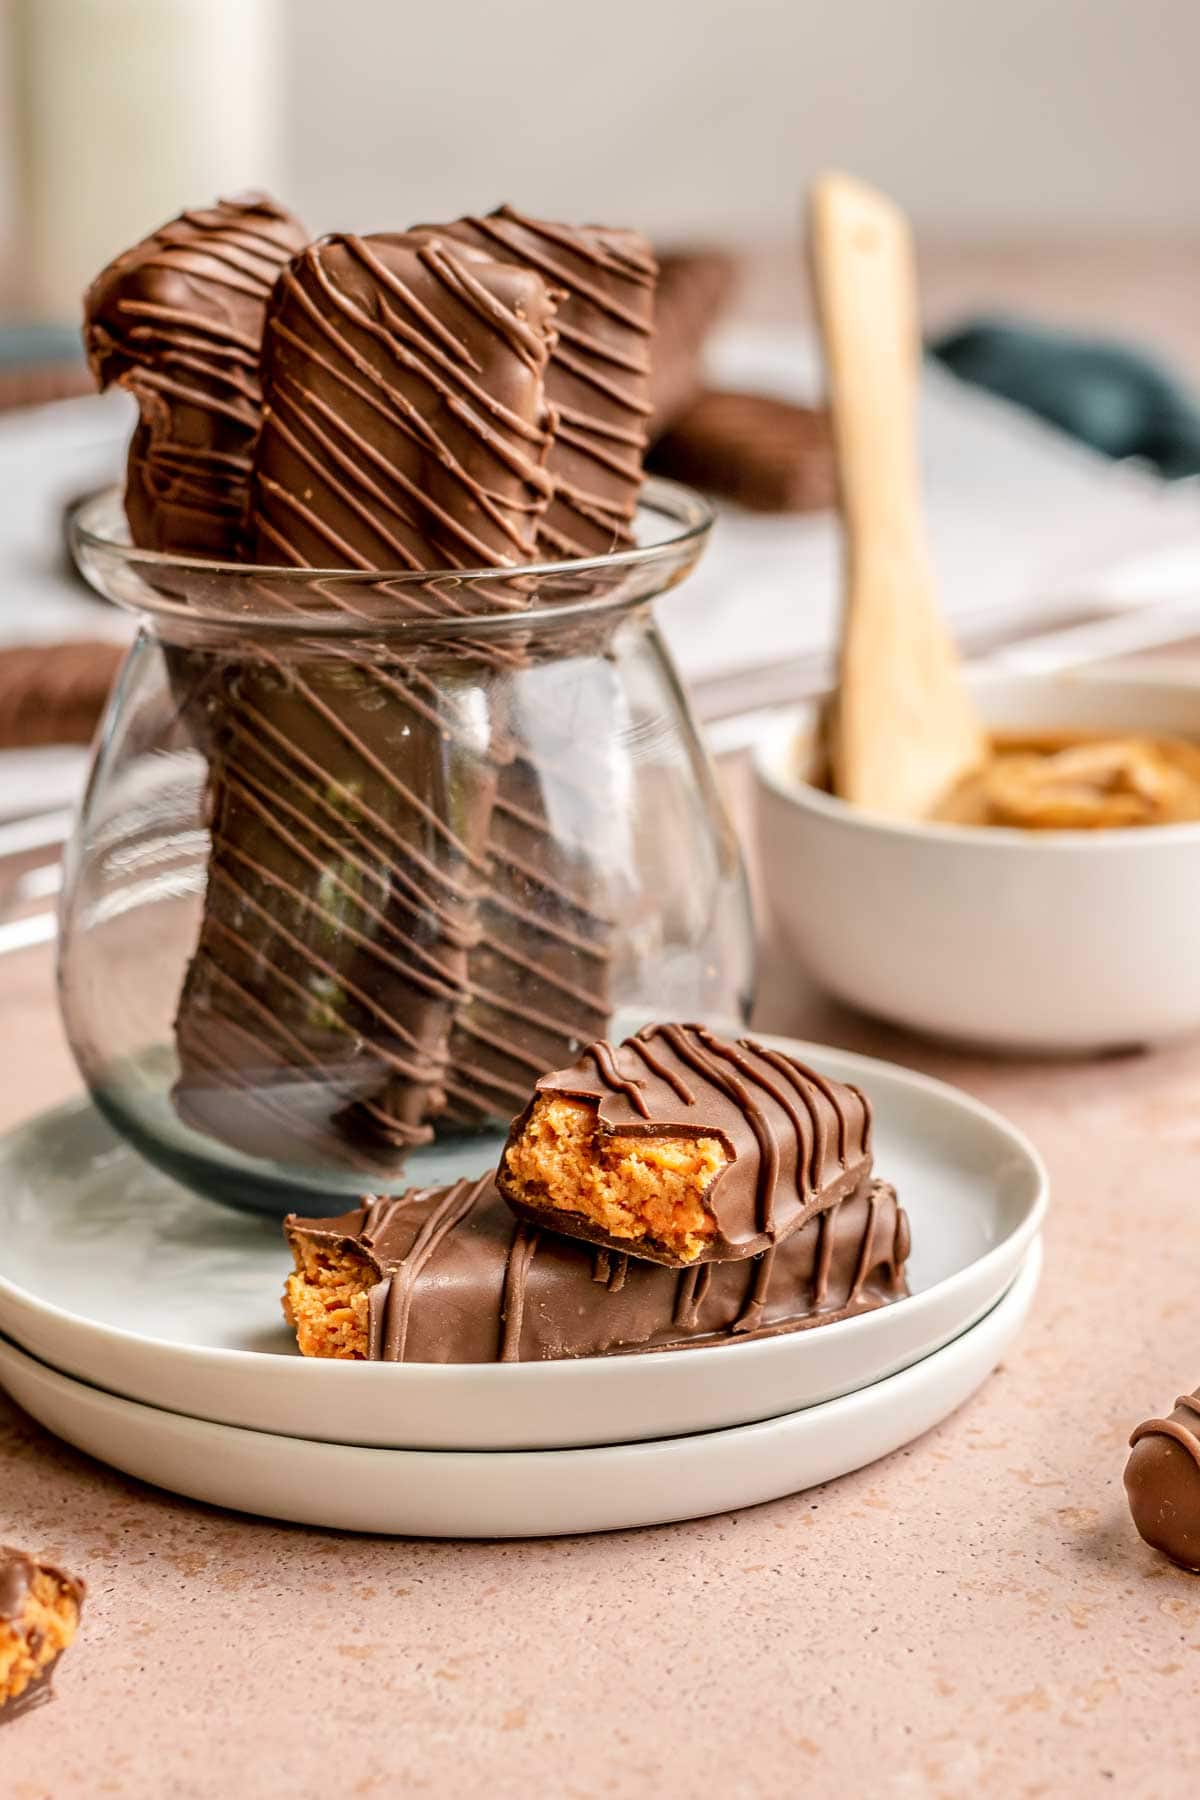
You can absolutely make this homemade candy recipe in advance. Try making the bars now and storing them to serve at a Halloween party. After letting the candy bars harden, place them in a ziplock bag and keep them sealed in the fridge or freezer. They’ll keep well for up to 2 weeks in the fridge or up to 6 months in the freezer.
Tips & Tricks
Follow these quick recipe hints to make the best homemade chocolate bars ever!
- Keep the candy from cracking
- To keep the butterfinger filling from cracking when you slice it into rectangles, it’s essential to prep the baking pan so that the candy doesn’t get stuck. You can also perforate the candy by cutting partway through the semi-hardened candy after it’s chilled for a few minutes. Then, follow the same lines to cut the fully hardened candy.
- Use high-quality chocolate
- For the best homemade candy bars, you want real, rich chocolate. Don’t use chocolate melting disks, as they’ll have a more waxy flavor. Instead, use milk chocolate bars or milk chocolate chips to melt down.
What to Pair With Candy Bars
- More small treats: If you’re hosting a party, game night, or another event, you can put out these homemade chocolates with other sweet finger foods like Slow Cooker Chocolate Candy, Rice Krispy Treats, and any other favorites.
- Desserts: Homemade Butterfinger Candy Bars can also make a great topping or finishing touch to other dessert recipes. Add the butterfingers to the top of a Peanut Butter Chocolate Poke Cake, or crumble the candy bars to sprinkle over Chocolate or Vanilla Ice Cream.
How to Store
- Store: To keep homemade candy bars fresh, place them in an airtight container with parchment or wax paper to separate the layers. Then, place them in the fridge to keep fresh for up to 2 weeks.
- Freeze: To freeze the chocolate bars, place them on a parchment-lined baking sheet in a single layer. Then, place the pan in the freezer for 1-2 hours. Once the candy bars have hardened, transfer the frozen chocolate bars to a freezer bag or another freezer-safe container to keep frozen for up to 6 months.
- Thaw: Let the homemade chocolate bars thaw at room temperature before serving.
Double Boiler
Double boiler: Instead of melting the candy filling and chocolate coating in the microwave, you can use the double boiler method. For a DIY double boiler, place a pot of water over medium heat and bring it to a low boil. Add a glass bowl over the pot. You need the bowl to be large enough that it will sit above the pot. Add the candy and let the heat from the water slowly melt the ingredients as you stir them into a smooth mixture.
Frequent Questions
It depends on your storage method. Kept chilled in the fridge, the recipe can keep well for several weeks, or they can keep well for several months in the freezer.
This homemade candy bar recipe has a practically identical flavor to the store-bought candy bars you grew up eating. The candy filling is sweet and salty with a delightfully crunchy texture, and the sweet chocolate coating is even better than the store-bought bars.
Variations
- Crunchy peanut butter: To add some extra crunch to your candy bars, you can use your favorite brand of crunchy peanut butter or mix chopped peanuts into the candy peanut butter filling.
- Add-ins: There are plenty of other mix-ins that you could try adding to customize your homemade candy bars. Try adding chopped nuts, coconut flakes, sea salt, or toffee bits to the candy mixture.
- Dark Chocolate: If you prefer a less sweet and more rich candy bar, you can coat the Butterfinger filling with melted dark chocolate chips instead of milk chocolate.
Related Recipes
More Homemade Chocolate Candy Recipes

Photos used in previous versions of the post.


Hi Sabrina! I’d love to make the butterfinger bars for my daughter’s wedding. Do you think they will freeze well?????
You can absolutely make this homemade candy recipe in advance. Try making the bars now and storing them to serve at a Halloween party. After letting the candy bars harden, place them in a ziplock bag and keep them sealed in the fridge or freezer. They’ll keep well for up to 2 weeks in the fridge or up to 6 months in the freezer.