Beer Battered Shrimp are crispy, golden brown, and so flavorful. Make these shrimp for your next party, and watch how quickly they disappear!
This makes the perfect Appetizer for a game night, football watch party, or holiday get-together. Serve up the crispy shrimp with other favorite finger foods like Bacon Wrapped Smokies, Cocktail Meatballs, and Buffalo Wings.

Sabrina’s Beer Battered Shrimp Recipe
Get ready to savor the incredible flavors of Beer Battered Shrimp! This recipe offers a fantastic way to whip up crispy, golden shrimp that everyone at your family gatherings and parties will love. The process is so simple: we dip the shrimp into a flavorful beer batter before frying them to a crispy perfection.
Recipe Card

Ingredients
- 2 pounds shrimp , peeled, no tail and deveined (13-15 count)
- 2 teaspoons kosher salt
- 1/2 teaspoon white pepper
- 1 cup flour
- 1 tablespoon garlic powder
- 1 tablespoon paprika
- 1 large egg
- 12 ounces beer
- vegetable oil , for frying
Instructions
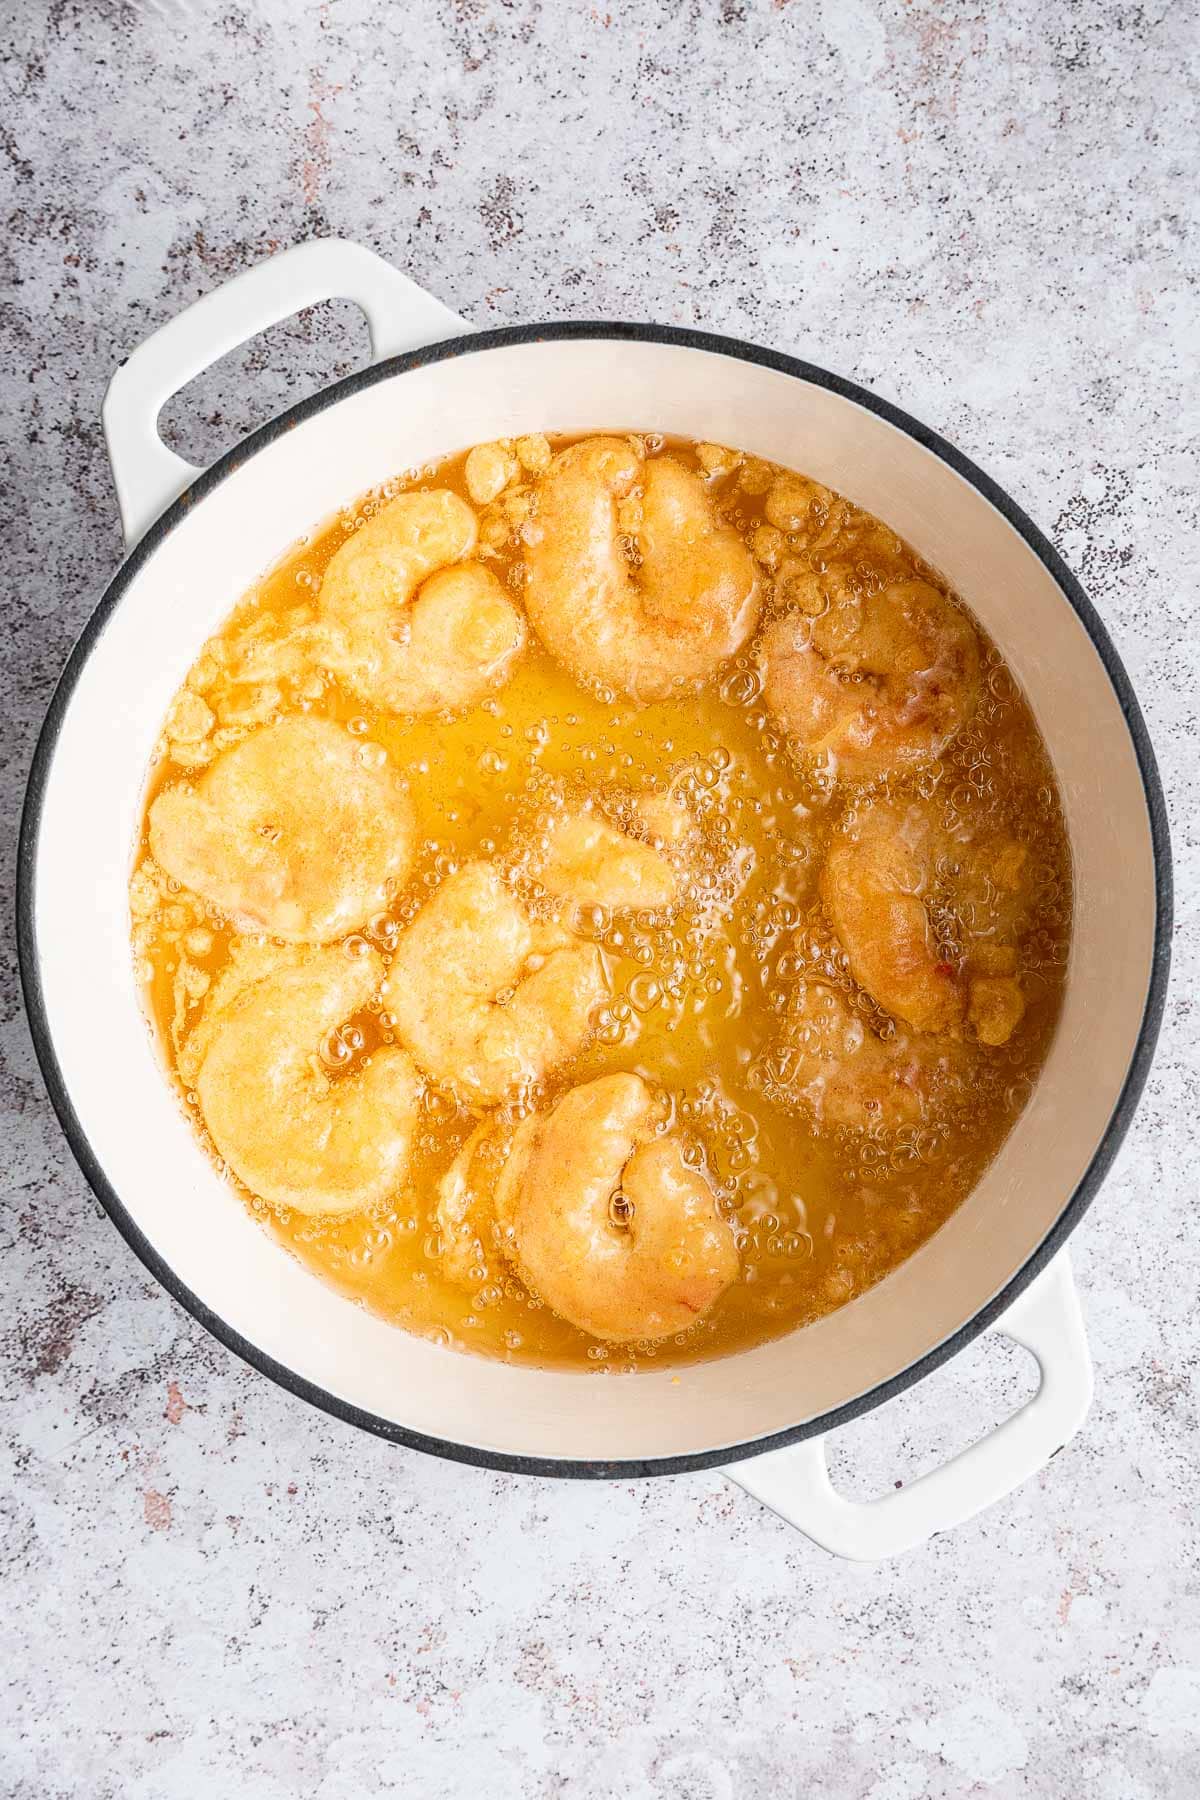
- Heat 3 inches of oil in a Dutch oven to 365 degrees.
- Dry the shrimp well with paper towels then season with salt and white pepper.
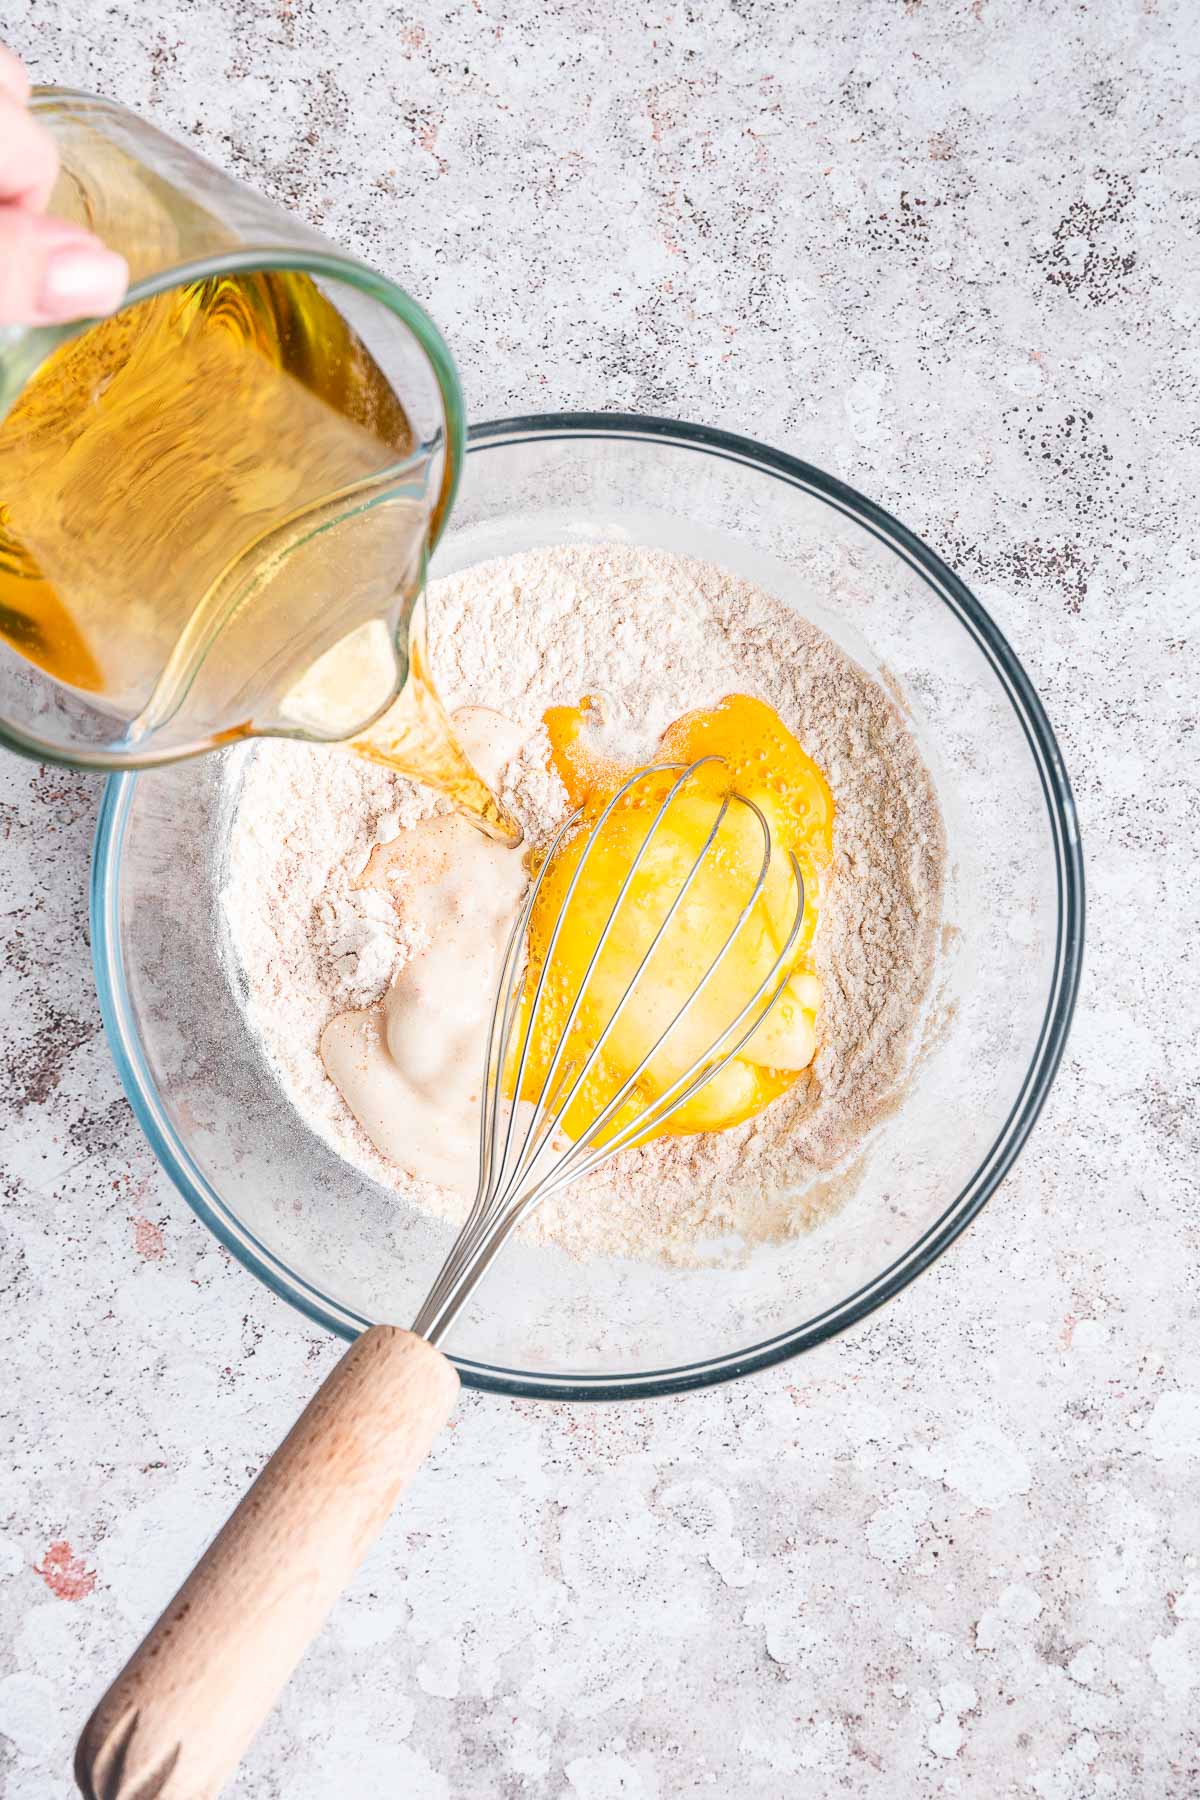
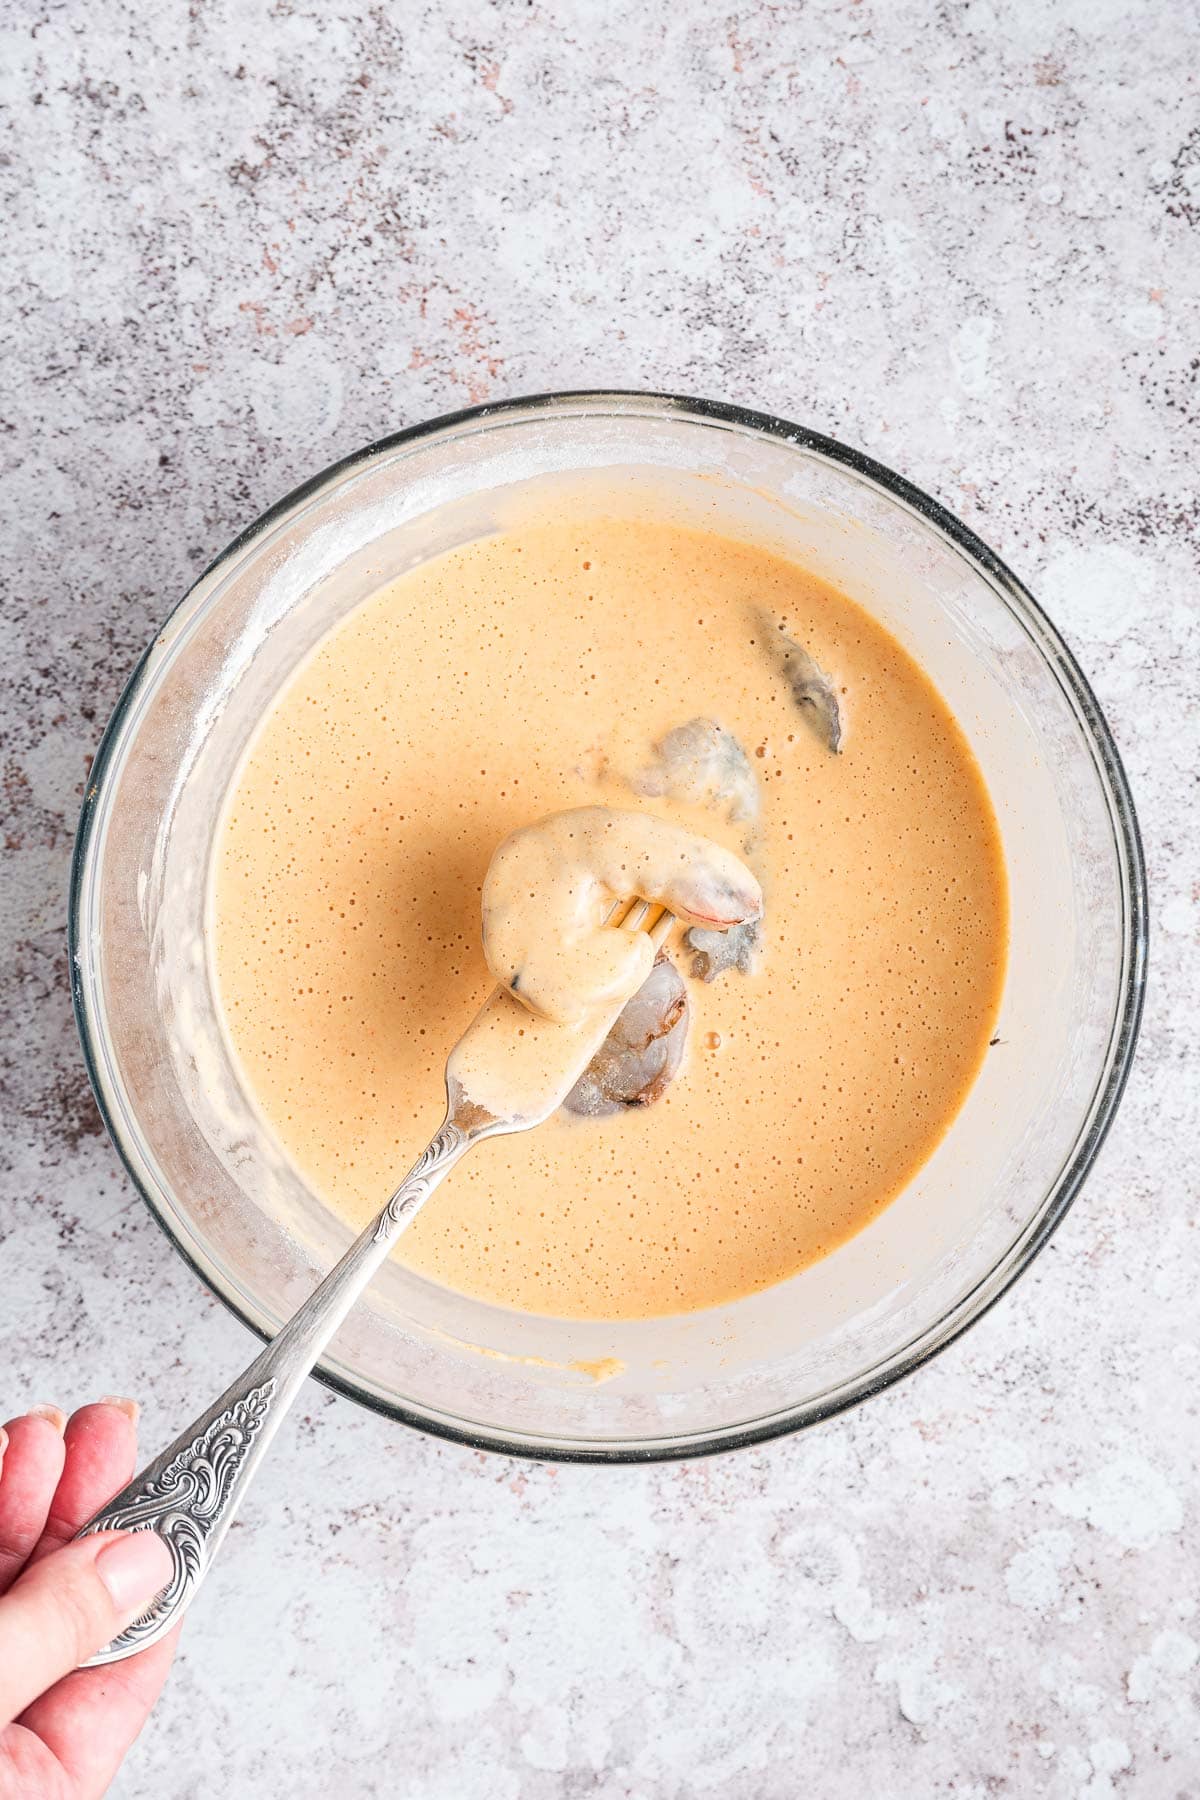
- Mix the flour with the garlic powder and paprika, then add in the egg mixing well before whisking in the beer slowly.
- Dip the shrimp into the batter then carefully into the oil frying until golden brown, about 1-2 minutes.
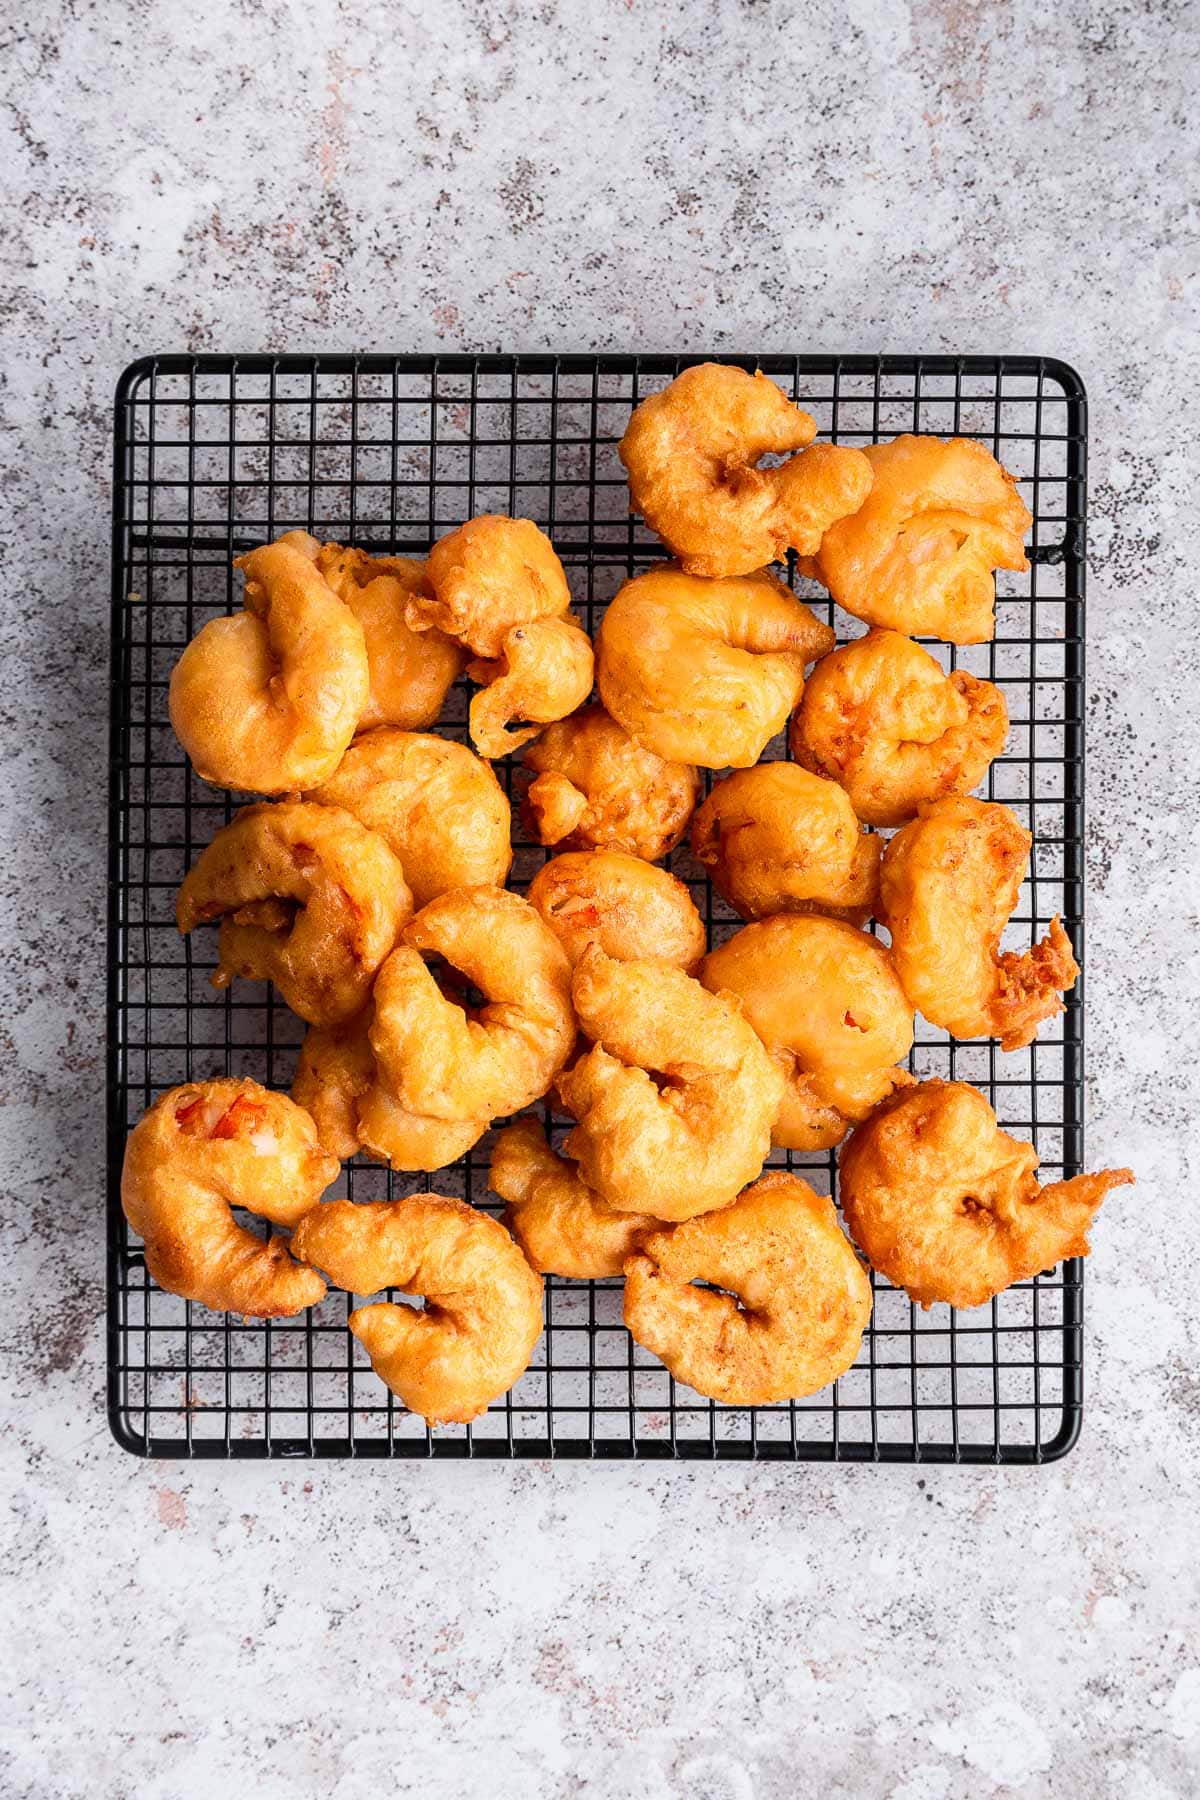
- Remove to a wire rack (not paper towels or newspapers, it will steam).
Notes
- Click on the yield amount to slide and change the number of servings and the recipe will automatically update!
- Click on times in the instructions to start a kitchen timer while cooking.
- To convert measurements to grams, click on the Metric option next to Ingredients in the recipe card.
Nutrition
Want to save this recipe? Create a free account to easily save your favorite recipes
Table of contents
About this Recipe
These Beer Battered Shrimp are so easy to make! Beer batter is easy to make by combining flour, an egg, beer, garlic, and paprika for flavor. The carbonation in the beer gives the batter a delicate, crisp texture. It also creates a light, malty flavor. After mixing the batter, you’ll use it to coat the shrimp and fry them in oil until golden for an amazing party dish or dinner recipe. Plus, the high temperature of the cooking oil cooks the alcohol out of the batter.
Ingredients
- 2 pounds Shrimp: It’s essential to use peeled, deveined shrimp with no tail. Because of the outer layer of batter, the shrimp can’t have the shell or tail still attached. Also, because of the batter, you’ll want to opt for fresh over frozen. If you use frozen shrimp, thaw and dry them before adding the batter.
- 2 teaspoons Kosher Salt: Salt enhances the shrimp’s natural taste. You can use flaky kosher salt or just a single teaspoon of another fine-grained salt, like Himalayan pink salt, if you prefer.
- ½ teaspoon White Pepper: White pepper adds a subtle, mild heat to the shrimp and complements the other flavors. You can substitute with black pepper if needed.
- 1 cup All-Purpose Flour: The flour is the base of the beer batter, creating a crispy coating when fried. You can use other types of flour, like rice flour, for a gluten-free option.
- 1 tablespoon Garlic Powder: Garlic powder infuses the batter with a savory and aromatic flavor.
- 1 tablespoon Paprika: Paprika lends a smoky taste to the batter. Smoked paprika can be substituted for a more intense smokiness.
- 1 large Egg: The egg adds structure and helps thicken the batter.
- 12 ounces of Beer: You’ll need 12 ounces of beer for the beer batter. Use your favorite beer brand for a delicious flavor that you’ll love. Just steer clear of any beers with strong flavors like IPAs or Stouts. The best options are light beers like lagers or pale ales.
- Vegetable Oil for Frying: Vegetable oil is used for deep frying the shrimp. It should have a high smoke point, such as canola or peanut oil, to maintain the proper frying temperature. Fill your pot with about 3 inches of oil, enough to cover the shrimp as they cook.
Kitchen Tools & Equipment
- Dutch Oven: Use a large Dutch oven to heat the cooking oil and fry the shrimp.
- Thermometer: The oil needs to reach the proper cooking temperature. Use a deep-frying or candy thermometer to check when the temperature reaches 365 degrees.
- Paper Towels: Carefully dry the shrimp with paper towels. Drying the shrimp helps the seasoning and batter to stick to the surface and ensures they fry evenly.
- Mixing Bowl: Use a medium bowl to whisk together the beer batter ingredients.
- Tongs: Use a slotted spoon or heat-safe kitchen tongs to remove cooked shrimp from the oil when ready.
- Wire Rack: Place the fried shrimp on a wire rack to cool. A wire rack is better than paper towels because it stops moisture from collecting and ruining the crisp texture of the fried batter. Place a baking sheet beneath the wire rack to catch drippings for easy cleanup.
Can this be made ahead of time?
Yes. If you want to prep battered shrimp ahead of time, prepare the recipe as usual. After coating the shrimp in batter, place them in a single layer on a baking sheet and freeze for 1-2 hours until the shrimp and batter are frozen. Then, keep it in a ziplock bag in the freezer. When you’re ready to cook, don’t defrost; just add the frozen shrimp to the cooking oil and cook until done.
Recipe Tips & Tricks
- Pick Fresh Shrimp: Look out for tell-tale signs to make sure the shrimp you purchase is good. You’ll want to check that the shrimp are translucent with a light gray, white, or pink color. You should avoid any yellow or otherwise discolored shrimp. Also, avoid any shrimp with a slimy shell or bad odor.
- Peel and Devein Shrimp: You can purchase shrimp already shelled and deveined, but if you don’t, it’s easy to do it yourself. If still attached, use your hands to pull off the head and legs. Pull up from the head end to remove the outer shell from the meat. Then, use a sharp knife to cut along the back of the shrimp. Use the tip of the knife to remove the vein from the back and discard it.
What to Pair With
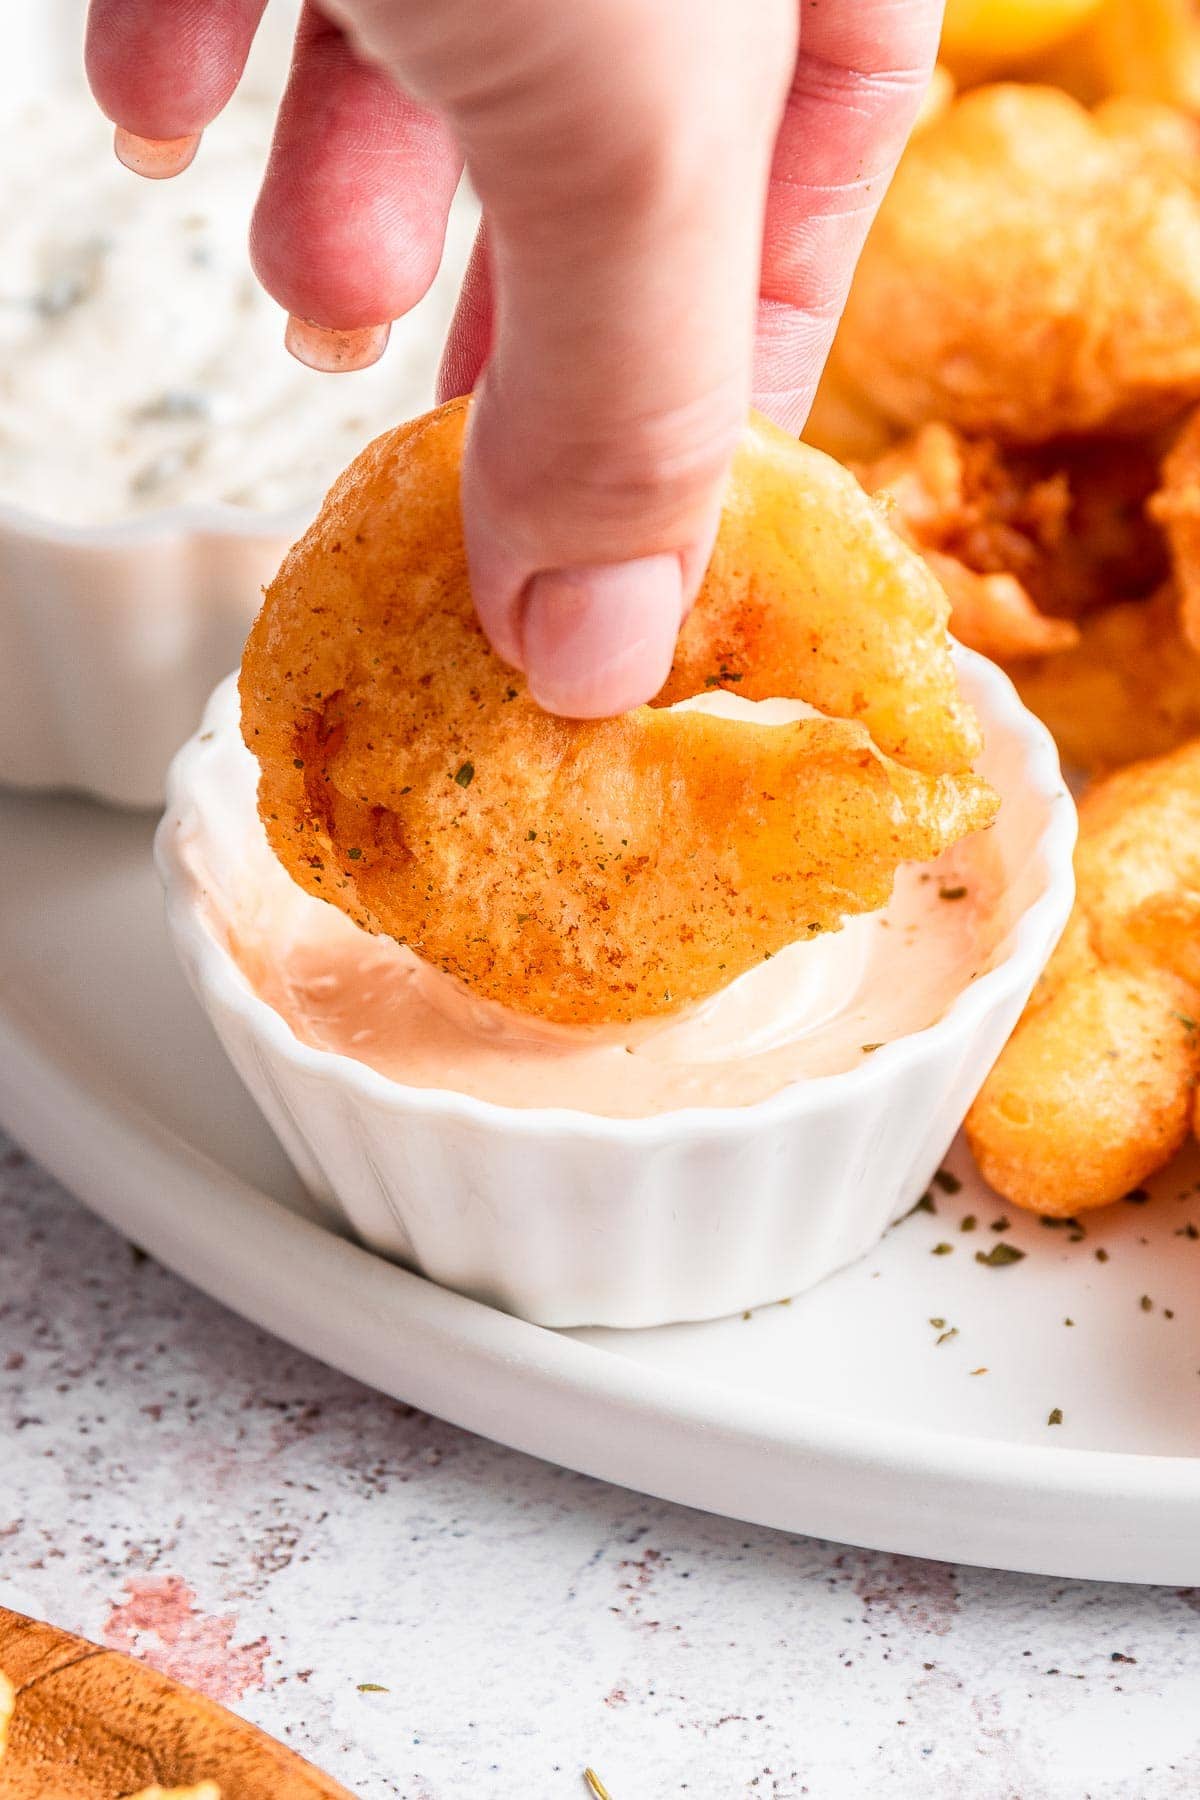
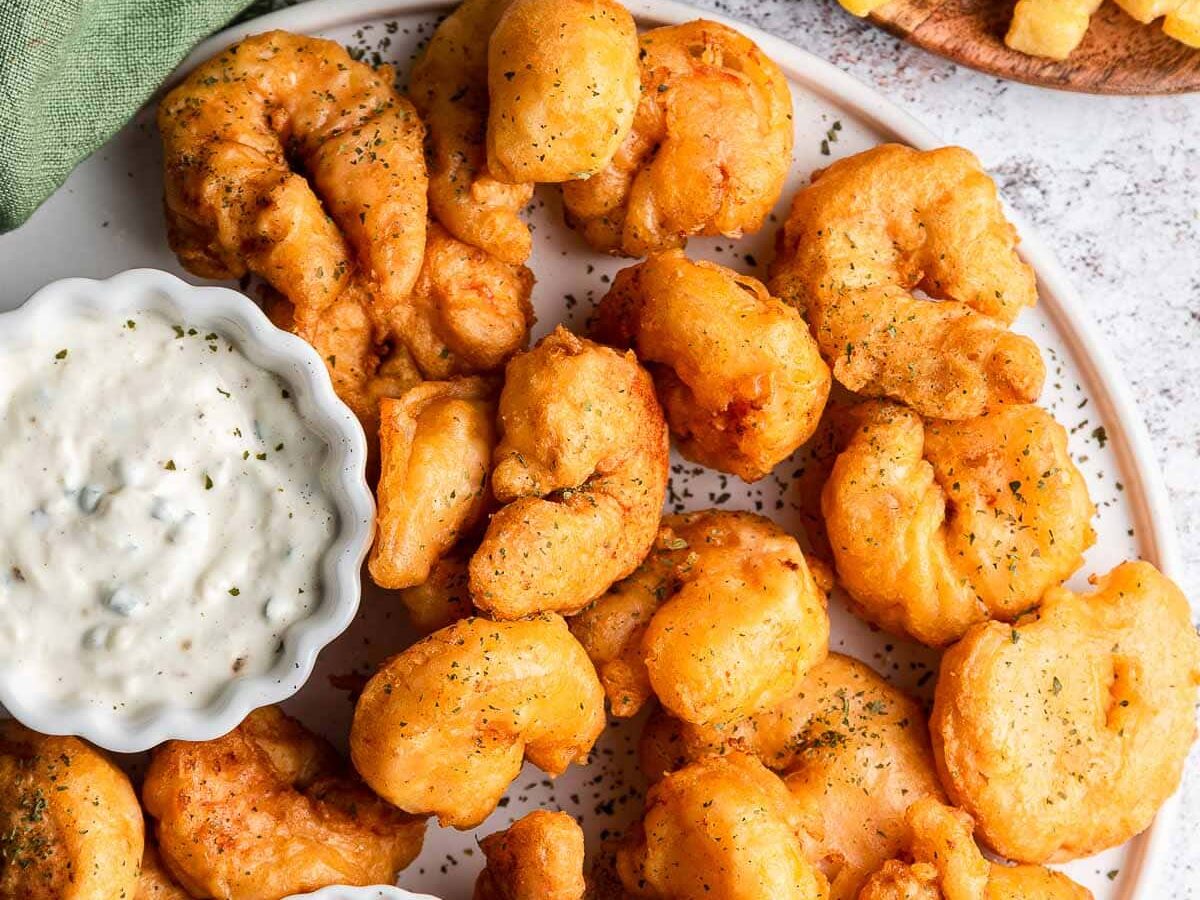
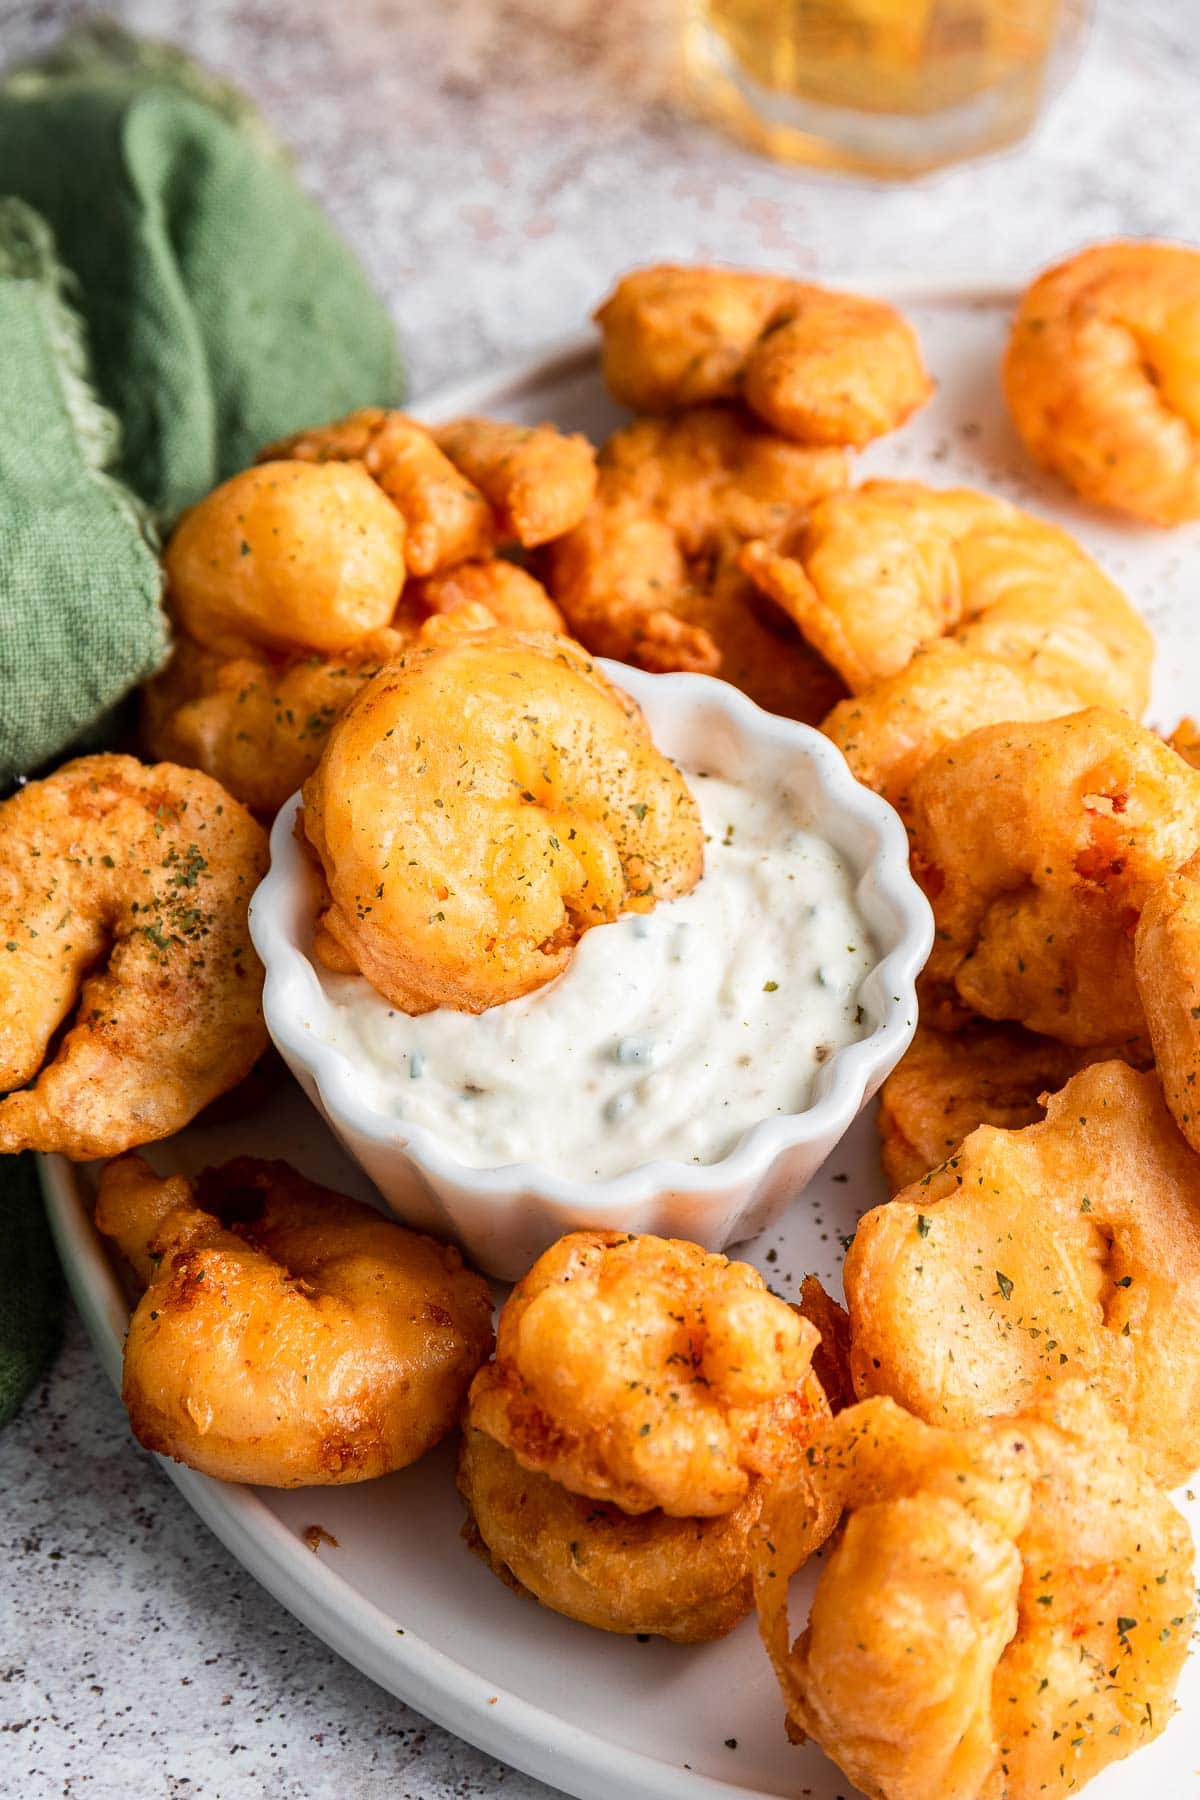
- Once you’re ready to serve, add the fried shrimp to a serving basket with a paper liner. Put out your favorite homemade dipping sauces on the side, like hot sauce, Tartar Sauce, Honey Mustard, or Spicy Mayo.
- Serve these shrimp as an appetizer or as a dinner with filling side dishes. They go great with crowd-pleasing dishes like Coleslaw, French Fries, or Southern Cornbread.
How to Store
- Storing- To keep any leftovers fresh, wait for them to cool, then transfer the shrimp to an airtight container. Kept sealed, the recipe can stay good in the fridge for 3-4 days. It’s best to consume them within 1-2 days to maintain their crispy texture.
- Reheating- For reheating, you can use an oven or air fryer to help maintain the crispiness. Preheat your oven to 350°F and place the shrimp on a baking sheet. Heat for about 5-7 minutes or until they are heated through and crispy again. Avoid the microwave for these shrimp.
- Freezing– Leftovers can be frozen, but they may lose some of their crispiness when thawed and reheated. To freeze, arrange the cooked and cooled shrimp in a single layer on a baking sheet and place them in the freezer until they are firm. Then, transfer them to an airtight container or freezer-safe bag for up to 3 months, separating layers with parchment paper to prevent sticking. Label and date the container. Frozen shrimp can be reheated directly from the freezer in an oven or air fryer, but be prepared for a slightly different texture compared to freshly fried shrimp.
Air Fryer Cooking Method
This is a great option if you want to use less oil. To start, prep the shrimp and batter ingredients as usual. Then, preheat your air fryer to 385 degrees. Dip the shrimp in batter, letting the excess batter drip off. Then, place the shrimp in a single layer in the air fryer basket and spray with a coating of cooking spray. Cook for 5 minutes, then flip the shrimp and cook for another 5. You’ll have to work in batches to air fry all the shrimp.
Frequent Questions
The batter will stick to the shrimp so long as you completely dry the shellfish before dipping them. Use paper towels to pat the shrimp dry before dipping them in the beer batter.
Use beer with a light, malty flavor. A Brooklyn Lager, Coors Light, or Budweiser will all work. Feel free to use your favorite kind of light beer and enjoy the savory, earthy flavor it gives the shrimp recipe.
It’s best to make the batter just before frying to maintain its consistency and ensure a crispy result. If you must prepare it a day ahead, store it in the refrigerator and give it a quick stir before using.
The shrimp are done when they turn a golden brown color, which typically takes about 1-2 minutes. Use visual cues, but you can also check for an internal temperature of 145°F (63°C) using a meat thermometer to ensure they are fully cooked.
Variations
- Beer-free batter: The alcohol cooks out of the beer, but if you prefer just not to cook with beer, you can swap it out for another ingredient. The carbonation in club soda creates a similar light and crisp batter to beer, so it makes a great substitute.
- Seasonings: To introduce a new flavor, you can season shrimp with red pepper flakes, cayenne pepper, onion powder, or Old Bay seasoning.
- Beer-Battered Coconut Shrimp: For crispy coconut shrimp, add the beer batter as usual. Then, cover the battered shrimp in sweetened coconut flakes before frying.
Related Recipes
More Yummy Shrimp Recipes


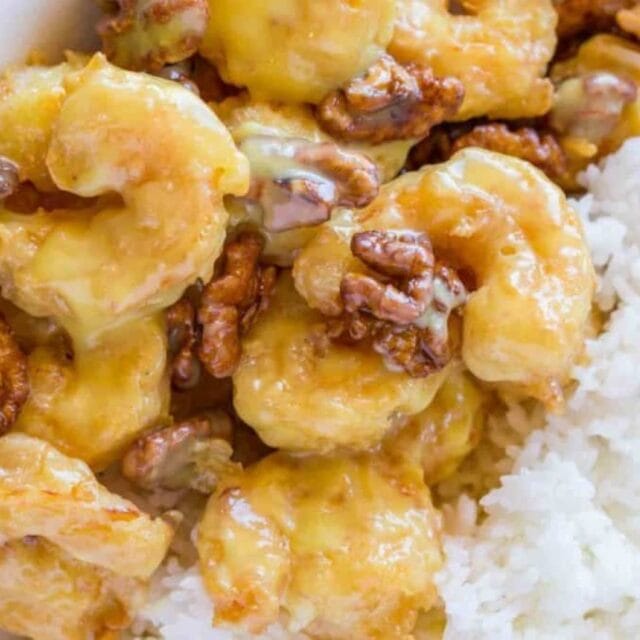

Photo used in previous post